
Greenhouses in Frost Pockets: Assessing Low Ground
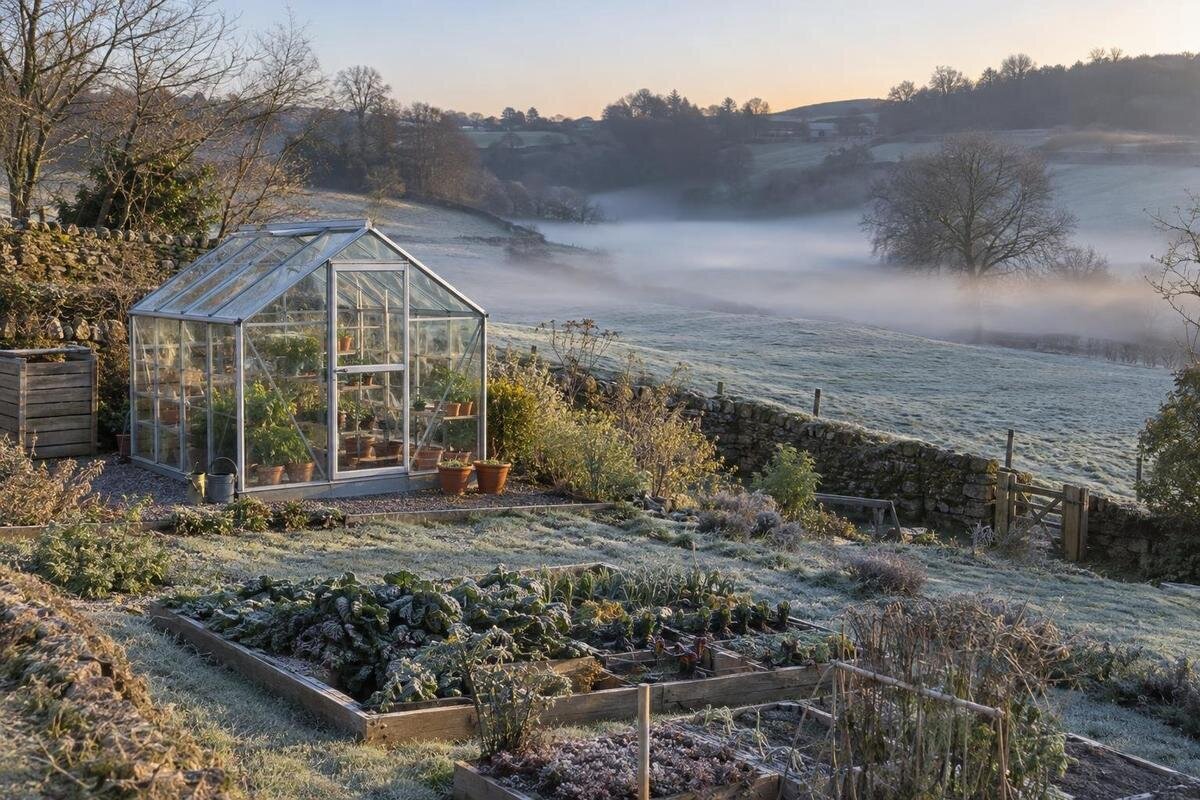
Greenhouse site planning
In a low-lying garden, the coldest place may not be obvious from its shape, and a sunny afternoon tells you little about overnight conditions. Compare possible greenhouse positions with repeated minimum-temperature readings, a simple map of slopes and barriers, and notes on the weather. That evidence helps distinguish a genuine frost pocket from a spot that only looks low, then informs your choice of site and any heating plan.

How a frost pocket forms
A frost pocket is not simply any low garden. On clear, still nights, the ground and nearby surfaces lose heat and cool the air close to them. Cooler air is denser and may drain down a slope, then collect in a hollow or linger where a bank, wall, dense hedge or nearby buildings slow its movement. That can leave one corner colder than a slightly higher position nearby. It is a local pattern, not a fixed property of every valley or depression: wind, cloud, terrain and obstacles can change what happens from one night to the next. A low-looking spot alone does not prove that cold air is trapped there.
A hollow may read much like the surrounding ground in breezy or cloudy weather, so one frosty morning or a regional frost date is not a site assessment. Treat a frost pocket as a measurable difference between candidate positions over relevant nights. Frost on grass can help identify places to check, but surface frost is not an air-temperature reading and does not predict conditions inside a future greenhouse. Measure at the proposed site before deciding whether it suits your crops and the months you want to grow.
Map the low points and barriers
Draw a simple plan to scale, or add measured dimensions to graph paper, marking each candidate patch. Show the direction of the slope, high and low points, hollows, banks and changes in level. Add walls, fences, hedges, mature trees, buildings, sheds, dense planting and obvious gaps, as well as drains, paved areas and gates. The aim is not to produce a survey; it is to identify possible cold-air routes and places where air could be slowed. Take photographs from fixed viewpoints in daylight and near dawn, and note their dates. Mark where frost, mist or standing water appears rather than relying on memory.
Put the likely greenhouse position on the plan, including its proposed orientation, so you can place sensors where it would actually stand. The footprint of a lean-to greenhouse belongs on this drawing if that form is on your shortlist: use the actual dimensions in the product information and check the wall and slope, rather than assuming a sheltered wall is suitable. Leave yourself a way to reach the measuring points. This sketch is a planning aid, not a survey or a foundation design.
Set up comparable temperature readings
Compare a suspected hollow, a position partway up the slope, a slightly higher open patch and, if space allows, a reference point beyond the suspected pocket. Use matching minimum/maximum thermometers or data-logger sensors at the same height. Put the instruments together at the start to see whether one consistently reads differently; label them and note any observed difference rather than assuming perfect agreement. Simultaneous readings matter because cloud, wind and temperature change through the night. Moving one instrument between locations on successive nights can confuse site differences with changes in the weather.
Choose a height that is relevant to the conditions you want to monitor, and keep it consistent at every comparison point. Place each sensor in a ventilated screen, shaded from direct sun and protected from rain. Keep it off soil, paving, walls and greenhouse frames, where the immediate surface may affect a local reading. If you suspect a colder layer close to the ground, add a second sensor at that height in one location and label it as a separate height comparison. If a Limited Edition Aluminium Greenhouse is under consideration, mark its intended outline first and put the nearest sensor beside the proposed position, not in a convenient but unrelated part of the garden.
Log overnight minimum temperatures
A minimum/maximum thermometer records the lowest value since its previous reset. Read it at the same time each morning, note the minimum, then reset it as the device instructions direct. Record the date, time, sensor ID, location and height, along with a brief note about cloud, wind and ground wetness. A number without that context is hard to compare later. A data logger can retain a time series, showing when the temperature fell and whether a low was brief or lasted for hours. Follow its instructions for the recording interval and preserve the time stamps; do not compare readings taken over different periods as though they were equivalent.
Run the comparison over multiple cold-season nights, not just one dramatic frost. Give particular attention to clear, still conditions, when local differences may be easier to see, but include windier or cloudier nights as a contrast. Record conditions at dusk and in the morning, including wind direction as best you can. Where planning time allows, collect a few weeks of data across changing weather; a shorter run may show an obvious difference but miss another pattern. For a T-shaped orangery greenhouse, check readings across the intended outline rather than assuming one central sensor represents all the ground it would occupy.

Use readings to trace cold-air movement
Use the map and simultaneous readings to infer cold-air movement rather than trying to see it directly. On calm nights, note which point cools first, which reaches the lowest minimum and whether the same places stay colder for longer. If a low sensor repeatedly falls below a nearby higher one, that is evidence of a local difference; one event is not enough to declare a permanent frost pocket. Frost on grass, mist or dew can identify areas worth monitoring, but it cannot show the air temperature or prove which direction the cold air travelled. Check whether the repeated differences make sense alongside the slope and the night's weather.
Mark likely routes and barriers on the sketch. A slope may carry cooled air towards a dip; a solid wall, bank, dense hedge or group of sheds may interrupt a route, while openings may leave a passage. The effect depends on the arrangement and the night's wind, so treat each feature as a possibility to test, not a universal rule. Overlay the complete proposed greenhouse footprint and compare its edges with the repeated readings. If a Pyramid Greenhouse is among the models being compared, plot the actual planned outline: the model name does not show whether the garden position sits outside the cold-air route.
Check sunlight and drainage separately
Keep frost, sunlight and drainage as separate checks. Use a seasonal shadow sketch to note when nearby walls, trees, fences or buildings shade each possible site; the pattern can differ by season and time of day. A sheltered location may avoid one exposure yet still receive too little light for your intended use. Photograph the candidate area from the same angle at different times, and update the sketch as the sun's path changes rather than judging the plot from one bright afternoon. A relatively warm reading does not make a shaded site suitable, and an open position is not automatically the warmer choice.
Inspect the ground after rain as well as in dry weather. Mark puddles, soggy patches, runoff routes and places where water moves towards or away from the proposed footprint. A hollow that gathers cold air may also have drainage issues, but the two need separate evidence. For a Limited-Edition Aluminium Greenhouse with Storage, plot the complete proposed model footprint when reviewing wet patches and light, rather than drawing only the area you intend to grow in. Surface frost is not evidence that the ground is firm or drains well.
Compare the candidate greenhouse positions
Make a comparison table for each candidate position: lowest reading, number of nights with similar lows, how long temperatures remained low if a logger shows this, sensor height, weather, relative ground level, barriers, shade and wetness. Compare points on the same nights and at the same height. Look for a repeatable pattern rather than allowing one extreme result to dominate; a misplaced sensor or a change in cloud can skew one night. Note any difference you observed when the instruments were together, so a small gap between locations is not treated as precise if it falls within the devices' variation. Relate any temperature threshold to the crops you actually plan to grow.
A slightly warmer site may still be impractical if it is persistently wet, too shaded or cannot accommodate the model you want. A colder but usable position is not an automatic rejection; it calls for a realistic crop calendar and a considered heating plan. The same test applies to any model, including a Bloomcabin Prestige Greenhouse: compare readings for the exact ground it would occupy, especially if the proposed footprint crosses more than one low area. A product name or catalogue category cannot confirm that a particular low-lying position is suitable.
Plan heating from the measured conditions
Decide what conditions your intended crops and growing season require before planning heat. Extending the season is different from maintaining conditions for particular plants. Your outdoor log describes exposure at the proposed site, not the temperature a future greenhouse will hold. After installation, paired indoor and outdoor readings can show how the enclosure behaves, but the outside minimum by itself does not specify a heater size. The model, its actual dimensions, enclosure details, ventilation, target conditions and site exposure all matter. Use your records as information for a supplier or qualified heating professional, not as a do-it-yourself calculation.
The Spacious Greenhouse listing gives a floor-area range of 47 to 70 m². That helps identify the model's scale, but floor area alone is not a heating specification; the same applies to smaller options. Do not transfer a heating plan from a different greenhouse or assume extra heat will correct shade, wet ground or cold-air stagnation. Present the lowest readings with the weather notes and, where available, the duration of the cold spell, rather than passing on a single figure without context. Have electrical or fuel equipment selected and installed professionally, following the equipment instructions; this guide is not an installation manual.

Check the exact footprint and ground requirements
Before committing to a position, check the model-specific outside dimensions, base information and ground-preparation requirements for the selected configuration. A floor-area figure does not show where the outer edges, door opening or base will sit, and an illustrative photograph is not a construction drawing. Put the exact outline on your site sketch and check it against slopes, drains, barriers and access without assuming one universal setback. If the patch is sloping, soft or prone to standing water, ask the supplier and a suitably qualified local professional what preparation is appropriate. Do not guess at a foundation or try to make a generic rule fit.
Take the Aluminium Classic Greenhouse as a model-specific example: use its product information to establish the proposed footprint and base requirements before choosing between two sites. Do the same for every alternative; a product name and broad floor-area range cannot substitute for dimensions or advice about the ground. Keep the frost log with the sketch so anyone helping you assess the site can see which readings came from the greenhouse area and which came from the reference point. This keeps siting and any heating discussion tied to the same measured place.
Keep a useful record after installation
Keep a compact record that another person could follow: a dated site sketch; sensor locations, heights and IDs; minimum values and times; weather notes; and photographs from consistent viewpoints. Record the device type and any difference you noticed during the side-by-side check. Note later changes to a hedge, fence, tree, gate, drain or nearby building work, since they may alter the conditions you mapped. If a reading looks surprising, repeat the instrument comparison before blaming the site. Preserve raw logger data as well as your summary, especially where it shows how long temperatures remained low.
After installation, keep an outdoor reference sensor and a separate indoor sensor if you want to understand how conditions differ, following the device instructions and using comparable shielding. Note whether doors or vents were open and whether heating was running; otherwise, readings may not be comparable. Recheck after meaningful changes to trees, hedges or drainage and through the first cold spells. The outdoor log helps with the position and plan; indoor readings show what happens in the finished greenhouse at that exact location. Those observations can inform crop timing and later heating decisions without promising the same result every winter.
Frequently asked questions
How can I tell whether my garden is a frost pocket?
Frost repeatedly appearing in the same hollow, or thawing later there than on a nearby slope, is a useful clue. However, frost on grass reflects the surface, not the air a greenhouse would experience. Compare minimum air temperatures at the hollow and at a higher reference point on the same nights. Repeated differences in similar weather are stronger evidence than one frosty morning.
How long should I record temperatures?
There is no fixed number of nights that proves a site is frost-free. Record multiple cold-season nights, including several that are clear and still, as well as some windier or cloudier conditions. Where planning time allows, a few weeks of readings across changing weather can show more than isolated measurements. A logger adds a time series; a minimum/maximum thermometer can still be useful if readings and resets are consistent.
Where should I put the thermometer?
Use matching sensors at the same height in ventilated shade, away from walls, paving and the ground. Include the suspected hollow and a slightly higher point. Simultaneous readings are best because weather changes overnight. If you have only one thermometer, repeat the comparison on similar nights and return to a reference point, but treat the results as less certain.
Will a greenhouse prevent frost?
Do not assume an unheated greenhouse will remain frost-free simply because it is enclosed. Indoor conditions depend on the structure, ventilation, exposure and weather, so outdoor readings cannot guarantee an indoor minimum. After installation, paired indoor and outdoor readings during cold spells will show how conditions differ at your actual site.
Can heating make a low-lying site workable?
Heating may be part of the plan if your crops need conditions the site cannot provide naturally, but it will not solve shade, standing water or unsuitable ground. A logger gives useful information about outside exposure, not a heater rating. Have any proposed system assessed for the actual greenhouse, crop plan and site by a suitably qualified professional.
Choosing a greenhouse for a low-lying garden is easier when the decision rests on repeatable readings rather than the lowest point on a sketch. Map the terrain, compare minimums at the proposed footprint, and weigh cold-air movement alongside light, drainage and the actual model dimensions. If no position avoids the colder area, the log still gives you a grounded basis for deciding whether your intended crops and a properly planned heating arrangement are realistic.
