
What to Do When Greenhouse Glazing Seals Wear
Greenhouse repair guide
Greenhouse glazing seals can look dirty long before they stop doing their job, and a quick clean may reveal cracks or gaps that grime was hiding. Cleaning removes surface deposits; it cannot restore a seal that has split, shrunk, hardened or lost its shape. Because glazing systems use different seal profiles and retention parts, a near match is not a reliable substitute. This guide explains what to inspect, how to identify the existing component, when to ask an installer, and what to include in a request for a manufacturer-matched spare.

01
What a glazing seal does in a greenhouse
Greenhouse glazing seals may be called gaskets, glazing rubbers or weather seals, but the term does not describe one universal component. Depending on the frame system, a shaped strip may cushion a pane, reduce a gap or help form a weather-resistant joint. Separate clips, beads, capping pieces or other retainers may hold the pane in place. A roof joint, side panel, door and opening vent can use different components even on the same structure. The manual or parts drawing is the best guide to what the visible strip is meant to do. A loose-looking edge does not, by itself, prove that the seal is the only problem.
Look at the joint without pulling the strip or pressing on the pane. Note which part of the frame it sits in, whether it runs continuously or is interrupted, and whether clips or caps are present nearby. A replacement with a similar colour or width can still have a different cross-section or fastening arrangement. Keep the name of the whole greenhouse separate from the name of the component you need: the Aluminium Classic Greenhouse range identifies complete models, not a particular gasket. Its listed areas run from 3.77 to 28.08 m², but size alone will not identify your seal. Use the component labels in the parts drawing to distinguish the seal from the surrounding retainers.
Signs that cleaning will not restore a seal
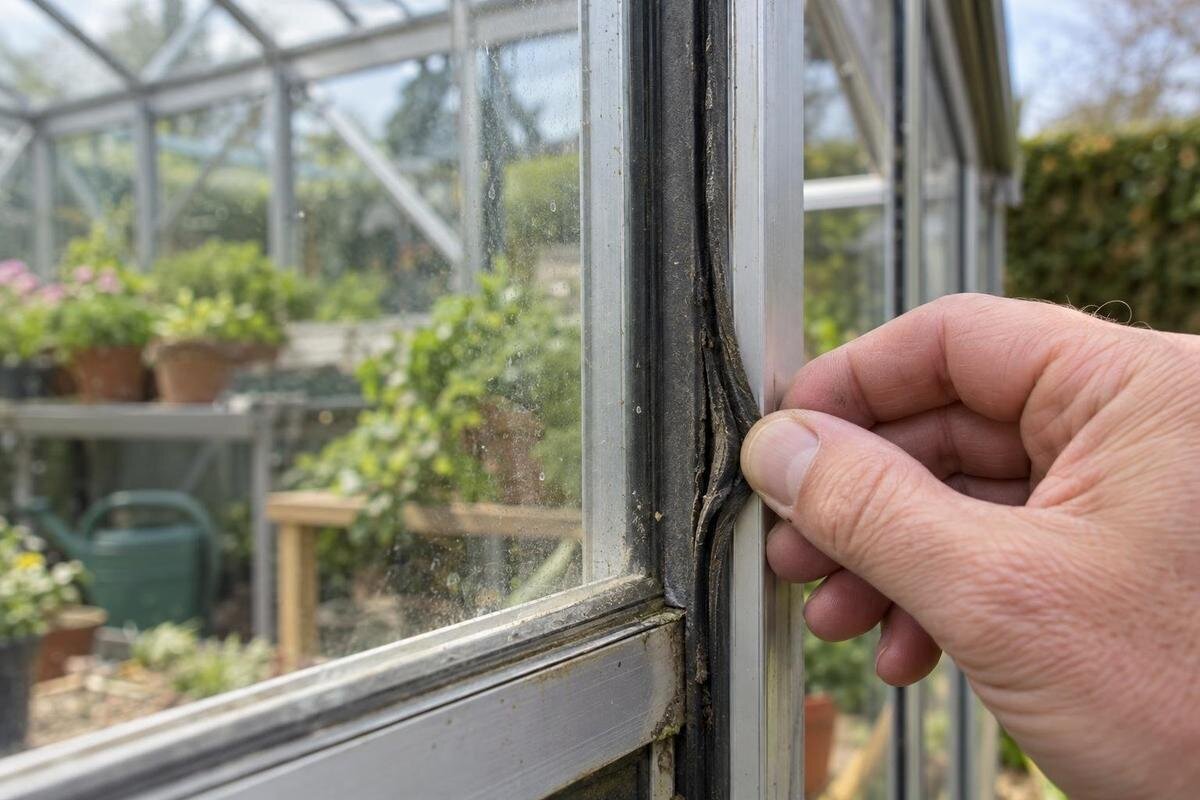
Look for splits along the length of the seal, open ends where material appears to have receded, sections that have dropped out of a channel, or gaps that remain after surface debris is removed. A seal that looks permanently flattened, brittle or misshapen may no longer sit as intended. Cracks can be easier to spot at corners and joins than along a straight run. These are signs to investigate, not a test of how securely the pane is retained. Discolouration, a dark line or a patch of algae alone does not establish that the seal has failed.
Compare a suspect section only with another joint in the same position and of the same design; a roof seal and a wall seal need not match. Record whether one panel or several are affected, and note the location of each gap or split. Avoid tugging, bending, scraping or pressing the edge to test its condition. A deteriorated strip could break further, and glazing may move. Clear photographs in good light, labelled with the position on the greenhouse, are more useful than a guess based on appearance.
02
Clean gently before judging the material
Loose leaves, dust and surface growth can hide the edge of a seal. Remove loose debris with a soft brush or cloth, and use a mild cleaning method only if the greenhouse care instructions allow it. Work gently so that you do not lift the strip or catch an edge with a tool. Avoid abrasive pads, blades, wire brushes, solvents, oils and high-pressure washing unless the manufacturer specifically approves them. A cleaner may change the appearance of the surface, but it will not restore material that has split, shrunk or lost its shape.
Once the joint is clean and dry, check the same areas again in good light. If dirt was the issue, the line may look sound and continuous; if a gap, split or loose section remains, cleaning has revealed the condition rather than repaired it. Note what became visible after cleaning, especially where deposits had obscured a join or corner. This gives the supplier a clearer description than simply saying the seal looks old. Keep cleaning and purchasing decisions separate: a dirty joint alone is not a reason to replace the greenhouse. If replacement is already under consideration because a suitable repair is unavailable, the Limited-Edition greenhouse range with storage offers a separate complete-unit comparison, with listed areas from 5.52 to 28.08 m². Consider whether storage belongs in your new layout rather than treating this range as a source of repair parts.
Do not assume every leak comes from a glazing seal
A damp patch beside a pane can make a worn seal seem likely, but water or a draught does not confirm the cause. Moisture may be condensation, or it may be associated with another joint, a door or vent, an overlap or a drainage route. A seal can also look untidy without being the source of a particular problem. Before requesting a replacement, note precisely where moisture appears and whether it is limited to one joint or occurs in several parts of the greenhouse.
Observe the area during normal use and after the conditions in which the issue usually appears. Take photographs and mark the affected locations, but do not hose the greenhouse, dismantle a panel or probe joints to force a diagnosis. Keep observations separate from conclusions: describe water beside a particular pane rather than reporting a failed gasket before the cause is known. If more than one component appears affected, ask an installer to assess the wider structure. For an existing lean-to greenhouse, make clear whether the affected area is at a glazed joint, an opening or the junction beside the adjoining building. If a full replacement becomes necessary, the Aluminium Lean-to Greenhouse range has listed areas from 3.69 to 14.34 m². Compare its complete product information with the intended position; the appearance of a current model cannot identify the source of a leak in your existing greenhouse.

03
Identify the original greenhouse and glazing position
Before looking for a spare, gather the greenhouse model name and any serial or product number shown on the unit, paperwork or manual. An invoice or assembly document may give a more precise name than a general description such as aluminium greenhouse. If your records identify the Bloomcabin Prestige model, use that exact name and include any accompanying reference numbers. Do not substitute the name of a similar-looking current listing. If your documents use different descriptions, include both and say where each came from. Clearly distinguish recorded details from anything you only remember; the manufacturer’s part reference remains the key detail for ordering the seal.
Describe where the seal sits: roof, side panel, door, vent, corner or another specific joint. If you can do so safely, photograph the whole greenhouse, the affected panel and a close view of the seal in place. Include a familiar object for scale only if it can be positioned without touching the glazing. If the manufacturer asks for measurements, follow its instructions and leave the seal fitted unless a qualified person advises otherwise. A profile that looks alike from the front may have a different cross-section.
Request a manufacturer-matched replacement
Contact the greenhouse manufacturer or the appropriate parts supplier with the model details, photographs and the seal’s location. Ask for the exact spare-part identifier and whether it is confirmed for that model and glazing position. If the original reference is missing, ask whether the manufacturer can identify the profile from your photographs or records, and whether an approved cross-reference exists. Do not choose a replacement solely by colour, an approximate width or a short description such as rubber glazing strip.
Clarify what the spare covers before ordering: the required length or quantity, whether it is intended for a complete run or a defined section, and whether there are separate corner or joining pieces. State how many joints are affected, but do not assume that this equals the number of parts needed. Ask the supplier to distinguish the component reference from the order quantity so that you know what each item in the quotation represents. Request the relevant replacement instructions and establish whether an installer should fit it. If no matching part is available, ask about an approved alternative before moving to a whole-greenhouse enquiry. At that stage, the T-Shaped Orangery Greenhouse is a complete-unit option with listed areas from 16.52 to 30 m². Consider whether its layout meets your needs rather than choosing a replacement solely because a seal is difficult to obtain.
04
Know when an installer should assess the glazing
Do not attempt to remove or reposition glazing to reach a seal if a pane is cracked, loose, shifted or overhead, or if the joint is at height. The same applies if you cannot tell whether clips, beads or another retainer are holding the panel. Avoid leaning on the pane or using a tool to prise out a strip. Even a small repair can involve components whose role is unclear from the outside, so uncertainty about how the glazing is secured is a reason to stop and seek advice.
Ask an installer or the manufacturer to confirm whether the visible problem is a seal, a retainer or another part of the glazing system. Before work is agreed, establish which component needs attention, whether the pane has to be moved, what replacement part is specified and what procedure is approved. Describe any difficulty reaching the joint when arranging the assessment, so that the discussion covers access as well as the component itself. Keep this assessment separate from a quotation for a new greenhouse: first establish what the repair involves, then compare the alternatives if necessary. For a substantially larger replacement, the Spacious Greenhouse range has listed areas from 47 to 70 m². That scale warrants a separate review of your available space and intended use; it should not become the default choice merely because the existing glazing needs professional attention.
Follow the approved replacement method
A correct spare part is only part of the repair: its installation method must also match the greenhouse system. Depending on the design, the seal may fit into a channel, work alongside separate retainers or require other glazing components to be handled. Do not assume that every seal can simply be pulled out and pushed back in, or that the same method applies to roof and wall joints. Check the model-specific manual or ask the manufacturer for the relevant drawing and instructions before work begins.
Avoid making an improvised repair with silicone, glue, foam strip or a cut piece of another gasket unless the manufacturer explicitly approves it. Such additions may change how components fit or make later maintenance more difficult. If advice mentions an alternative part, check that it also explains the fitting method; approval of a component should not be treated as permission to devise your own installation procedure. Keep the relevant instructions with the part details so that whoever carries out the work has the same information. If an approved repair cannot be established and you move to a new-unit comparison, the Limited Edition Aluminium Greenhouse range has listed areas from 3.77 to 28.08 m². Similar dimensions or model names do not establish compatibility with the old greenhouse. Compare the new unit as a complete purchase rather than assuming its components can be used for the repair.

05
Compare a seal repair with replacing the greenhouse
A seal repair may be worth exploring when the frame and other glazing parts appear serviceable, the correct spare is available and the work can be carried out using an approved method. Broader problems change the decision: several failing joints, missing retainers, damage elsewhere or a discontinued system may call for a wider assessment. Age alone does not settle the question. Ask for the scope of the proposed repair and, where appropriate, a separate assessment of what would be involved in replacing the whole greenhouse.
Compare the confirmed repair work with the requirements of a new unit: available space, intended use, layout, access and the product details that matter to you. Keep the two options distinct when reviewing quotations. For the repair, you need a clear description of the components and work included; for replacement, you need to understand the complete greenhouse being offered. Do not assume that existing panes, seals or other parts will transfer to another model. If you are considering a different form of greenhouse, the Oasis Pyramid Greenhouse is a listed range with areas from 5.53 to 18.9 m². Its area range can help narrow the comparison, but it does not settle whether the layout suits your plans. Consider what you want to retain about the current greenhouse and what you would change, then assess the complete product information against those priorities.
Prepare a clear parts or replacement enquiry
Bring the details together in one enquiry so that the recipient can connect the model, affected joint and photographs without searching through separate messages. Put the model and any product or serial number at the top, followed by a description of the problem. Group photographs from the overall view to the panel and then the close-up, using the same location labels throughout. Include the relevant manual or order details if available. Explain what changed after cleaning and identify any details that remain uncertain. This keeps your observations separate from your request for a part. Do not remove a section to send as a sample unless the manufacturer or an installer has confirmed that this is safe and necessary.
When the reply arrives, check whether it confirms a matching part or merely suggests a possible profile. If several profiles are offered, ask what distinguishes them and which unresolved detail would determine the choice. Keep any follow-up in the same correspondence so that the supplier can refer to the original information. Where identification remains uncertain, establish whether more information or an installer’s inspection would resolve it before ordering. Keep the final response with your maintenance records, photographs and inspection date. After a repair, add the locations treated and the part reference used. Record the work actually completed rather than describing all seals as renewed if only some were replaced.
Frequently asked questions
Can I clean a greenhouse glazing seal with household cleaner?
Check the greenhouse care instructions first. Use only a cleaning method and product the manufacturer allows, and avoid abrasive tools, solvents and pressure washing unless specifically approved. Cleaning may remove grime, but it cannot repair a split, hardened or flattened seal.
How can I tell whether a glazing seal needs replacing?
Look for splits, material that has receded from an edge, gaps at joints, a seal that has come out of its channel, or sections that appear permanently flattened or brittle. These are signs to investigate, not proof that the seal is the only faulty component. Do not pull it to test it.
Can I use a universal gasket or silicone instead?
Not unless the greenhouse manufacturer confirms that the substitute is suitable for your exact glazing system. Similar-looking profiles may fit differently, and an adhesive or sealant may interfere with the original arrangement. Ask for the correct part reference or an approved alternative.
Does water near a greenhouse pane mean the glazing seal has failed?
No. Water may be condensation or may be associated with another joint, opening or drainage route. Note where and when it appears, then inspect nearby areas without disturbing the glazing. If the source remains unclear, ask an installer to assess it.
Do I need to remove a pane to replace a glazing seal?
That depends on the greenhouse system and the manufacturer’s replacement instructions. Some work may involve glazing or retaining parts, so do not assume it can be done safely with the pane in place. If removal is required or the procedure is unclear, ask the manufacturer or an installer.
A clean joint gives you a clearer view of its condition, not a renewed seal. If a split, flattened or displaced section remains after gentle cleaning, confirm its exact profile and location against the greenhouse documentation before ordering. If the correct part or an approved method cannot be confirmed, pause rather than improvise; an installer can assess whether a supported repair or full replacement is the more practical route. Keeping the model details, part reference and photographs with your maintenance records makes a later parts enquiry more precise.
