
Can You Put a Greenhouse Between a House and Fence?
Greenhouse siting
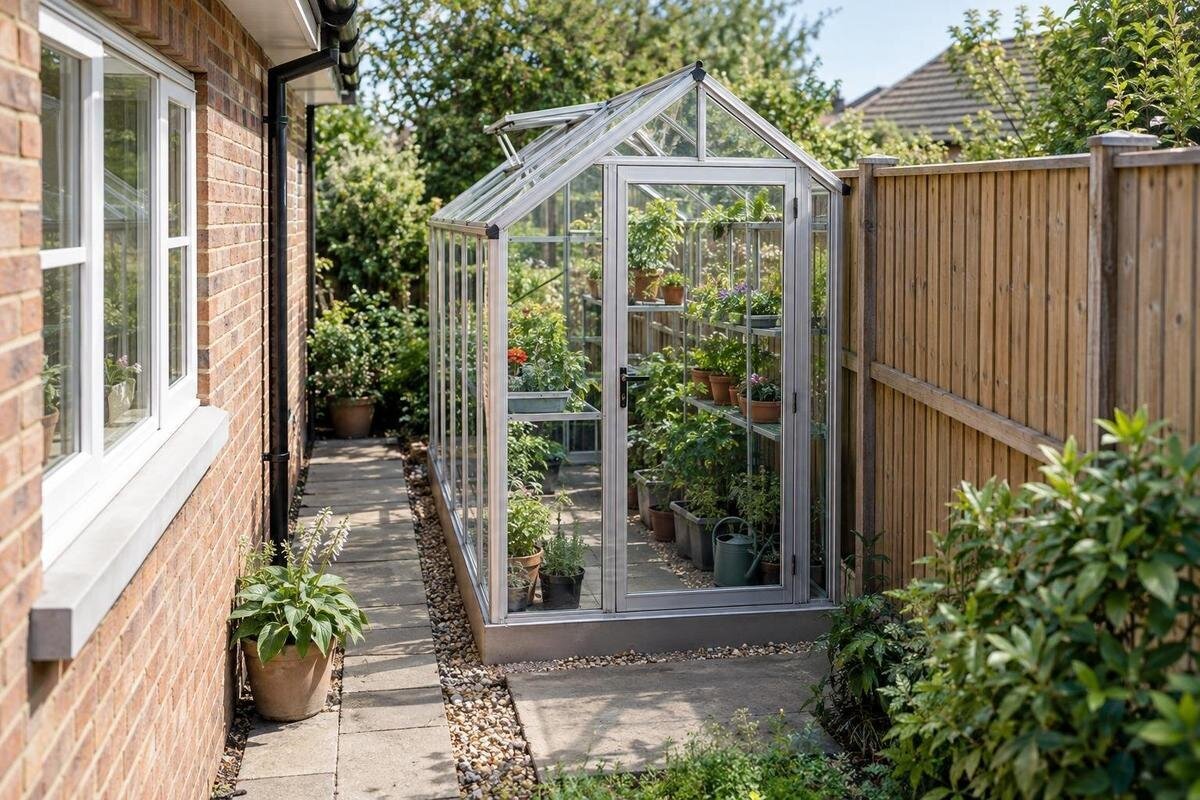
A side passage can look roomy from the garden and feel very different once you account for a greenhouse, house eaves, a fence, doors and the route needed to maintain everything. The useful question is not simply whether a base fits between two boundaries. It is whether the complete outside outline fits at every point, whether you can still reach the greenhouse and the house or fence, and whether the remaining inside width suits your growing plans. A measured sketch is more reliable than judging the gap by eye.

The three conditions a side-passage greenhouse must meet
Yes, a greenhouse can fit between a house and a fence, but only a site survey and the exact model can show whether the position is practical. Check three things separately: the complete outside footprint fits; there is access for the greenhouse’s doors and routine care, plus any work the house and fence still need; and the inside leaves usable room for plants and a route between them. A base fitting on the ground is only one of these tests. If the gap also serves as a route to the back garden, bins or services, include those everyday uses rather than treating it as unused ground. There is no single minimum gap for every model or task.
Keep footprint, access and growing space as separate measurements. A floor-area figure does not reveal exact width, roof projections or the room needed to reach glazing; nor does it show whether a bed-and-path arrangement will work. A wall-adjacent greenhouse may make different demands from a freestanding one, but neither format should be assumed to suit the wall or fence beside it. Compare the exact model and size you have in mind, check what its dimensions include and read its installation requirements. Judge it against the real passage, not a product photograph or category name, and keep another possible location in mind if one of the three tests fails.
Measure the passage along its full length
Measure the passage end to end rather than taking a single width at the garden entrance. Check the narrowest points, including where walls, fence panels or paving change direction, and record the usable length as well as the width. Note posts, steps, raised paving, bins, gates and permanent objects that reduce the route. Measure along the proposed greenhouse position, not just at either end: a fence can angle inwards and a house wall can have projections. If the gap changes shape, mark where it narrows or widens on your sketch. Take photographs from both ends and close views of each pinch point, then label them with the measurements.
Check above ground level too. Eaves, guttering, downpipes, open windows, vents or a sill can narrow the available space or block access, even when the ground-level measurement looks generous. Note where each projection begins and how far it reaches; do not assume a gutter or pipe can be moved. If your measurements point towards a wall-adjacent form, the lean-to greenhouse range is one category to compare, but its name does not confirm that a particular model can be fixed to your house or that the wall is suitable. Check the chosen model’s instructions and ask the supplier about any uncertainty. Record the route through the garden entrance as well, so the site can be reached for installation.
Use the greenhouse’s complete outside dimensions
Use a dimensioned drawing for the exact model and size, not a product picture or headline floor-area figure. Identify the external width and length, and find out whether each measurement refers to the base, frame, eaves, roof, gutters or other projections. A drawing may show more than one outline; match each dimension to the feature it describes. Compare the widest part of the structure with the narrowest part of the passage, and its full length with gates, doors and changes in level. If an important projection is not dimensioned, ask for clarification instead of estimating it from an image.
Draw the outside outline on your plan and show the space left on both sides. For example, a hypothetical 2.4 m-wide passage and a 1.8 m-wide greenhouse leave 0.6 m in total. That remainder is shared between the sides, not a ready-made access route or a recommended clearance. Test different positions on the plan if one side needs more access, but check whether the other side still needs cleaning or fence work. The Limited Edition Aluminium Greenhouses range is listed with floor areas from 3.77 m² to 28.08 m²; those figures do not identify the outside width of the exact variant. Choose using its dimensioned outline.
Calculate the width left for growing
Once the outside fit looks possible, plan the interior using its clear usable width. Allow for the frame and include any benches, shelves, raised beds or storage you intend to add. Sketch a realistic arrangement: one bed along the wall and a path, two beds with a central route, or containers with room to turn near the entrance. Measure beds and pots you already use rather than drawing symbols of arbitrary size. The stated floor area is not all planting space, and an aisle that looks generous on paper can narrow once trays and containers are in place.
Write down how you intend to work as well as what you intend to grow. Will you carry seed trays through the aisle, move a watering can, take out spent plants or use a garden trolley? If built-in storage is on your shortlist, mark its position before allocating the remaining width. The greenhouses with built-in storage category is a reminder to count that space rather than assume the whole interior is available for growing. Check the selected variant’s layout and dimensions, then make sure the path stays open when doors, pots and seasonal equipment are in their usual positions.

Check the door and the route into the greenhouse
Allow space for the door to open and for a clear approach, not just for the doorway itself. Confirm the doorway position, width and opening method for the selected model, then show the space needed to open the door on your site sketch. A hinged door may need space outside; a sliding door still needs a clear approach. Check whether a house door or window opens into the same route, and whether the garden gate can open fully without meeting the greenhouse. Keep the way in clear enough to carry compost, trays, tools and plants without awkward manoeuvring. Include the equipment you actually expect to use.
Plan access for installation and later use. Consider how greenhouse parts will get from the garden entrance to the site and whether the narrowest turn can be negotiated; do not assume that a structure can be assembled in place simply because it fits once built. If you are comparing the Prestige greenhouse, its listing identifies a version with a metal base. Check the documented base footprint as well as the frame, entrance and working route. For any model, use the supplier’s instructions for assembly and base requirements, and seek qualified help if the site itself needs structural work.
Trace roof runoff and surface drainage
Follow the house roof’s water path before settling on the greenhouse position. Note the gutter line, downpipes and outlets, and look at the passage during or soon after rain if practical. Record where water flows, where it splashes and whether any spot stays wet. A roof edge or overflowing outlet may direct water into the strip even if the ground looks dry on a fine day. Check the proposed position against the house doorway, fence base and walking route, and note any surface drain or channel that must remain open. A photograph taken in wet weather can help explain a problem that is hard to see later.
Mark roof outlets and drainage features on the plan, then consider where water from the greenhouse itself would go. Do not block an existing outlet, direct water towards the house or assume the greenhouse can receive runoff from the house unless its documentation expressly allows that use. The T-shaped orangery greenhouse label does not show where a particular roof edge or gutter will discharge, so use the selected variant’s drawing and drainage information. If siting would change a drainage path, leave a wet access strip or require changes to a building or ground, ask a qualified professional for site-specific advice before proceeding.
Map shade and ventilation through the year
Map shade from both boundaries, not just the bright patch you see at midday. The house and fence can cast different shadows, and the pattern changes with the sun’s position through the year. Visit at different times and, if possible, compare observations across seasons. Dated photographs from the same points or a simple shadow sketch can show when the proposed site receives direct light and when it is shaded. Note which part of the greenhouse is affected and how the pattern changes along the passage. A single snapshot, especially in one season, cannot describe the conditions throughout the year.
Relate that record to the crops and season you have in mind rather than assuming a greenhouse suits every growing plan. Check ventilation too: note whether openings on the chosen model would face a wall, sit close to the fence or be obstructed by another feature. Confirm where they are and how they open using the model information. If you compare a pyramid greenhouse range, use its exact plan and elevation alongside your shadow map; a shape name alone does not establish internal growing width, light exposure or ventilation access. Assess the site and the selected model together.
Keep house and fence maintenance accessible
A side passage may also be the only way to reach house services or maintain the fence. Mark windows, vents, taps, outside lights, meters, drains, bins and gate hardware, and note what space is needed to use or service each item. Include fence panels that may need repair or repainting and wall surfaces that need inspection or cleaning. Do not assume an access point will remain reachable because it sits above or below the greenhouse roofline; consider whether you can get to it after installation. The same applies to anything that needs to be opened or checked regularly.
Distinguish access for cleaning the greenhouse from access for maintaining the house and fence. If you cannot reach one side of the greenhouse from outside, check which surfaces can be cleaned from within and whether shelves or plants would obstruct them. That does not resolve access to the wall or fence behind it; plan those tasks separately. If a wall or fence is not yours, get the owner’s agreement before relying on it as a fixing point or planning changes, and confirm any attachment with the supplier or a qualified professional. When checking the Classic aluminium greenhouse range, match the exact variant to the services and maintenance routes on your drawing rather than using a catalogue image as a site plan.

Compare model layouts for the passage
Once you have checked the measurements, compare the layouts of the models still on your shortlist. Use the same proposed beds, pots and equipment in each interior sketch so that the comparison reflects how you would actually garden. Note where the entrance leads, where storage would sit and whether you would have to move containers to reach the far end. Two layouts with similar floor areas may leave quite different arrangements for growing and working. Record the practical advantage or drawback of each candidate beside its sketch, rather than choosing by area alone. A useful comparison shows what each layout allows you to do in this particular passage.
Pay particular attention to irregular footprints: a wider section may meet the fence even when the main body appears to fit. Consider where that extra space falls and whether it would be useful for your proposed beds or storage without obstructing the route. The Spacious Greenhouse range is listed at 47 to 70 m², so establish whether any variant belongs on your site shortlist before comparing its interior layout. That floor-area range alone does not establish suitability for a passage. For every candidate, keep a brief note of any unresolved layout problem. A model that requires you to give up an essential access route should not remain on the shortlist merely because it offers more growing space.
Test the layout with a scaled plan
Bring the measurements together in one scaled plan. Draw the house, fence, gate, wall openings, eaves, gutter, downpipes, drains and fixed objects. Add both the ground or base outline and any roof projection shown for the exact greenhouse variant. Label the measurements, indicate where access is needed and mark the door’s movement. Draw the interior separately, with beds, storage, pots and a path at realistic widths. A second side view can reveal conflicts above ground level that a ground-only drawing misses. Choose a scale you can measure clearly and keep it consistent throughout.
Then test the proposed outline on the ground with string, chalk or removable markers and walk the route from the entrance. Check the door approach, access to the house and fence, and whether the inside still has a clear working path. This mock-up is a practical sense check, not a substitute for product instructions or professional advice where drainage, fixing or ground conditions need assessment. If the layout works only by blocking a service, ignoring roof runoff or accepting too little usable growing width, treat it as a no-go for that model. Compare a different outline or location instead.
Frequently asked questions
Can a greenhouse sit directly against the house or fence?
Only if the chosen model’s instructions allow that arrangement and you can still reach the surfaces and services that need maintenance. A lean-to label does not, by itself, confirm that a particular wall or fixing arrangement is suitable. Check the model details and ask the supplier or a qualified professional about any uncertainty.
How much clearance should I leave beside a greenhouse?
There is no single clearance that suits every greenhouse and task. Work out which sides need to be reached for cleaning, repairs or fence maintenance, then show those routes on your plan. A greenhouse may fit within the gap and still leave too little room to use or look after it.
What should I measure besides the gap width?
Measure the passage length and its narrowest points, including projections at eaves level. Note gates, doors, downpipes, drains, windows and services. For the exact model and size, check the outside dimensions, any roof projections, the base outline, door position and usable interior width.
Is a greenhouse’s floor-area figure enough to tell if it will fit?
No. Floor area does not show the exact width, length, projections or position of the entrance. Compare the dimensioned drawing for the specific model and size with your site plan, and check what each measurement includes.
What if the house roof drains into the passage?
Note where the gutters and downpipes carry water and keep existing outlets accessible. Do not assume the greenhouse can take runoff from the house or that a new position will drain well. If the layout would change a drainage path, get site-specific advice from a qualified professional.
Choosing a greenhouse for a side passage means balancing the space it occupies outdoors with the space left to grow and maintain it. A useful plan includes the house roof and its outlets, both boundaries, the complete outer outline, access routes and the interior layout—not just the advertised floor area. If each check works for the exact variant, the passage may be a practical site. If one fails, changing the model, footprint or location is more useful than trying to make a bare fit work.
