
Greenhouse Beside a Garage: Checks Before You Site It
GREENHOUSE SITING
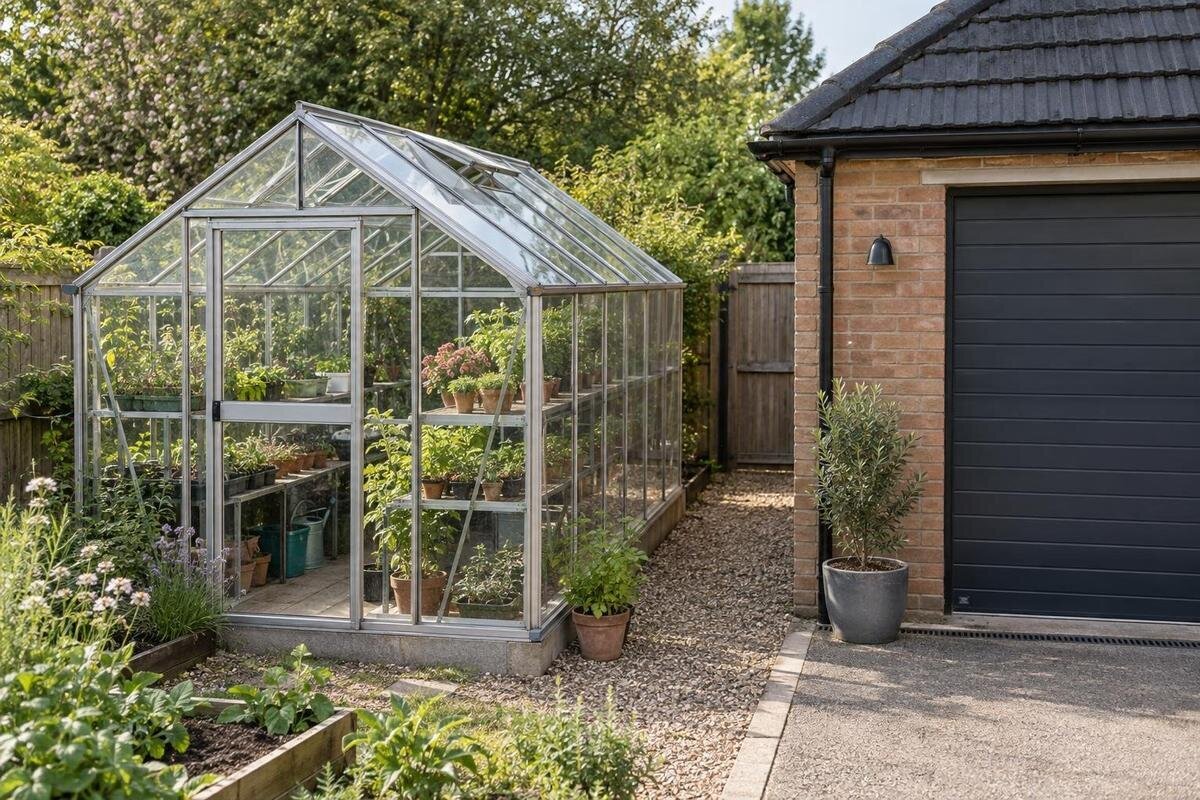
Putting a greenhouse beside a garage can make use of a convenient part of the garden, but the garage changes more than the available footprint. Its height can affect sunlight; its roof may send rainwater towards the proposed site; and a narrow gap can interfere with doors, maintenance or everyday access. Before choosing between a separate greenhouse and one attached to the wall, map the whole working area and observe how it behaves in sun and rain. The aim is a position that works for growing while leaving the garage straightforward to use.

Map the working area beside the garage
Begin with a scaled sketch of the garage and the full strip beside it. Mark the wall, eaves, gutter line, downpipes, windows, side door and other fixed features, then add the path, gate, fence and places where bins, bikes or tools are kept. Note how the garage door moves and where a car sits in normal use. This prevents an apparently clear rectangle on paper from taking space already needed to reach or use the garage. If the strip narrows or changes shape, measure it at several points rather than judging by eye. Label each measurement so it is clear whether it runs from the wall, gutter edge or boundary. Keep fixed features separate from movable items: relocating a bin may free up space, but the route used to take it out still needs to remain available.
Draw the greenhouse on the same scale using the plan for the exact model, not just a product-category name. Include the entrance and any roof projection shown on the drawing, then add room for opening doors and carrying items. A listed area does not reveal length, width or door position: the Pyramid Greenhouse range, for example, is listed from 5.53 m² to 18.9 m², but those figures do not set out one particular footprint. Use the area only to compare broad options; check the chosen model’s drawing and add the clearances specified in its instructions. Mark the gutter edge separately from the wall, as it may project over the working strip.
Check sunlight through the day and year
The garage’s height, roof profile and position relative to the proposed site can all affect how much direct sun reaches it. A check at midday in summer says little about morning or evening shade, or about a different season when the sun follows another path. Sketch the shadow edge against fixed points in the garden at several times, and repeat the observation at different times of year where possible. Dated photographs from the same viewpoint can make changes easier to compare than memory. Record the time as well as the date, and distinguish direct sunlight from a bright but shaded area. If you cannot observe every season before deciding, note that gap in your records rather than treating one day’s photographs as a complete picture.
Look at whether the shadow crosses the proposed growing area, the entrance or a side where access is already limited. Check other buildings and fences too; the garage may not be the only obstruction, and the site can look open from one viewpoint while a roofline casts shade at another time. Compare your observations with the plants you intend to grow and the requirements for the chosen greenhouse. Do not assume that the garage wall will make up for reduced sunlight by providing useful warmth. Record when the area gains and loses direct sun, then decide whether that pattern suits your plans.
Freestanding or attached greenhouse?
A freestanding greenhouse beside the garage has its own position rather than relying on the garage wall as part of its support arrangement. That can make the building interface simpler, but it still needs the base, installation and clearances specified for its own model. The gap should be wide enough for the inspection and maintenance tasks you expect to carry out; a narrow space that is difficult to reach can make routine tasks awkward or block access to the garage gutter. Show the gap explicitly on the plan, rather than treating it as whatever space remains after positioning the greenhouse. This also makes it easier to compare a nearby freestanding layout with one designed to meet the wall. A freestanding layout may still receive shade or roof runoff, so it does not remove the need for those checks.
An attached greenhouse is a different proposition: the garage wall and the junction between the two structures become part of the design. Check that the exact model is specified for attachment and that its instructions match the wall type and arrangement at your garage. The Lean-to Greenhouses range is listed from 3.69 m² to 14.34 m², but the category name and area range do not establish that a particular model is suitable for your wall. If attachment is being considered, have a qualified installer or building professional assess the wall and weatherproof connection. Do not choose an attached layout simply because the garage offers a convenient surface.
Trace rainwater from the garage roof
Follow the garage roof’s water path before settling on a position. Note where the gutters run, where each downpipe discharges and whether any part of the roof sends water directly to the ground. If possible, observe the area during rainfall from a safe position on the ground; look for overflow, splash, pooling and the route water takes across paving or soil. Add these observations to the sketch, including access to gutters and downpipes, rather than judging drainage from a dry-day visit. Mark any likely overflow point separately from the normal outlet.
Do not assume a greenhouse roof or its base can receive a concentrated flow from the garage roof. A downpipe outlet, overflowing gutter or runoff channel aimed at the gap can create repeated wetting and make the strip harder to maintain. Keep the rainwater route and greenhouse position clear of one another where possible, without blocking an existing outlet or diverting water by guesswork. If the workable layout depends on changing roof drainage, ask a qualified roofing or drainage professional to assess the route and a suitable solution.

Keep the garage and greenhouse routes clear
Check the garage as it is actually used, not as an empty building. Allow for the full movement of the main door, the space needed to park and get in or out of a car, and any side entrance used for bins, bikes, garden tools or stored equipment. If you carry larger items in or out, include the turning space they need on the sketch. A greenhouse that fits while the garage is shut may still obstruct access when a door is open or something is being moved. Check the route in the usual parking arrangement, not only when the driveway is clear.
Then test the greenhouse side of the same route. Confirm where the selected model’s door sits, which way it opens and whether a person can reach it without squeezing between the structure and garage. Think about carrying trays, compost or watering equipment, and moving around the greenhouse when its door is open. The Limited-Edition Aluminium Greenhouses with Storage listing describes a range with built-in storage, from 5.52 m² to 28.08 m²; check the exact plan to see how its door and storage relate to your entrance route. Identify which items you would store there and trace how you would carry them from the garage or garden. Include space to pause at the entrance while handling a tray or bag, rather than measuring only the width needed to walk through. Consider internal storage and external circulation separately.
Leave room to maintain both structures
Routine care needs room too. Consider how you would clean the greenhouse surfaces, inspect the side facing the garage, deal with leaves around the gap and reach the garage gutter or wall for ordinary upkeep. If a panel, door fitting or other part needs attention later, will there be a practical way to approach it? A gap that can be seen but not entered may not be useful when a task needs hands and tools. Think through maintenance on both buildings, not only the greenhouse’s front and entrance. On the sketch, identify where each task would be carried out and how you would reach that point. This helps distinguish a genuinely accessible gap from one that is open at the front but blocked farther along by a downpipe or other fitting.
Set the clearance from the actual tasks and the exact manufacturer guidance, not from a universal distance. A very narrow gap can be hard to keep clear; a wider one takes more garden space and may still be poorly placed if a door or downpipe blocks it. The Spacious Greenhouse listing covers 47 to 70 m², but area alone does not show the perimeter or access needed around a particular model. If a large-format option is under consideration, use its full plan to identify the sides that need to remain reachable. Keep the garage wall and any fittings accessible for inspection too.
Assess the surface and base separately
An existing patio, driveway edge or concrete strip may look like an easy base, but appearance alone does not confirm that it meets the selected greenhouse’s installation requirements. Check where the surface changes from paving to soil, whether it is uneven or cracked, and how water behaves at the proposed position after rain. A narrow strip between two structures can collect runoff even when the wider garden drains well. Record changes in level and any puddles; do not assume that a hard surface is suitable simply because it is already there.
Use the installation guidance for the exact model to establish what base and ground preparation it calls for. The Bloomcabin Prestige Greenhouse page names a version with a metal base, but that description does not establish whether the base suits your paving, soil or site conditions. Do not assume an existing garage slab extends far enough or is intended to support a greenhouse. If the ground, surface or water route is uncertain, ask a competent building professional to assess the specific site rather than applying a standard foundation detail. Keep any change to surface drainage from creating a new pooling problem beside the garage.
Compare the actual outline and orientation
Width is only one part of the fit: the greenhouse’s outline and orientation can determine whether it works in a side passage. If the space widens at one end, narrows near the garage door or has an angled boundary, compare the exact shape rather than placing a generic rectangle in the widest part. Note which side carries the entrance, where corners project and whether roof edges or gutters extend beyond the base. These details affect whether the structure can be reached and whether it blocks a path or garage opening.
A model name or floor-area figure cannot substitute for that drawing. The T-Shaped Orangery Greenhouse range is listed from 16.52 m² to 30 m²; area alone does not show which part of a selected outline would face the garage or where its door sits. Rotate the exact plan on your sketch and compare each orientation against sunlight, garage-door movement, rainwater routes and the maintenance gap. Keep a separate sketch for each workable orientation, with the entrance and garage-side edge clearly labelled. That makes it easier to see whether gaining space at one end would obstruct access at the other. Treat dimensions as model-specific, as products within a category need not have identical proportions. If an orientation leaves an unusable entrance, it is not a practical fit.

Test the proposed footprint on the ground
Before committing to a site, mark the chosen model’s outline at full size with a temporary line, string or other removable marker. Mark the garage-side clearance, the greenhouse door position and the route you intend to keep open. Then use the garage normally: open its door, park as usual and walk the route with the sort of item you expect to move. Try the greenhouse entrance from its proposed approach. This ground-level test can expose a blocked turn or awkward pinch point that a neat overhead drawing hides. Ask the installer what access is needed for the work and later maintenance.
Repeat the check in different conditions where possible. Photograph the marked site during the day, note the shadow line and observe the roof-water route in rain; a single dry, bright visit will not reveal every seasonal or drainage issue. The Limited Edition Aluminium Greenhouses range is listed from 3.77 m² to 28.08 m², so mark out the exact size you are considering using its model drawing. Keep the outline visible while testing the entrance and access routes, and distinguish the proposed structure from the clearance around it. Update the sketch if an access route, gutter or service point has been missed.
Compare layouts before choosing a model
Compare the options using the same checklist: enough light for your growing plans, a clear route for garage doors and everyday movement, no unresolved roof-water conflict, workable maintenance access, a suitable base and, if attached, confirmation that the model and wall are compatible. Separate firm requirements from preferences such as shape or appearance. If a candidate fails an essential check, do not try to solve it by accepting a blocked entrance or an unassessed building connection. Compare another orientation or position instead.
Once you have identified a workable layout, compare catalogue models against it. The Aluminium Greenhouses range is listed from 3.77 m² to 28.08 m². For each shortlisted size, record the dimensions, opening positions and base requirements from the exact product drawing and installation instructions alongside your site measurements. Note which requirements the layout meets and which remain unresolved, so a smaller floor area or preferred appearance does not distract from an access problem. For an attached layout or a change to the garage, have the proposed connection and water-management details checked by the appropriate qualified professional. If neither layout leaves the access and maintenance space you need, another part of the garden may be more workable.
Frequently asked questions
Is a freestanding greenhouse always the better choice beside a garage?
No. A freestanding model avoids relying on the garage wall, but it still needs the base, installation and access specified for that model. An attached layout may work if the greenhouse is designed for it and the wall and connection have been assessed. Compare the site constraints rather than assuming one layout is automatically better.
How much space should I leave between a greenhouse and a garage?
There is no universal distance. The gap depends on the greenhouse model, door movement, access to gutters and the space needed to clean or inspect both structures. Use the model’s instructions and your actual maintenance tasks to set it out, then check the complete plan against the site.
Can a garage downpipe discharge beside a greenhouse?
First trace where the water goes, including any overflow. Do not assume the ground or greenhouse can handle a concentrated flow, and keep the outlet accessible. If the proposed position depends on changing the drainage route, ask a qualified drainage professional to assess it.
How can I tell whether the garage will shade the greenhouse too much?
Observe the proposed area at different times of day and, where possible, in different seasons. Record the shadow with dated photographs or a sketch, then compare what you see with the plants you intend to grow and the requirements for the chosen greenhouse.
Can I attach any lean-to greenhouse to a garage wall?
No. The lean-to label alone does not confirm that a particular model is designed for your wall. Check the exact installation instructions and have the wall and connection assessed by a qualified professional before choosing an attached layout.
A workable garage-side greenhouse position is more than a footprint that fits on the ground. It keeps doors and routes usable, has a considered path for roof water, receives light that suits your growing plans and leaves room for maintenance. Use the site sketch, seasonal observations and exact model plan to compare a separate greenhouse with an attachment. If the choice depends on an unverified wall, base or drainage change, resolve that issue before settling on the location.
