
Choosing Greenhouse Shade Netting: Level and Placement
Greenhouse growing guide
Shade netting is often sold with a percentage, but the label alone cannot tell you whether a crop will receive enough useful light. The right choice depends on what you are growing, the light already reaching the plants and the parts of the greenhouse you intend to cover. Rather than choose a universal percentage, map the crop zones, take comparable readings at canopy height and check what the maker’s rating actually measures. Then choose a level and placement that address the observed excess without unnecessarily darkening areas where plants still need more light.

Crop light requirements vary
Different crops have different light needs, and those needs can change as plants move from establishment to active growth, flowering or fruiting. Seedlings, mature plants and crops grown on benches may also receive different amounts because their canopies sit at different heights and positions. Use dependable, crop-specific guidance or information from the seed or plant supplier to set a realistic target for the stage you are managing. A broad label such as sun-loving is not precise enough to select netting. Do not copy a percentage chosen for another crop or assume that every greenhouse needs the same level of shade.
Separate a measured light problem from a general impression that the greenhouse looks bright. Leaf scorch, pale growth, stretching or poor flowering can have several causes; no one symptom proves that netting is needed. Note which plants are affected, where they sit and when the change appears, then compare those observations with readings from the same growing area. If the greenhouse holds crops with different light needs, list them by bed, bench or shelf. Record the growth stage alongside the crop name so that you compare the readings with guidance for the plants you actually have, rather than for a later stage. This helps you identify which areas need further assessment and which can remain uncovered. The aim is to reduce a demonstrated excess without darkening plants that are already growing well in a less exposed area.
What a shade percentage tells you
A shade percentage usually describes the share of incoming light that a material is intended to block, according to the maker’s rating. Check the product description to confirm that the number is a shading percentage, not light transmission, which describes how much passes through. A label stating 40% shade does not mean the same thing as 40% transmission. If the maker does not explain the test basis, ask what was measured and under what conditions. The rating may refer to a particular measure or band of light, so it is not automatically a promise of an identical reduction at the plants.
The light reaching leaves also depends on the greenhouse glazing and its condition, the sun’s angle, cloud, nearby obstructions and the net’s position. Those factors alter both the starting light level and what reaches a particular bed. Two nets with the same printed percentage may produce different results in practice, and readings beneath one net can change with the weather. When comparing products, record the stated rating, whether it describes shading or transmission, and the measurement basis given by the supplier. Leave an unanswered item marked as unknown rather than treating two incomplete descriptions as equivalent. Compare ratings only when suppliers define them in comparable terms. Keep the product information alongside your crop records so that the advertised level remains separate from the light you have measured in the greenhouse.
Crop zones and coverage area
Sketch the greenhouse plan and mark beds, benches, pots, propagation shelves, hanging plants and paths. Next to each crop zone, note whether excess light is a concern and whether the plants have similar requirements. This is more useful than deciding that the whole roof needs cover because one patch receives strong sun. A defined area may call for local coverage, while a mixed greenhouse may need separate zones or no shade over some plants. Observe the shadow pattern at several times: the brightest area in the morning may not be the part that receives the strongest sun later.
Floor area, planted area and the surface to be covered are three separate measurements. The Limited-Edition Aluminium Greenhouses with Storage range is listed from 5.52 to 28.08 m²; those figures describe floor area, not roof dimensions or how much you need to shade. For an existing structure, use its own drawings or measure the intended surface as the netting maker directs. For a new greenhouse, confirm the exact model and size before estimating coverage. Record each relevant plane or crop zone separately; ordering from the footprint alone can leave you with the wrong amount of material or cover crops that were not part of the plan.
Where and when to measure light
Measure light at canopy height in the beds or on benches you mapped, rather than taking one reading at the door or under the ridge and treating it as representative. Choose several points: an exposed area, a typical crop area and a spot that already looks shaded. Keep the sensor at a consistent height and orientation, follow its instructions and make sure your body is not casting a shadow over it. Record the location, date, time and sky conditions with every reading. A midday measurement gives only a snapshot; it does not describe morning or afternoon light, or the total light received over a day.
Repeat readings at times that reflect your crops’ exposure, and include more than one kind of day where practical. Use the same instrument, settings, positions and method so comparisons are meaningful. The Bloomcabin Prestige Greenhouse range is listed from 3.77 to 28.08 m²; choose measuring points for the particular size and growing layout you are considering, rather than borrowing a reading from another greenhouse. Give each point a simple reference on your sketch, such as the front bench or the centre of a named bed. Keep a space in the record for changes in canopy height or crop position, as these affect whether later readings represent the same place. A sketch or photo showing sensor positions makes the method easier to repeat. Keep individual readings separate from any daily total reported by your instrument, so that a snapshot is not mistaken for a full day’s light.

Light meters and useful units
A lux meter can help compare relative brightness when you use the same instrument consistently, but lux is weighted according to human vision. It is not a direct measure of the light used by plants, so do not convert a lux reading to a crop requirement with a universal multiplier. A photosynthetic photon flux density (PPFD) meter measures photosynthetically active radiation (PAR), typically reported in micromoles per square metre per second. Daily light integral (DLI) describes the accumulated light over a day. Crop guidance may use PPFD or DLI, so check that the guidance and your measurements use compatible units.
Choose a tool for the question you are trying to answer. If you need to see which corner is brighter, a basic meter may show a useful relative pattern under comparable conditions. If you need to assess a crop target, a PAR/PPFD meter or a suitable data logger gives more relevant information. Before choosing an instrument, note the units used in your crop guidance and check what the device measures and records. This avoids collecting figures that cannot answer your question. In a large growing space, one sensor reading is unlikely to show whether light is even across the crop area. If you are considering the Spacious Greenhouse range, listed from 47 to 70 m², include representative measuring points in your growing plan. Check the instrument’s instructions for calibration, orientation and logging intervals before comparing results.
Placing shade over the right area
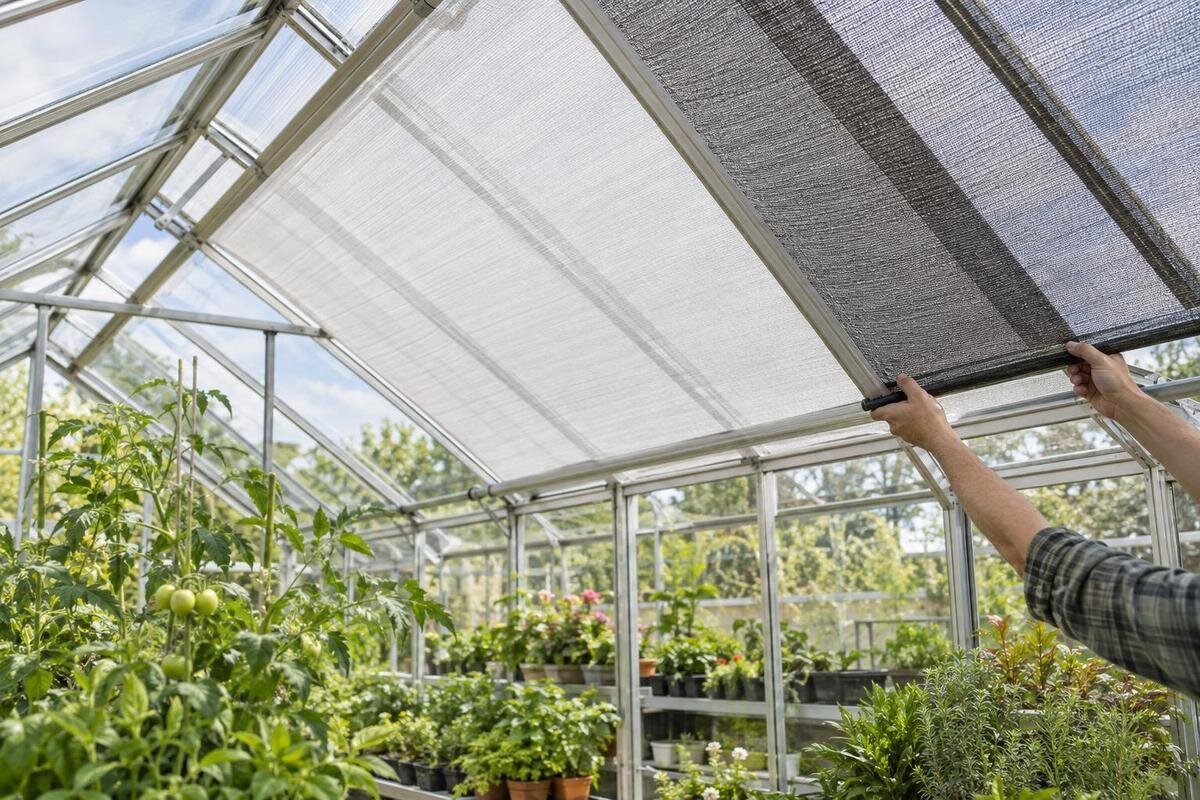
Choose coverage for the plants and surfaces that need it. If one bed receives substantially more light than the others, a defined patch may be preferable to reducing light across every crop, provided the netting is designed for that arrangement and can be fitted as instructed. Where crops have similar needs and exposure, broader coverage may be easier to plan. Partial shading can create a transition between covered and uncovered areas, so check readings around that boundary rather than assuming the net’s outline marks the exact change in light at leaf level. Keep doors, vents and access points clear.
Measure the surface where netting will be fitted, not the greenhouse floor area. If you are choosing a greenhouse at the same time, use the exact model drawings or supplier guidance for the Aluminium Greenhouses range to establish the relevant surface before ordering netting. On your plan, distinguish the area you want to shade from the dimensions of the material needed to cover it. Ask the netting supplier how to allow for the intended fit, including any required overlaps or fastening allowances; do not guess these dimensions. If the proposed cover comes in separate pieces, identify which surface each piece is intended for. Keep the quantity of netting separate from its shade rating: one describes how much area you cover, while the other describes the material’s intended light reduction. This gives you two clear requirements to compare when buying.
Greenhouse shape and site exposure
Site exposure matters as much as greenhouse form. Nearby walls, trees, fences and other structures can shade one side while leaving another exposed. Watch how the shadows move instead of relying on a compass direction or a general rule about which roof slope needs covering. For Lean-to Greenhouses, include the adjoining building in your observations rather than treating the greenhouse as an isolated structure. Mark where its shadow falls on the growing area at the times you take readings. Note whether a crop zone is consistently shaded or exposed only during part of the day. The actual surroundings and crop positions determine where coverage may be useful; the model name alone does not establish a shade plan.
On a pitched, curved or multi-sided roof, surfaces may receive light at different angles and times. Relate each proposed covered surface to the crop area beneath it, rather than assuming that the roof outline and the shaded growing area will coincide. Use your observations to identify which surface matters during the period of excess light. A photograph taken from the same position at different times can help you compare the shadow pattern without relying on memory. Keep this placement plan separate from the fitting plan: a useful position for shade still needs a suitable netting product and attachment method. For an unusual shape, use the relevant model documentation and confirm dimensions and installation details with the supplier or a qualified installer rather than improvising attachments.
Seasonal changes in light and coverage
Light levels and crop requirements change during the growing season. Netting that is useful during a period of strong sun can reduce valuable light when the sun is lower or plants are at a different stage. Consider the season in which the crop is exposed, rather than buying for the brightest day you remember. If your records show that only part of the year calls for shade, choose a product and fitting arrangement intended for removal or adjustment, and follow its instructions. Do not assume that every shade net is suitable or practical to move while fitted.
Plan how you will manage the coverage before buying: when it may be fitted, how you will reach it and where it can be stored without damage when it is not in use. If you are comparing structures as part of the same project, ask about the intended shading arrangement for the exact model in the Limited Edition Aluminium Greenhouses range. Do not assume that a removable or adjustable cover will fit. Consider whether you want to remove the whole cover seasonally or change coverage over individual crop zones; explain that intended use to the supplier. Confirm compatibility, access and the permitted fitting method together. A cover is only practically adjustable if the products and fitting method are intended for that use and it can be handled as directed.

Fit, access and manufacturer instructions
Read the shade-netting maker’s instructions for dimensions, orientation, fastening and whether the material is intended for the position you have chosen. Check how the proposed coverage affects access to plants, doors, windows, vents and equipment that you need to maintain. Include these openings and access routes on the fitting plan, so they are not overlooked when measuring the covered area. The netting should not obstruct ordinary use of the greenhouse. If compatibility is unclear, ask the netting supplier or greenhouse manufacturer before fitting it. Do not force netting onto the frame or alter the structure unless the manufacturer and a competent professional confirm the method.
A greenhouse with several sections or an unusual plan may need separate measurements and distinct coverage areas. When planning shade for a T-Shaped Orangery Greenhouse, use the drawings for the specific model to identify each relevant roof surface rather than relying on one overall floor-area figure. Label the proposed pieces of netting on the drawing and show which crop zone each is intended to shade. Include the access points and openings that must remain clear. This lets you explain the complete arrangement to the supplier instead of asking only whether a certain quantity of netting will fit. Confirm the dimensions and fitting details for each piece, including how adjacent pieces are intended to meet. The T-shaped model name identifies the layout; it does not establish compatibility with a standard cover.
Checking the result after fitting
After fitting the netting, repeat the same measurements at the same canopy points and at comparable times. Compare shaded and unshaded zones only when their original exposure is similar, and record the weather, season, crop stage and any changes in the surroundings. If possible, take readings before and after fitting under comparable conditions; otherwise, differences may come from weather or sun angle rather than the net. Check whether light in the intended crop zone still matches the guidance you selected, and whether unshaded plants continue to receive enough light.
Review the whole growing area rather than judging the result from a spot that merely looks darker or from a single plant. On a greenhouse with several distinct roof faces, note which zone each measurement represents; when assessing a Pyramid Greenhouse, keep those zone references consistent in your before-and-after records. Look for the intended reduction in the target area as well as any unwanted reduction elsewhere. If the crop zone still receives more light than intended, check the rating and placement against the product instructions before changing coverage. If light has fallen too far, adjust the coverage only if the system is designed for that change. Record the adjustment separately so you can distinguish its effect from the original fitting. Persistent high temperature is a separate issue from light level; a shade rating is not a ventilation specification.
Frequently asked questions
What shade percentage is best for a greenhouse?
There is no single percentage that suits every greenhouse or crop. Check the light needs of the plants and their growth stage, then measure light where they grow. Compare those findings with the shade netting maker’s description before choosing a level.
Does a 40% shade rating mean plants receive 60% of the light?
Not necessarily in your greenhouse. A shade rating usually describes light blocked under the maker’s test, but the measurement and test conditions matter. Check that the figure means shading rather than transmission, and do not treat it as a guaranteed reduction at the leaves.
Where should I measure greenhouse light?
Measure at canopy height in representative crop areas, including exposed and naturally shaded spots. Keep the sensor position and method consistent, and note the time, date and sky conditions. One reading in the centre of the greenhouse may not describe every bed.
Can I use a lux meter to choose shade netting?
A lux meter can help compare relative brightness in similar conditions, but lux is weighted for human vision rather than plant light use. For crop targets expressed as PPFD or DLI, use compatible measurements or ask a horticultural professional how to interpret the figures.
Can I shade only part of a greenhouse?
Partial coverage can make sense when crops or exposure differ, provided the netting and its fitting method are suitable for that arrangement. Map the area first and check readings around the covered zone. Follow the netting maker’s instructions and keep access and greenhouse openings clear.
A useful shade plan links three things: what the crop needs, what your measurements show and what the netting maker’s rating actually means. Match the coverage to the growing areas concerned, follow the product instructions and repeat readings after fitting. That gives you a practical basis for reviewing the level when the crop, season or greenhouse layout changes, rather than treating one percentage as a permanent answer.
