
How to Size a Greenhouse Heater
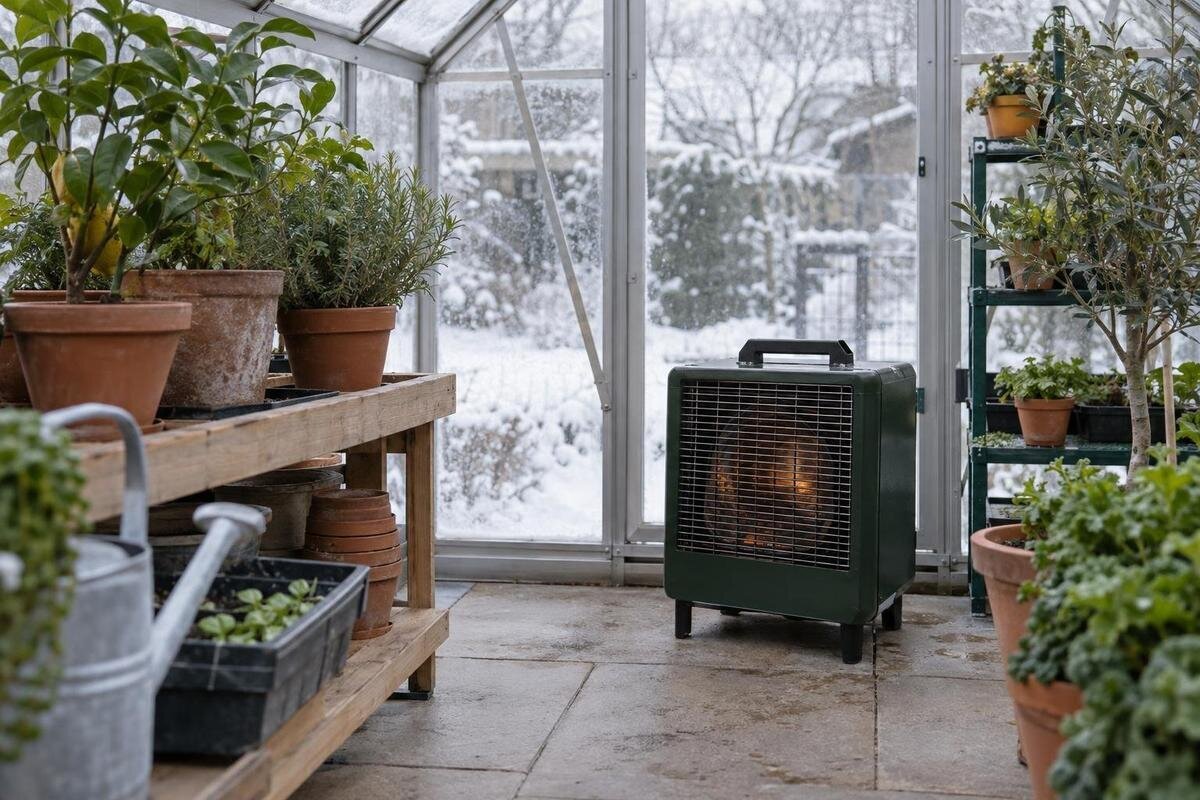
Greenhouse heating
Selecting a greenhouse heater by floor area alone is a blunt shortcut: the same footprint can have a different roof area, glazing performance, air leakage and exposure to wind. A useful estimate begins with the minimum indoor temperature you want and a selected cold-night temperature outside, then totals heat loss through the enclosure and incoming replacement air. The result is the heat output required under those assumptions, not a guarantee or an energy bill. The worked figures below are deliberately hypothetical; they are not specifications for any greenhouse. Use exact product dimensions where available, and treat gaps in construction data as uncertainty rather than filling them with a confident guess.

Heater output is different from running cost
Greenhouse heater sizing asks how much useful heat, in watts, is needed to hold a chosen indoor temperature when outside is at a specified cold-night temperature. The result is a design heat load, usually expressed in watts or kilowatts (1 kW = 1,000 W). It is a rate of heat loss at one set of conditions, not a prediction of how many hours a heater will run overnight. As outdoor temperature, wind and ventilation change, demand changes too; a thermostat may cycle the heater rather than keep it at peak output.
Capacity is separate from energy use and cost. Energy consumed over time is measured in kilowatt-hours (kWh); the total depends on run time, controls, heater type and actual heat loss. The Spacious Greenhouse, listed in sizes from 47 to 70 m² shows why a catalogue size range cannot give a heater rating: surface area, construction, air exchange and target temperature still matter. This guide sizes heat output only; a separate cost estimate needs actual energy use and the tariff that applies to you. Multiplying maximum kW by every hour assumes continuous full output, which may not match thermostat-controlled use.
Set the temperatures used in the calculation
Choose the inside target first: it is the lowest temperature you intend to maintain during the design cold spell, not a warm daytime reading or a general idea of comfort. Different plants and uses can call for different minimums; maintaining active growth may need a different target from simply keeping a collection through winter. Use reliable horticultural guidance for the plants you are protecting. The calculation does not decide what temperature is suitable; it estimates the heat output needed for the figure you choose.
Then choose an outdoor design temperature that reflects the site and the cold event you intend to cover. A winter average can understate the peak load; a very rare record may set an unnecessarily demanding design, so state the basis rather than treating one number as universal. Subtract the outside temperature from the inside target to get ΔT. For arithmetic only, 8°C inside and −7°C outside give a 15-degree difference (15 K); those values are not plant recommendations. At a fixed heat-loss coefficient, doubling ΔT doubles the calculated output.
Measure the heat-losing surfaces
List each boundary between the heated air and a colder space: roof faces, side walls, gable ends, doors and other panels. Measure each part rather than using the footprint alone. For a rectangle, multiply length by height; for a triangular gable, use half the base multiplied by its perpendicular height. For a sloping roof, use the sloping length, not its plan projection. For curved or unusual surfaces, use manufacturer drawings or divide them into simple shapes and label the approximation. Keep areas in square metres and use dimensions for the actual selected size.
Floor area remains useful for comparing product sizes, but it is not the total heat-losing surface. The Aluminium Classic Greenhouses, listed from 3.77 to 28.08 m² gives a range of catalogue areas, not a heater requirement. Mark what each surface faces: outdoor air, ground or an adjacent space at another temperature. A greenhouse beside a house does not automatically have zero loss through the shared wall; the adjoining temperature and wall construction matter. Treat a ground-facing floor separately rather than applying a wall value without evidence, and count every boundary once.
Use documented heat-transfer values
For heat conducted through a surface, use Q = U × A × ΔT. U is the assembly’s heat-transfer coefficient in W/(m²·K), A is surface area in m², and ΔT is the temperature difference in K. Add the terms for each roof, wall, door and glazed area. A frame, base and glazing may not share the same U-value, so keep them separate when specifications allow. The sum Σ(UA) is a heat-loss coefficient in W/K; multiplying it by the relevant temperature difference gives watts.
Use a documented value for the exact construction and size where one is available; a material name or model label is not a substitute. The Limited Edition Aluminium Greenhouses, listed from 3.77 to 28.08 m² have a catalogue size range, but that alone says nothing about U-value or thermal performance. If data are missing, show a low and high estimate based on stated assumptions, or ask the supplier for verified figures. A watts-per-square-metre shortcut can be a rough screen only when its glazing, leakage and temperature assumptions match your greenhouse. If a whole-greenhouse heat-loss figure is supplied, check whether it already includes air exchange, the base or thermal bridges before adding those losses.

Include air exchange and draughts
Even a well-measured enclosure loses heat when outside air enters through gaps or intentional ventilation and must be warmed. A common simplified sensible-heat term is Qair ≈ 0.33 × n × V × ΔT (W), where n is air changes per hour and V is internal volume in m³. Equivalently, 0.33 × n × V is the heat-loss coefficient for air exchange, in W/K. The factor is an approximation for air’s heat capacity; the result is only as reliable as the assumed air-change rate.
Do not borrow an arbitrary air-change rate and present the answer as exact. Leakage depends on the greenhouse’s condition, wind exposure, door use and the state of the vents at the design moment; use documented or tested data if available, or run clearly labelled scenarios. The Aluminium Lean-to Greenhouses, listed from 3.69 to 14.34 m² still need their actual boundary conditions checked: a wall next to a house is not automatically warm or insulated. Include the cold-weather ventilation pattern you are sizing for, and do not count an open vent in one term while assuming a fully closed house in another. Necessary ventilation should not be blocked simply to reduce the estimated heater size.
Add the losses to calculate the design output
Bring the terms together as H = Σ(UᵢAᵢ) + 0.33 × n × V, in W/K, then calculate Q = H × ΔT in watts. Include other losses only when you have an appropriate value. If several boundaries have different adjacent temperatures, calculate each UᵢAᵢ term using its own temperature difference instead of forcing one ΔT across the whole greenhouse. Divide Q by 1,000 to convert watts to kilowatts. This is a steady-state estimate, not a moment-by-moment model; it does not automatically include every thermal bridge, ground effect or moisture-related load.
For arithmetic only, suppose a hypothetical greenhouse has 40 m² of exposed area with an assumed effective U-value of 5 W/(m²·K), a 60 m³ volume and an assumed 1.5 air changes per hour. The surface term is 40 × 5 = 200 W/K; the air term is 0.33 × 1.5 × 60 ≈ 29.7 W/K. Total H is about 229.7 W/K. At ΔT = 15 K, Q is about 3,445.5 W, or 3.45 kW. These invented inputs are not typical or recommended values, and they are not data for a particular greenhouse; omitted boundaries or different leakage could change the result.
Compare the result with the heater’s rated output
Compare the calculated kilowatts with the heater’s documented useful heat output, not an unrelated number on a label. A specification may show electrical or fuel input as well as heat delivered; check which figure is being quoted, its units and the conditions behind the rating. For comparisons, use output ratings stated on the same basis. A model name, advertised coverage area or maximum input power does not prove that useful output will meet your calculated load. If a unit has staged or variable output, check its available range as well as its maximum.
Do not add a blanket safety percentage simply to make an uncertain estimate look precise. Refine the biggest unknowns—outside design temperature, exposed area, U-values and air exchange—then consider any appropriate allowance with the equipment supplier or a qualified professional. Excess capacity is not a substitute for a good sensor or even heat distribution; with a fixed-output, on/off heater, a much larger unit may cycle more often or create local temperature swings, depending on its controls. The Prestige Greenhouse with Metal Base, listed from 3.77 to 28.08 m² is a greenhouse listing, not a heater specification: its name and area range do not establish a required output or the base’s heat loss.
Account for roof shape, volume and heat distribution
Two structures with the same floor area may have different exposed surface areas and internal volumes. A high ridge, gable ends or a complex roof can add panel area; greater internal volume increases the air-exchange term. Measure sloping and vertical faces from drawings, and use internal dimensions for the volume calculation. The Pyramid Greenhouse, listed from 5.53 to 18.9 m² illustrates the limit of a listed area range: it does not give the roof area or cubic volume for the selected size. Use the relevant drawing rather than inferring either figure from the product name.
Total kilowatts are not the same as an even temperature at every plant. A sensor near a warm outlet can report a different condition from a draughty corner, while shelves or partitions can alter air movement. Follow the heater maker’s guidance for the control sensor and check temperatures in the locations that matter. The sizing calculation deals with capacity; it does not replace a check on heat distribution.

Define any separately heated zones
If part of a greenhouse is kept cooler, decide where the heated zone ends before measuring. A partition between warm and cool spaces becomes a heat-loss boundary, even though it lies inside the outer walls. If a door between zones is often open, air exchange can make the two spaces behave more like one. If you heat everything to the same target, include the full heated volume and all external boundaries instead. This distinction matters when the area shown for a configuration is not the same as the area you intend to heat.
The Limited-Edition Aluminium Greenhouses with Storage, listed from 5.52 to 28.08 m² identifies a storage configuration, but the product title does not say whether a compartment is thermally separate or included in your intended heated zone. Confirm the exact layout and drawings, then mark the target temperature and boundary for each zone. Do not assume an attached space receives the same heat as the growing area, or that its wall can be ignored. If the boundary construction or room-to-room temperature is unclear, avoid a precise-looking guess and seek a technical assessment.
Check assumptions against the exact greenhouse
An estimate can be wrong even when the arithmetic is correct. A small change in U-value, air-change rate or chosen outside temperature changes the load; gusts, frequent door opening, a vent left open or a colder-than-design night can push demand beyond the figure. A simplified calculation also omits details such as thermal bridges, ground coupling and moisture-related loads unless they are included explicitly. Record the inputs alongside the result and, where information is uncertain, calculate a range rather than a single wattage with misleading decimal precision.
Match the calculation to the exact greenhouse size and construction, then verify the heater’s rated heat output, control range and operating conditions. The T-Shaped Orangery Greenhouse, listed from 16.52 to 30 m² provides an area range, not a surface-area schedule; use the drawing for the selected configuration. Keep the target temperature, outside design point, measured areas and assumptions together so the figures can be reviewed. If the result is close to a heater’s output limit, resolve the uncertain inputs before choosing rather than relying on a generic margin. Temperatures observed during a cold spell can also show whether your original assumptions need revisiting.
Frequently asked questions
Can I size a greenhouse heater from floor area alone?
Only as a rough first filter. Floor area does not show the total roof and wall area, greenhouse height, heat loss through different surfaces, draughts or the temperature difference you need to maintain. A watts-per-square-metre rule is useful only when its assumptions match your greenhouse. For a better estimate, calculate the exposed surfaces and air-exchange loss.
Which outdoor temperature should I use?
Choose a cold-weather design temperature that reflects your site and the conditions you want the heater to cover. A winter average can understate demand, while an exceptionally rare record may give an unnecessarily demanding figure. State the temperature you use: the resulting output applies to that particular indoor and outdoor temperature pair.
What should I do if I cannot find U-values or air-exchange data?
Do not treat a guessed value as a product specification. Ask for technical information for the exact greenhouse configuration, or show a range using clearly stated low and high assumptions. If the range would change which heater you choose, a more complete assessment is worthwhile.
Should I add a fixed safety margin to the result?
There is no universal percentage that corrects every uncertain calculation. First check the largest uncertainties, such as the design temperature, surface areas and air leakage. If you still need an allowance, base it on the remaining uncertainty and the heater’s documented output, with advice from the equipment supplier or a qualified professional where needed.
Does a heater with enough calculated output guarantee the target temperature?
No. The calculation depends on its assumptions, and actual results can change with wind, ventilation, door use and the greenhouse’s construction. Temperature can also vary around the space. Confirm the heater’s rated heat output and controls, and treat the calculated figure as an estimate for the conditions you specified.
A useful heater-size estimate is a transparent heat-loss figure tied to one indoor target and one cold-weather assumption. Keep the surface areas, documented values, air-change assumption and calculation together, then compare the result with a documented heat-output rating on the same basis. If uncertain inputs could change which heater fits, refine them or get a qualified assessment. Treat the final number as an estimate for the conditions chosen, not a promise of a particular greenhouse temperature.
