
A Kitchen Garden Planned Around the Greenhouse
Kitchen garden planning
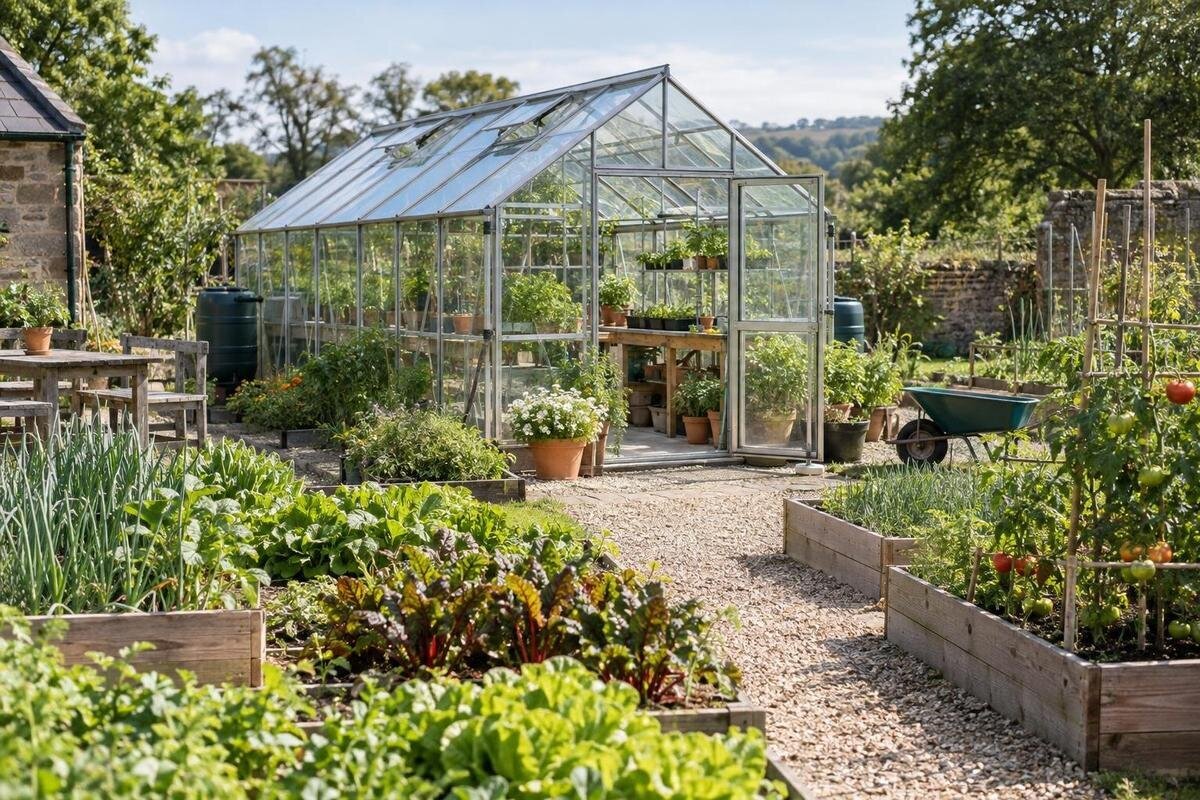
A greenhouse can sit at the centre of a kitchen garden without being the only place where growing happens. Its position affects how easily you reach outdoor beds, bring water to crops, move material to compost and carry produce back to the house. Plan those everyday routes around the greenhouse footprint, so the structure connects the working areas rather than dividing them.

Give the greenhouse a clear role in the garden
Begin by listing the jobs the greenhouse needs to support, rather than dropping it into the middle of a blank plan. It may be used for raising seedlings, protecting crops or extending the growing season, but the outdoor beds still need to carry much of the food-growing work. Map the gate, house, usable beds, water source and compost point alongside it. Treat “centre” as a working relationship, not a demand to use the geometric middle of the plot: the best position connects regular jobs without taking too much productive ground or cutting off an existing route.
Write down the journeys you make during an ordinary gardening week: carrying seedlings out, bringing a harvest in, filling a watering can, moving prunings to compost and fetching tools. Mark where each journey begins and ends, including the route from the house or garden gate. Note which journeys happen most often and which involve awkward loads; this gives you a practical basis for comparing positions rather than choosing the most symmetrical layout. Then compare possible greenhouse outlines on the same scaled plan. The Pyramid Greenhouse options are listed across floor areas from 5.53 to 18.9 m²; compare a proposed model's dimensioned drawing with the garden, because the area range alone does not show its shape or the room needed for paths. Keep the surrounding beds and routes visible on each version so you can see what changes when the greenhouse moves.
Map light, ground conditions and existing access
Make a measured base plan of the usable garden, showing boundaries, trees, fences, buildings, gates and established paths. Note where shade falls at more than one time of day, and repeat the observation at different times of year if possible; a single sunny snapshot can be misleading. Distinguish features that create lasting shade from shadows that move. The aim is to understand which parts of the garden receive light and how a proposed greenhouse position relates to them. Mark observations separately from estimates, so later decisions are not based on details you have not actually checked.
After rainfall, observe where water lingers or runs and whether a slope makes the wheelbarrow approach difficult. Add existing taps, drains, service covers and any known underground services to the plan. Record where you stood to make each observation, particularly if only part of the site was visible. The Limited Edition Aluminium Greenhouses listing covers floor areas from 3.77 to 28.08 m². If that range is under consideration, mark the exact proposed outline, then add working space and approach routes separately. Compare those routes with the wet areas and slopes you recorded, rather than assuming the shortest route will be the easiest to use. Ask a qualified site professional about uncertain ground, drainage or service routes before relying on them. Keep any unresolved area clearly marked so it is not mistaken for confirmed usable ground when the bed layout is drawn.
Place outdoor beds where they are practical to work
Set out beds in relation to both the greenhouse and the routes people will use to reach them. Beds should be easy to tend from their edges, with paths that let you harvest or carry tools without walking through cultivated soil. Use your light observations to decide where crops with higher light requirements might go, and group crops with similar watering or harvesting routines if that makes daily work simpler. Leave room to rotate crops between beds rather than tying the same planting pattern permanently to one patch of ground.
Sketch bed shapes before fixing the greenhouse position: a narrow leftover strip may look usable on paper but be awkward to reach or work. Check that there is a clear route from the greenhouse to the beds and that paths remain continuous at corners. The Bloomcabin Prestige Greenhouse range is listed from 3.77 to 28.08 m². Place the chosen footprint beside the intended bed plan and assess the growing space that remains. For each bed, identify the edge from which you would sow, weed and harvest, and check that it stays accessible when neighbouring beds are planted. If a small patch has no convenient working edge, redraw it rather than counting it as useful growing space simply because it is unoccupied. Compare layouts by the beds you can comfortably manage, as well as by the amount of ground allocated to crops.
Plan wheelbarrow routes between the working areas
Trace a route from the garden entrance to the greenhouse, beds, water point and compost area, then trace the return journeys. A wheelbarrow carrying soil or harvested produce needs space to turn as well as a clear line to travel along. Look for pinch points at bed corners, gates and doorways, and note any steps, uneven transitions or slopes that could make a route inconvenient. Avoid making the only way to reach compost or a bed pass through the greenhouse doorway if another route is possible.
Use the selected greenhouse's full outline and door position when checking those paths; a simple box on a sketch may hide a difficult turn or block an approach. The Spacious Greenhouse listing gives floor-area options from 47 to 70 m², so consider a larger proposed footprint alongside the garden routes, not on its own. Those figures do not establish whether a model suits a particular site. For any size, test the route with the actual wheelbarrow and allow for the way the greenhouse door opens. Mark where you would stop the barrow while opening the door or unloading, as well as where it travels. That stopping place should not obstruct the only route to another working area. Check the return journey too: a convenient arrival route is not enough if leaving requires reversing through a narrow gap.

Put water within easy reach of the beds
Mark the existing water source or the place where a new source is being considered, then check how it serves both the greenhouse entrance and the outdoor beds. A convenient point reduces the need to carry watering cans over long distances or drag a hose across the busiest path. Note where a hose would be stored and whether it would cross a doorway, a bed or a route used to move compost. If you plan to collect or store water, include the container's position and access in the same drawing rather than adding it after the paths are set.
A water point should be convenient without becoming an obstruction: consider how people will fill a can, attach or put away a hose, and pass through the area at the same time. If a lean-to greenhouse is among the options, the Lean-to Greenhouses listing gives floor-area options from 3.69 to 14.34 m². Use the exact proposed outline and door position to check its relationship to the water route. Trace the hose route to the furthest bed you intend to water, including any corners it must pass around, rather than measuring only a straight line from the tap. Also mark where the watering can will be set down during filling and where it will be stored afterwards. These small working spaces belong on the plan alongside the source itself. Have a qualified installer assess any plumbing or pump requirements.
Compost position and wheelbarrow access
The compost area has two regular jobs: receiving garden material and providing finished compost for beds. Choose a position that makes both journeys straightforward, ideally with an approach from the beds and a route from the garden entrance. Leave enough room to reach the composting setup and turn or move material in the way your chosen method requires. Avoid placing it where a barrow has to squeeze past the greenhouse door or where bags and tools routinely block a main path.
Check the route in both directions on your plan, including the point where a full barrow turns and where material is unloaded. The Aluminium Classic Greenhouse listing spans floor areas from 3.77 to 28.08 m²; plot the exact option you are considering before deciding where the compost route can pass. Keep the compost location flexible until you have confirmed the greenhouse outline, path and bed positions together. Draw the working area beside the composting setup, not just the space occupied by bins or heaps. Identify where incoming material will be put down and where finished compost will be loaded for the beds. If those jobs use the same space, check that it can be cleared between them without moving equipment into the main path. This makes the compost area part of the working layout rather than merely a corner labelled on the drawing.
Plan storage beyond the greenhouse footprint
List the items that need to be close at hand, such as everyday hand tools, labels, watering equipment or containers for harvests. Then separate them from bulky items used less often. This makes it easier to see whether the plan needs outdoor storage as well as space for the greenhouse itself. Consider the full journey from storage to bed: a tool store is less useful if reaching it means crossing a planted area or leaving equipment beside a doorway.
The Limited-Edition Aluminium Greenhouses with Storage listing identifies built-in storage and floor-area options from 5.52 to 28.08 m². Check the product information for the arrangement and dimensions of that storage before deciding what it can hold; the floor-area range does not indicate storage capacity. Even when storage is part of the greenhouse selection, mark any separate outdoor storage on the site plan. Beside each location, note what you intend to keep there and how you will take it out. Long tools, containers and a wheelbarrow may involve different movements, so test access with the items you already own rather than judging it from an empty space. Include room to open the storage door and retrieve equipment without setting everything on the main path. This helps you distinguish a genuinely accessible store from a spare corner that is merely large enough to contain things.
Use the greenhouse's actual shape in the site plan
A greenhouse footprint affects the paths and beds around its edges, not just the space it occupies. Draw the proposed outline from a dimensioned plan, then add the door, neighbouring beds and any route that has to pass alongside it. Where the outline has projections or changes direction, check each corner: it may alter a turning route or leave a bed shape difficult to reach. Do not assume that an irregular footprint can be represented accurately by a rectangle with the same area.
For example, the T-Shaped Orangery Greenhouse listing gives floor-area options from 16.52 to 30 m². If you are considering a T-shaped outline, use the exact drawing to place each projecting section and then trace the paths around it. Assess the spaces beside those projections individually: decide whether each will be a bed, a route or an area kept clear for access. Avoid assigning a use to a recess without checking how you would enter it and reach its far edge. Compare the outline with your preferred bed shapes rather than forcing every bed to follow the greenhouse walls. Ask the supplier or installer about any access clearance required for the chosen model, and keep that space in the plan before finalising the nearby beds. A labelled outline makes these decisions easier to revisit than a floor-area figure alone.

Test the layout against real gardening jobs
Before setting out permanent beds or paths, mark the proposed greenhouse and working areas on the ground with a safe temporary method such as string or removable markers. Walk the route carrying a watering can, then try it with the wheelbarrow you use. Check the turn from the gate, the approach to the compost area and the space at the greenhouse entrance. A route that looks clear on paper may feel cramped at full scale, particularly when a barrow is loaded or another person is passing.
Test more than one routine. Follow the path for taking seedlings to a bed, bringing produce back, carrying garden material to compost and returning finished compost to the plot. Think about how the plan works when beds are actively planted and when you need to reach their edges for maintenance. If several people share the garden, have them try the routes too; different users may carry different loads or need a more direct approach. Adjust the path or bed position before treating the layout as settled.
Confirm site requirements before work begins
Once the layout works at ground level, record it in a clear plan with the greenhouse outline, door position, outdoor beds, routes, water point, compost area and storage. Mark which choices are fixed and which can change: the greenhouse and main access route may be difficult to move later, while crop assignments can be reviewed as the garden develops. For a shared kitchen garden, agree who will look after water, compost and the main paths, so routine maintenance is part of the plan rather than an afterthought.
Before work begins, confirm the exact dimensions and access details for the chosen greenhouse and check with the relevant local authority or a qualified planning professional what approvals may apply to your particular site and proposal. Ground preparation, drainage and service routes depend on the location, so get advice from appropriately qualified professionals rather than assuming one general layout will suit every plot. If plumbing or electrical work is planned, have the relevant qualified installer assess it. These checks help keep the outdoor garden plan workable as well as attractive on paper.
Frequently asked questions
Does the greenhouse need to be in the exact middle of the garden?
No. Treat the centre as a working role, not a point on the map. A greenhouse can anchor a kitchen garden from one side if beds, water, compost and the main access route still connect without awkward detours. Check how people and wheelbarrows will move before deciding that a central position is useful.
How wide should paths around the greenhouse be?
There is no single width that suits every plot, wheelbarrow and user. Mark the proposed route and test it with the barrow you actually use, including a turn and the space needed to pass a bed edge or open the door. Check the selected greenhouse drawing for its door position and any access clearances.
Where should I put a water point in a kitchen garden?
Choose a point that serves both the greenhouse entrance and the outdoor beds without making a hose cross the busiest path. Map the source, hose or watering-can route, and any container or storage area together. If the plan involves plumbing or a pump, have a qualified installer assess the specific arrangement.
Should the compost area be beside the greenhouse?
It can be nearby, but convenient access matters more than closeness alone. You need to bring garden material to the compost area and move finished compost back to beds. Keep that route clear of the greenhouse entrance and other narrow points, and choose a location that works with your particular composting method.
How can I tell whether a greenhouse will fit the kitchen garden?
Use the chosen model's dimensioned drawing to mark its full outline on a measured site plan. Then add the door approach, routes, outdoor beds, water point, compost area and any storage. A floor-area figure is useful for comparing scale, but it does not show the shape of the footprint or the space needed to work around it.
A useful kitchen garden plan links the greenhouse to outdoor beds, water, compost and storage through routes that work for the people who use them. Draw the complete footprint, test the paths at full scale and check the site-specific details before fixing the layout. The greenhouse then becomes a practical point of connection in a productive garden, rather than an obstacle that the rest of the plan has to work around.
