
Lean-To or Freestanding Greenhouse: Compare Your Site
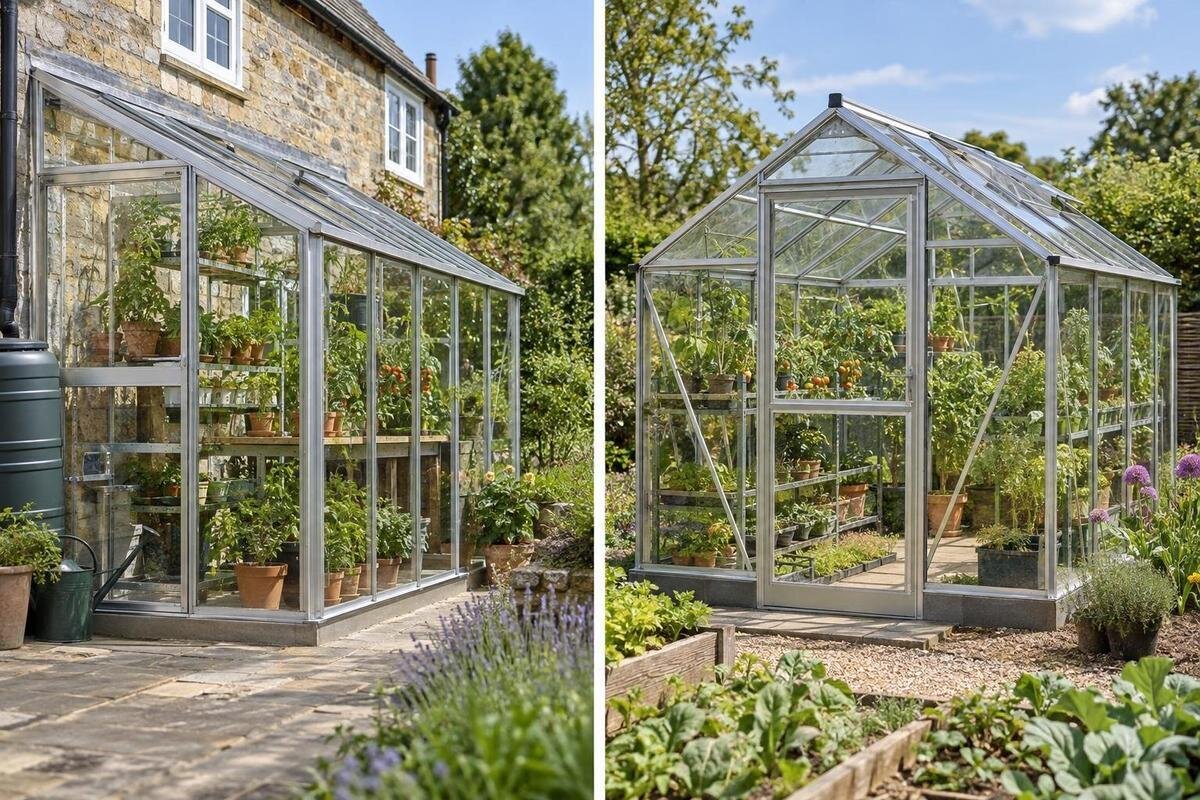
Greenhouse site planning
On a real garden plot, the choice between a lean-to and a freestanding greenhouse comes down to what can sit where, and what must remain usable around it. A lean-to depends on a particular wall and its openings; a freestanding structure needs its own position, approach and working clearance. Compare both on the same measured plan, including the growing layout, rather than treating a product’s floor area as the space it will occupy in everyday use.

Compare the same plot at the same scale
Begin with a plan of the whole garden area you are considering, not a product footprint viewed on its own. Record the boundaries, gates, sheds, mature trees, existing beds, taps, drains and paths. Mark which features are fixed and which could move; otherwise, the same strip can be counted twice as both greenhouse space and access. Include lawn or planting you are unwilling to give up, and points you need to reach for routine maintenance. Note the route you want to retain for a wheelbarrow, mower or compost delivery, plus the approach from the house. Use this single base plan for both options, so neither gets an artificially favourable position.
Draw both proposed outlines at the same scale, using dimensions for the exact configurations you are considering. Decide whether the test is an equal outer footprint or equivalent planting capacity: equal floor area can disguise differences in width, depth, shape and door position. Add roof projections and clearances stated in the model information, without counting them as growing area. The Aluminium Classic Greenhouse range is listed from 3.77 to 28.08 m²; that range can help shortlist scale, but it is not an outline for a particular size. If the candidates cannot share dimensions, compare them against the same crop list and route needs. The finished plan should show both the greenhouse footprint and the garden left for other uses.
What the wall changes for a lean-to
Treat the wall as a fixed part of the layout, not simply as a convenient edge. Record its length and height, along with the positions of windows, exterior doors, vents, eaves, gutters, downpipes and meter boxes. Note anything that must open or remain reachable. A greenhouse might fit beside the house on paper yet overlap a window, block a useful doorway or make a familiar route awkward. The wall should not be assumed to provide a suitable fixing point: attachment requirements depend on the wall and the selected structure. Have the proposed connection confirmed by the supplier or a qualified installer before relying on that position.
Measure how far the greenhouse would project from the wall and how much clear space would remain in front. There is no universal depth that suits every garden: the useful question is whether the selected model leaves enough room for its entrance and your intended approach. The Aluminium Lean-to Greenhouse range is listed from 3.69 to 14.34 m², but floor area alone does not give the wall length, projection or configuration you need to plot. Check the dimensions for the particular size, then overlay them on the wall plan. A lean-to can make use of a boundary, but it still occupies garden space and needs a practical route on its open side.
Where a freestanding greenhouse can fit
A freestanding greenhouse does not depend on a house wall, so you can test positions elsewhere on the plot. That flexibility is useful only if the chosen patch works as a whole: the greenhouse needs a place to sit, a sensible route to its door and any exterior access called for by its installation or maintenance information. A position in the middle of a lawn may divide the garden or interrupt mowing; an edge position may be constrained by a fence, shed, tree or existing path. Mark what would have to move and what you would lose before treating an open-looking area as spare.
Check whether the site offers one clear position or several, and compare each with the same garden features. A freestanding outline can be turned or shifted to test alternatives, but each change may alter its relationship to shade, paths and beds. It also needs enough surrounding space for the uses you want to retain; a nominally suitable patch can feel cramped once people have to get around it. Do not assume that being detached means every side will be accessible. If a boundary, hedge or outbuilding is close by, plot that obstruction and consider whether the remaining access is practical for the tasks you expect to do.
Assess daylight and shade at both positions
Compare light at the proposed locations rather than choosing by compass direction alone. Note when the house, trees, fences and neighbouring buildings cast shade across each outline. Conditions change during the day and across the year, so a single observation can give a misleading impression. Pay particular attention to the parts of the greenhouse where you expect to place the crops that need the most light. A wall may shade one proposed position, while a more open part of the garden may still sit in the shadow of a tree or shed. There is no site-independent rule that makes one greenhouse type brighter.
Mark the surrounding obstacles beside each outline and keep a simple record of when each proposed planting area is shaded. Assess the positions over the same observation period, so a sunny morning at one is not compared with an overcast afternoon at the other. If you are also considering a different shape, such as the Bloomcabin Oasis Pyramid Greenhouse, apply the same assessment to its proposed position. The range is listed from 5.53 to 18.9 m²; use the dimensions of your chosen configuration to locate its growing zones on the plan. Compare the light reaching those zones with your intended crops, rather than assuming the more open-looking position will always be better.

Plan the approach to the entrance
Trace the route you will actually use, from the house, gate or tool store to the greenhouse door. Think about the routine jobs: carrying trays, moving compost, bringing in a watering can or taking harvested produce back to the kitchen. Mark where the route passes existing beds, stored items or a narrow gate, and whether those obstacles would make everyday visits inconvenient. A short path on a drawing is not automatically the easiest one to use if it cuts across a planted area or requires awkward turns. Compare both greenhouse positions against the same route and keep the approach clear in the wider garden plan.
Check the entrance position and opening arrangement for the specific model rather than assuming where the door will be. Mark space to stand outside it and make sure a nearby wall, fence, gate or raised bed will not obstruct the opening. Also consider whether the entrance gives a useful route through the interior, or leaves you having to work around a planted area to reach the rest of the greenhouse. When shortlisting a size from the Limited Edition Aluminium Greenhouse range, listed from 3.77 to 28.08 m², examine the entrance on that configuration’s plan. Compare the doorway and approach with the items you expect to carry in, as well as the space remaining around it.
Separate growing space from circulation
A greenhouse’s floor area is not all planting area. Sketch the intended layout inside each option, including beds or containers, shelving, a potting surface and the route you need to move through. Decide whether you can reach plants without stepping into beds or brushing against neighbouring crops, and whether there is room to carry a tray from the door to the far end. Think about how the arrangement will work when plants are fully grown, not just when the greenhouse is empty. A plan that fills every corner on paper may leave too little space for routine work.
The shape and dimensions of the chosen model matter as much as its stated area. The T-Model Orangery Greenhouse range is listed from 16.52 to 30 m², but those figures do not tell you the clear width of an aisle or how much of a particular configuration suits your beds. Use the specific plan to divide the interior into growing, storage and circulation zones. For a lean-to, consider how you will reach and tend the planting along the wall side; for a freestanding option, check whether the door and internal route make the whole space usable. Compare the arrangements against the same planting plan, not just the total areas.
Leave usable access outside the greenhouse
Include exterior access in the comparison, especially if the greenhouse sits close to a fence, hedge, wall or shed. A freestanding structure may allow access around its sides only when the plot leaves enough room; being detached does not guarantee a usable passage. For a lean-to, the wall limits access along one side, so consider which faces you can reach and what the product’s installation and maintenance information requires. Do not count a narrow strip as useful access if you cannot comfortably get along it. Mark any space needed to carry materials to the site or to reach nearby garden features.
Decide whether storage belongs inside the greenhouse, outside it or elsewhere in the garden. The Limited-Edition Aluminium Greenhouse with Built-In Storage range is listed from 5.52 to 28.08 m². For a configuration you are considering, identify the storage area on its plan and keep it separate from the space allocated to crops and circulation. Compare that arrangement with your alternative greenhouse and the storage it would need elsewhere. A separate shed or cupboard beside the greenhouse may narrow a route or compete for the same clear patch. Draw both structures together, including access to the stored tools, rather than adding storage after the growing layout has been settled.
Check ground conditions and water routes
Walk the proposed positions after rain as well as in dry weather, and note visible puddling, uneven ground and routes taken by water from existing roofs or downpipes. This is a way to record site conditions, not to decide how the structure should be supported. For a lean-to, check whether the proposed position conflicts with house gutters, downpipes or access to the wall. For a freestanding greenhouse, mark the ground area it would occupy and any nearby drains or service covers that need to remain reachable. Keep the observations on the same plan so the two options can be compared fairly.
Use the chosen product’s base and installation requirements to assess what preparation each position would need, with a qualified installer where necessary. Keep this separate from the size comparison: the Bloomcabin Prestige Greenhouse with Metal Base range is listed from 3.77 to 28.08 m², but selecting a size does not settle how the ground should be prepared. Bring together the requirements for the exact configuration and your observations of puddling, uneven ground, drains and service covers. The lean-to also needs its wall connection assessed separately. Compare both positions on that basis, so an apparently convenient footprint does not hide a ground or water-route issue that affects the proposed layout.

Set out both layouts at full scale
Once you have narrowed down the possible configurations, mark each outline on the ground with string, canes or another temporary marker. Use the selected model’s dimensions rather than an approximate area, and mark the door and any exterior clearance separately. Walk the route from the house and gate, open nearby gates, and check whether paths still connect the garden as intended. Standing in the marked entrance gives a more useful sense of the approach than looking at a plan alone. If a product range covers several sizes, such as the Bloomcabin Orangerie Spacious Greenhouse listed from 47 to 70 m², those figures are not one layout to set out; use dimensions for the exact option you are assessing.
Repeat the same exercise for the alternative greenhouse in a realistic position. Then compare the plans against a short list of essentials: a suitable wall if choosing a lean-to, a workable route to the door, adequate light for your intended crops, usable interior circulation and the garden space you want to preserve. Separate conditions that rule out a position from preferences that you could compromise on. This stops a small convenience from outweighing a serious access problem, or a generous growing area from hiding a blocked path. Keep the outlines and notes together so you can see which arrangement works better across the whole plot.
Which greenhouse suits your site?
A lean-to is the more plausible fit when there is a suitable wall in the right position, the wall and its openings can accommodate the proposed arrangement, and the route in front remains practical. It may make sense where the plot has a useful wall-side strip but little room for a detached structure elsewhere. A freestanding greenhouse is worth comparing when no suitable wall is available, the wall is interrupted by doors or windows, or another part of the garden offers a better-positioned clear area. That position still has to preserve routes and provide the access the chosen model needs.
If both arrangements fit, let the intended growing layout break the tie: compare the planted zones, working path and garden space retained rather than relying on area alone. If neither works without blocking a route, losing a feature you need or compromising the wall connection, revisit the size or position instead of forcing the first sketch to fit. The better choice is the one whose footprint, entrance, attachment or ground requirements and usable growing areas work together on your actual plot. A careful comparison may show that the decisive issue is not greenhouse style at all, but where the garden can still function around it.
Frequently asked questions
Does a lean-to greenhouse always take up less garden space?
No. It uses a wall as one side, but still projects into the garden and needs a usable approach. Compare the exact outline and the space left for paths, doors and planting; the style alone does not show how much of your plot will remain free.
Which position will get more daylight?
There is no universal answer. A wall, trees, fences and nearby buildings can shade either option. Observe the proposed positions at different times and during relevant parts of the year, then compare the results with the light needs of the crops you plan to grow.
Can I attach a lean-to to any wall?
Do not assume so. Check the wall, openings and roof details against the chosen greenhouse’s installation requirements, and ask the supplier or a qualified installer to confirm whether the proposed attachment is suitable.
How much space should I leave around a greenhouse?
There is no single clearance that suits every model or site. Use the exact product information to identify installation and maintenance access, then check that doors, paths and nearby gates can still be used.
Is the listed floor area enough to compare two greenhouses?
No. Floor area does not tell you the exact width, depth, shape, entrance position or usable growing zones. Compare dimensioned outlines for the specific configurations, and include the approach and any required exterior clearance in your site plan.
The most useful comparison is a site plan that shows the greenhouse and everything you need to reach, grow or keep around it. When the wall is the main constraint, assess the lean-to carefully; when a clear position elsewhere is available, test the freestanding option against the same routes and planting plan. The outline that leaves the garden workable is the one that fits.
