
Moving a Greenhouse to a Different Part of Your Garden
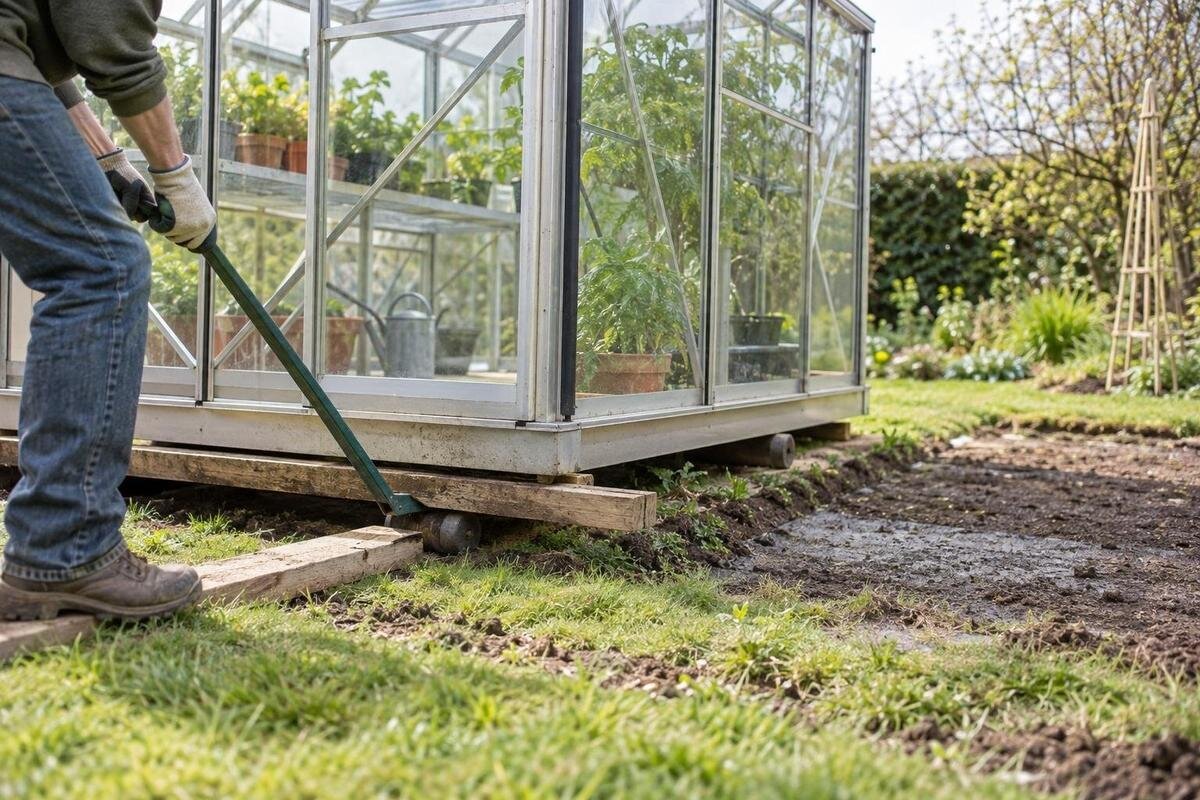
Greenhouse relocation guide
Moving a greenhouse to another part of the garden is more than shifting the frame. You need to identify the exact model, find the right dismantling information, assess the existing structure and prepare a suitable new position and base. Glazing, fixings and assembly order can be model-specific, so the safest plan is built around manufacturer documentation and a qualified installer. This guide covers what to record, what to ask and how to compare moving the greenhouse with repairing or replacing it, without relying on improvised glass handling or structural alterations.

Decide whether the existing greenhouse is worth moving
Begin with the reason for the move and the visible condition of the greenhouse. A change in shade, access, garden layout or intended use may justify a new position, but the structure must also be a realistic candidate for dismantling and rebuilding. From a safe position, note concerns such as distorted frame sections, cracked or missing glazing, fittings that appear damaged, a door or vent that no longer operates smoothly, or deterioration around the base. Do not push the frame to test it or remove panels to investigate. Photograph each concern, note which faults pre-date the move, and have an installer assess anything that looks unstable.
Compare the likely full cost with repair in place and replacement. A move may involve an initial inspection, dismantling, transport, temporary storage, new base work, replacement components and reassembly; ask what is included and what could change if damage or missing parts are found. Transport is only one part of the calculation. If replacement is under consideration, the Classic aluminium greenhouse range is listed in sizes from 3.77 m² to 28.08 m². Use the product page's drawings and specifications to compare scale; its listed range says nothing about the condition or suitability of your own greenhouse. Compare like for like, including the work required at both sites.
Identify the greenhouse and record its condition
Find the original order confirmation, invoice, manual, parts list and any model, serial or batch reference on the paperwork or frame. Record the greenhouse's outside dimensions, base outline, door and vent positions, glazing type if known, and any extensions or later changes. Take clear photographs from ground level of each exterior side, the roofline, door, vents, base and visible damage. Do not climb on the structure or remove panels just to improve a photograph. Keep the pictures with the date and notes describing what they show. An installer can then compare the existing layout with the maker's instructions rather than relying on memory or resemblance to another greenhouse.
Mark uncertain details rather than guessing: a panel can look like glass or another glazing material without its type being confirmed, and a model's appearance does not identify its parts. A catalogue page such as the Limited Edition aluminium greenhouse range can be considered as a separate replacement option, but it cannot identify an older greenhouse or confirm that parts fit. Send the original model reference, dimensions and photographs together when asking the manufacturer, supplier or installer for advice. Include close photographs of the area needing attention, taken without dismantling anything. These details help the person reviewing your enquiry find the relevant documentation and reduce avoidable back-and-forth.
Get model-specific dismantling advice before booking
Ask the manufacturer or supplier for the installation manual and any model-specific drawings, parts diagrams or dismantling guidance that are available. Check that each document matches the greenhouse's model and configuration, not just a product with a similar name. Older structures may have been altered, and details such as door position, extensions or replacement glazing can affect what an installer finds. If the paperwork is missing, send the identifying information you have and ask what documentation can be confirmed. Do not use a generic assembly guide as authority for taking apart a greenhouse whose exact design is unknown, or assume parts from another range will fit.
Arrange a site assessment with a qualified greenhouse installer who can handle dismantling and reassembly, rather than booking transport alone. Explain why it is being moved, how far it must travel, the visible condition, access at both locations and whether the existing base is staying behind. Ask for a written scope covering who inspects the frame, manages glazing, identifies missing or damaged components, arranges transport, prepares the base and completes reassembly. Clarify where work will pause if a problem appears and whether additional work needs your approval. Confirm who will coordinate the stages, so no contractor is assumed to be responsible for tasks outside the agreed scope.
Choose the new position before dismantling
Assess the proposed site while the greenhouse is still standing, so a change of plan is possible before work begins. Consider how shade from trees, walls, fences and neighbouring structures changes through the day and across the growing season, and whether the position suits what you intend to grow. Check access for routine work, room to open doors and a practical route for carrying in pots, compost or tools. Look for places where water collects or runs across the ground. These observations help describe the site; they do not establish its suitability. Tell the installer about slopes, soft ground, drainage concerns, overhead obstructions and nearby services that may affect the work.
Think about whether the new position calls for the same greenhouse or a different format. If you are considering a wall-adjacent layout rather than simply moving the current structure, the aluminium lean-to greenhouse range is a separate product category to research. Do not assume a convenient wall, path or corner meets a model's requirements; ask the installer to check the product instructions against the actual site. Mark the proposed footprint and door position on a plan or with removable markers, then walk the route with the installer. Record measurements rather than relying on a glance, and note which features must remain accessible.

Measure the footprint, clearances and access route
Measure the existing greenhouse at the outside edges of the base or frame, then compare those figures with the original manual or drawing. Record overall width and length as well as any projection, threshold or attached section; floor area alone does not show the space needed around the structure. At the new site, allow for the door to open fully, a person to pass and routine maintenance access. Note nearby walls, fences, trees, sheds and paths, and check whether access changes when gates are open. If you use string or removable markers to show the footprint, treat them as a layout check only; have the installer confirm the model's correct set-out before work.
Check the route from the garden entrance to the new position separately from the finished footprint. Record narrow gates, corners, steps, changes in level and overhead obstructions, then tell the installer so they can assess how components will be moved. If you are comparing a replacement, the T-model orangery greenhouse is listed in area options from 16.52 m² to 30 m². Area alone cannot confirm the exact length, width, door clearance or route needed, so consult the product drawing. For the greenhouse you already own, rely on its own dimensions; a different model's listed area does not prove the existing frame will fit. Include room for assembly work, not just space to place the greenhouse.
Have the base and ground assessed separately
Do not assume that the old base can be lifted, moved or reused at the new position. It may be fixed in place, may not match the new ground or may not align with the greenhouse after reassembly; a model- and site-specific review is needed. Ask the installer to compare the base arrangement with the manufacturer's instructions and state who is responsible for any new base or groundworks. A sloping, soft or poorly drained area needs professional assessment rather than a universal foundation recipe. Avoid cutting or changing the greenhouse frame, anchor points or old base to make parts meet unless the manufacturer and qualified professional approve the method. Record whether the base is staying, coming out or being replaced, and include that in the scope.
Agree the base requirements before groundworks begin. The position, dimensions, any level tolerances, anchoring arrangement and drainage details should come from the relevant documentation and installer, not a rule of thumb. Ask for a check before the greenhouse is reassembled, and clarify what happens if the prepared base differs from the agreed plan. The Prestige greenhouse with metal base is one catalogue model, but the words ‘with metal base’ do not show that its base is suitable for your existing frame or the new ground. Treat a product title as an identifier, not a foundation specification; check the exact instructions for the structure involved.
Clear the contents and plan temporary storage
Remove plants, pots, trays, tools and movable equipment before work begins, and decide where each will go. Make a simple inventory of anything attached or fitted to the greenhouse, such as staging or a separate storage section, and identify which pieces belong to the structure. Do not assume shelves, hanging items or other fittings are designed to travel while attached. Ask the installer which components must be removed and who will handle them. If equipment is connected to services, have the relevant competent person advise on safe disconnection and recommissioning; do not bundle that work into a general greenhouse move without confirming who is qualified to do it.
Plan the temporary home for plants and contents before the greenhouse is empty, especially if the work will interrupt watering, ventilation or access. Keep plant labels with the plants and mark loose greenhouse parts separately, so they are not confused with items supplied by the installer. If your current layout includes storage that you want in a replacement, the limited-edition greenhouse with storage is a product category to compare; confirm the exact configuration in its product information rather than assuming it matches your arrangement. A separate model has its own dimensions and assembly requirements. List the features worth retaining before choosing what to move, store or replace.
Agree a safe dismantling and transport plan
Glazing and frame components need a handling plan from the person carrying out the work. Do not try to remove large panes, loosen structural parts or move the greenhouse as a single unit on the strength of general advice; the safe method depends on the exact structure and should follow its instructions and a qualified installer's assessment. Ask who is responsible for recording, protecting and transporting each component, how breakage or missing parts will be reported, and where components will be held if installation cannot happen immediately. If the proposed method departs from the manufacturer's information, pause and ask for the reason and an approved solution before work continues.
Agree the sequence and practical arrangements: contents cleared, access kept available, components moved, the old site left in an agreed condition, and the destination base ready before reassembly. Discuss weather contingencies and what happens if a damaged panel, distorted piece or unidentifiable fitting is found. If the assessment concludes that transporting the existing structure is not worthwhile, the Oasis Pyramid Greenhouse is a separate product to compare, listed from 5.53 m² to 18.9 m². Keep relocation and replacement estimates separate so you can see which work each includes. Ask whether temporary storage is included in the relocation quote and who will arrange it if the dismantling and reassembly dates change.

Check reassembly and handover
Reassembly should follow the instructions for the identified model and the condition of the parts, with missing or damaged components checked against exact spare-part references. Do not accept an improvised substitution or an unrecorded attempt to force pieces into alignment. If a component does not match, ask the installer to pause at a safe point while they contact the manufacturer or supplier. The correct solution may depend on the original model and part number, so a photograph or similar-looking item is not enough to confirm compatibility. Keep any parts advice or approval in writing with the job records.
Before the installer leaves, review the completed work against the manual and ask them to demonstrate the doors, vents and other moving parts included in the job. Have outstanding items written down, with responsibility and the proposed resolution clearly recorded. Ask for a list of parts replaced, the documentation used, any care requirements and confirmation of what work was completed. Keep a copy of the invoice and any updated drawings with the original paperwork. This record helps with future maintenance or parts enquiries, although it does not replace a technical inspection where one is needed. If a problem identified at handover remains unresolved, ask the installer what must happen before normal use resumes.
Compare relocation with repair or replacement
Once the installer has reviewed the greenhouse, documentation, route and proposed base, compare the options on the same basis. Relocation is a practical option when the structure can be identified, the dismantling method and required parts are known, the new site can be prepared to the maker's requirements and the installer can quote for the complete job. Repair in place may be simpler if the current position is still suitable and the main concern is the greenhouse's condition. Replacement deserves serious consideration if the structure is in poor condition, essential parts cannot be identified, the footprint will not fit or uncertainty makes the relocation quote open-ended. These signs do not decide the answer alone; use the inspection, documentation and written scope.
If a new model is the better answer, compare its actual footprint, door position, base requirements and included features with the garden plan rather than choosing by area alone. The Bloomcabin Orangerie is listed in area options from 47 m² to 70 m². Use the drawings for the exact model you are considering to revisit the proposed layout, access and base work. Compare total installation costs as well as the purchase price, keeping any work at the old greenhouse site in the calculation. A considered replacement can avoid spending on a dismantling-and-reassembly plan that does not suit the site, while a documented move can preserve a greenhouse that remains usable.
Frequently asked questions
Can a greenhouse be moved without dismantling it?
Do not assume that it can. Whether any part can stay assembled depends on the exact model, its condition, the glazing and the route to the new position. Ask a qualified installer to check the manufacturer's instructions and the site before planning the move.
Can I reuse the existing base?
Possibly, but it should not be assumed. The base may not suit the new ground or align with the greenhouse after reassembly. Have the installer compare it with the model-specific instructions and assess the proposed site before deciding.
What information should I send when asking about spare parts?
Share the make and model reference, any serial or batch number, relevant paperwork, measured dimensions and clear photographs of the part and where it fits. If you have an exact part number, include it; appearance alone may not confirm compatibility.
Should I remove the glazing before the installer arrives?
Do not remove panes on general advice. Ask the installer what needs to be cleared and how they will manage the glazing for your particular model. Mention any damaged or loose-looking panels when arranging the assessment.
How should I prepare plants and contents?
Arrange a temporary place for plants, pots, tools and movable equipment before work begins. Keep plant labels with the plants, list greenhouse fittings separately, and ask the installer which attached items must be removed and who will handle them.
A successful relocation needs a plan for both the existing greenhouse and its new position. Gather the model information, record its condition, agree the base requirements and have a qualified installer review the work before dismantling begins. Compare the complete relocation cost with repair or replacement, including what happens at the old site. The aim is to retain a usable greenhouse where moving it makes sense, with reassembly and any outstanding work clearly accounted for.
