
Greenhouse Water: Roof, Ground or Condensation?
Greenhouse repair and maintenance
Water on a greenhouse floor is a symptom, not a diagnosis. Rain entering through the roof, moisture reaching the base from outside, and condensation on interior surfaces can all leave wet patches or puddles. Watering, a leaking hose or a spill can look similar. To find the source, record when the water appears, where it first forms and what happened beforehand. Compare observations during rain, in dry weather and after watering instead of resealing a joint or ordering a part based on one wet patch. The checks below help narrow the cause without dismantling glazing or making unsupported changes.

Before requesting a repair 1
Identify where moisture first appears
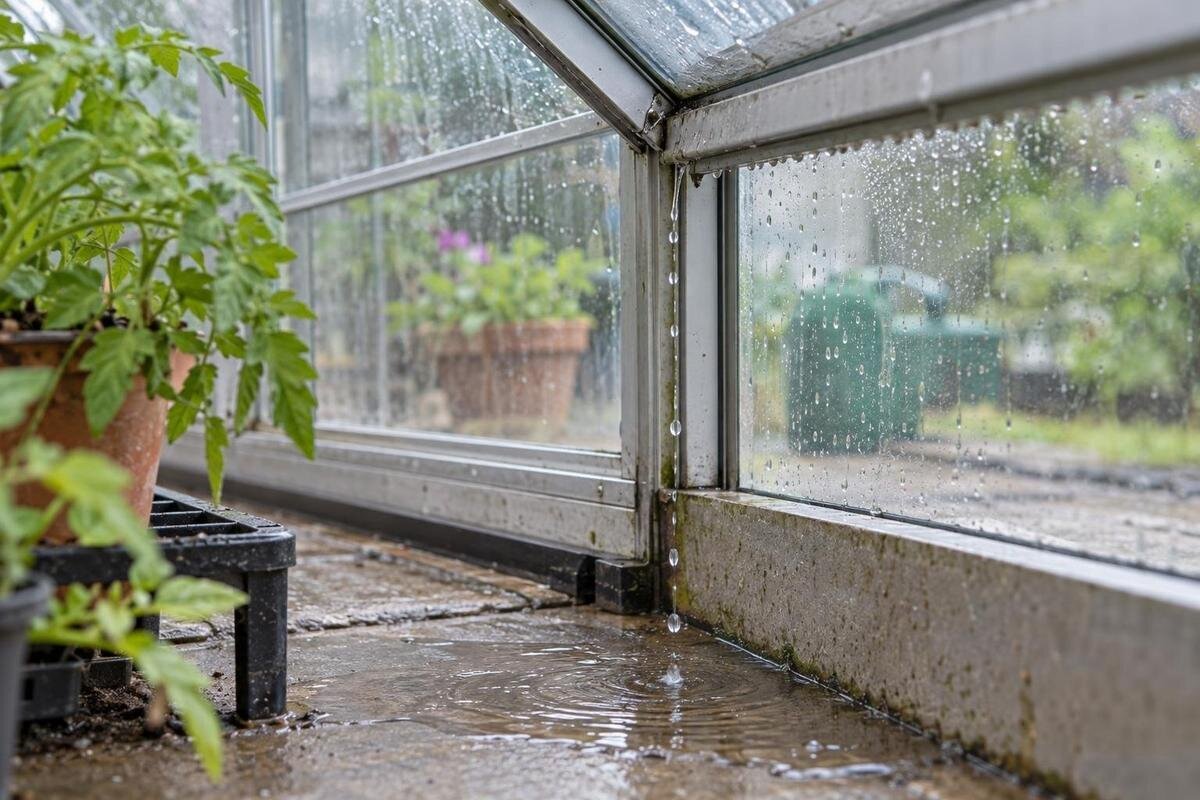
Start with the first wet point, not the place where water pools. A puddle in the centre may have travelled along a frame or across the floor from an edge; it could also have come from a pot, tray or spill. Take a photo before shifting plants or sweeping water away, and note whether the moisture is a single drip, a narrow trail, beads on a surface or a broad damp area. If it is safe and straightforward, dry a small accessible patch to see whether new water forms there. Do not touch suspect glass or climb onto the greenhouse.
Keep three main explanations open. Rain may enter through a roof pane, opening or joint; water may reach the greenhouse from saturated ground or surface run-off near its base; or moisture in the air may condense on cooler interior surfaces and run down. A hose, watering can or wet plant tray is another possible source. These patterns are clues rather than proof: wind-driven rain can affect one side, while condensation can drain to a single low point. Repeated observations are more useful than deciding from the shape of one puddle. A large wet patch can be the end of a longer water path, not the original source.
Keep a record of rain, watering and ventilation
Make a brief log for each occurrence. Record the date and approximate time; whether it was raining, how long it had been raining and whether conditions were windy; where the first wet point appeared; and whether water was used inside recently. Note whether moisture appeared overnight, in the morning or later, and whether vents or doors were in their usual position. Exact weather measurements are not needed. A simple sketch showing the wet patch, nearby frame, door or vent can be clearer than a general note that the roof leaks.
Compare like with like: observe during a normal spell of rain, then check again in a dry period and at a similar time after watering. Do not pour water over the roof to force a leak test; that can create a different path and make the result harder to interpret. Avoid changing several things at once, such as watering less, opening every vent and moving containers, because you will not know which change affected the result. Keep inspections to places you can see safely from the ground or within the greenhouse. Do not lean on glazing, reach towards a damaged pane or climb the frame. A repeatable pattern over two or more occasions is more helpful than one unusual shower.
Before requesting a repair 2
Check the roof during ordinary rainfall
During ordinary rainfall, look for the first fresh water inside rather than waiting for a floor puddle. A repeatable drip from one roof joint, a pane edge, a vent or another opening while rain is falling is a reason to investigate roof entry. Note whether it happens only in heavier rain or when wind drives rain towards one side. Water may travel along a frame before it drips, so the point directly above the floor mark may not be where it entered. Record the nearest visible joint or pane without touching it, and note whether water continues to appear after rainfall stops.
From ground level, note any visible displacement, damaged glazing, gaps at joints or seals that appear loose. Do not try to push a pane back into place, climb the frame or remove glass. Check the manufacturer's manual for the names of the parts and any inspection it permits. Distinguish a visible defect from the water's route: a loose-looking seal near a drip is worth recording, but proximity alone does not establish the cause. If extensive damage prompts you to consider a new structure, the Pyramid Greenhouse listing provides a complete model to include in that comparison. Keep your record of the existing roof fault separate from the specifications of a potential replacement.
Look at wall junctions and outside run-off
Water at an edge can come from an adjoining building or outside run-off, not necessarily through the greenhouse glazing. During rain, observe from a safe position where water runs down the nearby wall or roof, whether a gutter or downpipe overflows, and whether surface run-off moves towards one side of the greenhouse. At a wall junction, note whether wetness starts high at the join or appears only at floor level. An attached greenhouse's junction is model-specific, so the visible line alone does not identify which seal or flashing is responsible. Water can also enter the adjoining structure and emerge near the greenhouse, so note which surface becomes wet first and whether the wall is already damp before the floor.
Do not seal or alter a wall junction based on a guess. Compare the wet location with the greenhouse instructions and, if necessary, ask an installer to assess both the greenhouse and the adjoining surface. Explain whether the wall becomes wet before the greenhouse floor and whether the pattern changes with wind direction; this keeps the enquiry focused on the junction rather than on glazing alone. If you are considering a replacement attached to a building, the Lean-to Greenhouses range is a relevant catalogue category to explore. Check the junction details for the exact model under consideration rather than using its general appearance as a guide to your existing installation.

Before requesting a repair 3
Trace the water path without dismantling the greenhouse
Once a fresh drip is visible, trace only what can be seen. Note whether moisture starts on the inside face of a pane, at the meeting point of two glazing sections, beside a frame member or at an opening. Follow the wet trail upwards with your eyes; gravity can carry water along a frame or down a surface before it falls, so an apparent source at the base may be the end of a longer path. A dry paper towel held below a drip can help distinguish a new drop from an old stain, provided you can do so without reaching against glass. Record whether the same trail appears again.
Photograph the wider area first and then the detail so that the wet trail can be located on a rough plan. If the wetness is around a door or vent, record whether it was open or closed and whether that was its usual position. Include the visible route above the drip, not just the wet patch below it. Do not lift panes, pull out clips or cut seals to expose a hidden route, especially where glass is involved. The aim is to describe what you can actually see, leaving uncertain connections clearly marked as uncertain. If you later compare your greenhouse with the Aluminium Greenhouses page, use the model details rather than visual similarity to distinguish the structures; resemblance does not establish parts compatibility.
Compare dampness at the base with ground conditions
Assess the perimeter after rain and again during a dry spell. Water that appears first at floor level, along the base or at the same low corner after surrounding soil becomes wet points towards ground-level entry or surface run-off. Look outside, from ground level, for puddling beside the greenhouse, soil that remains visibly wet, or a slope that sends water towards it; note nearby taps or hoses as well. Those observations do not show what lies beneath a base, but they help distinguish water arriving from outdoors from a roof drip that has travelled down. Record whether the damp patch follows the whole edge or stays in one area, and whether water seems to arrive from a path or a higher surface.
Also check whether roof water or condensation has run down the inside frame and collected at the perimeter; timing and a visible trail help separate these causes. Do not dig beside the base, wedge it, raise the frame or change its support to test a theory. If persistent water is entering at floor level or appears to affect the base, ask a suitably qualified installer to assess the source before attempting alterations. Record both the indoor damp patch and the adjacent outdoor conditions so the enquiry covers the whole perimeter. If replacement is being considered, the Prestige Greenhouse with Metal Base page identifies a model variant to discuss. Its documented base requirements should be compared with the site rather than assuming that the existing base can be reused.
Before requesting a repair 4
Look for the pattern of condensation
Condensation forms when moisture in the greenhouse air meets a cooler interior surface. It often shows as fine beads or a sheen across more than one pane, frame or other cool surface, rather than a single point of entry, and it can appear when no rain is falling. It may gather and run down a pane or frame, leaving a drip or puddle that looks like a roof leak. Plants, damp compost and watering add moisture indoors; stagnant air can make it linger. None of those signs by itself proves condensation is the only source, because rain entry can happen at the same time.
Check the inside surfaces when it is dry outside, especially after a cooler period, and note whether moisture is spread across surfaces or begins at one joint. Compare mornings with times after the greenhouse has been aired using its normal ventilation arrangements. A broad pattern that recurs without rain supports condensation; one isolated drip tied to rainfall calls for a closer roof check. Record the pattern as well as any change after airing, since opening one vent does not by itself establish the cause. If condensation is part of a later replacement enquiry, include ventilation and glazing in your questions about models such as Limited-Edition Aluminium Greenhouses with Storage. The catalogue name alone does not describe how a model will manage moisture.
Rule out watering and other indoor sources
If moisture appears after watering but not during rain, inspect indoor sources before looking for a roof defect. Check the floor below the watering point, hose connection, pot, tray and any container used to collect run-off. A spill can spread under a bench, while drips from leaves or wet pots may continue after watering has stopped. A short observation period between normal watering sessions can be informative, provided plants are not left without water they need; do not change plant care for an extended period just to test a leak. Note whether the floor is wet only near a particular activity or in a wider area.
Record when watering finishes and where fresh moisture shows. If the greenhouse has a hose or irrigation system, note whether the wet patch appears during use and whether it follows the route of the hose or pipework. Observe any suspect connection during normal use without taking it apart. If the floor gets wet in dry weather and no indoor water has been used, return to the ground and condensation checks rather than labelling it a roof leak. These observations also distinguish an equipment problem from a layout issue, such as water spreading beneath a bench after watering. If you are already planning a larger replacement, Spacious Greenhouse can be included in a layout comparison, but a different structure is not in itself a solution to an unidentified water source.

Before requesting a repair 5
Prepare useful details before requesting help
When the clues point to a roof or base component, assemble a clear record before contacting the manufacturer, retailer or installer. Include the model name and any serial or order details you have, the type of glazing if known, the component's location on a sketch, and photographs taken from a safe position. Explain the weather, wind, ventilation and watering conditions when the moisture appeared, and whether the same point has leaked more than once. If you do not know the model or glazing type, say so rather than guessing from appearance; visually similar greenhouses may use different parts.
Ask which manual or drawing applies and whether the suspected component has an approved replacement identifier. If measurements are needed, ask who should take them rather than removing a pane to find out. For glass or a component that supports glazing, leave removal and replacement to someone qualified to handle it. Keep the enquiry focused on the evidence rather than saying only that the greenhouse leaks: identify the repeated wet point, describe the conditions and ask what additional view would help. Establish whether a part is listed for the exact model before ordering. If repair is not viable, you can move to a complete-model enquiry, including Limited Edition Aluminium Greenhouses among the options you wish to compare.
Choose repair or replacement after diagnosis
A repair is appropriate when observations lead to an identifiable fault and the manufacturer documentation or an installer confirms a compatible part or approved procedure. It is premature when the only evidence is a wet floor, when water appears at several unrelated points, or when its route cannot be seen. A roof repair, a base assessment and a change to watering arrangements address different causes; the observations should determine which is relevant. Where glass is cracked, loose or difficult to reach, keep clear of the area and ask an installer to assess it. Diagnosis may also show that water is arriving from outside rather than through a faulty greenhouse component, so replacing that component would leave the source unresolved.
Consider replacement only after you know whether the problem is local and repairable, whether the relevant part can be identified, and whether repeated water is coming from the greenhouse or its surroundings. If evidence points to outside run-off, seek advice on that cause before replacing the structure. For a replacement comparison, review dimensions, glazing, openings, base requirements and the parts available for each exact model. The T-Shaped Orangery Greenhouse page can form part of that shortlist, with questions guided by what you have learned about the existing greenhouse. A replacement decision should account for the source of the water as well as the condition of the structure; otherwise, the same problem may remain.
Frequently asked questions
How can I tell if rain is entering through the roof?
Look for a fresh drip or wet trail that appears during rainfall and begins at a visible roof joint, pane edge or opening. Repeat your observations and note the wind and timing. Water can travel along a frame, so a mark on the floor directly below a wet area does not prove that this is where rain entered. Inspect only from a safe position; do not climb onto or dismantle the greenhouse.
Why is the greenhouse floor wet when it has not rained?
Check watering, a hose or irrigation system, plant trays and spills first. If no water has been used inside, look for moisture across interior surfaces, which may be condensation, and compare the floor with dampness around the outside base. The time and place where moisture first appears are more informative than a puddle noticed later.
Can condensation look like a roof leak?
Yes. Beads can collect on panes or frames, then run down and drip onto the floor. Moisture across several interior surfaces, especially when it appears without rain, supports condensation; one repeated drip during rainfall points towards a possible entry point. Both can occur at the same time, so keep a record rather than relying on a single sign.
Should I seal a joint as soon as I find a drip?
No. First identify where the water enters and which part or joint is involved. A generic sealant may not suit the greenhouse system, and it could hide the water's path without resolving the cause. Check the manual and ask the manufacturer or an installer about the approved part or method. Do not remove or handle damaged glazing as a test.
What details should I include when asking for a repair?
Share the greenhouse model and any serial or order details you have, a sketch of the wet location, and safe overview and close-up photos. Describe the conditions when the moisture appeared, including rain, wind, watering and ventilation. Say whether the same point has shown water more than once, and identify the glazing type only if you know it. Ask which manual and replacement identifier apply before ordering.
An accurate diagnosis comes from sequence: observe the first wet point, compare what happens during rain with dry periods and watering, then distinguish a roof route, outside ground entry and interior condensation. Keep a record before drying away marks or moving parts, and consult the exact manual when a component may need repair. If the route remains unclear, or glass, a base or an adjoining structure is involved, an installer can assess it safely. Once the source is known, a repair or replacement decision is far less likely to address the wrong problem.
