
Planning Greenhouse Drip Irrigation for Pots and Beds
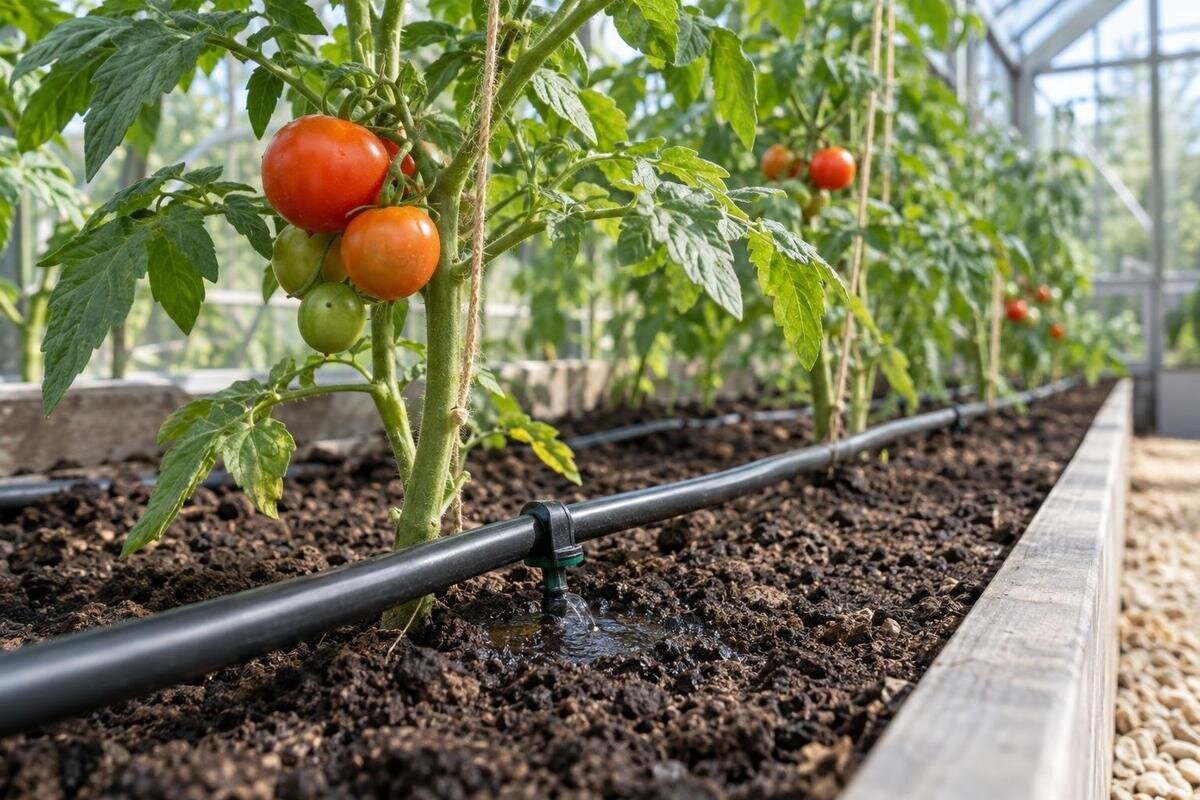
Greenhouse watering
Greenhouse drip irrigation can water individual pots, grow bags and bed rows through small outlets in a pipe network, but the same kit does not necessarily suit all three. A useful choice starts with the plants' positions and watering needs, then works backwards through emitter type, filtration, available pressure and the route each line must take. The aim is not a complicated plan: it is checking the proposed system against the actual greenhouse layout and testing the far end before relying on it.

Map the planting layout before buying a kit
Mark the water entry point, door, paths, fixed benches, beds and each group of pots on a simple plan. Separate plants you intend to water automatically from trays or containers you will continue to water by hand; otherwise the outlet count can grow beyond the real need. Measure the route tubing will actually follow, including turns around benches, rather than treating the greenhouse's stated floor area as growing space. The Classic aluminium greenhouse listing covers models from 3.77 m² to 28.08 m², but that area does not show your internal layout. Use the exact model and planned arrangement when drawing pipe runs, estimating branches and checking that every growing area is reachable.
Label each planting group as individual pots, grow bags, bed rows or a mixed area. A typical drip kit may include a supply connection, filtration, a main tube, branches and emitters, but fittings and arrangements vary by system. Mark where a filter, shut-off or line end could remain accessible, as well as where outlets should sit. Compare your drawing with the kit diagram: it can reveal a line that crosses a path, incompatible tubing sizes or a filter hidden behind a bench. Note whether the layout is likely to change during the season, too. A simple sketch with different marks for lines and emitters is easy to amend and more useful than a component count based on guesswork.
Choose drippers for pots and grow bags
Individual pots and grow bags are often planned around point emitters placed near each plant's root zone, rather than a continuous row of outlets across an otherwise empty bench. Check the emitter's rated flow, working-pressure range and connection type against the tubing and controller you plan to use. Adjustable drippers can suit different requirements, but their settings can be left uneven or knocked out of position; fixed-rate emitters are easier to compare when plants have similar needs, provided the supply meets their stated range. Labels such as low-flow or pressure-compensating do not remove the need to verify compatibility. Follow the manufacturer's limits and diagram, and position each outlet so water enters the growing medium rather than running onto the bench or pot rim.
Before deciding how many outlets to use, group plants by pot size, growing medium, stage and exposure, and note which are likely to be moved. That helps show which containers might share a branch without assuming every plant needs the same amount. One dripper may not wet a large or unusually shaped pot evenly, while extra outlets can overwater it; follow the system guidance and inspect moisture below the surface after a trial. If the Lean-to greenhouse range is on your shortlist, use the chosen model's actual interior plan to place benches and count pots. Include the positions you expect to use later in the season, so you can plan accessible branches rather than rearranging the whole network whenever a container moves.
Dripline and point emitters for beds
An inline dripline has built-in outlets along its length; individual drippers can instead be placed at selected plants. A regular bed row may suit a line if its outlet spacing, flow and pressure range match the planting pattern and system instructions. Point emitters offer more selective placement, but add fittings and require individual checks. Do not assume that any line labelled for beds will suit every soil, crop spacing or water supply. Grow bags arranged in a row remain separate root zones even when the tubing follows the row, so assess whether each bag receives water where it is needed rather than assuming the bed-line pattern will cover it.
On the plan, mark bed edges, crop rows and the walking route, then measure tubing along the planting rather than across access. A mixed bed may include plants at different stages or with different requirements; placing them on separately controlled branches can be easier than trying to meet all their needs with one line. Water spreads through growing media in different ways, so inspect the damp area at root depth after running the layout instead of judging by a wet strip at the surface. When planning beds inside a Limited Edition aluminium greenhouse, measure the actual rows and allow space to reach their ends. Record outlet positions as well as line lengths, so the drawing shows how the irrigation layout relates to the planting.
Separate plants with different needs into zones
Treat a zone as the set of drippers or lines operated together. Group plants only when their watering needs and emitter requirements are similar; pots, grow bags and beds may need separate adjustment because container volume, medium and planting stage vary. Separate zones let you change one group's schedule without changing all the others. That is useful when a shared setting would leave one area too wet or too dry, not simply because another branch could be added. Depending on the system, you may need individual valves or a multi-zone controller, so check how many zones it can operate independently. Several branches on a single timer are not automatically separate zones if they all open together.
Place zone boundaries around real growing groups rather than dividing the floor into equal lengths. A bed and a bench of pots could be separate zones if they need different watering schedules. Keep each zone within the emitter, controller and supply limits stated by the manufacturer; adding a branch changes demand and calls for another flow check. For a proposed T-shaped orangery greenhouse layout, label each group you want to manage separately on the planting plan. Then check that the chosen control arrangement can operate those groups independently, rather than counting pipe branches as if each were already a controllable zone.

Check pressure and flow at the farthest outlet
Read the operating pressure and flow requirements for the complete setup, starting with the emitters and controller rather than a general claim about the tap or water source. Pressure and flow are different measurements: pressure describes the force driving water through the system, while flow is the volume delivered over a given time. A reading at a closed tap may not reflect what reaches several open branches once the filter and controls are in place. Tube length, fittings and changes in height can affect delivery along a run. Test where the line enters the greenhouse and at the end of a working branch if possible; treat an untested supply as an assumption.
Test a zone with its intended filter and control arrangement installed and the branches open as they will be used. Follow the manufacturer's pressure-check method or use a suitable gauge, then compare output near the supply with that at the farthest emitter. A timed catch test can reveal uneven delivery when the same method is used at both points, but compare the result with the emitter specification rather than a universal target. Repeat for each zone, since branches may behave differently. If output falls away at the end, check for a blocked filter, kink, excessive demand or unsuitable run before changing emitter settings. When drawing up a layout for an Oasis Pyramid greenhouse, mark these test points on the pipe plan so you can find them again after planting.
Match filtration to the water source
Drip outlets have small passages, so particles can restrict delivery. Choose a filter that meets the emitter manufacturer's required mesh or filtration rating and can handle the system's flow; there is no universal rating that fits every kit. Check the filter's working-pressure range and connector size too, because a poorly matched filter can become a bottleneck. If you use stored rainwater or another source that may carry debris, consider whether coarse screening is needed before water reaches the system filter. Those stages do different jobs, and their placement and cleaning method should follow the respective manufacturers' instructions.
Position the filter where you can inspect and clean it without dismantling a bench or bed, then follow the maker's cleaning and flushing directions. Clear-looking water is not proof that it contains no particles; equally, a screen filter should not be treated as water treatment for dissolved substances. Use replacement mesh or parts only where the filter instructions identify them as suitable. If considering the Limited-Edition aluminium greenhouse with built-in storage, plan the water source and filter access separately from the storage layout. Keep the filter's servicing space clear rather than treating any unallocated corner as a suitable position.
Keep tubing routes clear and accessible
After choosing compatible parts, route the main tube and branches so they reach each growing group without blocking the door or the path between beds. Keep connectors, valves and line ends accessible; parts buried behind fixed benches are harder to inspect when flow changes. Avoid placing joints where they are likely to be stepped on, caught by a tool or crushed by moving pots. Use tubing, clips and fittings specified for that system rather than assuming a connector from another range will seal because it appears to fit. Include turns and connection points in your route plan: the shortest line is not necessarily the easiest one to clean or maintain.
Allow for changes such as moving pots, replacing a bed row or repositioning a bench. Accessible branches are easier to adapt, but any extension still has to meet the system's connection and pressure requirements and should be retested. Label branches or keep a simple layout note so you can find them without lifting furniture or disturbing planted areas. If choosing a Prestige greenhouse with metal base, trace the pipe route on the planned interior layout, including the space needed to reach valves and line ends. Check that moving a pot or opening the door will not pull a branch or catch a connector.
Choosing a timer for your zones
Automation is most useful after the zones are defined. A timer can operate a supply at scheduled intervals, but it cannot decide whether a pot or bed has received enough water. Check its operating pressure, flow, water-source and connector requirements against the irrigation instructions; some controllers or valves have minimum operating conditions, which matters when the source is not pressurised. Confirm that the controller can manage the number of independent zones you plan to run, and that any required valves are compatible. For a small or frequently changing setup, manual control may be easier to inspect and adjust than a timer that does not match the supply.
Run and observe the system before relying on a schedule. Once the root zones are being watered as intended, set a programme in line with plant needs and equipment instructions, then review it when planting, weather or growing medium changes. A fixed routine is no substitute for checking moisture. When planning a Spacious greenhouse, make a list of the zones and the controls each will need alongside the planting plan. Use that list to compare timer channels and component ratings, and keep a record of which programme operates each group.

Test each zone before relying on it
Before treating the system as ready, assemble and flush it in the sequence given by the manufacturer. Check every joint, cap and line end, ensure the filter is clean, and operate each zone with its actual branches open. Compare an emitter near the supply with one at the far end, then sample other branches rather than assuming the first pair represents the whole greenhouse. Use any pressure or output test supplied with the kit, and note the initial result for later comparison. Correct leaks, kinks or blocked outlets now; a tidy-looking installation can still deliver unevenly.
After a run, inspect moisture at root depth in a representative set of pots and at more than one point in each bed. A damp surface can sit above a dry root zone, while water concentrated at one outlet may not spread through an entire container. Let moisture distribute through the medium before judging it, and change one thing at a time: outlet position, branch grouping, a blocked dripper or the line arrangement. Recheck nearby plants after an adjustment. Avoid lengthening the whole system's schedule simply because one distant pot remains dry; first establish whether the issue is local or affects the full zone.
Maintain the system as planting changes
Include inspection in ordinary greenhouse work. Look for pinched or split tubing, loose connectors, a clogged filter and emitters that have stopped or changed output. Clear or replace parts only as the system manufacturer directs, and flush line ends where the design allows it. If a single plant is under-watered while its neighbours are not, inspect that pot's emitter and branch before changing the entire timer schedule. If a whole branch is affected, check its valve, filter and supply conditions. This distinction helps prevent a local fault from being treated as a greenhouse-wide watering problem.
Update the map when you move pots, change the bed pattern or add plants, and recheck output after extending or rearranging any branch. Switching water sources can change filtration needs and operating conditions, so repeat the relevant checks rather than assuming the old settings still apply. Follow the manufacturer's instructions for seasonal draining, cleaning or storage, especially where cold conditions could affect water-filled parts. A short note of the emitter type, zone and observed moisture helps you see which changes improved distribution and which created a new uneven patch.
Frequently asked questions
Are the same drippers suitable for pots and beds?
Not always. Pots and grow bags are often planned around point emitters, while a planted row may suit a dripline with built-in outlets. Choose by the emitter spacing, flow and pressure specifications, then check how moisture reaches the roots. If the two areas need different adjustments, use separate controllable zones.
What filter mesh should I use?
Use the filtration rating specified for your emitters and water source; there is no universal mesh rating for every system. Also check the filter's flow and pressure limits and follow its cleaning instructions. If the water may contain debris, consider whether screening is needed before it reaches the system filter.
How can I check the farthest emitter?
Run the complete zone with its filter and controls in place, then compare output near the supply and at the far end. Follow the manufacturer's pressure-testing method or use a suitable gauge. A consistent timed catch test can help reveal differences; compare results with the emitter specifications rather than a general target.
Will a timer fix uneven watering?
No. A timer controls when a system runs, not whether every emitter delivers the right amount. A blocked outlet, unsuitable run, poor zone split or supply issue can still leave plants unevenly watered. Test the line and inspect root-zone moisture before adjusting the schedule.
Can grow bags sit along a dripline?
They can be arranged in a row, but each bag still has its own root zone. Check that the outlet positions suit the bags and that water reaches the growing medium in each one. If bags need different watering from a nearby bed, consider a separate branch or zone.
A dependable drip setup matches the plants and emitters to a filtered water supply with suitable pressure and flow. It takes more than attaching a timer to a hose. Map the planted areas, separate groups with different needs, follow the equipment specifications for pressure and filtration, and test the completed layout. As pots move and beds change, update the plan and check the farthest outlets again. That keeps the system matched to the greenhouse you actually grow in rather than to a generic kit diagram.
