
Can You Site a Greenhouse Near a Pond?
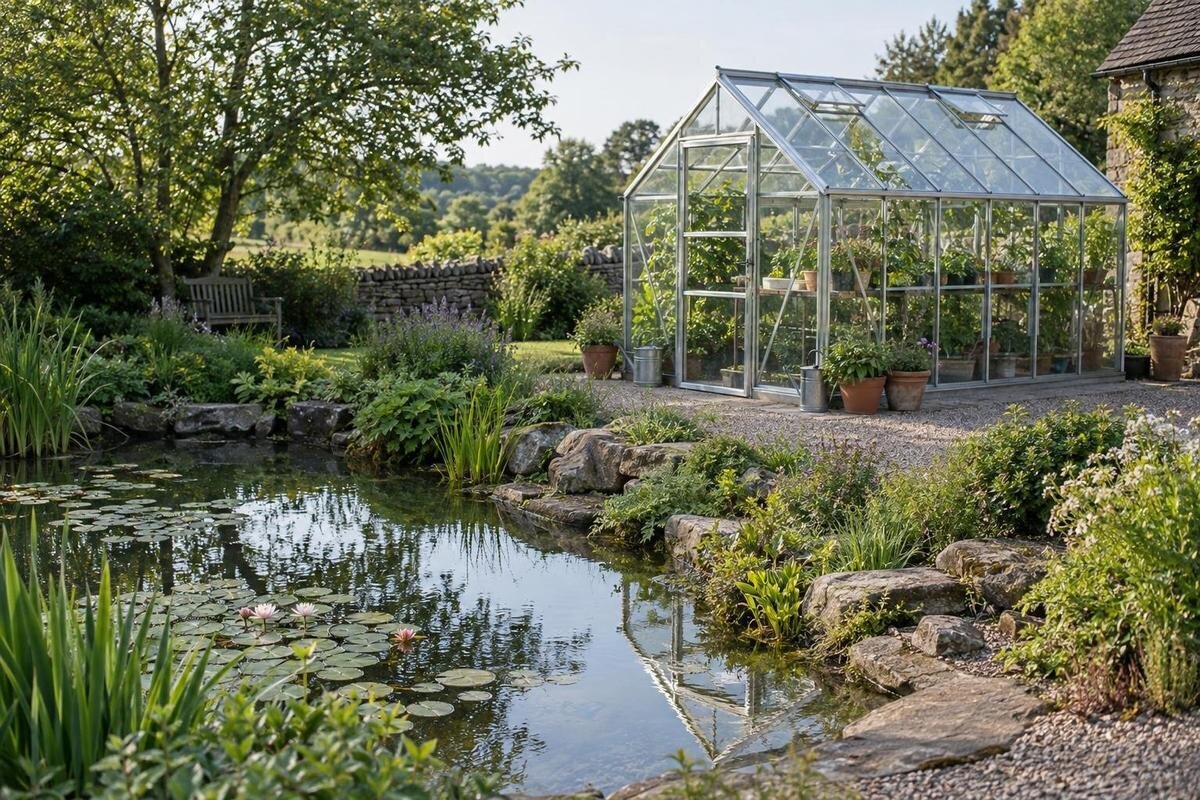
Greenhouse site planning
A greenhouse can sit near a pond, but the view is not a site assessment. The deciding questions are whether the ground under the proposed base is dependable, where water moves when the pond is high or the garden is wet, how much useful light reaches the footprint, and whether delivery and routine care remain practical. Map those factors for the particular garden; there is no universal pond-to-greenhouse distance that answers them all.

01
Can a greenhouse sit beside a pond?
Being beside water is not, by itself, a growing advantage. A pond does not guarantee useful extra light, a warmer position or better growing conditions, nor does its proximity establish whether the water is suitable for crops. Treat the pond as one feature of the site: it can affect access, ground moisture, shade, maintenance and where rainwater travels. A greenhouse can be considered if its base area and working routes are suitable independently of the pond edge. Avoid choosing a position only because it looks attractive from the house or seems convenient for carrying water. Suitability depends on the actual bank and garden.
First establish how the pond is built and managed. Is it a natural basin, an excavated pond with a sloping bank, a lined feature, or a raised pond held by a constructed edge? Note any inlet, outlet, overflow, pump, access cover or route used when the pond is cleaned. Those details change what needs checking, but they do not produce a standard clearance. Mark the ordinary waterline and any higher level the owner has seen, including where it has reached after wet weather. Ask whoever manages the pond about its maintenance and water movement. If it has been altered recently or its construction is unknown, gather its history before fixing the greenhouse position.
Assess the bank and the ground beneath the base
Walk the proposed footprint and the strip between it and the water in more than one condition if possible: after a dry spell and after rain, and at the usual and higher observed pond levels. Look for visible changes rather than trying to diagnose them: fresh erosion, slumped soil, cracks, soft or persistently wet patches, exposed liner, seepage, or a retaining edge that appears to have moved. Note each observation on the sketch and take photographs from a repeatable viewpoint. Compare them with older photographs if you have them. If reaching the area means stepping onto a soft or steep bank, do not do that just to inspect it. One tidy surface or dry-day visit cannot establish what lies beneath.
Find out whether the proposed ground is natural, filled, or affected by earlier excavation, repairs or drainage work. Records of pond construction or repair may help clarify what has changed. If there is a retaining structure, an embankment, visible movement, recurring seepage, or uncertainty about the ground history, pause before siting the base and ask a suitably qualified ground or structural professional to assess the relevant issue. The greenhouse installer can confirm the base requirements for the selected model, but should not be expected to judge pond-bank stability from a catalogue label. Even the Prestige greenhouse with metal base still needs a site assessment; the product description does not establish whether nearby ground is suitable. Keep the greenhouse specification and pond condition as separate checks.
02
Draw the complete footprint and access space
Draw the pond edge and the intended greenhouse position on a scaled plan. Use the exact selected model's outside dimensions, then add the space needed for door opening, vents, downpipes if specified, cleaning and a route to pond equipment. A floor-area figure alone will not show whether a unit fits beside a curved bank, a narrow path or a gate. Measure the tight points, include trees or garden structures that affect delivery or access, and mark the edge of each path rather than relying on memory. Plot the proposed base as a complete outline; do not reduce it to the area needed for benches or plants. Use the same reference points when comparing alternative positions.
For a catalogue reference, the Classic aluminium greenhouse range lists sizes from 3.77 m² to 28.08 m². That is an area range, not a pondside clearance or a dimensioned fit for your garden. Identify an exact variant and use its plan before marking out, then test whether you can still reach pond equipment, open the greenhouse doors and move through the garden without crossing soft ground. A paper outline or measured site sketch can reveal conflicts early. Keep the drawing at a scale that makes narrow gaps visible, and include the space needed to work around the structure as well as its footprint. The useful position is the one that leaves those routes clear.
Map high water and overflow routes
Do not plan only around the pond's everyday waterline. Establish where excess water goes when the pond is high, after heavy rain, when an inlet is running, or during maintenance that lowers or drains it. Ask the pond owner or installer about known overflow arrangements and past water paths; if it is safe, inspect the garden after wet weather and note low spots, channels, drains and ground that stays wet. Include the land above the proposed greenhouse as well as the bank, since runoff can arrive from elsewhere in the garden. Dated photographs at different water levels are more useful than one dry-day view, and help distinguish a known route from a guess.
If a mapped flow route crosses the intended footprint, access path or base area, do not cover it or assume a small change in ground level will solve the problem. The route may serve the pond or the wider garden, so any change needs a competent, site-specific review. When comparing a variant from the Limited Edition aluminium greenhouse range, listed from 3.77 m² to 28.08 m², place its outline over the mapped water routes. Confirm roof-water outlet positions for the selected configuration with the supplier or installer. Do not block a pond outlet to preserve a proposed position; establish where water can be managed without sending it towards the base, bank or neighbouring ground.

03
Check sunlight at different times of year
Use the actual proposed outline to record shade at different times of day and in different seasons. Sketch shadows cast by trees, hedges, walls and buildings in the morning, around midday and later in the day; repeat when deciduous trees are bare and in leaf, or use dated photographs from the same viewpoint. Note whether the shade comes from a permanent structure or a seasonal canopy, as the pattern can change considerably. A nearby pond does not make a shaded position sunny, and reflections from water should not be treated as a substitute for the light crops need. Check the particular plants you expect to grow, since their requirements differ. A seasonal diagram makes it easier to compare locations without relying on a general claim that a waterside or south-facing corner must be best.
Overlay the footprint for the exact variant you are considering on that shade record. The Oasis Pyramid Greenhouse range lists sizes from 5.53 m² to 18.9 m². Compare the selected model plan with the shaded periods that matter for your crops, and note which obstacles cast them. If two possible sites differ, record the difference rather than assuming that a particular greenhouse shape or the pond edge will make up for lost light. Check the full proposed outline, not just the centre of the greenhouse, against your observations. Keep the photographs and seasonal diagram alongside the model plans so you can compare the positions consistently.
Decide where roof water will go
Treat roof runoff as a separate line on the site drawing. For the model you choose, confirm which sides may discharge water, whether gutters and downpipes are included, and where any outlets sit; those details must come from the relevant product information or installer, not from assumptions about the range. Mark the route for water from the roof to its intended destination, including any storage and overflow arrangement. If there is more than one possible outlet, mark each one rather than drawing a single general arrow. The aim is to avoid uncontrolled discharge onto the base, a walking route or the pond bank. A roof concentrates rainfall at its edges, so a route that seems minor on a broad garden sketch deserves a closer look at the actual position.
If you want to collect rainwater, include the container and its overflow in the layout, without blocking a maintenance path or creating another wet area beside the base. Consider what happens when storage is full or the intended route is unavailable. Do not direct greenhouse runoff into the pond by default: consider how the pond is managed and where its normal overflow goes, and seek site-specific drainage advice if the destination is uncertain. Likewise, do not assume that pond water is suitable for crops simply because it is close at hand; its source and condition are separate questions. Keep the planned route visible on the sketch so the installer can discuss the actual outlet position before work starts.
04
Plan the delivery and installation route
Trace the route from the delivery point to the greenhouse footprint. Note gates, turns, slopes, steps, soft ground, overhead obstructions and any narrow section beside the pond. Identify somewhere for components and tools to be set down without blocking access or placing them on questionable ground. The installation team's requirements depend on the exact model and assembly method, so share a scaled sketch and site photographs and ask what access they need. Do not assume the route used for garden tools will suit every delivery, or that a pondside position can be reached safely by walking along the bank. If access depends on a path that becomes soft or flooded, compare another route or position before confirming the layout.
The T-model orangery greenhouse listing spans 16.52 m² to 30 m². For the exact size under consideration, ask the supplier or installer about handling and workspace requirements. Include the place where people will work during installation as well as the finished footprint, and keep the pond-maintenance route available. A map may not make every turn or step obvious, so confirm access on site and show the team any obstacles recorded in your photographs. If the only route takes people or materials along an uncertain bank, discuss alternatives before settling on the position. The delivery route needs to be workable as well as the finished layout.
Keep room for pond and greenhouse maintenance
Think about routine access after the greenhouse is in place. Mark the route for carrying compost, watering, pruning, cleaning glazing and reaching whatever pond equipment is actually installed. Keep the sides that need servicing reachable in line with the selected model's instructions, and preserve any path required to clean or maintain the pond. A gap that seems passable when empty can become awkward when doors are open, plants have grown, tools are being carried or the ground is wet. Consider how you will get to both features throughout the year, not only when the garden is dry. Avoid a layout that turns ordinary care into repeated trips along the bank or through a narrow pinch point.
If comparing the Limited-Edition Aluminium Greenhouse with Built-In Storage, ask for the exact plan showing how that configuration is arranged. The listed range is 5.52 m² to 28.08 m²; include the selected variant's full outline and access in the drawing. For doors and vents facing the pond, confirm how they open before planting or fixing a path. Mark service sides and door space separately from the base, then compare them with the pond-maintenance path, wheelbarrow route and place where tools are stored. Check whether these routes remain usable while someone is working at either feature. If the layout changes, update the plan before paths or planting are fixed.

05
Compare freestanding and lean-to options carefully
Compare greenhouse type against the boundary conditions rather than treating one format as a shortcut. A freestanding greenhouse still needs a suitable base area and clear working routes; a lean-to needs a wall in the right place and a site arrangement that works alongside that wall. If the candidate wall is close to the pond, assess its condition and how its shade, roof runoff and access interact with the bank and water paths. A wall can also constrain which side is reachable for maintenance. Do not assume that a lean-to solves a narrow pondside plot or that a freestanding design automatically avoids ground concerns. Include the wall and the pond on the same drawing as the proposed greenhouse.
The lean-to greenhouse range is listed from 3.69 m² to 14.34 m². Compare an exact plan with the same scaled sketch used for a freestanding option. Check product guidance and ask a suitably qualified professional about any structural interface or uncertain wall condition. Then compare light, overflow, roof-water routes and access on the remaining sides. Pay particular attention to whether the wall and pond leave enough room for the required maintenance routes. Choose between the formats on the basis of their actual position and requirements, rather than treating the smaller listed area as the deciding factor.
Use the site evidence to make the final decision
Bring the ground observations, pond history, high-water and overflow notes, dated photographs, seasonal shadow diagram, exact greenhouse plan and delivery route together. Compare the proposed base with the visible condition of the bank and keep any uncertain flow path or ground history on the drawing rather than smoothing it away. Separate what you have observed from what you still need to confirm. If the position works only by altering a bank, diverting an overflow or relying on ground that has not been assessed, pause and seek qualified site-specific advice before ordering. No universal setback can resolve those questions; the appropriate separation depends on the pond, ground, water movement, access and chosen greenhouse.
The Spacious Greenhouse Orangerie range is listed from 47 m² to 70 m². Use the selected variant's drawing for the final layout, keeping pond access and overflow routes visible alongside the footprint. Review any changes made during the comparison: a shifted base, a different door position or a revised path may affect another part of the plan. A sound choice leaves the base on ground suitable for the installation, preserves water routes and allows both greenhouse and pond to be maintained. The final drawing should show how those requirements fit together, rather than relying on a guess about distance.
Frequently asked questions
How far should a greenhouse be from a pond?
There is no single distance that works for every pond. The bank, ground, overflow routes, greenhouse footprint and access all matter. Map these features for your site, and seek a site-specific assessment if the ground or water movement is uncertain.
Can I install a greenhouse right beside a pond bank?
Do not assume that ground beside the water is suitable just because it looks firm. Check for signs of movement, erosion, seepage or persistent wetness, and find out how the pond was built. If the bank or ground is uncertain, get appropriate professional advice before choosing a position.
Does a pond make a greenhouse brighter or warmer?
Not reliably. A pond does not replace sunlight or guarantee a more suitable growing environment. Record shade at different times of day and in different seasons, then compare it with the light needs of the plants you intend to grow.
Can greenhouse roof water be directed into the pond?
Do not assume that it is an appropriate destination. Check how the pond is managed, where its overflow goes and how the greenhouse runoff would reach it. If the route is uncertain, ask a suitable drainage or landscape professional to assess the site.
What should I record before choosing a position?
Prepare a scaled sketch showing the pond edge, ordinary and higher observed water levels, overflow routes, the exact greenhouse footprint and access paths. Add dated photographs, seasonal shade observations and any information you have about pond construction, repairs or drainage.
A pondside greenhouse is a sound option only when the ground, water paths and practical routes work together. Choose a position from mapped evidence: bank observations, overflow records, light across the year and the full measured footprint, rather than an assumed setback or an attractive view. Where the plan depends on altering the bank, redirecting water or relying on uncertain ground, resolve that question before the greenhouse is ordered.
