
What to Check Before Using Self-Watering Containers in a Greenhouse
Greenhouse growing
Self-watering containers can reduce how often you have to water by hand, but they are not set-and-forget pots. A reservoir needs a clear refill route, any overflow needs somewhere safe to go, and the compost around the roots still needs both moisture and air. On paving, an accidental spill will not simply soak into open soil. Before planting, check the container, its location and the greenhouse floor as one arrangement.

Before you fill 1
How a self-watering container works
Most self-watering containers hold water in a compartment below or beside the growing medium. A wick, porous platform or another capillary connection draws moisture towards the roots; the route varies by design. The arrangement is not simply a pot sitting in a saucer that keeps all the compost wet. Before planting, find out where the reservoir sits, how water travels into the mix and whether the maker specifies a particular growing medium. Check that any wick makes contact as the instructions require and that no part has shifted during assembly. A blocked connection, a poorly suited mix or very dry compost can leave the root zone unevenly moist even while water remains below. Understanding this path is more useful than relying on the product label.
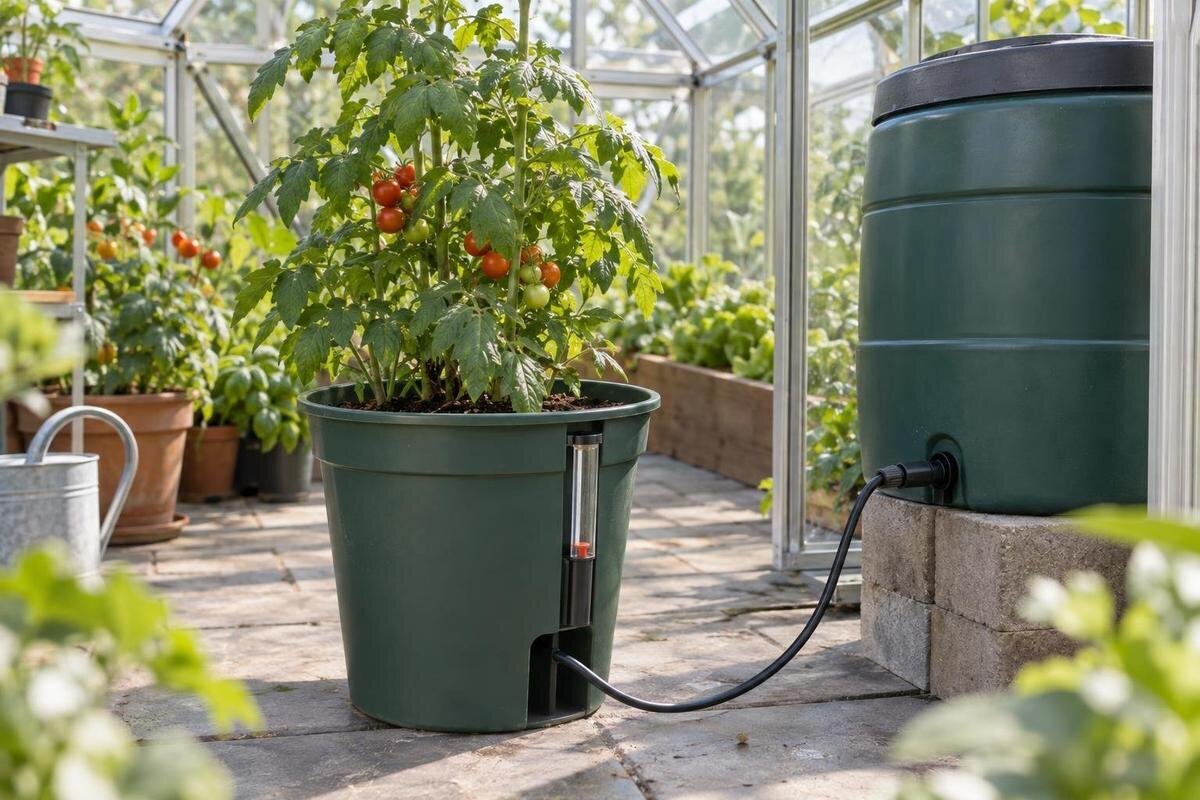
Look for a maximum fill mark, an overflow opening and a practical way to check the water level. Some containers have a visible indicator; others require access to the reservoir, and a fill tube is not necessarily a level gauge. Read the instructions for initial watering, as roots may not yet reach the moist layer after transplanting. Self-watering describes how water is supplied; it does not mean the container measures the crop’s demand, prevents every dry patch or needs no attention. Confirm that surplus water is handled as intended and that you can inspect the system without lifting a planted container. If the outlet or indicator will be hidden by plants or nearby pots, plan for access before planting.
Match plants and growing medium to the reservoir
Choose the planter with the crop and its stage in mind. A mature plant with roots able to reach the moist lower zone may use a reservoir differently from a newly sown tray or a small transplant whose roots remain near the surface. Seeds and young plants can need moisture in the upper mix before the capillary path reaches it. Follow the container’s start-up guidance and be prepared to water from above while roots establish. Do not assume filling the base will wet every part of a deep pot evenly; a dry upper layer can coexist with moisture lower down. If the design is intended for established plants, use another method for germination or early growth rather than stretching its stated role.
Group containers according to broadly similar moisture needs, not simply by which ones fit together on a bench. Some crops tolerate consistently moist compost; others need it to dry more between waterings. Separate reservoirs give you more control than one shared arrangement kept at a level that suits only the thirstiest plant. Growing medium matters too: its ingredients, structure, compaction and degree of dryness all affect capillary movement. Choose a medium suited to both crop and planter, and check how it wets after planting rather than assuming every compost wicks at the same rate. A quick comparison across the pot can show whether moisture reaches beyond the wick.
Before you fill 2
Check refill access and reservoir capacity
Treat reservoir capacity as one input, not a promise of a fixed number of days between refills. Water use changes as plants grow, set fruit or flower, and as light, warmth and ventilation change. A larger tank can still run low quickly under a vigorous plant in bright conditions. Check the manufacturer’s stated capacity and maximum fill level, then decide whether you can inspect it often enough for your crop. If the reservoir is hidden, identify how to check it before foliage spreads. A level indicator helps only if it remains visible and operates as described; do not infer remaining water from the height of the fill tube alone.
Think about the route from the water source to the fill opening: carrying a can around pots, reaching a tube behind foliage and avoiding spills all affect how manageable refilling will be. The Spacious Greenhouse listing covers floor areas from 47 to 70 m², but area alone says nothing about reservoir demand or refill distance. Use the plan for the chosen configuration to mark the planter, fill point and walking route, and keep those points reachable after plants mature. If topping up requires moving a full container each time, choose a different position or a design with more accessible filling.
Measure the complete container footprint
Measure more than the rim. Note the container’s full base, projecting fill tube, overflow hole, handles and any support required by its maker; then allow for foliage that will spread beyond the pot. Leave room to lift a lid or inspect a level indicator, reach the back of the planter, and prune or harvest without shifting other pots. Marking footprints with removable tape or a cardboard outline can reveal tight spaces before a container is filled. The space that matters is what you need for access throughout the growing season, not just the empty pot’s outline on delivery day. Include room to turn with a watering can without brushing against neighbouring plants.
Keep a clear route to the door and do not obstruct vents, drainage points or routine access to glazing with a row of large containers. A narrow gap can seem adequate until foliage, a cane or an open lid takes up space. When comparing sizes in the Aluminium Classic Greenhouse range, listed from 3.77 to 28.08 m², check the dimensions and plan for the exact configuration. Mark each pot’s footprint and the side you will approach for refilling. Assess the remaining passage space with those access needs included, rather than judging the layout by total floor area alone.

Before you fill 3
Assess the paved floor before filling
Paving changes what happens to a leak. Unlike open soil, a paved surface may not absorb a spill where it lands; joints, gradients and drains determine whether water moves away or collects in a low spot. Before filling any reservoir, inspect the floor at the intended position and note nearby drains, door thresholds and areas that already stay wet. A spill can carry compost or debris across a walking route, so consider how you will notice and clean it. Do not assume the whole floor slopes towards a drain simply because a drain is present, and avoid covering access to a drain with a heavy container.
Check that the planter sits level and does not rock on a raised joint or uneven slab. Follow instructions about feet, trays and support, and consider how difficult the container will be to move once its reservoir and growing medium are full. If you are unsure whether the surface or its support can take the filled container, ask the greenhouse or planter supplier, or a suitably qualified installer, before loading it; the empty pot’s weight is not enough to judge. The Prestige Greenhouse with Metal Base listing identifies a metal base, but that fact does not describe drainage across the paving beneath it. Assess the greenhouse base and the planter’s spill route separately.
Decide where overflow water will go
Find the overflow before filling: check its height, which side it exits and whether it is meant to set the maximum reservoir level. Keep the opening clear and follow the maker’s filling directions; pouring too quickly or continuing above the stated level can send water over the rim rather than through the outlet. If you place a tray beneath the container, treat it as a catch for small spills, not as a drain. A tray can fill unnoticed, especially behind foliage, so make sure it can be seen, reached and emptied. Do not block an outlet to stop a spill; that may change how the reservoir behaves.
On paving, trace the path from each outlet to a drain or another suitable place where water can be captured without pooling on a walkway. Avoid directing discharge towards a door threshold, a neighbouring container that hides a leak or a spot where water will sit. The Lean-to Greenhouse range is listed from 3.69 to 14.34 m², but a greenhouse’s stated area cannot tell you the fall of your paving or the route water will take. Try a supervised, small initial fill and watch the actual outlet before relying on the arrangement. If there is no safe route, reposition the planter or choose a design whose overflow you can manage.
Before you fill 4
Check moisture in the root zone
A reservoir reading tells you that water is present in the lower compartment; it does not prove the roots are receiving the right amount. The surface can dry while lower compost remains damp, or the mix can be too wet near the base. Check the medium at more than one depth where access allows, and avoid testing only beside the wick or fill tube. A fingertip, a small sample at the edge or another method recommended by the planter maker can give a better picture. Use a consistent spot and compare a few representative pots, so you notice differences between the reservoir and root-zone conditions. Take care not to disturb roots when checking near an established plant.
Repeat the check when conditions change, especially after a shift in sunlight, ventilation or plant size; greenhouse water use is not fixed from one week to the next. If you are considering the Limited Edition Aluminium Greenhouses, listed from 3.77 to 28.08 m², assess moisture at the intended planting positions rather than drawing conclusions from the floor area. A sunny edge, a shaded corner and a spot close to a vent may not dry at the same pace. Compare the growing medium with the reservoir reading in each position, and use what you find to adjust refilling rather than topping up every container on the same calendar.
Account for light, warmth and greenhouse layout
Glazing, shading, surrounding plants and ventilation can create different growing conditions across the floor. Warmth and bright light can increase water use, while a shaded position may dry more slowly; air movement and plant canopy also change as the season progresses. Do not place all containers according to the easiest empty-floor arrangement and assume they will behave alike. Keep vents accessible and observe how the chosen planting positions perform before grouping more pots there. This is especially useful where several crops share one greenhouse but have different water needs. As plants grow taller, check whether their foliage obscures a nearby fill tube or overflow.
For the T-Shaped Orangery Greenhouse, listed from 16.52 to 30 m², use the plan for your selected configuration to work out where separate container groups and a refill route will fit. If the layout has distinct areas, note which pots receive the most direct sun and which can be checked together without blocking a walkway. Group containers by growing conditions as well as crop needs, while keeping their individual fill points accessible. This lets you compare pots in similar positions without assuming that every reservoir needs topping up at the same time.

Before you fill 5
Keep filling and cleaning practical
Make access for cleaning part of the original arrangement. Fallen leaves and spilled compost can cover an outlet or make an indicator difficult to read; roots or debris may also need clearing from a reservoir, depending on the design. Check the manufacturer’s cleaning instructions and use only the maintenance method it recommends. Keep the filling point, overflow and any removable parts reachable without shifting several planted containers. If you cannot inspect below a canopy, a small leak or blocked outlet may stay unnoticed until water has spread across the paving. Leave enough room to remove and rinse parts as the instructions require.
The Limited-Edition Aluminium Greenhouses with Storage listing describes a built-in storage option and gives floor areas from 5.52 to 28.08 m². If you are comparing a model with storage, include the actual storage arrangement in your plan rather than counting the entire floor as open growing space. Check that watering gear can be collected and returned without blocking the approach to container fill tubes or an overflow. Storage may help keep tools together, but it does not by itself create a convenient water station; verify the chosen configuration and your refill route.
Trial the setup before adding more containers
Test the complete arrangement with one or two containers before relying on many. Fill them exactly as directed, watch the overflow on the first fill, and check the growing medium at the root zone as well as the reservoir level. Record when you top up, the level before and after, and any relevant change in weather or plant growth. This simple record can help distinguish a reservoir that is too small from a wick or mix that is not moving water as expected. Make one change at a time—position, medium or refill practice—so you can see what made a difference.
If you are planning container growing in a Pyramid Greenhouse, available in listed sizes from 5.53 to 18.9 m², use the trial to assess the actual positions you intend to fill with pots. Check access and drainage there, then observe the setup through both lower- and higher-demand periods before adding more containers. Do not leave a new arrangement unattended for an extended period until you know how quickly the reservoir level falls and where surplus water goes. Include carrying water to the fill point and checking the outlet in the trial, so it tests the everyday work as well as the planter itself.
Frequently asked questions
Do self-watering containers stop plants from drying out?
No. A reservoir can run empty, and a wick may not supply water as quickly as a vigorous plant uses it. The upper compost can also dry before roots have reached the moist layer. Check the growing medium as well as the reservoir level.
Can every greenhouse plant use a reservoir container?
Not necessarily. Plants differ in how much moisture they need, and some need the growing medium to dry more between waterings. Consider the crop and its stage, then group plants with similar needs so one reservoir setting does not dictate watering for every pot.
Should I water from above after planting?
Follow the planter’s instructions. New seeds and transplants may need moisture near the surface before their roots can reach water supplied from below, so filling the reservoir alone may not be enough at first.
How should I manage overflow on a paved floor?
Find the outlet and trace where water will go. Keep it clear, check that water will not pool on a walkway or at a threshold, and supervise a small initial fill. A tray can catch spills, but it needs to be visible and emptied.
Is a full reservoir a reliable guide to root moisture?
No. It shows that water remains in the reservoir, not that the compost around the roots is at the right moisture level. Check the growing medium at more than one depth where possible, and compare it with the reservoir reading.
A reliable setup depends on the fit between the crop, growing medium, reservoir and paved floor—not on reservoir size alone. Check that water can reach the roots, that you can refill and inspect the container, and that overflow will not pool where you walk. Trialling a small number of containers in their intended positions gives you practical evidence before you commit more greenhouse space.
