
How Much Space Should You Leave Around a Greenhouse?
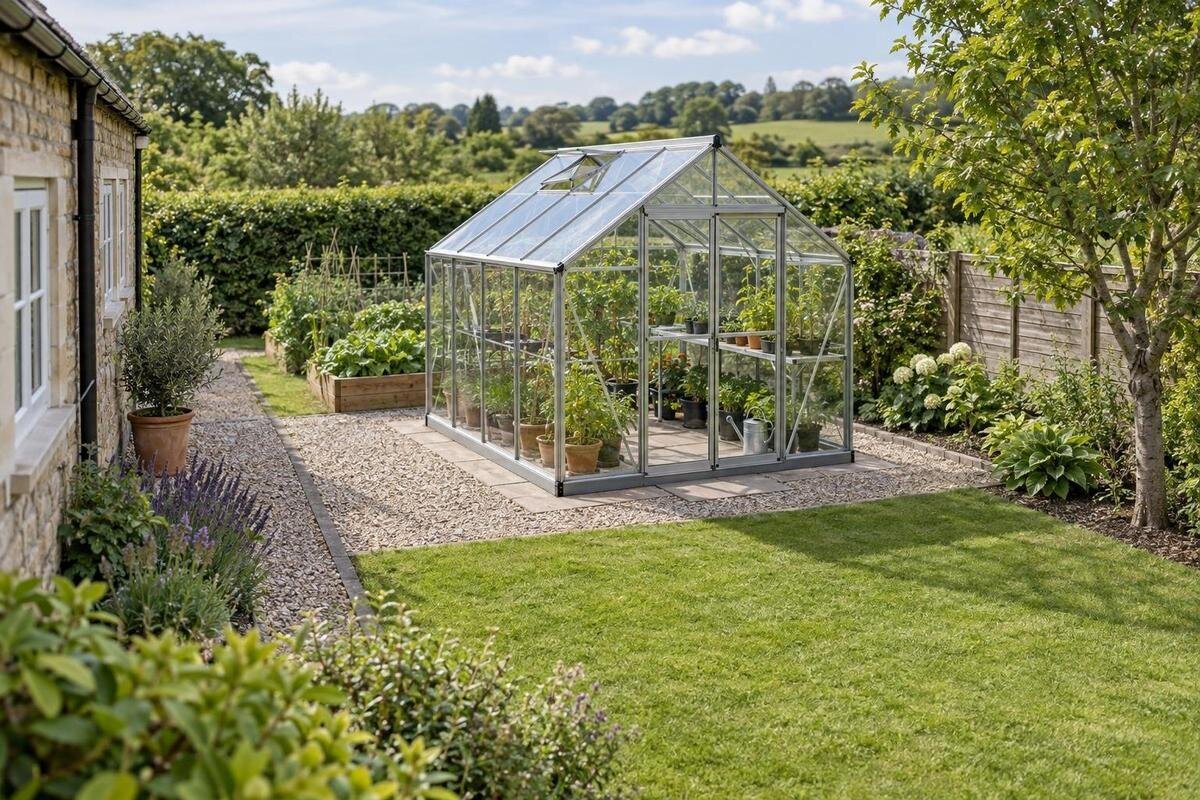
Greenhouse siting guide
A greenhouse needs room to be assembled, reached and maintained, but there is no universal strip of ground that suits every model and garden. The useful clearance is the space required for your actual jobs: carrying components in, opening doors, cleaning glazing and gutters, reaching repair points, and keeping paths and borders workable. A scaled sketch of the full footprint and these working routes gives a more reliable answer than the floor-area figure or a single rule of thumb.

Checks before choosing a site 1
Clearance depends on the task and the site
There is no single clearance that suits every greenhouse and every garden. A gap that lets an installer assemble the frame may be awkward for washing glazing or repairing a roof; a maintenance strip may still leave no route for carrying long components through the gate. The footprint, door and vent positions, roof projections, surrounding obstacles and the work you plan all change the answer. It is quite normal for the space needed at the entrance to differ from the space beside a wall or border. Treat perimeter space as part of the site layout, not as an arbitrary border added after choosing a position.
Keep this separate from the internal growing plan. Here, the perimeter means the ground beyond the greenhouse’s full outside outline, together with the routes that bring you to it. Write down assembly, glazing and gutter cleaning, repairs, mowing, hedge care and movement between beds. Decide which face each task uses and how often it needs doing. Some sides may only need occasional inspection; others may be on a route you use every day. Even so, a continuous route can matter when a task requires reaching the far end, and an open doorway does not automatically give you room to work alongside the structure.
Draw the outside footprint to scale
Begin with reliable site measurements rather than a guessed rectangle. At a convenient scale such as 1:50, where 1 cm on the page represents 50 cm on the ground, draw the boundaries and fixed features: house walls, fences, gates, trees, paths, steps, drains and raised beds. Mark changes in level or soft ground that affect where you can walk or stand. Add the exact outside plan dimensions of the greenhouse version you are considering, not only its advertised floor area. Include any base outline, roof projection or gutter shown on the dimensioned drawing; these may extend beyond the main plan. Label distances to nearby obstacles and the space between the site entrance and the proposed position.
Keep the sketch legible and use the same scale throughout. Add the door’s movement and any other opening parts once you have the model drawing, then mark the places where you expect to stand or pass. An arrow from the gate to the greenhouse shows whether a path turns sharply, narrows beside a border or crosses a step. The Bloomcabin Prestige Greenhouse range, for example, is listed from 3.77 to 28.08 m²; that range can help compare options but cannot replace the selected version’s outside dimensions. Write each clearance on the plan and allow for projections in the supplier’s drawing, rather than estimating by eye.
Checks before choosing a site 2
Plan access for assembly and materials
Installation clearance has a different job from the space kept for regular use. Components and tools have to travel from the access point to the site; turns through gates, around corners, across steps or past a narrow side passage can matter as much as the final position. Check the route width and height against the largest pieces, and make sure gates and side doors can open fully along it. Use the manufacturer’s stated assembly method and component dimensions where available. If an installer is involved, ask what access and temporary working area the chosen model needs; the finished greenhouse footprint alone does not show the room required to carry and assemble it.
On the sketch, draw the whole route and a temporary staging area where materials can be set down without blocking the way in or out. Consider whether that area uses ground needed for beds, a shed door, a household entrance or a shared passage, and whether the route will stay clear throughout the installation. If you are considering the Bloomcabin Orangerie Spacious Greenhouse, assess the delivery route and staging area alongside the proposed footprint. Keep temporary assembly space distinct from the paths you intend to retain afterwards: both need to work, but they may occupy different parts of the garden. Confirm the handling requirements for the selected version with the installer before ordering, rather than waiting until materials arrive.
Leave working room for cleaning and repairs
Cleaning and repairs need a place to stand and work, not merely a narrow way past. Think through how you will reach lower panels, corners, roof glazing and any gutters or seals that need attention. Use the manufacturer’s guidance to identify maintenance points, then check whether the person doing the work can reach them with the intended tools from a stable position. Do not plan to use glazing or the frame as a step. Where a task requires access equipment, the ground around the greenhouse needs to accommodate its proper set-up; ask a competent person how much working area that entails rather than assuming arm’s reach will be enough.
Draw a standing position along every exposed face, including at corners where a wall, hedge or fence may restrict movement. A side path can serve as both a route and a maintenance area, but only if stored pots, compost bags and plants will not take it over. Look at the ground surface too: a soft bed, loose stones or a slope may not provide a suitable place to stand or set equipment. When comparing options in the Classic greenhouse range, consider access to repair points as well as the surfaces you will clean regularly. Mark any area where an obstacle would prevent you from working beside the frame, and resolve that restriction before settling on a narrow side gap.

Checks before choosing a site 3
Allow for doors, vents and other openings
Opening parts need their own clear zone. If a door is hinged, draw its full swing; if it slides or folds, follow the movement shown in the exact model drawing. Allow room for a person to enter while carrying a tray or tool, not only for the door panel. Mark vents, roof vents or windows that open towards the perimeter, and keep fences, raised beds, stored items and branches outside their movement. Also account for the place where you stand to operate a vent or reach a handle. An opening needs both an unobstructed range of movement and a usable approach for the person operating it.
Do not confuse the door approach with a maintenance path. You may have space to enter but nowhere to clean the door track, reach a side vent or stand beside the frame. Check the plan for each opening and ask for a drawing if product images do not make the movement clear. The Bloomcabin Oasis Pyramid Greenhouse should be plotted from the exact selected version, with its doors and vents marked; the model name alone does not show where the openings sit or how they move. Allow for nearby planting to grow into the space, and keep seasonal containers or furniture out of the area needed to open the greenhouse.
Keep garden paths and borders accessible
Keep a continuous route for jobs elsewhere in the garden. Mark the way from the gate or house to the greenhouse, including turns needed to bring a wheelbarrow, mower or bulky container through. Measure the widest item you actually use and leave room for yourself alongside it; allow space to turn or park it at the destination rather than ending at a narrow dead end. If the route doubles as the greenhouse working strip, test both uses on the plan instead of counting the same strip twice. A route that is comfortable when empty may be awkward when you are carrying a load, so try it with the real equipment.
Nearby beds and borders also need to be tended. A bed placed close to the greenhouse may leave no comfortable place to weed, harvest or reach a hose, while a hedge may need access for trimming from the side you can actually reach. Keep planted areas outside the circulation route or choose an edge that will not quickly overgrow the path. When placing an option from the Limited Edition greenhouse range on your drawing, show the routes to the nearest beds as well as to the greenhouse doorway. Check where you would stand to tend each border and whether that would block the passage. This makes the shared use of a path clear before you commit to the layout.
Checks before choosing a site 4
Map obstacles and seasonal shade
Photograph the proposed site from the gate and from each corner, then add fixed obstacles to your plan. A photo can reveal a low branch, fence post, downpipe or change in ground level that is easy to miss while looking straight down at a sketch. Record existing tree canopies, hedges and outbuildings, and note which parts need regular attention. Include the route to each item you must maintain, not just its position; a hedge shown on the plan is not accessible if the greenhouse leaves no place to work on its garden side.
Check shadows at different times of day and through the seasons rather than relying on one bright afternoon. Note the date and time of site photographs and sketch where nearby trees, walls and buildings cast shade; this helps distinguish a brief shadow from a recurring one. Foliage can also encroach on a route as it grows, so consider the space needed to manage it. For the T-shaped orangery greenhouse range, mark every outside corner and recess on the selected model’s plan rather than treating the footprint as a plain rectangle. Compare that outline with the obstacles and shadows recorded on your site sketch. Keep shade observations separate from access measurements: a position that leaves a clear path may still have shade you need to assess.
Plan wall-side access for a lean-to
A lean-to can use a wall as one side, but the wall still forms part of the working perimeter. Check the exact relationship between the frame and existing windows, doors, vents, taps, meters, lights and drainpipes. Note any roof edge or gutter that needs access, and consider whether you can reach the wall for cleaning or repairs after installation. Do not assume a narrow space behind the frame is workable simply because it is out of sight. If the rear is inaccessible by design, make sure the end positions and the other sides allow the tasks that can be done from them.
Keep existing drainage points and routes visible on the sketch, and avoid a position that prevents access to something that must be inspected or maintained. For the aluminium lean-to greenhouse range, check the selected model’s drawings for its wall relationship, attachment and clearance requirements. Ask the supplier or a competent installer to confirm that it suits the wall and its projections. Include windows, downpipes and any roof overhang in the measured plan before settling on a position. Trace how you would reach each existing wall feature after installation, particularly where access would be from an end rather than directly in front. This makes any conflict between greenhouse access and household maintenance easier to identify.

Checks before choosing a site 5
Compare exact dimensions as well as floor area
Product listings may give floor area or a range of areas, while perimeter planning needs the selected version’s external dimensions. Two greenhouses with similar floor areas can have different outlines, entrances or projections; a built-in feature can also affect where people move around the structure. Check overall width and length, the shape, base, eaves, gutters and door location in the dimensioned drawing. Ask for a plan if any of these are missing. Do not convert square metres into a clearance width or use a product-family name as a substitute for measurements. An image can help you recognise a model, but a photograph cannot confirm its full outline.
For the Limited-Edition aluminium greenhouses with storage, check where the storage area falls in the exact plan and how you would reach it, rather than assuming its position. Include its access point when comparing the complete outline and opening positions of each candidate against the same scaled sketch. Record the external dimensions for the exact option, including any projections shown, so comparisons are like for like. Keep the advertised growing area in a separate note from these site measurements. This helps prevent a larger or smaller growing area from being mistaken for a better fit beside a path or border, and lets you compare storage access without losing sight of the working perimeter.
Test the perimeter on the ground
Before making the final choice, set out the footprint with string, chalk or a garden hose, using the exact outside dimensions from the plan. Mark intended work strips and routes as well as the greenhouse itself. Walk the route with the wheelbarrow or another bulky item you use; stand where you would clean the sides; check the door movement and whether you can reach both ends without crossing a bed. Use markers for nearby obstacles and take photographs from the gate and proposed entrances. This quick trial often catches a route that looked clear on paper.
Use the trial to identify conflicts early: a gate too narrow for components, an opening obstructed by a fence, a downpipe left inaccessible behind a lean-to or a path narrowed by a bed. If the layout does not work, shift the position, alter the route or compare a different footprint before ordering. Confirm model-specific assembly and maintenance clearances in the supplier’s documents, and check any applicable site or boundary requirements with the relevant party. The final plan should provide a practical route for the planned jobs, without leaving a strip too narrow to maintain or a side that can never be reached.
Frequently asked questions
Is there a standard gap to leave around a greenhouse?
No single gap suits every model and site. The space you need depends on the exact greenhouse, how it is assembled and what you must reach for cleaning, repairs and garden work. Check the selected model’s instructions for any specific installation clearance, then draw the footprint and the routes you need around it. These are separate from any fixed distance that may apply to a particular site.
Do I need the same clearance on every side?
Not necessarily. A side beside a wall may need different access from the side used to reach a garden bed or carry a wheelbarrow. Measure and label each side separately, but consider how you will reach the far end and work around corners. A route can serve more than one purpose if both jobs still fit.
How much room should I allow for cleaning?
Plan a place to stand beside each area you need to clean, with room for the tools you will use. Check gutters, roof glazing and other higher points against the manufacturer’s maintenance guidance. If access equipment is needed, allow for its proper set-up and ask a competent person about the working area required. Do not plan to stand on the frame or glazing.
Can I put a greenhouse close to a wall or fence?
Only if the chosen position still allows for installation, access to openings and the maintenance you need to do. Check for windows, drainpipes, roof edges, fence posts and any boundary or surface that needs attention. For a lean-to, use the model’s drawings and ask the supplier or a competent installer to confirm the wall relationship. Check any site-specific boundary conditions with the relevant party.
Can a product’s floor area tell me the outside dimensions?
No. Floor area does not show the full outline, maximum width or length, door movement, roof projections or the position of features such as storage. Find the dimensioned plan for the exact version you are considering, and include any projections shown. If a measurement is missing, ask the supplier for it before planning the perimeter.
A useful perimeter is a planned working area, not leftover ground. When the exact outline, access routes and changing garden obstacles are all on the same sketch, you can see whether assembly, cleaning and routine maintenance are possible before committing to a position. Make the final allowance from those tasks and the selected greenhouse’s dimensions; leave each side enough to do its particular job, without assuming every side needs an identical strip.
