
Starting and Maintaining No-Dig Greenhouse Beds
Greenhouse growing guide
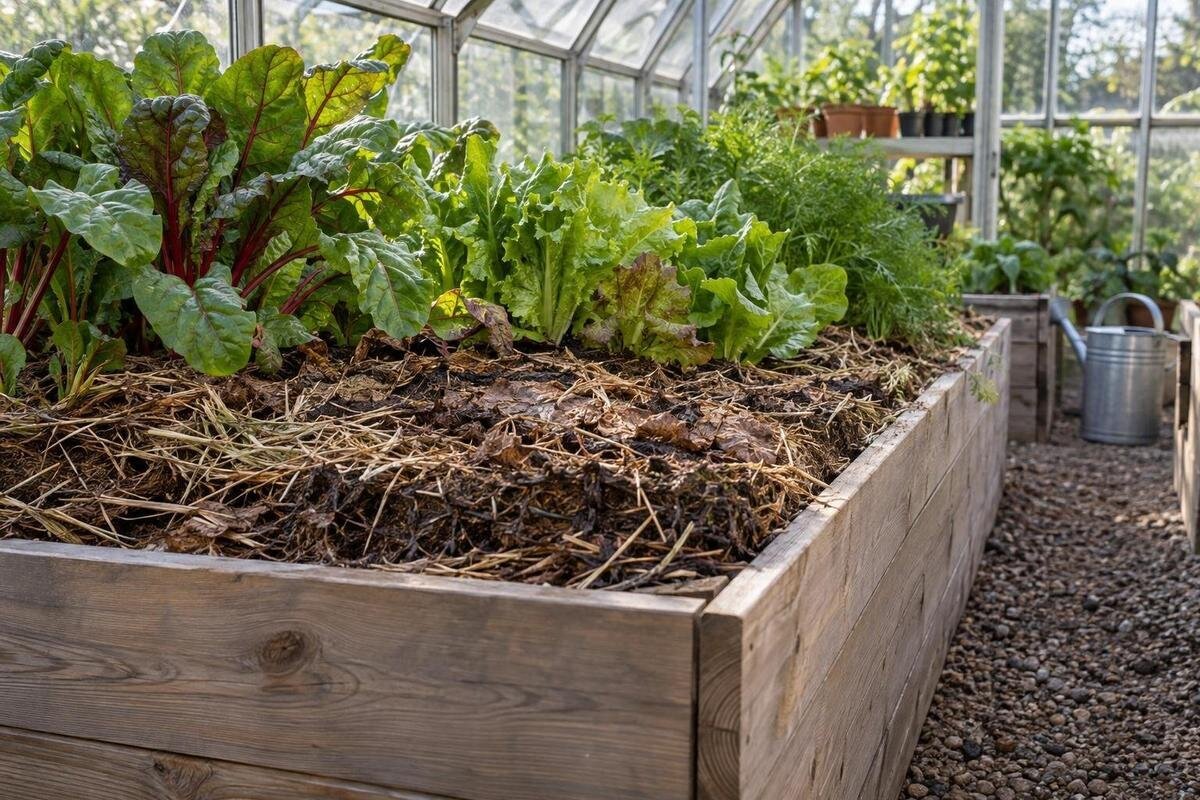
A no-dig greenhouse bed is a permanent growing area where you avoid routine turning and add suitable organic matter at the surface. This can limit disturbance, but it is not a shortcut around poor drainage, compacted ground or unsuitable materials. A reliable setup has a few clear stages: decide where beds and paths will stay, check the soil already there, then add only what the bed and crops need. Under cover, you need to manage watering and ongoing fertility, with particular attention to moisture because rain normally cannot reach the beds.

01
What no-dig means in a greenhouse
Here, no-dig means keeping a bed in one place and avoiding routine turning, trenching or mixing each new surface layer through the soil. Suitable organic matter is added at the surface; roots and soil organisms work through it over time. The aim is to maintain a usable structure and replenish organic matter without repeatedly inverting the whole bed. It is not a recipe for building a tall stack of unrelated ingredients, and it does not mean never touching the soil. You can still make planting holes, remove weeds and tackle a specific problem. The distinction is between limited, purposeful work and turning every bed as a routine task. A permanent layout also makes it easier to keep feet on paths and record what has been added.
A greenhouse roof changes how the bed receives water: rainfall normally cannot replenish soil moisture, so you manage watering and additions yourself. No-dig is most straightforward where the existing ground is suitable and drains adequately; surface compost will not correct prolonged waterlogging, severe compaction or contamination. A bed built over concrete or paving is a different growing system, because it relies on a contained medium and a suitable drainage arrangement rather than soil connected to the ground. Since the bed is intended to stay put, settle the greenhouse layout first. When considering the Bloomcabin Prestige Greenhouse, use the internal measurements of your chosen version to draw the beds and access routes before committing to their positions.
Planning permanent beds and paths
Start with accurate internal measurements of the chosen greenhouse, not its advertised floor area alone. Draw the door opening, ventilation panels, fixed storage, shelving, supports and any work surface; then mark the bed and path lines. Leave a route for carrying compost and watering each bed. Set bed width by reach: from a path, you should be able to tend the centre without stepping on growing soil. Beds accessible from both sides can be wider than those against a wall, but there is no universal width. Consider where you will stand, kneel or use tools, and leave room to maintain glazing and open doors or vents.
A path needs to remain continuous from the entrance to the beds and wide enough for your tools and normal movements. Check that an open door or stored item will not narrow the route. If built-in storage is part of the plan, include both its footprint and the space needed to access it. When considering Limited-Edition Aluminium Greenhouses with Storage, check these details for the exact version you intend to buy. Do not count storage or path area as planting space. A scale sketch helps identify awkward corners before soil is covered and shows whether a permanent bed will be hard to reach once plants mature.
02
Assessing the existing soil
Assess what is already under the greenhouse before adding compost. At several points in the proposed bed, inspect the surface and make a small hand-trowel opening to check texture, roots, rubble and signs of compaction. Note where water pools after watering or where soil stays unusually wet; a single dry-day inspection is not enough to judge drainage. Record previous crops and any persistent poor growth. A pale leaf or weak plant does not, by itself, identify a nutrient deficiency: moisture problems, root damage and other conditions can produce similar symptoms. Keep observations about the bed separate from assumptions about it.
For a clearer baseline, use a suitable soil test for pH and nutrients before making corrective additions. Sample growing soil rather than paths, take several small samples from the bed area, and follow the testing service’s directions on depth and mixing. If previous crop problems were severe or persistent, seek advice specific to the crop and symptoms rather than covering them with compost. A no-dig layer cannot correct a problem beneath it. If you are considering a model from the Lean-to Greenhouses range, check the soil along the exact strip you expect to plant, not just near the entrance, before fixing the bed’s position.
Removing weeds and correcting compaction
Clear the bed before its first top-dressing. Remove perennial weeds and their roots or rhizomes rather than simply covering them with compost; stubborn growth can return through a surface layer. Cut annual weeds before they set seed, and remove stones or rubbish that will obstruct planting. A temporary cover of plain, uncoated cardboard can block light over short vegetation or turf, but it is optional, not part of every no-dig bed. Remove tape and labels, and do not rely on cardboard to eliminate persistent weeds. A thoroughly cleared bed is easier to monitor than one where unwanted growth has been hidden.
Do not work wet soil: it can smear and compact under pressure. No-dig does not mean you must leave a serious compaction problem untouched. If a small area needs loosening, do it only when the ground is workable and lift with a fork without turning the soil over; then keep traffic off that section. Persistent standing water or broad compaction calls for investigating the cause, not adding a thicker layer to hide it. Confirm the final bed position before preparation: the Aluminium Classic Greenhouse is listed in sizes from 3.77 to 28.08 m², so use the footprint of the chosen version, rather than the range as a whole, to guide your plan.

03
Choosing suitable surface additions
Choose a surface addition by its source, maturity and intended use, rather than by the word “compost” on its own. Materials vary in texture and nutrient content, so check the ingredients and any analysis or application guidance supplied. Use a finished, stable material suitable for the type of bed and crops you are growing; do not treat fresh manure, unfinished compost or an unknown bulk load as a ready-made top-dressing. If the supplier cannot explain what the material contains or what it is intended for, do not assume it is suitable. That check matters particularly in a covered space, where you control most water and nutrient inputs.
Spread an even layer over the soil surface and leave it there rather than digging it through. Base the amount on the bed’s condition, the crop plan and the material’s guidance; repeated thick additions can raise soil levels and add more nutrients than the plants need. If a soil test shows a pH or nutrient issue, use its results and crop-specific advice to decide on a correction rather than adding general amendments by habit. Keep notes of the product, date and approximate volume, including which bed received it. This gives you a record of each surface addition and helps you judge later applications from the bed’s history rather than memory.
Calculating the bed’s material volume
Calculate the volume for each bed, not for the whole greenhouse floor. Measure the bed’s length and width, then multiply these by the planned layer thickness, keeping the units consistent. For example, a hypothetical bed 4 m long and 0.9 m wide with a 3 cm layer has a geometric volume of 4 × 0.9 × 0.03 = 0.108 m³, or 108 litres. That example illustrates the arithmetic only; it is not a recommended depth. Select an application amount using the material’s guidance, soil condition and crop-specific horticultural advice. For an uneven bed, estimate separate sections rather than applying one figure across the entire floor.
Add the volumes for individual beds, but leave paths, storage and other non-growing areas out of the calculation. Even where a greenhouse listing gives an area—for example, options from 47 to 70 m² for the Spacious Greenhouse—that figure does not tell you how much bed surface you will have once space for access routes is deducted. If a supplier sells material by weight, do not convert volume to weight without a reliable basis; material density varies. Use the supplier’s stated coverage or application guidance, and keep the calculation so you can compare the planned amount with what you actually spread.
04
Keeping paths separate from growing soil
Once the beds are established, treat the paths as permanent access areas and keep foot traffic out of the growing soil. Walking on beds, especially when they are wet, can compact the surface and make later planting more difficult. Keep bed edges visible and clear weeds from paths before they seed. Choose a path surface that suits the space and remains practical to walk on; avoid letting material from the path become an unplanned addition to the bed. If a bed needs attention, reach it from the path or work across it from both sides rather than stepping in to save a few minutes.
Keep the route usable as crops grow, and consider how you will carry tools or compost to the far end of each bed. A shaped footprint needs particular care at the drawing stage. When planning beds for the T-Shaped Orangery Greenhouse, mark how paths will connect to every growing area in the selected version. Check that you can reach the ends and corners of each bed from those paths, with room to turn while carrying tools. Revisit the plan before planting tall or spreading crops, as their mature growth can narrow a route that looked generous when the bed was empty.
Planting and feeding according to the crop
Planting does not require mixing the whole bed. For transplants, make a hole only as large as needed, set the plant at the depth recommended for that crop, and firm the soil gently around it. For direct sowing, seeds need good contact with a suitable, reasonably fine surface. If the compost top-dressing is coarse, prepare a narrow seed row with an appropriate fine material rather than incorporating it through the entire bed. Water newly planted areas as needed to settle the soil, while avoiding a saturated surface. Plan supports and access for tall or spreading plants before they occupy a path or shade neighbouring crops.
A permanent bed need not carry the same crop in the same place every season. Keep a simple record of crop families and planting positions, and move crops where practical; this gives you a better basis for planning future additions and noticing recurring problems. Nutrient needs also differ, so use crop-specific advice and soil-test results when deciding whether a bed needs anything beyond its surface material. If you are considering the Pyramid Greenhouse, draw the planting rows and support positions on the exact layout of your chosen version. Check how you will reach the plants for sowing, transplanting and tending without standing on the growing soil.

05
Watering under greenhouse cover
A roof normally keeps rain off greenhouse beds, so outdoor rainfall is not a reliable watering measure. Check moisture in the root zone at several points rather than judging by a dry-looking surface or by one spot near a water outlet. The right frequency varies with the crop, weather inside the greenhouse, soil and stage of growth; a fixed weekly schedule can leave some areas too wet and others too dry. Direct water to the soil where practical, and check that it has reached the intended area without leaving the bed saturated. Adjust your approach when conditions or planting change.
A surface layer can make the top of a bed look moist while the soil beneath it dries, or hide a wet patch after watering. Lift it in a few places and check the soil below before deciding what to do next. Plan a manageable route for a watering can or hose, and avoid leaving equipment where it blocks a path. When comparing greenhouse options, including the Limited Edition Aluminium Greenhouse, use the exact chosen layout to trace your route from the water source to each bed. Check that you can water the far ends as well as the areas nearest the entrance without stepping into the beds.
Maintaining a no-dig bed over time
Review the bed between crops and at the end of the growing season. Note whether the surface has settled, whether water behaves differently, and whether the soil remains easy to plant into. Remove weeds while they are small and clear crop remains that could carry a recurring problem. Record what you added, roughly how much, and where each crop grew. Those notes help distinguish a genuine decline in the bed from a one-season issue with watering, planting time or crop choice. Do not add a fresh layer automatically just because another year has passed; check the bed and the material guidance first.
If plants repeatedly struggle, investigate before replacing soil or adding several amendments at once. Check watering, roots, pests and crop history, and use an appropriate soil test when nutrients or pH may be involved. A visible symptom is a reason to look for causes, not proof of one particular deficiency. Where a serious disease or contamination concern is suspected, get advice suited to the crop and situation before reusing affected material. No-dig works best as a steady routine of observation, limited disturbance and measured surface additions—not as a rule that prevents you from responding to a real problem.
Frequently asked questions
Can I start a no-dig bed directly on greenhouse soil?
Yes, if the underlying soil is suitable and drains adequately. Clear weeds, check for compaction and assess the bed before adding a measured surface layer. If the floor is concrete or paving, you are setting up a contained growing system rather than an in-ground bed, so plan its medium and drainage separately.
Do greenhouse beds need watering when it rains outside?
Usually, yes: a greenhouse roof keeps most rainfall off the beds. Check moisture in the soil around the plants’ roots rather than judging by the weather outside or the surface alone. How often you water depends on the crop, conditions and soil, so avoid relying on a fixed calendar.
How much compost should I add at the start?
There is no single depth that suits every bed. Base the amount on the existing soil, the crops you plan to grow and the compost’s stated use or application guidance. Measure the bed so you can estimate the volume, and avoid adding more simply because a larger layer looks like a more thorough start.
Do I need to put cardboard under every no-dig bed?
No. A temporary layer of plain, uncoated cardboard can block light over short vegetation, but a cleared bed does not need it. Remove tape and labels, and do not rely on cardboard to suppress persistent weeds or use it as a permanent barrier beneath the growing area.
Should I replace greenhouse soil every year?
Not as a routine rule. Check the soil’s structure, moisture behaviour and test results, and add suitable material when the bed needs it. If plants perform poorly, investigate possible causes such as watering, pests or nutrient imbalance before deciding that the soil needs replacing.
A lasting no-dig bed begins with a well-planned layout and a realistic view of the soil beneath it. Keep paths clear, use suitable surface additions in measured amounts and check moisture directly rather than relying on outdoor rain. With crop and amendment records to guide each review, you can maintain the bed without turning it over or replacing its soil as a routine annual task.
