
Work Out How Many Tomato Plants Fit Your Greenhouse
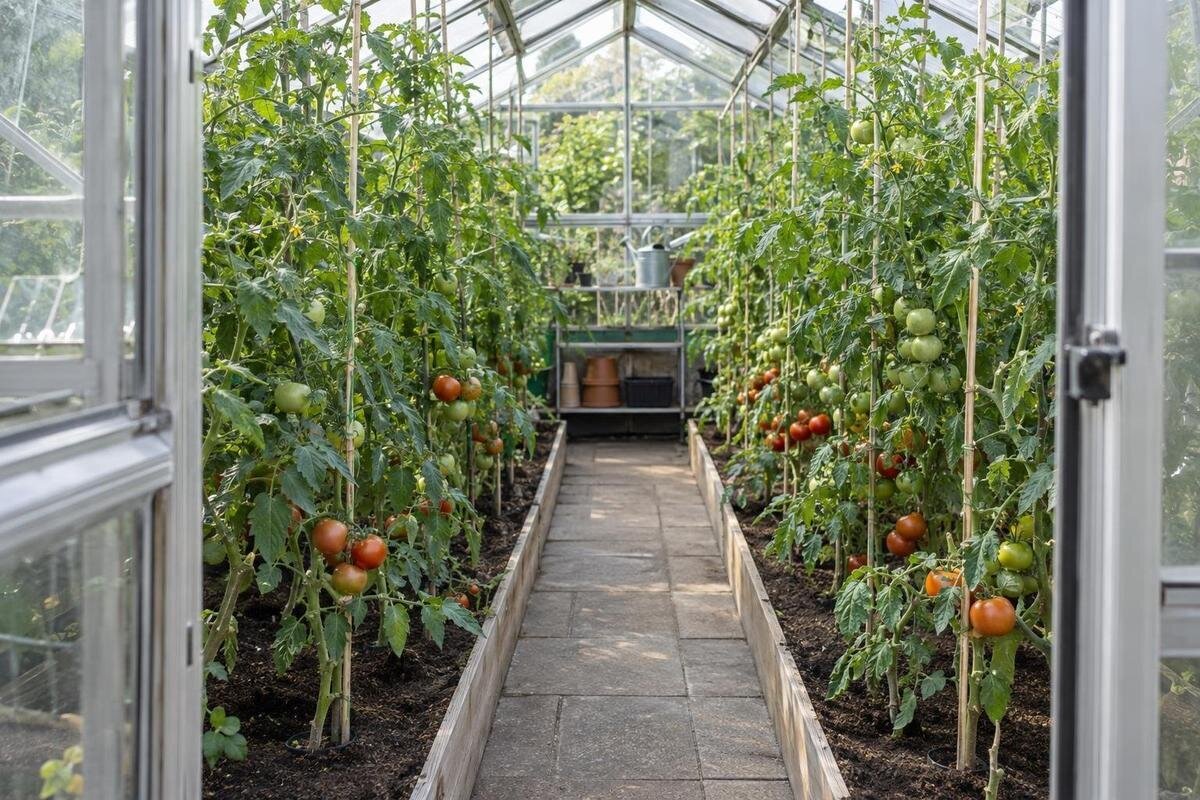
Tomato growing
To estimate how many tomato plants fit in a greenhouse, plan the planting rows inside its usable internal dimensions. The headline floor area is only a starting point: bed width, a working path, the door and end space, plant habit and room to tend vines all affect the count. The method below turns your measurements and spacing assumptions into a practical number, with an illustrative layout you can adapt.

01
Calculate capacity from planting rows
A greenhouse does not have a fixed tomato capacity based on floor area alone. Two structures with the same number of square metres can differ in internal width, doorway position, shape and fixed fittings; a row of single-stem cordons also uses space differently from bushier plants. A useful figure is the number of planting positions you can place in workable rows, not an area divided by a generic number. Write the cultivar or plant type, training method, plant spacing, bed width and path width beside the estimate. If one assumption changes, you can update the affected row rather than starting over. The aim is to fit plants you can reach for tending and picking, not the highest possible number of stems on paper.
The calculation has four parts: measure the usable interior, allocate the width to beds and access, count positions along every row, then add them. After that, test the plan against watering, tying in, pruning and picking. A mathematical position is not automatically practical if it falls in a doorway, behind fixed shelving or beyond an easy reach from the path. Keep a realistic working count and, if useful, a denser upper estimate under a clearly stated training plan. The upper figure is a comparison, not a promise of easy management or a particular harvest. Separating the maximum number of planting holes from the number you are comfortable caring for makes the estimate more useful.
Measure the usable space inside
Measure from the inside, not the external footprint or a headline area. Record the clear length and width at floor level, then note frames, posts and fixed fittings that reduce bed or path space. In a narrow or irregular greenhouse, take more than one width measurement: a doorway can interrupt a row, and available space may change along the length. The Aluminium Greenhouses range is listed from 3.77 m² to 28.08 m², but an area figure alone does not show the internal row length and width of the size you are considering. Use the Aluminium Greenhouses page to identify a model, then confirm the exact dimensions you need for your plan. Keep all measurements in metres before calculating so you do not mix units.
Draw a simple plan to scale, even if it is only a rectangle on squared paper. Mark the door opening, the route from it and anything that will stay in place, such as staging, a shelf, a water butt or storage. Measure the space left for beds after those items are shown; do not allocate the same strip to both a plant row and an access route. Note headroom as well as floor area: a low sloping edge may be awkward for a tall vine although it appears on the floor plan. If a drawing gives only outside dimensions, ask for internal measurements rather than subtracting an assumed frame thickness. Measuring each end of a wall can also reveal a taper you might miss from a single width.
02
Fit beds and a working path across the width
Across the width, decide whether you need one bed or two and where the path will run. In a narrow plan, one bed along a side with a route beside it may be more workable than squeezing in two rows. A wider greenhouse may take beds on both sides of a central path, but each bed must be narrow enough for you to reach its wall-side plants from the path. Mark the path before counting plants: it needs to connect the door to the growing area and let you reach the bed edges. A generous-looking bed can leave too little clear floor once the route is drawn, so make that trade-off visible on paper. Separate growing space from access before working out a total.
Allow a path width that suits how you actually work rather than assuming there is one standard aisle. Picture carrying the watering can or harvest basket, turning at the end and tying in a plant without pushing a neighbouring vine. A lean-to plan may have a different balance of wall-side space and access from a freestanding layout, so draw the real wall lines and door position before deciding where plants go. Compare your measured layout with a specific Lean-to Greenhouses option, but use exact internal dimensions and access points; the product type alone cannot establish how many rows fit. In a short house, leave turning room at the end as well as a clear strip down the middle. If you use a trolley or other equipment, include its actual width in the sketch.
Calculate positions along each row
The row calculation is simpler than the whole-room calculation. Let L be the usable length of one planting row, e the margin you reserve at each end, and s the distance between plant centres. The count is floor((L − 2e) ÷ s) + 1; floor means round down. Subtracting both end margins gives the span available for gaps between plant centres, and the final +1 counts the first position as well as the gaps. If a post, door or bed edge shortens one part, use the shorter continuous length, not the greenhouse’s full internal length. Count separate row sections independently if an obstruction breaks the bed. Check that enough span remains for one position after end margins are allowed.
For an illustrative row 3.0 m long, reserve 0.25 m at each end and allow 0.50 m between plant centres. That leaves 2.50 m between the first and last possible centres: five intervals fit, giving six positions in the row. The example numbers are illustrative, not product dimensions; use your own bed length and chosen spacing. When considering a Bloomcabin Prestige Greenhouse, use the internal measurements of your chosen size to establish each bed’s usable length before applying the calculation. If two rows have different usable lengths because a door or shelf limits one, count each separately and add the results. Do not round up to a seventh position: another interval would exceed the span allowed by these assumptions.

03
Match spacing to the tomato type and training method
Spacing down a row depends on what you are growing and how you plan to train it. A tall cordon tomato kept to one main stem can often be placed closer than a bush type allowed to spread, but cultivar instructions take precedence. For a first sketch, many gardeners allow about 45–60 cm between single-stem cordons and around 60–90 cm for bushier plants; treat these as planning ranges, not rules for every variety. Check the seed packet or plant label, and allow more room for a vigorous variety or one you intend to train on more than one stem. These figures are centre-to-centre distances, not bed widths. On a short row, even a small change can add or remove a whole position.
Use one spacing assumption for a row only when the plants have similar habits. If varieties are mixed, mark the plants needing most room first and count the spaces left; do not squeeze an extra plant into a gap just because the row divides neatly on paper. Keep plant-to-plant spacing separate from the distance between rows. Two lines of stems may be well spaced along their own beds while neighbouring foliage and hands still have too little room between them. If you have not chosen varieties yet, calculate with the wider allowance and treat closer spacing as an option to review later. That gives you an estimate you can revise when plant labels are known, rather than an optimistic figure based on an unknown cultivar.
Allow for mature vines and routine care
The planting line marks the stem, not the full footprint of a mature tomato. Leaves and side shoots extend beyond it, and a plant trained with several stems takes more width than a single-stem cordon. Sketch a loose canopy zone around each position, using the cultivar’s expected habit as a guide. If neighbouring zones overlap heavily, increase spacing or remove positions instead of relying on constant pruning to make the drawing work. Keep clearance on the wall side as well as the path side; an edge row still needs to be reached and inspected. This is a practical visual check, not a precise prediction of how large every vine will become. Include the support line in the sketch if it affects access.
Think through the jobs you will do in the space: carrying water, tying in stems, removing side shoots where appropriate, checking plants and picking fruit. Each row needs an access route that lets you reach the plants without stepping into a bed or pushing through another vine. If fixed storage forms part of the layout, show its boundary before setting bed positions. For the Limited-Edition Aluminium Greenhouse with Built-In Storage, use the exact plan and measurements rather than assuming the named model’s full floor area is available for tomato rows. Storage can change where a bed and path fit; it is one of the obstructions to include in the drawing. A route that works for watering may still need room for tying or carrying a basket, so test more than one routine task.
04
Worked example: two rows in a 2.4 m by 3 m plan
Here is a worked plan using illustrative dimensions only; they are not available product sizes. Imagine a clear internal width of 2.40 m and a length of 3.00 m. Across the width, leave 0.20 m beside each wall, make two beds 0.65 m wide and allow a 0.70 m central path: 0.20 + 0.65 + 0.70 + 0.65 + 0.20 = 2.40 m. Put one row down the centre of each bed. This arrangement is an arithmetic example, not a recommendation for every gardener; change bed or path widths if they do not suit your access, planting method or measured space.
On each 3.00 m row, leave 0.25 m at both ends and use 0.50 m between plant centres. Six positions fit in each row, so the plan holds 12 plants under those assumptions. Twelve is a layout result, not a universal density or a promise of crop yield. A wider path, larger end allowance, bushier cultivar or one-bed layout reduces it; a different training method may also change the spacing. These measurements do not describe a Bloomcabin product. For the Limited Edition Aluminium Greenhouses range, replace every sample measurement with confirmed inside dimensions of the exact size you are considering, then recalculate. This keeps an illustrative count separate from a model-specific estimate.
Adjust the count for an irregular floor plan
When the floor plan is not a plain rectangle, count continuous bed runs rather than multiplying total width by total length. In a T-shaped layout, one arm might take two beds while another allows one; a path junction or doorway may break a row into separate lengths. Mark each usable segment and calculate it separately, so you do not count plants in an area without workable access. When considering the T-Shaped Orangery Greenhouse, use its exact internal plan to identify those separate bed runs and the routes between them. If a route crosses the centre of the greenhouse, keep the crossing clear instead of treating it as extra bed space.
The same method works for angled walls, an alcove or a bed that stops short of the door. Count a position only if the plant can stand there without obstructing the route and can be reached for routine care. If a path branches, check that the branch stays usable at the junction; if it ends at a wall, leave room to turn or work at the last plant. Where the roof slopes down, check that the planned vine height and support position suit the available headroom. Do not assume every part of an unusual floor outline is equally useful for tomatoes. Irregular floor plans need more careful drawing, not a different plant-count formula.

05
How containers and benches change the layout
Pots, grow bags and raised beds change what controls the count, but they do not remove spacing needs. For containers, mark each pot or bag position using its actual footprint, then add room for the plant’s canopy, watering and any handling you expect to do. Do not estimate by container diameter alone: leaves, support and space to get hands around the plant matter too. A staging bench or shelf uses floor area for one purpose and should not be counted again as a floor-level tomato row. Raised beds make row lengths clear, but their edges and the path around them still occupy width. If containers are movable, decide whether you will actually move them during the season before treating the floor around them as free.
Use a row calculation for fixed beds and a position-by-position sketch for containers, then compare both plans using the same internal dimensions. A container layout is not automatically denser, especially if every pot needs individual access. The Spacious Greenhouse range is listed from 47 to 70 m², but that area range does not establish how many tomatoes will fit: beds, paths, fittings and plant spacing still determine the number. Do not scale the 12-plant example directly by floor area; a longer, narrower footprint or a different route can change how many continuous rows fit. Count the planting positions the layout genuinely supports, rather than assuming that plant capacity increases in proportion to floor area.
Check the estimate against the exact greenhouse plan
Before settling on a number, compare your drawing with the internal measurements for the exact model and size. Check the details that could invalidate a counted position: a door interrupting the bed, a post narrowing the path, or fixed benches and storage occupying part of a row. Check that the proposed bed width continues along the whole row, too. For a Pyramid Greenhouse, compare the planned rows and supports with both the clear floor space and the available headroom. If a dimensioned drawing is unavailable, ask for the measurements you need instead of estimating frame allowances.
Write the assumptions beside the total: row lengths, end margins, centre-to-centre spacing, bed arrangement and path width. If you are choosing between two layouts, count both rather than relying on floor area; then compare how many plants remain when you increase spacing for a bushier cultivar or a more comfortable route. Use the lower, realistic number for planning a seed or plant order, and keep a denser version only if you are content with its tighter clearances. Recheck the plan after adding actual pots, supports or fixed fittings, since each can remove a usable position. It can also help to ask whether the full count is manageable during the jobs you do most often.
Frequently asked questions
Can I calculate the number from square metres alone?
Not reliably. Square metres include both growing and non-growing space, and do not show how many continuous rows fit. Draw the beds and a working path using the internal dimensions, then count positions along each row. Floor area can help compare options, but it cannot replace a layout.
What spacing should I use for cordon tomatoes?
For an initial plan, about 45–60 cm between single-stem cordons is a useful starting range; bushier plants may need around 60–90 cm. These are planning figures, not rules for every variety. Follow the plant label and allow more room if you intend to train extra stems.
How wide should the greenhouse path be?
There is no single width that suits every greenhouse and gardener. Allow for the route you need, including carrying water or a basket and reaching both sides of the bed. Test the path on your plan before adding another row; a count that blocks routine access is too high.
Will single-stem training let me fit more plants?
It can allow closer spacing along a row than bushier or multi-stem plants, so more positions may fit. It does not automatically create room across the bed or path, and mature foliage still needs space. Recheck both the row count and the clearance between plants.
How do I count plants in an irregular greenhouse?
Split the plan into continuous, reachable bed runs. Measure each run separately, allow for end margins, calculate the positions and add only the rows with workable access. Do not count a corner or narrow section simply because it contributes to the total floor area.
The practical capacity of a greenhouse is the number of tomato plants that fit into measured rows and remain reachable as they grow. Count positions with the cultivar and training method in mind, then check the path, end margins and fixed fittings against the jobs you will do. The illustrative plan shows how stated measurements produce a clear total; your own count comes from the internal dimensions and choices that suit your growing routine.
