
How to Find the Source of Greenhouse Condensation Drips
Greenhouse troubleshooting
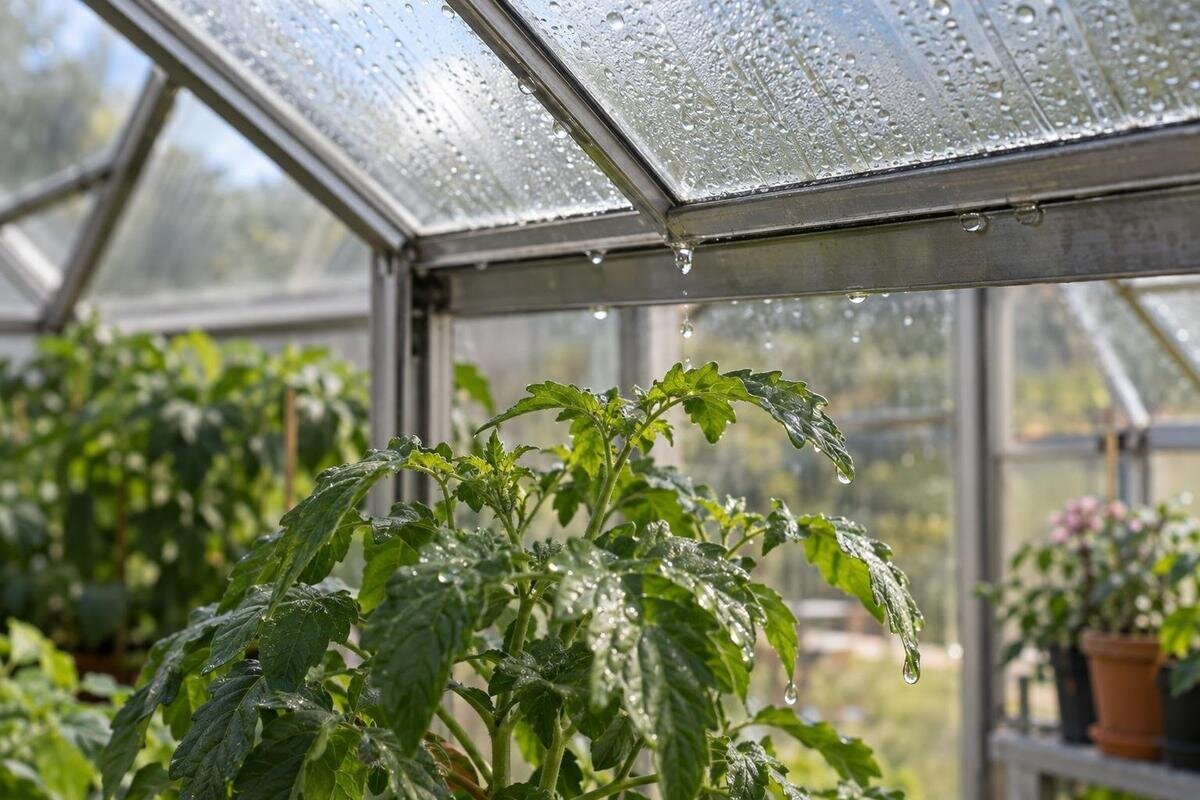
Wet leaves at daybreak can look as though water fell from the pane directly overhead, but a nearby wet spot is not proof of its source. Moisture may have condensed on glazing or a frame, then followed a rail before dropping; it may also have formed directly on a leaf. A leak or irrigation splash can leave a similar mark. A short run of timed photographs, a sketch of drip locations and overnight temperature and relative-humidity records can help separate these possibilities. The aim is to trace the first wet surface, not to change ventilation or watering at random.

First establish whether the water is condensation
Condensation forms when moisture in the air meets a surface cool enough for water vapour to turn to liquid. The surface may be the inside of roof glazing, a frame member or a leaf; these do not all cool at the same rate. If drops appear on several surfaces after the greenhouse cools overnight, condensation is plausible. It is not the only explanation: rain can enter at a joint, a watering can or hose can splash foliage, and droplets at leaf edges can have a plant-related source. A wet leaf by itself is not evidence that the roof above it is dripping. Treat each clue as a lead, not a diagnosis.
Use timing and extent to sort the possibilities. Note whether the pane or frame is wet before the first leaves are, whether drops appear during or after rain, and whether affected plants were watered or sprayed recently. A leak may follow rainfall and trace back to a seam; splashes tend to be local to the route of watering, although water can travel before settling. Compare the inside and outside faces where they are safely visible from the ground. Do not dismantle glazing to investigate. If two causes could overlap, keep both on the record instead of forcing one explanation.
Photograph the drip pattern before it changes
Before wiping, pruning or moving pots, take a wide photograph showing the crop rows and the roof area above them, then closer views of wet leaves and any visible drops on glazing, rails or vents. Use the same standing points and time-stamp each image so you can compare mornings fairly. Include enough of the frame to recognise the panel or crossbar; a close-up of one leaf alone loses the route back to the roof. Avoid flash glare if it hides small drops, and do not reach over plants or climb for a better angle. A safe ground-level view is more useful than a risky close-up.
On a simple plan, mark each wet patch, when it first appeared, and whether it is a single drop, a trail or a broader film. Label roof bays, crossbars, joints, vents, doors, benches and watering lines; a hand-drawn grid is enough. Note whether the interior pane, frame and foliage are wet at the same time, and whether it rained overnight. Take the first set before sunlight or handling changes the pattern, then repeat at roughly the same time on several mornings. Consistent points are easier to connect to a surface or seam than one dramatic photograph.
Trace the water back along the roof and frame
Start at the affected leaf and look vertically upwards, but do not stop at the glazing directly above it. Water can collect on a sloping pane, run along an edge or frame, then fall from a crossbar several centimetres away. A drop may also be deflected by a plant label, support, tie or another leaf. Follow each visible trail backwards until you reach the highest wet point you can see, and note where the trail changes direction. One wet rail might serve several drops, while one crop area can receive water from more than one route. If there is no wet surface above the plant, compare leaves in the same row and at different heights before assuming the roof is responsible.
Mark roof surfaces, wall-side junctions and vent edges separately on the sketch so you can distinguish their water routes. For a lean-to, pay particular attention to where the roof meets the wall and how that junction relates to the wet crop below. The Lean-to Greenhouses listing covers an area range of 3.69–14.34 m². When comparing a particular size, use its drawing to locate the wall connection, openings and intended water routes. These details are more useful for assessing a suspected drip path than the product name or floor area alone.
Find the cold surface above the crop
Condensation on a panel means that its surface has reached the dew point of the air touching it. The air measured at crop height can still show less than 100% relative humidity because the surface is colder than that air. Roof glazing, edge pieces, fasteners and frame members may therefore show different patterns on the same night. A surface can reach the dew point without freezing. A cold area high on the roof is not automatically a leak: if the water is on the inside face and recurs in dry weather, surface condensation is a stronger possibility. If water appears at one seam during or after rain, keep water entry on the list as well.
Inspect likely cold spots just before dawn, while the overnight pattern remains visible, and note whether moisture sits on the inner pane, a frame or a junction. Touch is a poor thermometer, and a reading against a shiny surface may be unreliable unless the instrument is intended for it; follow its instructions and compare like surfaces at the same time. For buyers comparing Limited Edition Aluminium Greenhouses, listed at 3.77–28.08 m², the relevant details here are the glazing specification and frame construction. Ask for those details for the chosen model rather than inferring thermal behaviour from its title or size.

Read overnight temperature and humidity together
Place a temperature-and-humidity logger near the affected crop, at roughly leaf height, but not against glass, a frame, heater, vent, door or wet bench. Those positions can record a local extreme rather than conditions around the plants. If two suitable instruments are available, keep one at the crop and place the other in a contrasting area; note each position so the readings remain meaningful. Check the device instructions, clock and logging interval, and keep it in the same place on repeat nights. Keep the sensor out of direct water. A handheld reading taken after sunrise may miss the overnight change that produced the droplets.
Record the overnight temperature and humidity trend, along with the time the first drip appears, rainfall, watering, heating, door use and vent position. Relative humidity changes as air cools, so a rising percentage does not by itself prove that extra water entered the greenhouse; it shows that the air was closer to saturation at that temperature. Logs can support a condensation explanation, but cannot identify which pane or frame released a drop, so pair them with the map. The Spacious Greenhouse range, listed at 47–70 m², is relevant when comparing larger layouts. Whatever the floor area, take readings around the affected crop and roof zones rather than assuming one central sensor represents the whole space.
Compare drip patterns across nights and roof sections
Compare nights rather than chasing a single humidity figure. If drops recur on the same panel after cool nights without rain, that supports an inside-surface condensation route; if one seam wets during or after rainfall, inspect for water entry. A clear sky can allow exposed surfaces to cool more than the surrounding air, while cloud, wind and vent position can change the pattern; none is a diagnosis on its own. Write the conditions beside each photograph and reading, and compare nights with similar watering and vent settings. Look for a repeatable association, not a perfect match: more than one cause can operate at once.
When drops cluster below a roof section, consult the actual plan for changes in roof plane, frame junctions and vent openings. For a layout such as the T-Shaped Orangery Greenhouse, listed at 16.52–30 m², use the drawing for the particular size to locate intersections and annotate your drip map. The catalogue name identifies the format, but a ground-level photograph or silhouette cannot show the precise water path. Mark where a visible trail crosses from one roof section to another, rather than treating the whole roof as a single source.
Check vents without assuming they are the cause
Ventilation can affect moisture and surface temperature, so opening a vent does not always stop overnight drips. Air exchange may carry moisture out, but the result depends on outside conditions and on how a change cools or warms the interior. First record whether each vent was open, partly open or closed, and whether an automatic opener moved as its manual says. Note whether a door was left ajar, too. Then compare nights when the setting differs for a clear reason. If testing a change, alter one setting at a time, follow the equipment instructions, and do not force an opener or block an opening to reproduce a result.
For a replacement or ventilation upgrade, compare vent locations, supplied openings and opener compatibility for the exact product variant. The Aluminium Greenhouses listing spans 3.77–28.08 m², so identify the size you are considering before asking about its ventilation configuration. Establish how many vents it has, where they sit and how they operate, then check whether your planned opener is listed for that configuration. Keep these questions tied to the affected roof and crop area on your map. Judge any subsequent change by the drip pattern and plant conditions, not simply by whether one pane looks dry on a single morning.
Record watering and shading as separate variables
Record other moisture inputs that could contribute to the overnight pattern: watering late in the day, wet trays or benches, damp ground, recently watered pots or misting can add moisture near foliage. Dense growth may also leave air less able to move around a particular leaf, so compare affected and unaffected areas without assuming every wet leaf has the same cause. You do not need to stop watering to test this; note the timing and method, and compare similar nights while keeping ordinary crop care in mind. Photograph the reach of a sprinkler, misting line or hose if it could explain a local splash.
Treat shade as a separate variable, not a condensation cure. Shading changes how much solar energy reaches the structure and plants, so its effect on night-time drops cannot be assumed from the word alone. Note when it is deployed, what area it covers and whether it is inside or outside, then compare like nights rather than adding or removing it after one wet morning. If considering the Pyramid Greenhouse, listed at 5.53–18.9 m², check the accessory information for the exact model before choosing shade. The listing's name and area range do not establish which shading options are compatible.

Rule out rain entry at joints and openings
Give rainwater and local irrigation a separate check. Look above the wet area for a single path from a joint, vent, open panel or damaged seal, and note whether it appears only with rainfall, wind-driven rain or after a watering event. Water can run along frame members before releasing, so the drip point may not line up with the entry point. A dry-night pattern on broad areas of internal glazing points more towards condensation, but a leak and condensation can coexist. Do not climb onto the greenhouse or remove glazing; use a safe ground-level view, consult the manual, or ask a competent installer to inspect a difficult or damaged area.
If a wet route is near a transition to a storage area, mark the suspected entry point on the diagram for that exact structure. Do not assume that the partition or roof joint is responsible simply because the water appears above a divider. The Limited-Edition Aluminium Greenhouses with Storage listing covers 5.52–28.08 m²; when comparing one of these models, request the layout and relevant assembly or maintenance guidance for the chosen size. Use the junction details to trace a localised route, while keeping it distinct from moisture spread across a cold pane.
Test a targeted change before considering replacement
Once the likely source is clearer, make the smallest relevant change and keep the same records. For recurring condensation on inner glazing, investigate moisture inputs, vent operation and whether the timing of an existing ventilation or shading setting can be adjusted in line with the equipment instructions. For rainfall-linked water, focus on the actual joint or seal and seek model-specific repair guidance; do not cover intended vents or use a generic sealant where the material or fitting is uncertain. If only a few leaves are wet, trace the drip height and route before changing the whole greenhouse climate. Compare the result on more than one reasonably similar night.
Consider a replacement only if the evidence shows that the present structure or layout cannot meet your needs after practical checks, not because water appeared once. Use the source you have traced to guide the comparison: glazing and frame details matter when investigating cold surfaces, while vent arrangement and shading compatibility relate to possible adjustments. The Bloomcabin Prestige Greenhouse page identifies a version with a metal base and an area range of 3.77–28.08 m². Those details do not establish condensation performance. Compare the chosen model's drawings, specifications and maintenance instructions against the problem you need to address, rather than expecting a different greenhouse to stay dry automatically.
Frequently asked questions
How can I tell condensation from a roof leak?
Look at what gets wet first and when. Droplets across several interior surfaces after a dry, cool night are consistent with condensation; water appearing at one seam during or after rain is a reason to check for a leak. Photograph the pattern and compare more than one night. These clues are useful, but the two causes can occur together.
Will a humidity meter identify the dripping panel?
No. It records air conditions where the sensor is placed, not the temperature of each pane or the route taken by a falling drop. Position it near the crop, away from glass and vents, and pair its readings with photographs, a drip map and notes about watering and vent settings. A reading alone cannot locate the source.
Should I wipe droplets off the leaves straight away?
Photograph them and note their position first, if you can do so without disturbing the plant. Wiping or moving foliage can remove useful evidence about where the water was and when it appeared. Afterwards, deal with standing water only if it is practical and safe; do not climb or risk damaging leaves to reach a spot.
Will leaving the vents open overnight stop condensation?
Not necessarily. Ventilation can affect moisture and temperature, and the result depends on outside conditions and the vent arrangement. Record the actual position of each vent and compare nights with similar conditions. If you test a change, follow the relevant equipment instructions and do not force an opener or block an opening.
Why are the leaves wet when the roof glass looks dry?
A leaf can itself be the cold surface where condensation forms. Water may also run along a frame before falling, so the drip point can be away from the wet pane, or the pane may have dried first. Compare the earliest wet spots, plant heights and visible tracks; do not rely on the nearest pane alone.
Reliable diagnosis comes from matching place, route and timing. Photograph droplets before they change, map the exact wet spots, follow tracks to the highest wet surface, and compare that record with overnight temperature, humidity, rain, watering and vent positions. Condensation is a surface event; a leak or splash follows a different path, and more than one cause can be present. Keep adjustments small and compare like conditions. That turns a vague morning problem into a specific surface, joint, opening or routine to investigate.
