
Will a Water Butt Run Greenhouse Drip Irrigation?
Greenhouse watering
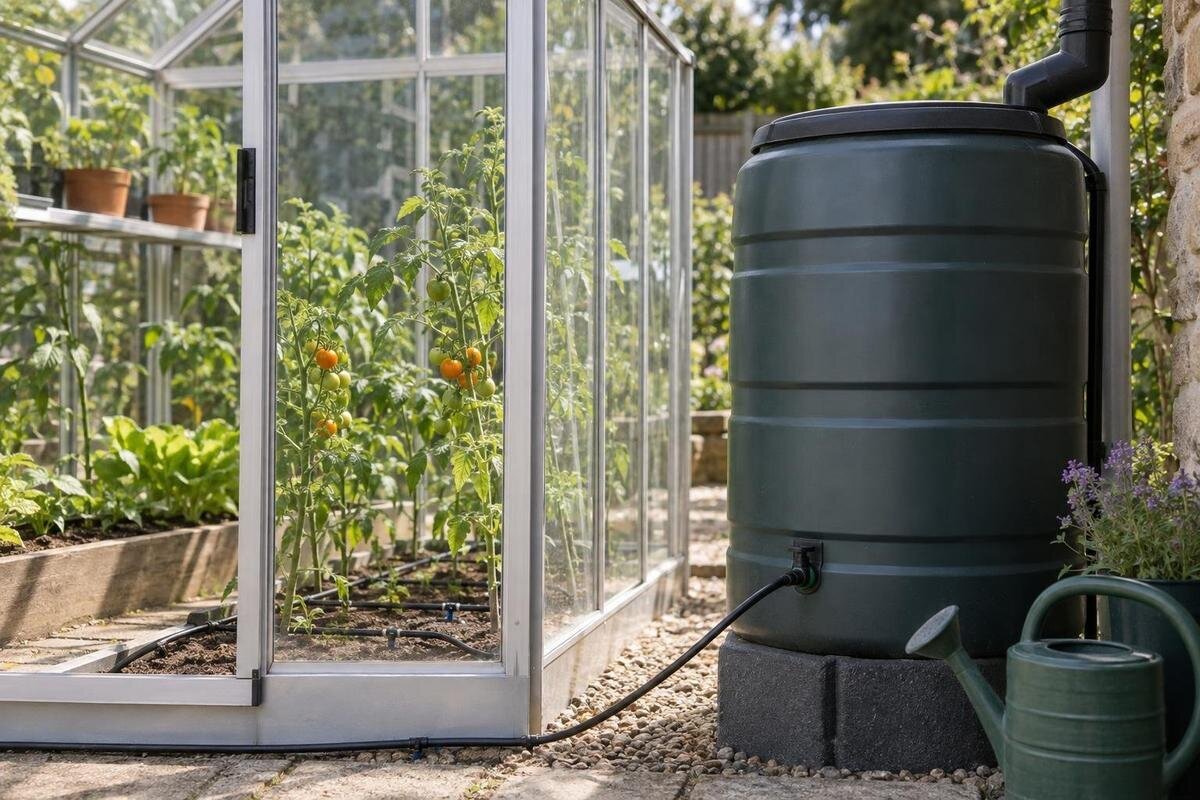
A water butt can feed some greenhouse drip-irrigation systems by gravity, but the tank alone cannot tell you whether the setup will work. The key factors are the available head, the emitters’ requirements and the flow that remains after water passes through the filter and pipework.

When a water butt can supply greenhouse drippers
Yes, a water butt can feed a greenhouse drip line by gravity, but only if the chosen emitters are intended for the low pressure available and still deliver adequate flow at the lowest water level you plan to use. A butt is not a mains supply: its pressure comes from the height of the water surface, so it falls as the tank empties. A system that drips when full may slow, become uneven or stop later. Check the emitter manufacturer’s minimum operating pressure; seeing water at the tap is not enough to show that every outlet will work.
Include the greenhouse footprint in the plan. The butt’s position, doors, benches and planting rows affect tubing length and branches, so a quick test from the tap alone says little about the finished run. When considering Lean-to Greenhouses, use the actual measurements of your chosen greenhouse to mark the reservoir position and line route; the greenhouse listing does not establish irrigation compatibility. Keep a route diagram that includes the filter, valves and connectors, as those parts all sit between the water surface and the drippers. Mark the growing areas separately from the access routes, then show where the main line divides to serve them. This gives you a layout to reproduce during testing rather than a rough estimate of how much tubing you need. A workable route should reach the growing area without crossing a doorway or obstructing routine access.
The water surface, not the tank base, determines gravity head
The useful height is the vertical difference between the water surface inside the butt and each emitter, not the tank’s top, base or tap height. At full level, the surface is higher; near the minimum usable level, it is lower and the gravity head is reduced. If an emitter sits above the water surface, a normal gravity feed cannot push water up to it. Even when it is lower, a small gap may not overcome resistance in the filter and pipework.
Measure those elevations with the tank in its intended position, and repeat the comparison for the lowest level at which you expect to irrigate. Record the full and minimum water levels against the same reference point so that the measurements remain comparable. A horizontal distance does not add head, although a longer route can increase friction loss. Keep horizontal route length and vertical height difference as separate notes on your plan: they describe different constraints. If you use a pressure gauge, choose one suitable for low pressures and check it at the irrigation inlet while water is flowing; a static reading with a closed valve does not show performance under demand. On sloping ground or tiered benches, consider the highest emitter as well as the farthest one. For a Limited Edition Aluminium Greenhouse, base these checks on the intended line and emitter positions, not on the greenhouse model name.
Check the emitter’s minimum pressure before buying
Read the emitter or kit documentation for its minimum operating pressure, rated flow at that pressure, and explicit guidance on gravity or low-pressure use. A quoted flow rate applies only under its stated test conditions; those conditions may assume a supply pressure that a water butt cannot provide. Choose a system whose specified range includes the head you can supply. If the manufacturer does not publish a minimum or gravity guidance, ask before buying rather than treating a general drip-irrigation label as proof of compatibility.
Pressure-compensating does not automatically mean pressure-independent: many such devices still have a stated operating range. Adjustable drippers, drip tape and simple microtube outlets also respond differently as pressure changes, so their advertised flow figures are not interchangeable. When comparing products, keep the stated pressure alongside each quoted flow rate rather than comparing the flow figures alone. Note whether the figure refers to an individual outlet or the complete kit, and distinguish an adjustable setting from a stated output under specified conditions. For a T-Shaped Orangery Greenhouse, draw the intended planting rows and irrigation branches separately; the greenhouse shape does not tell you how water will be distributed. Assess every branch under the real emitter load rather than assuming that a central supply will feed them equally. Check that the connections suit the tubing, and label different emitter types so you can compare their outputs separately.
Filters and pipework matter more at low pressure
Rainwater from a collection surface can carry leaves, grit and fine organic material, while stored water may develop sediment or algae. Small passages in drippers can clog, so follow the system manufacturer’s filter specification and choose a filter suited to the required flow. A clear-looking butt is not proof that the water is clean enough for tiny outlets, and a coarse screen at the inlet may not meet the emitter’s requirements.
With a gravity-fed supply, the filter both protects the emitters and adds resistance, especially if it is dirty or unsuitable for the flow. Use a filter supported by the system instructions, keep it reachable for inspection and clean it as directed; do not remove it just to make an unsuitable setup run. Finer filtration is not automatically better, because a very fine filter may clog more readily. In a Pyramid Greenhouse or any other growing space, leave the filter and any line-flushing points accessible when routing tubing around benches. Allow room to carry out the specified cleaning procedure without dismantling the growing layout or moving planted containers. Include that access in your route sketch, not just the space occupied by the fitted filter. If performance worsens, check the filter before assuming tank height is the only issue.

Test the complete assembly before permanent installation
Before fixing the system in place, assemble as much of the intended layout as possible: the butt in its planned position, its outlet and valve, the filter, main line, branches and actual emitters. Use the longest route and the number of outlets you expect to run together. Fill the butt to a known level, let the lines fill as the kit instructions specify, and look for leaks or outlets that pulse. A short tube attached straight to the tap leaves out the components and distance most likely to affect the final flow.
Use marked cups or a graduated jug to catch each outlet’s water over the same timed interval; if the output is very small, choose a longer interval so differences are easier to see. Label the containers to match the outlets on your diagram, and write down the collection time as well as the volume. If you cannot collect from every outlet at once, leave the other drippers running while you measure each one. This preserves the intended demand on the supply rather than turning each measurement into a single-outlet test. The volume caught in equal periods lets you compare flow between emitters. Record the results and compare them with the manufacturer’s guidance, not a generic target. Repeat with the filter in place and the tank at its lowest intended level. When planning a Limited-Edition Aluminium Greenhouse with Storage, remember that storage space is not confirmation of a structure’s ability to carry a full water butt.
Compare near and far outlets with every branch open
Test the distribution, not just the nearest dripper. A main line may feed several branches, and each connector, valve, filter and length of tubing can reduce the flow remaining at the far outlets. Run the system as it will operate, with all intended drippers open, then collect water from near, middle and far points on each branch. Include emitters at different heights. For a small layout, measure every outlet where practical; testing one dripper with the rest closed can conceal a weak supply.
Look for patterns in the results. If all outlets are low, check the water level, filter restriction, valve position and whether the emitters’ minimum pressure is being met. If only the far end is weak, inspect for a kink, blockage, long or narrow section, or too many emitters on that branch. Uneven results can also point to different dripper types. These clues guide further checks rather than proving a cause. Map the actual rows in your Bloomcabin Prestige Greenhouse layout, then repeat the test after making a change. Change one thing at a time where practical, and note what you altered beside the new readings. Otherwise, an improvement may be difficult to attribute to a particular adjustment. Keep the original results so you can compare the revised arrangement with the first test rather than relying on how the drips look.
Repeat the test as the water level falls
A system that passes one quick test can struggle later because the water surface drops as the butt empties. Set a minimum operating level and include it in your test; do not wait until the tank is almost empty and drawing from settled debris. A simple gravity-fed butt does not maintain constant inlet pressure as its water level changes. Track the height of the water surface rather than relying on a percentage-full estimate, because the tank’s shape affects how much the level falls as water is used.
Water quality can change too: leaves or sediment may collect near the outlet, and stored water can develop algae. Keep any cover or guard in place and inspect and clean the tank and filter according to their instructions. If flow drops after a period of use, compare the water level and filter condition with your earlier test, then inspect the branches before changing how long you irrigate. Note which outlets have slowed: a change across the whole system and a change at one outlet call for different checks. Use the same collection interval as before so that the recorded amounts remain comparable. A recorded baseline makes it easier to tell whether the problem is a lower head, a restriction or a blocked outlet. Extending the watering time without identifying the change leaves you uncertain whether the original distribution still holds.
Raising the butt can help, but it needs a suitable support
Raising the butt can increase the vertical difference between the water surface and the emitters, but a full tank needs a stable support designed to carry it. Follow the tank manufacturer’s placement guidance; do not balance the butt on a bench, shelf or greenhouse frame unless the relevant documentation confirms that the structure is suitable for that load. A higher position can also make filling, cleaning and checking the outlet less convenient, so consider those tasks before changing the location.
A longer route across a larger growing space may make a higher reservoir seem attractive, but the actual emitter requirements and route determine what is needed. When planning irrigation for a Spacious Greenhouse, distinguish the position that gives the shortest pipe run from one that provides adequate head and safe access. Neither the model name nor the greenhouse listing establishes an approved support point or irrigation rating. Compare the proposed positions on your layout before deciding to raise the butt; include the route back to the planting areas and the access needed for cleaning. If the butt cannot be placed safely, do not improvise a tall stand to gain pressure. Consider low-pressure emitters, a simpler layout or a suitable pumping arrangement instead.

Options when gravity provides too little pressure
If the emitter specifications call for more pressure than gravity provides, reconsider the components and layout first. Emitters designed for low-pressure use, a shorter route or separately operated zones may be more suitable than trying to make a high-pressure kit drip. Splitting the system can reduce the number of outlets running at once, but only if each zone remains within the manufacturer’s requirements. A pressure regulator controls or reduces pressure from a supply; it cannot create pressure where the gravity feed is insufficient.
Where the chosen emitters genuinely need a higher inlet pressure, a pump designed for irrigation may be an option. Its operating range and delivery must suit the system, and both products’ instructions should be followed for compatibility and installation. Base the choice on the complete arrangement you have tested, including the filter, branches and number of outlets running together, rather than the performance of one dripper. Keep the emitter requirements and your test results together when discussing a pumping option with a supplier or installer. Use a qualified professional for electrical or permanent plumbing work where appropriate. Once you have chosen from the Aluminium Greenhouses range, plan route lengths and zones from the actual planting layout; the greenhouse choice does not specify the irrigation pressure. A change of supply still needs a complete-system flow test.
Pressure and flow checks for the finished system
A practical pass means the complete assembly meets the manufacturer’s pressure and flow requirements with the filter fitted, the intended emitters operating and the butt at its lowest planned level. The output should also suit your watering layout: compare the amounts collected from different outlets and consider the plants, containers or beds they serve. There is no single flow target that applies to every greenhouse, so do not judge compatibility from a brief trickle or from an advertised rate measured under different conditions.
Keep a short record of the water level, timed catches, filter condition and outlets tested. Give each outlet a simple reference on the layout so that a later reading can be matched to the same location. Record which branches were open and any adjustable dripper settings; without those details, two sets of figures may describe different operating conditions. Repeat the same check after moving the butt, extending a line, changing an emitter or cleaning the filter, as each can alter flow. Your record should make clear which arrangement passed, not merely that a test took place. If the weakest outlet fails the low-level test, treat the arrangement as unproven even if the tap pours freely. That result gives you a clear basis for changing the components or layout before relying on gravity feed.
Frequently asked questions
Can I connect any drip-irrigation kit directly to a water butt?
No, not automatically. Check the kit’s minimum inlet pressure and use it from gravity only if the manufacturer allows low-pressure or gravity-fed operation. A trickle from the tap is not proof that every emitter will work once the filter, pipework and full number of drippers are connected.
Will raising the water butt solve low pressure?
It can increase the vertical difference between the water surface and the emitters, but it will not make an unsuitable dripper compatible. Recheck the system at the lowest intended water level, and place the full tank only on a stable support designed to carry it.
Are pressure-compensating drippers suitable for gravity feed?
Not necessarily. Pressure-compensating emitters usually have a specified operating range, so check that the available head falls within it. Their label alone does not confirm that they will deliver the advertised flow from a water butt.
How can I test the flow from each dripper?
Run the complete system with its filter and all intended branches open. Collect water from the outlets over the same timed interval, compare the amounts with the manufacturer’s guidance, and repeat when the butt is at its lowest planned level.
Do I need a filter for rainwater?
Follow the emitter manufacturer’s filtration instructions. Rainwater can carry debris that blocks small outlets, but a filter that is unsuitable or dirty can also restrict a low-pressure supply. Choose one that matches the system and keep it accessible for cleaning.
Treat the water butt as a low-pressure reservoir, not simply as a tap. If the emitter specifications match the available head and the complete line delivers adequate, even flow down to the water level you plan to use, gravity can be a practical supply. If output fades or varies, adjust the emitters or layout—or use a suitable pumping setup—before depending on it.
