
Hardening Off Greenhouse Seedlings Before Planting Out
Seedling care
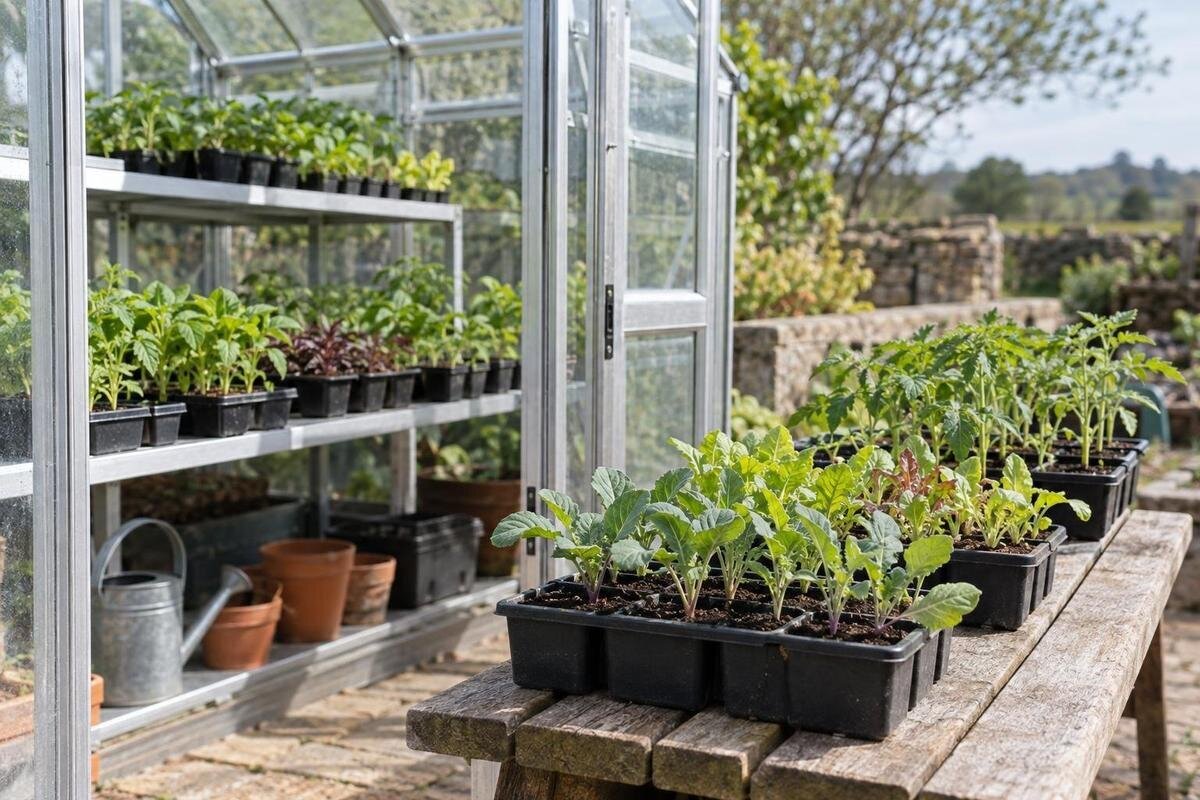
Hardening off greenhouse seedlings before planting outside is a gradual, weather-led process. A seedling that has grown under glass may be used to steadier conditions than it will meet in a bed, pot or exposed patio. Check the crop’s planting guidance, choose suitable windows in the forecast, begin in shelter and let the plants’ response set the pace. A date on the calendar alone cannot tell you when to move them on.

Why greenhouse seedlings need gradual acclimatisation
Seedlings raised in a greenhouse meet a different environment once they leave it. The structure may shelter them from some wind and rain, while light and temperature around a bench can still change with sunshine, ventilation and time of day. A tray that has sat in calm conditions has not yet faced gusts, direct outdoor sun or a cool evening. Tender foliage may wilt or scorch when those changes arrive at once, and small root systems can lose moisture quickly in wind. Even positions within one greenhouse can differ; consider where each batch actually grew, rather than treating all greenhouse-raised seedlings alike. Their starting point is the light, temperature and shelter they have experienced.
Hardening off is gradual acclimatisation: you increase outdoor exposure in manageable steps and pause when conditions are unsuitable. It is not a test of toughness, a reason to let compost dry out, or a guarantee that a tender crop will tolerate cold. Seedlings started in especially sheltered conditions may need a gentler beginning than those already growing in a brighter, well-ventilated position. A recent move to a different bench can change their starting conditions too. When planning a greenhouse for propagation, compare the Pyramid Greenhouse listing with the footprint and bench space your trays require. Allow for the seedlings that must remain under cover as well as those going outside; hardening off does not free up their indoor space immediately.
Check seedling readiness crop by crop
Use plant condition, not the sowing date alone, to judge whether a seedling is ready to begin. Look for steady, healthy growth and undamaged leaves. Where practical, check that the root ball holds together when lifted gently, with roots developing through the cell but not forming a dense, tangled mass. There is no universal leaf count or seedling height, because crops are transplanted at different stages. A plant that has just been potted on, has been very dry or is growing poorly may benefit from a recovery period before it has to cope with sun, wind and cooler air. Follow the crop’s growing guidance if you are unsure about its stage.
Keep hardy crops and tender, warm-season crops on separate plans. Tomatoes, peppers and courgettes, for example, are more sensitive to cold than many hardy vegetables, but crop, variety and stage still matter. Follow species-specific advice for planting timing and suitable night conditions; do not infer cold tolerance from a seedling’s size. Mark mixed trays so you can take the right ones in or leave a suitable group outside without confusion. If you are considering the Limited-Edition Aluminium Greenhouses with Storage, compare the clear bench area in your proposed layout with the number of trays you need to keep separate. Account for storage and growing space separately when planning that layout, so tools and supplies do not occupy the places reserved for returning seedlings.
Use the forecast and the actual site
Check the forecast for each outing and for the planned planting, not just the afternoon high. Look at wind, rain, cloud, frost risk and the overnight low; a mild spell can still bring a cold night. Local conditions can differ over a short distance: a courtyard, open lawn and sheltered corner may have different wind and sun. Observe the chosen hardening spot at the time trays will be there. A wall or hedge may reduce wind but cast changing shade, so consider both. The temperature inside a greenhouse is not a reliable substitute for what the seedlings will meet outside.
Choose an initial window with moderate conditions: a calm, bright or lightly overcast day is easier to manage than strong wind, heavy rain or intense sun. You do not need a perfect run of days, and there is no benefit in forcing an outing because a calendar says to proceed. If the forecast turns poor, keep the seedlings protected and wait for another suitable period. When comparing the Prestige greenhouse for propagation, assess its proposed position and the outdoor hardening spot separately. Note when the outdoor spot loses its shade or becomes exposed to wind; that observation helps you judge an outing more usefully than the greenhouse’s position alone.
Choose a sheltered first outing
For the first session, put seedlings outside in bright shade or dappled light, sheltered from strong wind. Avoid placing them straight into full sun, particularly around midday, even if the air feels comfortable. Begin with a short, supervised outing; the point is to observe the plants, not to meet a fixed number of minutes. Put trays on a stable surface where they cannot tip, and keep them within easy reach so you can move them if the sun strengthens or the wind picks up. If you need to leave unexpectedly, bring the seedlings under cover rather than leaving an early session to chance.
Make the first outings easy to end. A clear route from the greenhouse bench to the outdoor spot means you can move trays promptly if conditions change, without carrying them through a cluttered area. If you are comparing the Spacious Greenhouse range for raising seedlings, check the chosen configuration against your tray sizes and route to the exit. Measure the trays you actually use and consider how you will carry them through your planned layout. Include a convenient place to set a tray down while moving another batch, rather than relying on being able to carry everything in one trip.

Increase outdoor light and time gradually
When the first outings go well, extend exposure in small steps. You might keep the seedlings in shelter for longer before introducing more direct light, rather than changing duration, sun and wind all at once. Move towards the light levels the crop will receive after planting, as appropriate for that crop; not every seedling needs full sun. A cloudy spell can provide a gentler transition. If a sudden sunny period or a gusty day arrives, shorten the outing or return the trays to shelter instead of sticking to the previous plan. Compare each outing with the last one: more time outside in shade is a different change from the same amount of time in direct sunshine. Keeping that distinction clear makes it easier to decide what to adjust if the seedlings struggle.
Let the plants’ response decide when to advance. Seedlings that stay firm and show no new damage may be ready for a little more exposure on the next suitable day. In your propagation area, group trays by crop and light needs so that you can manage batches at different stages of hardening off. When comparing the Aluminium Greenhouses range, consider the selected configuration and the light around your intended benches. Map out where each group would sit rather than assuming every position receives the same conditions. This also gives you a clear place to return a batch without mixing it up with seedlings that have already managed longer outings.
Treat cold nights as a separate decision
A successful daytime outing does not prove that seedlings can stay outside overnight. Outdoor conditions can change quickly after the sun leaves, and a mild afternoon says little about the night minimum. Follow the crop’s specific guidance and check the forecast for the hours the plants will be exposed. Tender crops should remain protected when expected conditions fall outside that guidance. Do not move every crop out overnight simply because the daytime weather has been mild; make the decision crop by crop and keep a place ready for trays that need to come back in.
A greenhouse can be useful as a place to return trays, but do not assume it will stay warm overnight. Conditions can fall after sunset, so check the temperature where the seedlings will sit rather than relying on the greenhouse’s name or position. If you are considering Lean-to Greenhouses for propagation, include the overnight holding area in your layout and assess the conditions there against each crop’s needs. Keep the decision to leave a batch outside separate from the decision to plant it out: a successful night is part of its acclimatisation, not a substitute for checking planting conditions.
Keep compost moisture steady outdoors
Small cells and pots can dry faster outside in sun or wind than they did on a sheltered bench. Check the compost rather than judging by the leaves alone: the surface may look dry while the root area is still moist, or a small cell may be drying out quickly. Lift a pot to compare its weight if that helps, and check trays before and after an outing. The aim is to keep compost appropriately moist for the crop, not to keep every pot saturated. Wilting can have more than one cause, so check the compost and the weather together.
If the compost is dry, water as needed and let excess drain before moving the tray. Avoid leaving pots standing in water, and do not add extra water just because a seedling has wilted in hot sun. When planning a propagation workspace, allow for a practical place to set down and drain trays without blocking the route you use to bring them in. Compare the Limited Edition Aluminium Greenhouses listing with the space needed for that arrangement. Consider both the trays being watered and those ready to move outside, so you can handle each batch without repeatedly rearranging the whole bench.
Pause when seedlings show stress
Watch the seedlings during an outing and again after they return to shelter. Leaves that remain limp, pale or bleached patches, scorched edges, bent stems or foliage damaged by wind are reasons to stop increasing exposure. These signs do not identify one cause on their own: heat, direct sun, wind and compost moisture can all affect a plant. Look at the conditions the tray experienced and check the compost before deciding what to change. A brief droop in warm sun is not the same as lasting damage, so observe whether the plant recovers in shade.
If a seedling is struggling, end that day’s outing and return it to a bright, sheltered position. Check the compost and water if it is dry; reduce direct sun or wind at the next suitable session. Wait until the plant has recovered before increasing exposure again, and make one adjustment at a time so you can see what helped. If you are planning room for several batches, consider where a tray can recover without blocking routine access. When assessing the T-Shaped Orangery Greenhouse, include that space in your proposed tray arrangement. Label a recovering batch with the exposure it last managed comfortably, so it is not accidentally moved outside with a more advanced group.

Plant out only when the crop and site are ready
Hardening off deals with the change in exposure; it does not set the planting date. Before planting out, check the crop’s recommended stage and timing, the conditions at the destination and the forecast for the next spell of weather. The soil should be in a condition the crop can grow in, and the site should not expose a tender seedling to conditions it cannot tolerate. A plant can be well acclimatised and still struggle if it is planted too early or into an unsuitable spot. Compare the destination with the place where you hardened the seedlings off. If their outings were consistently sheltered but the bed is exposed, take that difference into account rather than treating time outdoors as proof that every site is suitable.
When conditions are suitable, choose a calm, mild part of the day if possible and avoid planting into a hot, bright or windy spell. Water a dry seedling before moving it, handle the root ball carefully and plant at the spacing and depth recommended for that crop. Water after planting as appropriate, then keep an eye on the plants while they establish. Temporary protection may be useful if the forecast or site calls for it, but it does not replace choosing a suitable time and location.
Plan a workable space for trays and records
A simple staging area makes a weather-led routine easier to follow. Keep labels with their trays, group crops that share similar needs and leave enough room to lift or move each batch without disturbing the others. Plan a practical route between the greenhouse and the outdoor spot, and note where you can return trays when the forecast changes. These details help you manage several crops with different planting guidance, rather than treating every seedling as one batch with one timetable.
Record the crop, the conditions during each outing and how the seedlings responded. Brief notes on light, wind, compost moisture and any leaf damage can help you decide whether to extend exposure or pause. Include where the tray stood and roughly how long it was outside, so you can distinguish a longer sheltered outing from a shorter, more exposed one. Note its condition after returning under cover as well as during the session. If a poor-weather spell interrupts the routine, resume at the last level the plants handled comfortably instead of trying to catch up to a calendar. Two batches sown at the same time may be ready to plant out on different dates because they have met different conditions. Keep the record simple enough to use: its purpose is to guide the next outing, not to produce a detailed diary.
Frequently asked questions
How long does hardening off take?
There is no reliable fixed number of days. The time needed depends on the crop, how sheltered the seedlings have been and how suitable the weather is. Build exposure through a series of manageable outings, and pause or step back if conditions worsen or the plants show stress.
Can I leave seedlings outside overnight?
Only when the crop’s guidance and the forecast indicate that the expected night conditions are suitable. Tender seedlings may need to come back under cover even after a mild day. A greenhouse is not automatically warm overnight, so check the conditions where the trays will sit.
Can I harden seedlings off in rain or wind?
A little gentle rain on a mild, calm day need not prevent an outing. Heavy rain or strong wind can damage small plants, tip trays or chill seedlings, so wait for better conditions or bring them back under cover. Hardening off does not mean exposing plants to bad weather.
Should I water seedlings before taking them outside?
Check the compost first. If it is dry, water as needed and let excess drain before moving the trays; do not leave them sitting in water. Sun and wind can dry small cells quickly, so check moisture again after the outing rather than following a fixed watering schedule.
How can I tell when seedlings are ready to plant out?
They should have coped with the outdoor conditions they will meet, but hardening off alone does not decide the planting date. Check the crop’s recommended stage and timing, the forecast and the condition of the planting site. A hardened seedling may still be vulnerable if the site is unsuitable.
Hardening off works best as a series of small decisions: is this seedling healthy enough to begin, is today’s spot suitable, and did its last outing leave it ready for a little more? Crop guidance still sets the limits, particularly around cold and planting time. Pausing for wind, strong sunshine or a chilly night protects the progress already made. Plant seedlings only when they have managed the conditions they will meet outside and the crop and site are ready too.
