
How to Zone Greenhouse Watering for Pots and Beds
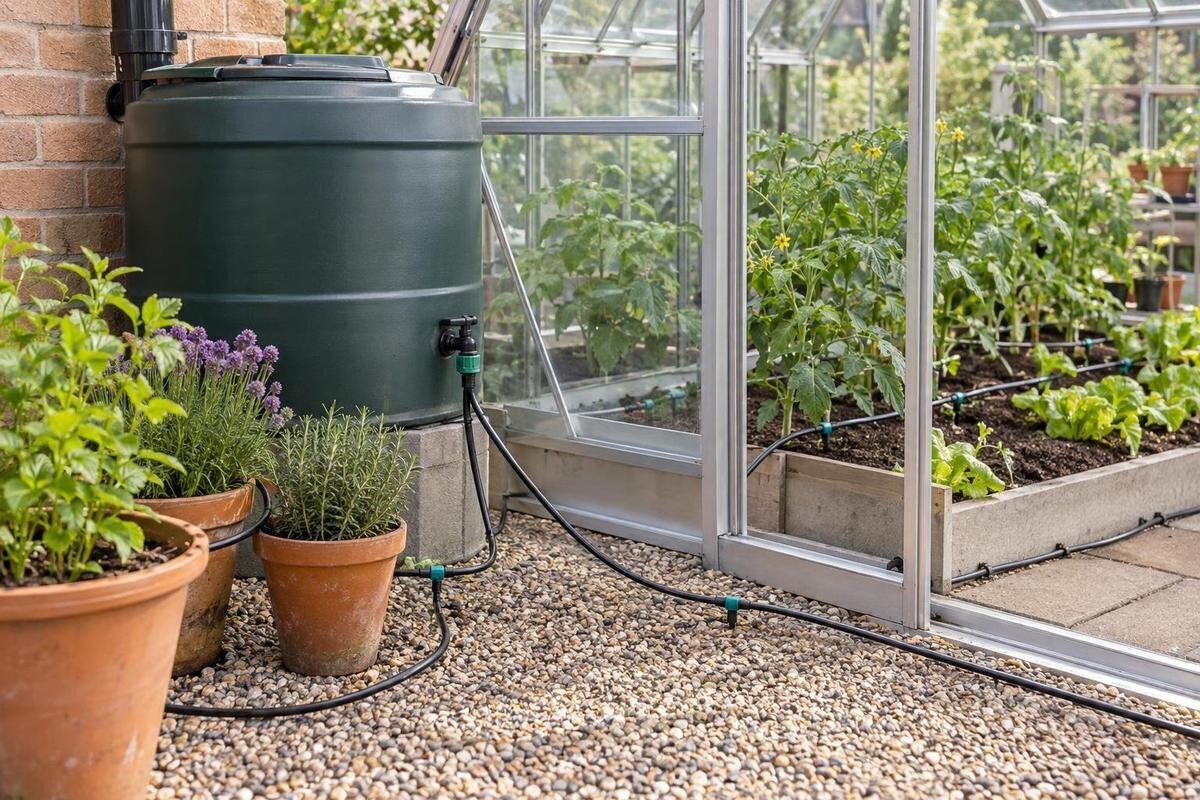
Greenhouse watering guide
Within one greenhouse, pots and a planted bed can look like one growing area but behave like separate watering jobs. A container holds a limited volume of growing medium; its size, crop and position affect how quickly moisture changes. A bed may buffer moisture across a larger soil volume, though its depth, texture and planting pattern matter too. One timer running every outlet for the same length of time can leave some roots too dry while others stay wet. Zoning means grouping plants with similar needs and giving each group independent control. Done carefully, it makes schedules easier to adjust without adding a separate controller to every container.

Why pots and beds may need separate watering
A container holds a finite volume of growing medium. Its size, drainage, crop and position all affect how quickly moisture changes. A bed may give roots access to a more continuous volume of soil, but its depth, texture and planting pattern matter too. Neither arrangement always dries faster: a shaded pot and a shallow, exposed bed can behave very differently. The useful distinction is that the root zones have different capacities and conditions, so the same timed dose may not leave both at a suitable moisture level.
A watering zone is a group of outlets that can be run to its own schedule. Two lines that open and close together are still one zone, even if one waters pots and the other waters a bed. To separate their timing, you need independent control, such as suitable valves and controller outputs, or a manual arrangement that lets you operate the lines separately. You do not need a separate zone for every plant. The aim is to avoid tying plants with different watering needs to the same schedule, while keeping the layout simple enough to understand and maintain.
Map the growing area before routing pipes
Start with a sketch of the greenhouse, marking the water source, bed edges, benches, pot groups, doorways and the routes you use to move around. The Pyramid Greenhouse listing gives sizes from 5.53 m² to 18.9 m², but a product range is not a working floor plan. Use the dimensions of the particular size you are considering to judge distances and access. Give each proposed group a clear name on the sketch, so you can distinguish its growing area from the pipe route that serves it. Note whether pots stay in one place or move through the season, and show both positions if necessary. A line that has to be shifted every time you rearrange a bench can make an otherwise clear watering plan awkward to use.
Mark growing conditions as well as fixed features. A pot beside a vent or in a sunny position may dry differently from a similar one in a shaded corner; moisture can also vary along a bed. Observe representative areas at consistent points in the watering cycle, rather than judging by surface colour alone. Record which crops change during the season and which containers are moved. This map will help you decide whether a simple pots-versus-beds division makes sense, or whether one of those groups already contains plants that need separate attention.
Group plants by their root-zone needs
For containers, compare pot size, growing medium, crop, plant stage and position before grouping them. A set of similar pots may suit one schedule, while a large container and several small ones may not respond alike. Check how the compost feels around the roots, not just at the surface, and look for patterns across several examples. If one or two pots consistently need different treatment, you can water those by hand rather than building an extra automated zone. Revisit the grouping after repotting, replacing crops or moving pots, because the old schedule may no longer fit.
A bed can be one zone when the crops and soil conditions are broadly similar and water reaches the planted area evenly. Consider a split if rows have distinct needs or if observations repeatedly show different moisture patterns. Do not divide a bed just because it is easy to add another line. First identify which plants would belong to each proposed group and what difference in timing you are trying to accommodate. This gives each division a practical purpose rather than simply adding more controls. When planning the layout, the Limited-Edition Aluminium Greenhouse with Storage listing spans 5.52 m² to 28.08 m²; use the actual footprint you are considering to place beds and pot groups. The listing does not specify how many plants an irrigation system can serve.
Make each zone independently controllable
If you water manually, separate shut-off valves can let you run the pot and bed lines at different times. For an automated system, check that the controller and valves support independent programmes, or can operate zones sequentially as intended. A manifold with several outlets does not necessarily provide several separate schedules: the outlets may open together. Check the equipment instructions for the number of independent outputs, the compatible valve type and whether the system runs zones one after another or at the same time. Do not assume that the number of ports tells you how many zones you can control.
Draw the supply line and each branch on your greenhouse plan, then mark where the controls will be reachable and easy to identify. Give the branches the same names as the pot and bed groups on your sketch. For a manual arrangement, note which valve you will open for each group; for an automated arrangement, match each controller output to its line. The Bloomcabin Prestige Greenhouse range is listed from 3.77 m² to 28.08 m²; plan from the dimensions of the specific version rather than the range alone. Its listing does not confirm irrigation fittings, attachment points or controller compatibility. Keep lines accessible so you can trace each route and operate its control without disturbing plants. You should be able to identify a zone at both its control and its growing area.

Place outlets to reach roots in pots and beds
In a pot, position the outlet so that water reaches the growing medium around the roots rather than running down the side or wetting only one small patch. Whether a container needs one outlet or more depends on its size, shape, crop and the equipment instructions, so do not apply a fixed number to every pot. Test a representative container by checking moisture through the growing medium after watering. If pots are moved, make sure their outlets move with them or are repositioned; a line left behind can make a working schedule appear ineffective.
In a bed, arrange delivery along the planted rows or areas, following the emitter spacing and layout specified for the equipment you choose. Check the edges and the far end, not just the spot nearest the water source. Mark the proposed outlet positions on the sketch alongside the planting areas, so you can see which parts of the bed each line is intended to serve. The Spacious Greenhouse listing covers sizes from 47 m² to 70 m²; sketch the actual beds and route lengths for the footprint you are considering. Those area figures do not establish flow, pressure or irrigation compatibility. Keep pot and bed lines separate if they need different timing, even when they share a supply, and identify where each line ends for later checks.
Check the water supply and system requirements
A zone plan cannot be sized from greenhouse floor area alone. Before choosing components, have the available pressure and flow at the connection measured under the conditions in which the system will operate. Compare the readings with the requirements for the controller, valves, filters, regulators and emitters, using their documentation or advice from a qualified supplier or installer. The number of outlets and their rated demand also matter. If the source cannot support simultaneous operation, a sequential arrangement may be possible, but only if the controller and other components are suitable for it.
The Aluminium Classic Greenhouse listing gives a range from 3.77 m² to 28.08 m². The selected footprint can help you map the route from the source to each zone, but it cannot tell you whether the water supply will meet the system’s requirements. Check that fittings and components are compatible with one another and with the water source. Keep the pressure and flow readings with your zone plan, alongside the intended outlet count for each branch. When comparing a kit with individual parts, this gives you a consistent description of the system you need to supply. Use the actual measurements and product instructions rather than assuming that greenhouse size, outlet count or a general description proves the system will work. Include whether your proposed zones will run together or separately.
Set a separate programme for each zone
Set the interval between watering and the duration of each run as separate decisions. A container group and a bed may need different settings, and there is no universal runtime that suits every crop, growing medium or outlet. Use relevant crop guidance and the equipment instructions as a starting point, then check conditions at root level. Record both settings for each zone: a note of runtime alone does not describe how often that group receives water. Make sure each control operates the intended line before relying on a programme. The Aluminium Lean-to Greenhouse listing gives sizes from 3.69 m² to 14.34 m²; whichever structure you choose, its area does not determine watering duration. Base the schedule on the plants, growing medium, water delivery and measured moisture, keeping the pot and bed settings separately identifiable.
Change settings gradually and keep a note of what you altered and what you observed. If a pot group is too dry before its next run, consider whether its interval, delivery or grouping needs attention; if the medium remains too wet, check the same factors before simply shortening every zone’s run. Alter one setting at a time where possible, so you can tell what made a difference. Reassess after a change in crop stage, greenhouse exposure or growing arrangement. A schedule that worked for young plants may not suit a different mix of containers or a fuller bed.
Check moisture where the roots are
Use several representative pots rather than relying on one. Check the growing medium below the surface around the root zone, both after a run and before the next one is due. A dry-looking surface does not necessarily tell you what is happening deeper down. If you use a simple lift check to compare container weight, use the same pot and growing medium as a reference; it is a trend, not a universal measure. Make checks at a consistent point in the cycle so that observations from different days are useful to compare.
In a bed, check more than one point, including near and far from the supply and across the planted area. The Limited Edition Aluminium Greenhouse catalogue range is 3.77 m² to 28.08 m², but total area does not show where moisture varies within your chosen layout. Place checks according to the actual bed, rows and outlets, and mark the locations on your sketch so you can return to them. Record which zone has run and when you made the check; otherwise, observations taken at different stages of the watering cycle are difficult to compare. If you compare delivery at different points, use the same method at each one and follow the equipment instructions. A sensor can add information, but its position still needs to represent the roots you are trying to water.

Trace uneven watering one zone at a time
If one pot is dry while the rest of its group is not, look first at its outlet, connection and position, then check whether that plant belongs in the group. If an entire zone is affected, confirm that the correct valve opens and that the controller is running the intended programme. If the beginning of a line appears wetter than its far end, inspect outlets and connections and compare the measured supply with the system requirements. These are possible causes, not automatic diagnoses; check the whole route before changing the schedule for every plant.
Test one zone at a time and note what happens at both the near and far points. For a layout based on a T-Shaped Orangery Greenhouse, the listed sizes run from 16.52 m² to 30 m²; use the plan for the particular size to identify the ends and branches that need checking. The product name and area range do not confirm any irrigation arrangement. Follow the affected branch from its control to its outlets, recording where delivery differs rather than treating the whole greenhouse as one fault. Keep this record separate from notes about changes to watering intervals or runtime. Follow component instructions when cleaning or replacing parts, and check suitability before altering a fitting or using a treatment. Once the fault is corrected, reassess the schedule rather than assuming the previous settings still fit.
Review the zones as plants and seasons change
A zone plan needs occasional review as the greenhouse fills, crops are replaced, pots are repotted or beds are replanted. Growth can change how plants share space and how much of the bed is occupied. Changes in light, ventilation and temperature can also affect how quickly growing medium dries. Recheck moisture when conditions or plantings change, then adjust the relevant zone rather than altering every programme by default. If a container becomes an exception, decide whether it can be watered by hand or whether the group itself should be divided.
Label valves, lines and controller settings so it is clear which schedule serves each group. Keep a brief record of changes, checks and any faults; it makes it easier to distinguish a seasonal adjustment from a blocked or disconnected outlet. Inspect and prepare the system for colder periods according to its manufacturer’s instructions. If the layout changes, update the plan before moving lines or adding outlets. Clear labels and a current sketch make separate zones easier to manage than a complicated system whose branches and settings have become hard to trace.
Frequently asked questions
Can pots and beds use the same water source?
Yes, if the source and components can supply the planned system. Separate valves or controller outputs can give pots and beds different schedules, but check measured pressure and flow and the equipment instructions before relying on one supply.
Do I need a separate timer for every crop?
Usually not. Group plants with similar root volumes and watering responses, then separate groups only where checks show they need different timing. A controller must be able to run those groups independently; multiple outlets alone do not guarantee separate programmes.
How many pots should go in one zone?
There is no fixed number. Consider pot size, growing medium, crop, position and how evenly the outlets deliver water. If a few containers behave differently from the rest, water them by hand or give them a separate branch rather than changing the whole group’s schedule.
How can I tell if a watering schedule is working?
Check moisture around the roots in representative pots and in several parts of the bed, at consistent points in the watering cycle. Also check that outlets are working and that water reaches the far end of each line. Adjust one setting at a time.
Can one greenhouse bed have two watering zones?
Yes. Separate areas when their crops, soil conditions or watering responses differ, or when checks show delivery is uneven. Before splitting a bed, look for blocked outlets, poor connections or a supply issue; these may explain the difference without needing another schedule.
A useful greenhouse watering plan is not the one with the most valves; it is the one that gives genuinely different root zones different control. Group pots and beds by how they respond, check the supply and equipment before setting up the lines, and verify moisture at representative points. Keep the plan simple enough to maintain, but leave room to change a grouping when crops, containers or growing conditions change. That way, each schedule can reflect the plants it serves instead of asking one timer to suit every corner.
