
How to Calculate Tomato Plant Capacity in a Greenhouse
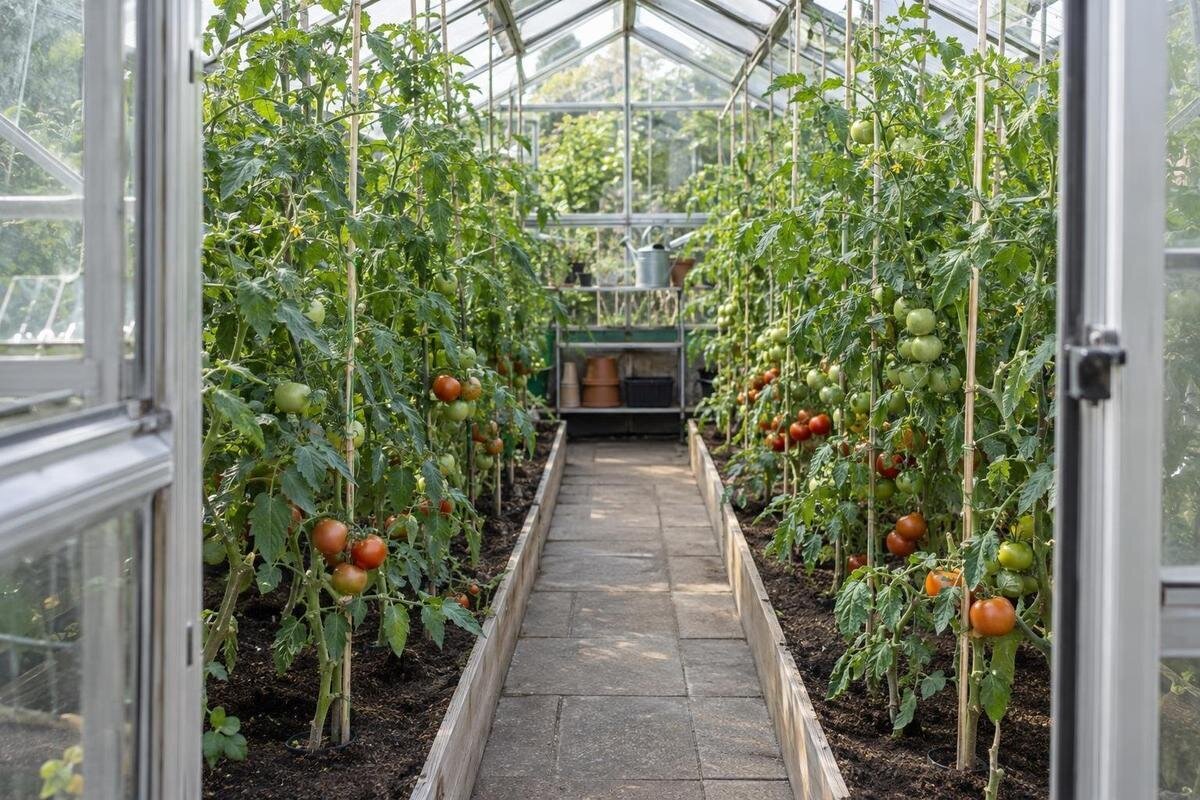
Greenhouse growing guide
A useful tomato count comes from the planting rows that fit inside the greenhouse, not from its advertised floor area. Start with the clear internal dimensions, reserve a route and end clearances, then count positions at the spacing suited to your cultivar and training method. The figures in the worked example are illustrative only; they are not dimensions or plant-capacity claims for a Bloomcabin model.

01
Why floor area does not give you a plant count
Published floor area is useful for comparing overall greenhouse size, but it does not directly tell you how many tomato plants will fit. Some of that area has to stay clear for the entrance, a walking route, turning, shelves or equipment. Two plans with the same floor area can provide different lengths of usable bed if one has a central path and the other has perimeter beds. Tomato spacing is measured along a row, not as a square allocation of floor area. Dividing square metres by a guessed area per plant can therefore produce a tidy but misleading total. Start by drawing where the stems could go.
Each stem is only the starting point: leaves, supports and fruit occupy space as the crop develops. A plan that fits seedlings may feel cramped once the canopy is mature, particularly where two rows face each other across a narrow route. Treat capacity as two checks: how many positions fit along the usable rows, and whether those rows leave enough room for growth and routine work. The first check is arithmetic; the second depends on training, cultivar, access and greenhouse shape. You may have spare floor area but too little straight planting length, or long beds without a workable route. The result should be a number you can tend, not simply the maximum number of marks on paper.
Measure the usable space inside
Measure the clear internal width and length of the exact greenhouse size you are considering, rather than relying on outside dimensions or a headline area. Use a dimensioned drawing where available and confirm where its measurements are taken; for planting, you need the space between obstructions at bed level. The Prestige Greenhouse catalogue listing gives an area range from 40.6 to 302 sq ft, but that range is not a usable tomato-row measurement. A model family can include very different sizes, so note the dimensions of the selected option before you draw the beds. External dimensions may help with siting, but the internal layout determines the planting lines.
On a scaled sketch, mark the entrance, its opening, base rails, posts, fixed benches, shelves and any storage before drawing a planting line. Measure the narrowest clear width, not just the distance between the longest walls. Roof supports and sloping sides matter too: they may leave floor area inside the outline while reducing the height or reach available beside a bed. Record usable straight runs in metres and note interruptions; a post or doorway can split what looked like one continuous row into two. If a drawing does not make an obstruction clear, confirm the relevant measurement before counting positions.
02
Draw the beds and working route
Draw the bed or container footprints to scale, then add the route from the door to each plant. One possible arrangement is two side beds with a central path; another puts a bed in the middle and leaves routes on both sides. Neither layout is automatically more efficient. A central bed may allow another row but needs access along both sides, while a side bed can leave floor that is useful for moving and watering. Count only the rows that remain reachable, and keep the route continuous rather than ending it behind a bench or bed. The plan should show the path as clearly as it shows the growing space.
Choose the route width around the jobs you do: carrying a watering can or harvest basket, reaching the bed edge and getting past any equipment kept inside. There is no single aisle measurement that suits every greenhouse and gardener, so mark a trial width on the plan and see what it leaves for beds. In a Lean-To Greenhouse, check how the wall-side planting line will be reached from inside; the footprint alone cannot show whether that row is practical. Allow for foliage when it is fully grown, not just for an empty bed. A route that narrows behind the plants is not clear access.
Allow for doors, storage and other obstructions
Length is lost at the ends as well as across the width. Keep plant centres back from doors so leaves and fruit do not obstruct entry, and so you can stand at the end of a row to train or pick. Mark any door opening and the space needed to bring trays, watering equipment or a harvest through. If a shelf or bench is fixed in place, subtract its footprint and the approach to it before measuring the row. For a removable bench, decide whether it will stay in summer; a plan that counts the same space twice gives a misleading total. These end and obstruction allowances will affect the row calculation.
Storage needs the same check. If you are considering a greenhouse model with built-in storage, mark the storage, its access and any door clearance on the same plan as the tomato beds. The product description establishes that storage is included, not how much of a chosen layout remains available for planting. Do not assume that the label means storage is outside the growing area or that nearby floor space is free; check the drawing for the selected size. Once fixed uses are marked, measure the uninterrupted length left for each row.

03
Set spacing to suit the cultivar and training method
Choose a centre-to-centre spacing for the way each tomato will be trained. A cordon tomato is generally managed as one main stem, which makes a straight, supported row easy to calculate. For an initial layout, test roughly 45–60 cm between cordon plants, then follow the variety’s label or supplier’s advice; vigorous cultivars and different growing systems may need another allowance. Measure from stem centre to stem centre, not from pot rim to pot rim or leaf edge to leaf edge. The variety’s mature habit matters more than the appearance of seedlings at planting time, so use the plan to test the spacing before planting.
Bush types and plants allowed to carry several stems can spread farther across the bed, so they may need more room than a single-stem cordon. Also consider the gap between parallel rows: two rows close together may fit on paper while their foliage later meets across the path or makes inner plants difficult to reach. Wider spacing reduces the count but can make training, ventilation and picking simpler. Set a spacing for each variety or training system rather than applying one figure to every tomato in the greenhouse. Where the growing advice gives a range, choose a figure that suits the plant’s expected vigour and the access your layout provides.
Calculate the number of positions in each row
For one straight row, let R be the available length after excluding fixed obstructions, e the minimum distance from each end to the nearest plant centre, and s the centre-to-centre plant spacing. Provided R is at least 2e, the number of positions is floor((R − 2e) ÷ s) + 1: subtract both end allowances, divide by the spacing, round down and count the first plant as well. For example, a 3.0 m row with each end plant centre set back by at least 0.3 m and spacing of 0.5 m gives floor(2.4 ÷ 0.5) + 1 = 5 positions. The Classic aluminium greenhouse listing spans 40.6 to 302.3 sq ft; for any listed size, use the selected drawing to establish R and e rather than converting area directly into plants.
Apply the calculation separately to each continuous row and add the results. If an obstruction divides a bed into two runs, calculate each run and include end clearance where the break interrupts planting. If you have already measured from the first permitted plant centre to the last, call that distance L and use floor(L ÷ s) + 1 instead; do not subtract end allowances a second time. A row shorter than its end clearances has no planting position. Keeping the measurement method consistent avoids the common off-by-one error of dividing a length by spacing and forgetting that the first plant also takes a position.
04
Work through an illustrative greenhouse layout
Here is a complete example using illustrative internal dimensions only, not a Bloomcabin product size: a clear rectangle 2.4 m wide by 3.0 m long. On the plan, two side beds each 0.65 m deep, a 0.90 m central path and 0.10 m clearance at each outer wall use the 2.4 m width. These are chosen figures for demonstrating the method, not universal bed or aisle recommendations; reach, door position and the structure may call for another arrangement. Set the first and last permitted plant centres at least 0.3 m from the ends of each bed. This leaves a 2.4 m span in which to position the plants; access is provided by the central path.
At 0.5 m centres, five positions fit on each side, so this drawn layout holds 10 plants. At 0.45 m centres, six positions fit per row, or 12; at 0.60 m, five still fit per row, or 10. Counts change in steps because plants occupy whole positions, not fractions. The narrower spacing is not automatically better: check cultivar guidance, mature width and how easily you can reach the bed. A Limited Edition Greenhouse listing spans 40.6 to 302 sq ft, so this illustrative count should not be transferred to a different selected size.
Adapt the count to the greenhouse shape and height
A T-shaped or stepped floor plan cannot be treated as one rectangle just because a total area is listed. You can split an outline into rectangles to understand its floor area, but the plant count still depends on continuous bed lengths and on whether a route joins them. In the crossbar and stem of a T-Shaped Orangery Greenhouse, sketch each potential row separately and make sure the junction remains passable. A short corner strip is not automatically a useful planting row: count it only if it can be planted and tended without blocking the route or making another bed harder to reach.
Height changes the usable layout as well. A tall cordon may need a clear line for its support and room for routine training and harvesting, while a low perimeter or sloping roof edge can make a nominally wide bed awkward to use. Check a side view as well as a floor plan for internal headroom and obstructions above the rows. If you are planning more than one row, consider the mature canopy between them: floor separation is only useful if foliage does not close off access or make picking difficult. Base the layout on the chosen training method, not just the number of stems you could mark on the floor.

05
Check that every plant will be accessible
Test the drawing as if the plants were full-grown. Can you reach both ends of each row, water each bed or container, and train the vines without stepping on another bed or pushing through foliage? If you intend to harvest from one side, account for the reach across the bed; a long central bed may need access on both sides. Check that you can stand by the doorway and turn with a basket without blocking the only route. These checks may remove a proposed row or shorten a bed, but they turn a paper maximum into a workable growing capacity.
The Pyramid-type greenhouse range is listed from 60 to 203 sq ft, but those figures alone do not show the clear route or planting-line length in the selected option. Use its particular floor plan to mark access first, then the beds, and recheck the route against the expected canopy. Trace the path from the entrance to every plant and back out again; if it crosses a bed, depends on moving a fixed item or ends behind a row, revise the capacity. Plan for the busiest growing period, not only for the open floor and small plants at the start of the season.
Work backwards from your target number
You can also start with a target count. If you want N plants in one straight row, the minimum row length is (N − 1) × s + 2e: there are N − 1 gaps between plant centres, plus clearance at both ends. Five cordons at 0.5 m centres with 0.3 m at each end need 2.6 m of row. Divide a target across the number of rows that will fit, then add the bed widths, working paths and fixed uses to find the internal width you need. This gives you a more useful size brief than asking for a floor area alone.
The Spacious Greenhouse listing covers sizes from 506 to 753 sq ft, but even a large listed area is not itself a tomato-capacity figure; the rows and access plan still decide the count. Compare the drawing for the selected size with your proposed layout, including the entrance and storage. If the target works only by narrowing the route or crowding plants beyond the variety’s guidance, reduce the number or look for a plan with more usable planting runs. A sound estimate is the number you can grow and reach, not the most stems you can mark on the floor.
Frequently asked questions
How many tomato plants fit in a small greenhouse?
There is no dependable count based on the word “small” alone. Measure the usable internal rows, allow for paths and end clearances, then count positions at the spacing suited to your tomatoes. The illustrative 2.4 m by 3.0 m layout in this guide holds 10 plants at 0.5 m centres; that is an example, not a product measurement or a universal recommendation.
How far apart should greenhouse tomato plants be?
For single-stem cordons, you can test roughly 45–60 cm between plant centres on your plan. Treat that as an initial planning range, not a rule for every variety. Check the seed packet or supplier’s growing advice, particularly for vigorous or bush types, and allow for the mature canopy and access you will need.
Can I fit more plants by growing them in pots or grow bags?
Containers can make a layout easier to rearrange, but they do not remove the need for room around each plant. Count the plant centres, then check that the containers fit without narrowing the route or blocking access. Include space to water and support the plants, and do not assume that one container always equals one plant position.
Can I use the whole greenhouse floor for beds?
Do not count the entire floor as planting space. Reserve a route from the entrance that lets you reach and tend every plant, including room to stand at row ends and move a watering can or harvest basket. You may be able to reach a narrow bed from one side, while a wider bed may need access from both sides. Paths reduce the number of planting positions, but inaccessible beds do not provide useful growing capacity.
What should I do if the spacing calculation gives a fraction?
Round down to the number of complete gaps that fit, then add the first plant position. For example, a 2.4 m centre-line span at 0.5 m spacing gives floor(2.4 ÷ 0.5) + 1, or five positions. Keep the end clearances in the calculation; otherwise the first or last plant may sit too close to a doorway or obstruction.
Your greenhouse tomato capacity depends on the cultivar, plant spacing, number and length of rows, end clearances and working route. Keep those assumptions beside the drawing so you can recalculate if the greenhouse size or training method changes. Leaving a little spare room is more useful than aiming for a theoretical maximum when the plants fill out and you need to water, train and harvest them.
