
Can Greenhouse Drip Irrigation Run from a Water Butt?
Greenhouse watering guide
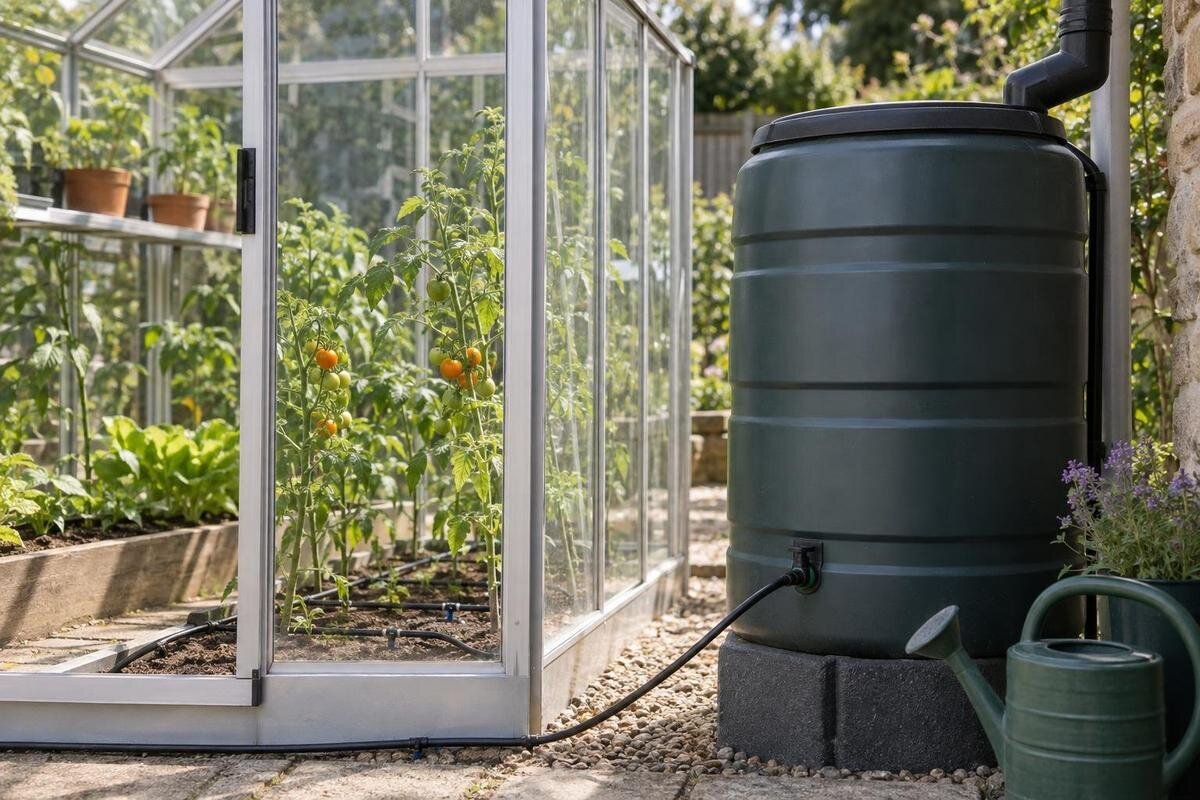
A water butt can run greenhouse drip irrigation if the system’s operating requirements suit the available gravity pressure. The key measurement is the vertical distance between the water surface and the emitters, not the butt’s capacity. Filters, valves and tubing then reduce the pressure available while water is flowing. Many kits intended for a mains tap need more pressure than a raised butt can provide. Check manufacturers’ operating requirements, then measure actual output at the farthest points with the butt both full and low. A trickle at one dripper is not proof of even delivery.

When a water butt can run drip irrigation
A water butt can supply a drip system by gravity when its water surface sits above the emitters, available pressure meets the minimum specification for every component, and the outlet can deliver enough flow. This may suit a simple, short route with emitters expressly sold for gravity-fed or low-pressure operation. Do not assume that every kit labelled as drip irrigation will work from a butt: equipment designed for a mains tap may need more pressure than a raised reservoir provides. The emitter data and the instructions for any valve or timer matter more than the kit’s broad description.
Treat the arrangement as one water path, not just a barrel attached to a hose. Water passes through the outlet, filter, any control valve, main tube, branches and emitters; restrictions and long runs can reduce delivery. A dripper near the inlet may work while the far end barely wets its pot, and a valve with a minimum-pressure requirement may stop the line opening. Feasibility means adequate output at the most demanding emitter with the intended outlets open. It does not mean that water appearing somewhere proves the system will work evenly. A short run with emitters at similar heights is easier to assess, but testing is still essential.
Measure head from the water surface to the emitters
Head is the vertical separation between the free water surface in the butt and the point where water leaves an emitter. Measure from the surface, not from the butt’s base, top rim or outlet fitting. For reference, a one-metre water column gives about 0.1 bar (10 kPa) of static pressure before flow losses; half a metre gives about 0.05 bar. This is an estimate, not a promise of running pressure. Once water moves through a filter and pipework, the pressure available at the emitter will be lower. An emitter above the water surface will not have positive gravity head from the reservoir alone.
Head changes as the butt empties, and emitters at different heights will not have the same pressure. Check the lowest water level you intend to use and the highest emitter, which will have the least head. Then allow for the filter, valves and pipe friction, which reduce pressure further while water is moving. When planning irrigation for a Lean-To Greenhouse, mark the butt position and the heights of beds, pots and benches on the same sketch. A dripper in a pot on a bench may sit substantially higher than one in a ground-level bed. Record these levels relative to one fixed reference point so that measurements remain comparable. There is no universal stand height that suits every system. Compare output at different heights rather than assuming that equal lengths of tubing will produce equal delivery.
Water-butt capacity and pressure are different
Capacity tells you how much water a butt stores; head determines the static pressure available from gravity. If two containers have their water surfaces at the same height, extra litres do not by themselves create more static pressure. A larger reserve may provide more usable water, but the way head falls during watering also depends on the container’s shape. A wide container and a narrow one can lose different amounts of water before their surfaces drop by the same distance. Choosing a bigger tank in the hope that it will make a weak dripper run faster will not solve a pressure problem.
Keep three figures separate when comparing arrangements: the butt’s capacity, the minimum water-surface height during irrigation and the total water used by the emitters. If you are considering the Limited Edition aluminium greenhouse, work from your intended planting layout rather than treating greenhouse floor area as a measure of water demand. Empty paths and work areas need no emitters, while closely spaced pots may need several within a small area. Mark a refill level on the butt once you have established the lowest level at which the system performs adequately. Water below that mark may still be useful for filling a watering can, but should not be counted as dependable irrigation storage. When delivery slows, record both the water level and emitter output; that helps distinguish falling head from a blockage.
Choose emitters and controls for low pressure
Start with the emitter manufacturer’s minimum operating pressure and flow information. Choose drippers, dripline or another component whose stated operating range includes the head your setup can actually deliver; ideally, the supplier identifies it as suitable for gravity or low-pressure use. A nominal flow figure is meaningful only under the pressure conditions stated by the manufacturer. If a data sheet provides a flow-versus-pressure table, use the entry closest to your measured conditions rather than assuming the printed litres-per-hour figure will apply to a water butt.
Check every component between the butt and the plants, including filters, regulators, automatic timers and valves. Some need a minimum inlet pressure or a particular flow to open; others may restrict a low-pressure supply. Pressure-compensating emitters are not automatically gravity-compatible: compensation works only within the stated operating range. For a planting layout in a T-Shaped Orangery Greenhouse, identify which branches will run together before selecting the controls. One valve feeding several branches must accommodate their combined demand, whereas separately controlled branches need compatible valves of their own. Ask the irrigation supplier for the operating range of the complete combination, not just the drippers. If the data are missing, an adjustable dial or a gravity-feed claim without supporting specifications is not enough to establish suitability. Testing confirms delivery within an appropriate operating range; it does not override a stated minimum pressure.

Plan the pipe route around beds and changes in height
Draw the full route from the outlet to the last emitter before buying tubing. Mark the actual beds, pots, benches, doors and work aisles, then trace the main line and each lateral. A straight-line distance across the greenhouse will underestimate the route if tubing must follow edges or avoid access areas. Note the elevation of each row as well as its length. Water travelling uphill uses some of the available head, while lower outlets may have more pressure, so emitters on the same line can behave differently.
Use the tube type and sizes specified for the chosen kit, and stay within its published run limits; an ordinary garden hose or an added length may not behave like the intended mainline. When planning beds inside a Pyramid-type greenhouse, use the selected model’s layout and your own bench positions to plot the route. Leave room to reach joints and branch connections without moving large pots. Keep branches reasonably comparable where possible and avoid unnecessary fittings. Include any permanent feeder pipe outside the greenhouse in the route length, rather than measuring only the tubing among the plants. If a route is long or has major height changes, test it in sections to locate restrictions. Secure the line so that normal gardening does not kink it, pull an emitter out of a pot or strain the butt outlet.
Test flow at every emitter, not just at the outlet
Test with the real components assembled: butt, outlet, filter, valve or timer, tubing and all emitters. Fill the reservoir to a recorded level, open every emitter that will normally run together and allow the flow to settle. Then collect each dripper’s output separately for a measured interval. A marked measuring jug or small graduated container is more informative than judging wetness by eye. To express the result per hour, divide the collected litres by the minutes and multiply by 60; for example, 0.3 litres in 20 minutes is 0.9 litres an hour. Write down the level and the test conditions so you can compare results.
Repeat the test at the lowest water level you intend to use. Include the farthest and highest outlets, and compare them with a near, lower emitter. Test with all intended outlets open: testing one dripper alone can hide a shortage when the full line is running. For a layout in the Classic aluminium greenhouse, number the emitters on your sketch and record each collection result beside its position. Use the same collection interval for comparisons. If the butt level falls noticeably during a test, measure outlets simultaneously where practical, or restore the starting level before comparing separate runs. Otherwise, a later result may reflect lower head rather than a poorer branch. Compare delivery with the manufacturer’s data and each plant’s watering plan. Revise weak branches rather than increasing the running time for every outlet, which could leave the better-supplied pots too wet.
Rainwater filters can reduce available flow
Rainwater can carry leaves, grit and sediment from the collection surface or butt, and narrow emitter passages can clog. Use the screen or filter type and filtration grade specified by the emitter manufacturer. A coarse inlet screen may catch leaves without being an adequate filter for the drippers. A cleanable filter is easier to inspect, but its mesh and housing still need to suit the system. Avoid choosing a very restrictive filter by guesswork: any added resistance matters more when gravity pressure is low.
Inspect and clean the filter as recommended for that product, and flush the laterals as instructed if sediment appears. If you want to collect roof water from a Prestige Greenhouse, establish which collection fittings are available and compatible before buying the butt connection. The supplied greenhouse information does not verify gutter or irrigation-accessory compatibility. Plan access to the filter housing so that you can isolate the supply and remove the filter element without dismantling the pipe route. Note its position on your layout and keep the manufacturer’s cleaning instructions with the irrigation records. After cleaning, repeat a representative flow check at a recorded water level. A fall in delivery across several branches can point to a shared restriction at the outlet or filter; one weak emitter is more likely to need a local inspection. This distinction helps avoid replacing sound components unnecessarily.
Check total demand and divide long runs into zones
Estimate total demand from all the emitters that will be open together. Add their stated flow rates as a first check, then confirm the result by measuring the assembled system: low pressure, long pipework or an unsuitable valve can make actual flow differ from label values. If the combined demand is more than the butt outlet and route can deliver, end emitters may be starved. A lower total demand in one zone can be more reliable than one long line serving every bench.
Group plants with broadly similar watering needs and emitter requirements, and separate lines when bed positions or elevations make balanced delivery difficult. More valves are not automatically a solution: each valve must work at the available pressure, and every zone needs its own flow test. The Spacious Greenhouse listing spans 506 to 753 sq ft, but floor area alone cannot tell you how many outlets a planting plan needs. Count the actual emitters in each zone and decide whether zones will operate together or in sequence. Sequential operation reduces simultaneous demand, but the butt will contain less water when the later zone starts. Test that later zone at its expected starting level as well. Label the valves and record which rows they serve so that uneven delivery can be traced to a particular branch.

Raise the butt only on a suitable support
Raising the reservoir can increase head, but a full water butt is heavy. Use a stand and footing suitable for the tank’s full filled weight, keep it level and stable, and avoid improvised stacks of loose blocks or containers. Check the butt manufacturer’s support requirements, including whether its base needs continuous support or a particular stand. Do not rest a tank on a greenhouse bench or attach it to the greenhouse frame unless that support is specifically rated for the load. When considering a greenhouse with built-in storage, plan a separate suitable position for the reservoir: the model name does not establish that the storage compartment or frame can carry a full butt.
Choose a position that keeps the outlet, filter and refill opening accessible and allows the pipe to reach the growing area without being pulled tight. The support needs to be safe when the butt is full, not just when it is empty. If you are unsure about a base or stand, ask a competent professional to assess it rather than adding height as a trial. If the required pressure would mean using an unstable support, investigate gravity-compatible emitters or a properly matched pump-fed system instead. Safe placement is part of the irrigation plan, not a detail to decide after testing.
Commission the system before relying on it
Commissioning should establish both reliable water delivery and useful watering at the roots. Follow the kit instructions for assembly and flushing, then check connections for leaks and observe where each emitter releases water. In pots, make sure the dripper remains over the compost rather than slipping against the rim or outside the container. In beds, inspect the wetted area around the outlet instead of assuming that one visible wet patch reaches every plant. After a trial watering, check moisture below the surface at representative positions and adjust emitter placement or running time to suit the planting. If you use a timer, confirm that it opens and closes at the available low pressure, including at the planned refill level. Watch the end of a cycle too: continuing drips can indicate that the supply has not shut off completely.
Use your records to decide whether the arrangement is dependable as built. If head at the weakest point is below an emitter’s or valve’s stated minimum, choose compatible components or reconsider the supply. Where the specified pressure is adequate but measured delivery is uneven, investigate restrictions, branch lengths and emitter condition. Gravity-rated components, a simpler or divided route, or a suitable pump-fed kit are possible alternatives; select a pump system using its supplier’s compatibility requirements rather than adding an arbitrary pump. Keep the final layout, component details, refill mark and measured outputs together as a baseline. Recheck affected branches after changing the system, and retain hand watering as a fallback until delivery and root-zone watering are consistent.
Frequently asked questions
Can I use any drip-irrigation kit with a water butt?
No. Check the operating-pressure range for the emitters, filter and any valve or timer. The complete kit must suit the gravity pressure available from your butt. Then test actual delivery with all intended outlets open; a successful trickle does not override a component’s stated minimum pressure.
How high should I raise the water butt?
There is no universal height. Estimate the vertical distance from the lowest water surface you will use to the highest emitter, then allow for pressure lost through the filter and pipework. Compare the result with the kit’s minimum pressure.
Will a bigger water butt give me more pressure?
Not by itself. Pressure depends mainly on the height of the water surface above the emitters. A larger butt can hold more water, but it will not create extra head if the water surface is at the same level.
Will pressure-compensating drippers work by gravity?
Not necessarily. Pressure compensation works only within the emitter’s stated operating range. Check its minimum pressure and flow data; the label alone does not show that it will work with a water butt.
How can I tell whether every dripper is getting enough water?
Run the complete system with all intended outlets open. Collect and measure water from individual emitters, including the highest and farthest ones, and repeat when the butt is near its lowest planned level.
A water butt is a workable drip-irrigation source when the lowest water level still provides enough head for the most demanding emitter and every component in the route. Capacity alone cannot answer that question. Check the pressure requirements, measure output with all outlets open and repeat the test as the butt empties. If the system cannot deliver evenly under those conditions, change the layout or compatible components rather than treating an occasional trickle as dependable irrigation.
