
Choosing a Drip Irrigation System for a Greenhouse
Greenhouse irrigation guide
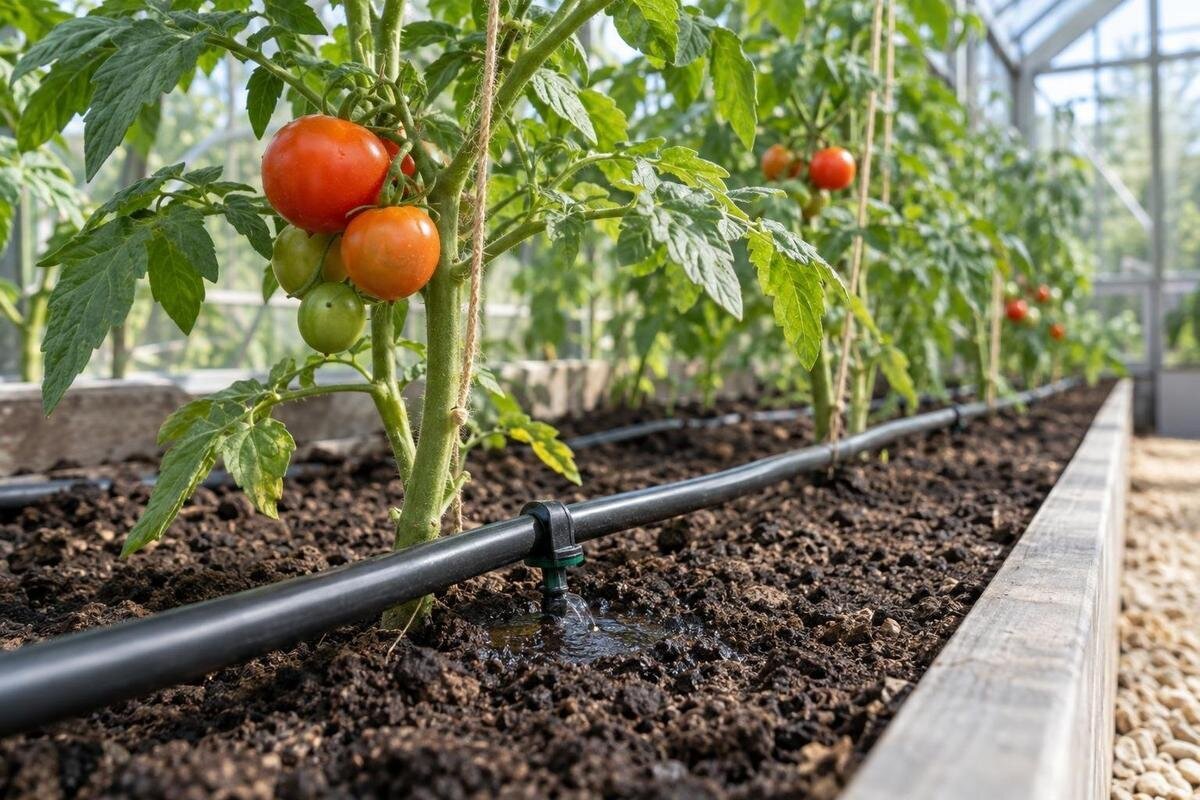
Drip irrigation in a greenhouse is easiest to manage when the outlets follow the crop layout, rather than a kit being chosen by floor area alone. Pots, grow bags and planted beds need different outlet positions, while filtration and pressure control must match the emitters actually used. This guide explains how to compare drippers and dripline, divide plants into useful zones, check flow and filter requirements, and test the complete arrangement before relying on it. The aim is a system you can inspect and adjust as the growing plan changes.

Map the greenhouse before buying a kit
Draw a scaled sketch of the interior as it is actually used: mark fixed beds, bench edges, pots, grow bags, crop rows, doors, access paths and the point where water enters. Note which containers move and which beds are permanent, then count the planned watering points and measure likely pipe routes. The same floor area can hold very different numbers of emitters. Leave clear access to valves and walking routes; tubing across a passage is easy to catch with trays or tools. Include bench heights and any shelf tiers, since a tube must reach an outlet without being stretched, kinked or pinched. Also note where a watering can or hose will still be used. This drawing is the basis for line lengths, fittings and zones, not simply the greenhouse footprint.
Check the intended water source and the kit’s operating range before ordering. Pressure may change when another tap is running, so a closed-tap reading does not show what reaches emitters under flow. When comparing sizes in the Classic aluminium greenhouse range, draw the planting layout for your selected size rather than estimating irrigation demand from floor area. Record the supply entry point and accessible positions for the shut-off, filter and regulator. If working-pressure readings or connection details are unclear, ask the irrigation supplier what information it needs.
Match emitter type to the planting arrangement
Point-source drippers serve individual planting positions and are often used where outlets need to reach separate pots or grow bags. They offer choice over where each emitter sits, but each branch, join or stake adds a connection that needs checking. Inline dripline has built-in outlets at set intervals and suits repeated rows when the spacing corresponds to plant positions. Some systems use microtubes or stakes to guide water into containers; use only fittings designed for the chosen tube and emitter. Adjustable drippers or multi-outlet fittings can be useful where the system supports them, but their output and adjustment method differ by model. Where planting intervals vary, fixed outlets may miss plants or water empty gaps. Choose from your crop arrangement, not the word drip on the packaging.
Use the manufacturer’s flow rating and operating-pressure range for each outlet. Pot size, crop and growing medium affect the arrangement needed; one dripper per pot is not a universal rule. Where several outlets feed a pot, count them all when assessing demand and check where they deliver water. For a Lean-To Greenhouse, measure the intended bench and pot positions before choosing fixed emitter spacing: the structure format alone does not establish a suitable interval. Keep the emitter model and specification so replacement outlets can be matched to the original system.
Separate containers and beds when needs differ
Treat containers and beds as separate watering groups unless observation shows they can share a schedule. Pots and grow bags hold a limited volume of growing medium, while a planted bed offers a continuous root area; they may not respond in the same way to one watering duration. Within a group, separate plants with clearly different needs or growing media if one run time leaves some too wet and others too dry. Seed trays and mature pots can also need different arrangements, so do not group them just because they sit on the same bench. Small pots along a bench can share a line, but check containers at both ends rather than assuming the conditions match. In beds, position dripline near the crop row and confirm the outlet spacing suits planting distances. Do not bury tubing or cover emitters unless the product instructions allow it.
Give a group its own valve when you need to water it independently. A branch shut-off can isolate a bed, a bench of pots or a newly planted row; check that the fittings and controller support the planned zones. Label each valve on the layout sketch. When planning a limited-edition aluminium greenhouse, distinguish planted areas from paths and storage before counting outlets. More floor area does not necessarily mean proportionally more emitters. Leave enough slack to move pots without stretching tubing, but avoid loose coils that catch tools.
Route pipework for access and straightforward maintenance
Plan distribution as a main supply line feeding branches, then laterals or short feeds to the plants. Keep the main line accessible for inspection and position branches near the rows they serve; this reduces awkward crossings and makes it easier to isolate a problem. Follow the system’s stated limits for line length, pressure and fittings rather than extending a standard diagram by guesswork. Use the end closure or flush fitting specified by the maker so sediment can be cleared in the intended way. Count elbows, tees, valves and end caps as well as tubing: a kit measured only by pipe length can still be short of the fittings that make its layout workable. Avoid hiding joints under gravel or where routine sweeping can push soil into open ends.
An irregular growing plan may need branches in several directions. For a T-Shaped Orangery Greenhouse, sketch the central access route and each planted area separately, then decide which branches need independent valves. A visually balanced arrangement does not guarantee equal flow: working pressure, components and pipe routes still matter. Keep tubing clear of doors, bench legs and frequently moved trays, with connectors visible for inspection. Valves need enough surrounding space to turn without pulling on a branch. Marking these positions makes it easier to trace a leak or isolate a blocked line.

Match filtration and pressure control to the emitters
Drip outlets have small passages, so filtration must meet the rating stated by the emitter or dripline manufacturer. Filter specifications may be expressed as mesh or microns; use the maker’s guidance to compare them rather than treating figures from different scales as interchangeable. A filter protects downstream outlets only when fitted in the correct direction and kept clean. Debris in the water can block emitters, while a dirty filter can restrict flow, so position it where it can be opened without shifting planted trays. A coarse screen at a tank inlet is not necessarily a substitute for the finer filtration required by the drip system. If a kit includes an integrated filter, check the source-water suitability and maintenance instructions. Follow any flow-direction arrow on the filter housing.
Pressure control also depends on the selected system. Check whether a regulator is required, its permitted inlet pressure and the emitters’ operating range; an arbitrary regulator may not suit them. Ask the supplier about pressure losses through filters and pipework if its guidance does not cover your layout. For a Pyramid-type greenhouse, mark accessible positions for this equipment alongside the proposed benches. Measure pressure while water is flowing, using the supplier’s recommended method. If readings fall outside the specified range, seek advice rather than adjusting the regulator by guesswork.
Size zones from emitter demand, not floor area
Make a zone schedule before buying: note each line, its emitter type and count, and the manufacturer’s rated flow at the specified pressure. Compare the zone demand with the capacity stated for the supply and tubing; if the figures or permitted line lengths are unclear, ask the supplier to confirm the design. Check whether a stated capacity applies to one outlet or to a complete zone. This is not a matter of matching pipe to greenhouse floor area: emitter count, run length and working pressure are the useful inputs. A rated output is not a promise of delivery at the end of an untested line. Pressure-compensating emitters can help in some layouts, but only when their operating range and flow suit the system; they do not remove the need to observe line limits or filtration requirements.
Split the system into zones when the supply cannot serve all outlets at once or plant groups need different run times. Check how many zones the timer or manifold supports, and record which may run together. When planning a greenhouse with built-in storage, keep pipe routes and service points clear of stored items; a valve hidden behind equipment is difficult to inspect or operate. Allow for future planting changes in the sketch, but confirm spare flow and controller capacity before adding outlets to an existing zone.
Use a timer only after the layout is working
Automation can make repeat watering easier, but a timer only opens and closes the supply for a chosen interval; it will not clear blocked outlets or correct uneven pressure. Establish even delivery manually first, then choose a controller compatible with the source connection, operating pressure, zone layout and required flow. Check whether it serves one zone or several independently, and whether the manufacturer states a minimum flow for reliable operation. If a timer needs a particular connector or power source, verify that before purchase rather than assuming every garden controller suits every irrigation line. A timer’s display confirms an on period, not that water reached every emitter. Keep a manual shut-off accessible so you can isolate the system for inspection.
Set run times from the crop, container, growing medium and observed moisture, then review them as plants grow or conditions change. A schedule copied from another greenhouse may be unsuitable even with identical emitters. When planning crops for a Prestige Greenhouse, group plants by watering needs rather than assuming the model determines the number of zones. Check moisture at representative positions along each line. Record timer settings and the date of each adjustment so you can assess its effect before making another change.
Test the complete system before relying on it
Commission the system before plants depend on it. Assemble it to the manufacturer’s diagram and flush new tubing as instructed, then run each zone with all its planned outlets open. Check joints, end closures, valves and filter for leaks or restrictions. Inspect emitters near the supply, midway along each branch and at its far end; weak or uneven output can indicate a pressure, blockage or layout problem that a check at one outlet will miss. If you measure delivery, collect comparable samples over the same interval and compare them with the maker’s performance data under matching conditions. Correct faults and repeat the test after changing a regulator, filter or line. Recheck after cleaning the filter, since that can change the observed flow.
Test the final arrangement, not a short sample of tubing on a bench. When considering the Spacious Greenhouse range, use the selected planting plan to establish which lines must operate together. Run each zone with its intended supply and controls, including any other water use expected during watering. Check moisture in containers and beds separately: a damp surface does not prove water has reached the intended root area. Record the tested arrangement and valve assignments, giving you a baseline against which to assess later additions or changes.

Recheck outlets as the crop layout changes
Revisit outlet positions as crops grow or move. An emitter beside a small transplant may not wet the same root area once a plant has developed, so check the growing medium rather than assuming the original placement remains suitable. When a pot is removed, close or remove its outlet as the system permits; do not leave an open take-off that leaks or admits dirt. When moving a container, confirm that the outlet still sits over the growing medium rather than against the pot wall or beyond the root area. Use the sketch to keep different crop groups on their intended branches when replanting, instead of connecting everything to the nearest tube. This matters when you rotate crops or change a bench from mature plants to seedlings, as the groups may need separate settings.
Review the system after moving benches or trays and at the start of a new crop. Look for kinked tubing, loose connectors, displaced stakes and outlets obstructed by growing medium or leaves. Compare delivery at the positions used during commissioning to distinguish a developing fault from a change in plant demand. Sun exposure, ventilation and plant size can make neighbouring pots dry at different rates even when delivery is even. Where those differences persist, reconsider the watering groups rather than repeatedly changing the schedule for the whole line.
Maintain the filter, lines and records
Follow the component maker’s care instructions. Clean filter elements at the stated interval, or sooner if flow changes; flush laterals through the intended end fittings and check for sediment before closing them again. Clear or replace a blocked emitter only by the method recommended for that model, since forcing a tool into a small outlet can damage it. Inspect tubing and connectors for splits, kinks and movement, especially where a line meets a bench edge, valve or frequently moved pot. Label each branch by crop group and mark its shut-off point. If the system is left unused or stored, follow the maker’s procedure, particularly where freezing is possible. A simple record makes leaks, seasonal changes and replacement parts easier to trace.
Before ordering, confirm emitter spacing, rated flow and pressure, filter rating, compatible tubing, permitted line lengths, flushing fittings and zone controls. Establish which components are included and which must be bought separately; greenhouse photographs do not establish irrigation availability or compatibility. Check that replacement emitters and filter elements can be identified from model numbers. Missing operating or filtration specifications should be resolved with the supplier before purchase. Keep the instructions with your final zone sketch so maintenance and replacement parts can be matched to the installed system.
Frequently asked questions
How many drippers does each pot need?
There is no universal number. Follow the emitter maker’s guidance, then consider pot size, crop, growing medium and outlet position. Test the arrangement and check moisture through the intended root area. If you add outlets, include their demand when checking the line’s capacity.
What filter rating should I choose?
Use the rating required by the dripper or dripline manufacturer. Check whether it is stated in mesh or microns, and compare the figures using the maker’s guidance. Water-source debris and the filter’s cleaning requirements also matter; a coarse inlet screen may not meet the emitter requirement.
Is dripline better than individual drippers?
Neither is best for every greenhouse. Inline dripline can suit repeated rows when its outlet spacing matches planting positions. Individual drippers make it easier to position outlets for pots, but add fittings and points to inspect. Choose according to your crop layout and the product ratings.
Will a timer correct uneven watering?
No. A timer controls when a zone runs, not whether each outlet is clear or receives the specified flow. Check pressure, filtration, line limits and emitter output first, then choose a timer that is compatible with the tested setup.
Can one system water pots and beds?
Yes, if the components and water supply suit both, but they may need different outlet types or run times. Put groups with different needs on separate valves, check each zone’s flow, and test the growing medium at representative positions before combining schedules.
A suitable greenhouse drip system follows the planting layout and delivers water consistently within the components’ specified limits. Independent zones let you adjust pots and beds without changing every plant’s schedule. Once the complete arrangement has been tested, moisture checks show whether outlet positions and run times suit the crops. Accessible lines, labelled valves and a record of the tested setup make it easier to adapt the system when planting changes.
