
External or Internal Greenhouse Shading: Which Solves Your Problem?
GREENHOUSE SHADING
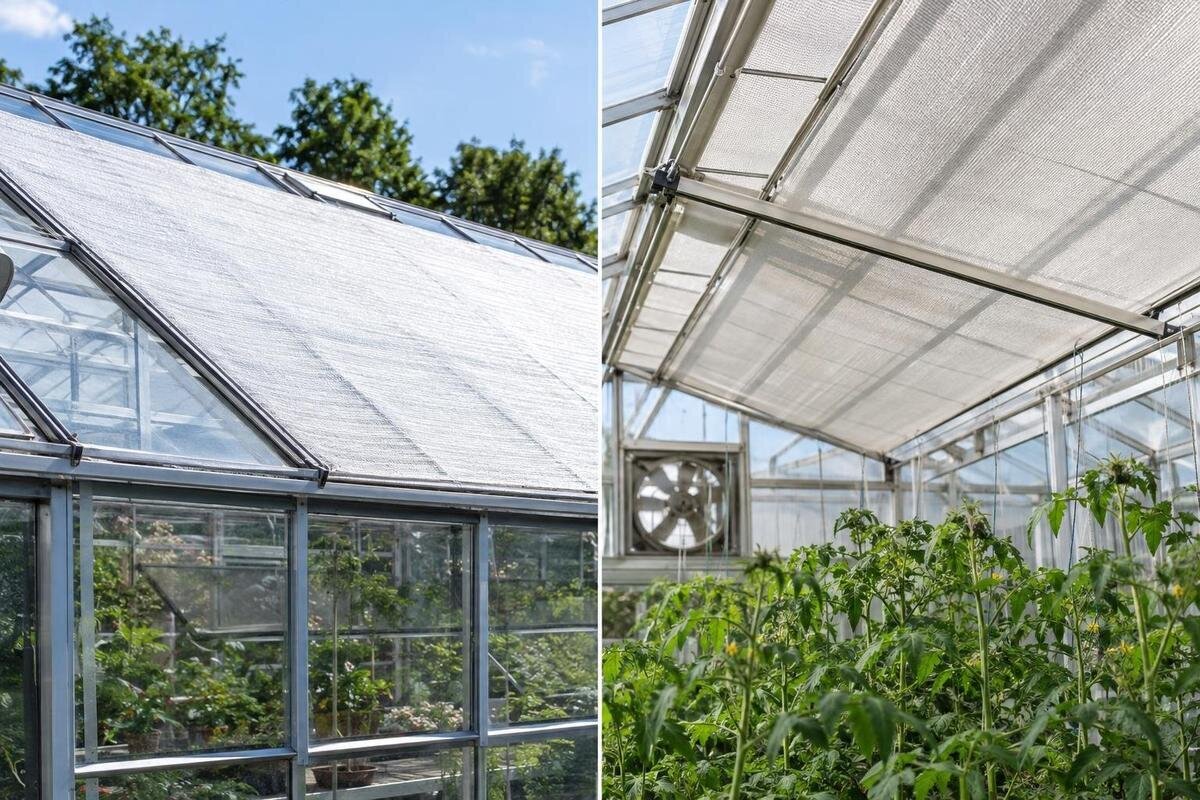
Before choosing greenhouse shade, separate three problems that can feel similar: heat building up in the air, direct sun falling on a particular crop, and a screen that is awkward to reach or fix safely. External and internal shading intercept sunlight at different points, so they do not solve these problems equally. A screen outside can reduce solar energy reaching the glazing; one inside can protect plants from direct rays, but sunlight has already crossed the glazing. The best position also depends on the sun pattern, ventilation, growing layout and fixing points approved for your exact greenhouse. A short log on bright days can show what needs changing.
Before choosing a shade system 1
How shade position changes greenhouse heat gain
External shading intercepts some sunlight before it passes through the greenhouse glazing. That limits the solar energy reaching the glass, plants and surfaces inside; the result depends on coverage, the screen material and the sun's angle. An outside screen can release some absorbed heat to outdoor air rather than adding all of it to the enclosed space. This is why external shading is generally the stronger option to investigate when direct sun is driving heat gain. It reduces incoming energy; it does not actively cool the greenhouse or remove heat already stored indoors, and it cannot promise a particular air temperature.
Internal shading intercepts light after it has crossed the glazing. It can reduce direct rays on leaves, benches and work areas, and a reflective surface may send some light back out. However, absorbed light can warm the screen and other surfaces within the greenhouse, so some of that heat remains inside. An internal screen may therefore protect a target area more readily than it prevents heat gain throughout the greenhouse. When considering the Bloomcabin Prestige Greenhouse, distinguish between shading a bench and reducing solar input across the structure. Those aims call for different coverage, so establish which matters most before asking about compatible shade systems.
When external shading is the better fit
Investigate an external screen first when your log shows that warming rises during direct sun on the roof or an exposed wall, particularly if several growing areas are affected. Intercepting sunlight before it passes through the glazing targets the incoming solar load rather than shading only the surfaces below it. The relevant area may be a roof section, a sunny side or both: morning and evening sun can reach a different face from high midday sun. Observe the greenhouse at the times the problem occurs and note which glazing receives sun. Broad cover is not automatically useful; coverage should follow the actual exposure.
External placement has trade-offs. A screen is more exposed to wind and weather and may be harder to reach for adjustment or cleaning. Ask the shade supplier about permitted operating conditions, including when the screen should be retracted or removed, and how you can do that from an accessible position. Coverage also affects the amount of equipment you need to handle: the Spacious Greenhouse range lists sizes from 506 ft² to 753 ft², but floor area is not the area of shade required. Use the roof and wall measurements for your chosen version when requesting a proposal. Include access for cleaning and removal rather than treating installation as the only task.
Before choosing a shade system 2
When internal shading is more practical
Internal shading is worth considering when the priority is to protect one bed or bench from direct rays, and reaching the greenhouse exterior is awkward or external fixing is not approved. A movable screen inside may be easier to inspect and adjust in some layouts, and its shade can be directed at a growing area rather than the whole house. It can reduce direct exposure on plants and make the shaded work area more comfortable, but those effects do not prove that the air temperature will fall. The sunlight has already crossed the glazing, and an interior screen may absorb and release some heat into the greenhouse.
Check the internal route before choosing a rail or panel. It must not foul doors, roof vents, automatic openers, lights, watering lines or plants as they grow; leave room for tending and cleaning too. For the Classic greenhouse, request a layout for the exact version you are considering and mark the intended screen position alongside your benches. Check where a retractable screen gathers when open, whether that bundle shades a bed, and whether its controls remain accessible. These details help distinguish a genuinely convenient interior arrangement from one that merely fits within the greenhouse. Confirm the proposed supports and clearances in the fitting guidance before ordering.
Use a temperature log to locate the heat problem
Compare conditions where plants are affected rather than relying on a single reading near a roof vent or in a sunny patch. Place a thermometer in a shaded, representative position at crop height, and use the same spot and instrument when comparing shade positions. Record the time, outdoor conditions, temperature and humidity, whether direct sun reaches the glazing or crop, and the state of doors, vents and fans. Follow the meter's instructions: a sensor exposed to direct sun can register its own heating rather than the surrounding air. The aim is a repeatable comparison, not a perfect weather station.
Use several sunny periods where possible, comparing similar parts of the day rather than a cloudy morning with a bright afternoon. A simple plan can show where the sun falls and where each reading was taken. Photos from the same viewpoint help record the screen position, sun patches, plant rows and clear or obstructed vents, but they do not replace measurements. If you are considering a lean-to greenhouse, record the proposed site's exposure at the times you expect to use it. For an existing greenhouse, measure in the affected growing area. Keep site observations separate from indoor readings: they answer different questions and cannot be compared as though they were the same test.
Before choosing a shade system 3
Map sunlight across the glazing and growing area
Shade is useful only where it reaches the relevant glazing or growing area at the time of the problem. Walk around the greenhouse when heat or direct light is an issue, then note which roof and wall panels receive sun and how the patches move across beds. Low morning or evening sun can enter through a side differently from midday sun over the roof. Nearby walls, fences and trees alter the pattern, as can the season; a view taken once in spring is not a map for the whole year. This can prevent buying broad cover for a small, well-defined exposure while leaving the affected panel uncovered.
Glazing type and layout also matter. The effect depends on the light that passes through the glazing, the area covered and the distance between the screen and the growing area; the same shade can therefore behave differently in two houses. Choose a position that shades the intended plants without unnecessarily darkening other beds, and allow for growth. When comparing versions of the Limited Edition greenhouse, draw the intended beds and shade coverage on the plan for your chosen size. Mark the sun's direction at the troublesome time as well. This gives a supplier a useful basis for discussing coverage rather than relying on an illustrative photograph.
Keep vents, doors and working routes clear
Shading should not interfere with ventilation. Check every roof vent and side opening through its full movement, including any automatic opener, and make sure an internal screen cannot snag or obstruct a fan. The system should also leave doorways and paths usable for carrying trays, reaching plants and cleaning glazing. This matters if a retractable panel is expected to move during the day: a screen that is hard to reach may be left in the wrong position or block an opening. Check the layout rather than relying on a product photograph, and compare the planned movement with the relevant instructions.
Mark doors, vents, opener arms, lights, water pipes and benches on a plan before settling on a shade line. Allow for the space moving components need; do not assume a screen can pass behind an arm because it looks clear while the vent is closed. For a T-Shaped Orangery Greenhouse, check each part of the actual layout and trace the route you would use to reach the shade controls. A position that is convenient beside one bench may be awkward from another growing area. Compare the screen's deployed and retracted positions with the vent clearances in the relevant instructions, and resolve any overlap before selecting the mechanism.
Before choosing a shade system 4
Confirm fixing compatibility for the exact model
Before choosing a shade material or mechanism, find out where it may be supported. An internal system may need designated tracks or frame points; an external one is exposed to wind and weather and may place different demands on its fixings. A glass pane, polycarbonate sheet, gutter or glazing bar is not automatically a fixing point. Do not drill, clamp, glue or load a frame based on appearance or a generic fitting diagram. Check the greenhouse manufacturer's instructions and the shade supplier's compatibility information for the exact model and version.
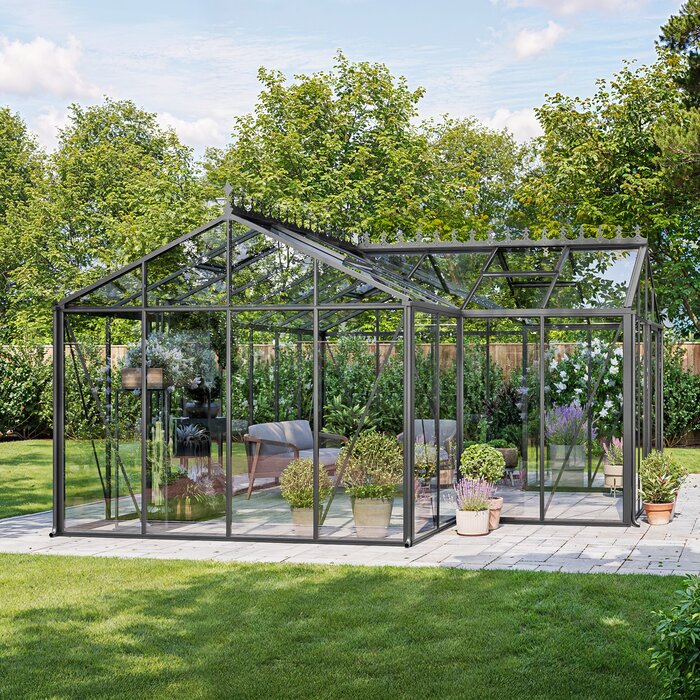
Ask which frame members may carry the system, whether the proposed brackets suit that frame, and what clearance is needed around vents and doors. If you are considering the Bloomcabin Oasis pyramid greenhouse, identify the exact version in your enquiry and include a drawing of the proposed screen position. Request written confirmation covering both the greenhouse connection and the shade hardware, rather than accepting a general statement that a bracket fits greenhouses. Keep that guidance with the model details for future maintenance or replacement parts. If the instructions do not cover your configuration, seek confirmation from the manufacturer or a suitably qualified installer; do not estimate structural capacity yourself.
Plan for adjustment, storage and maintenance
Think about how often the shade needs to move. A fixed screen may suit an exposure that affects the same area regularly, but it can reduce useful light at other times. A movable system offers more control only if it can be reached and operated without disrupting ventilation or daily work. Ask the shade maker how its product should be opened, closed, cleaned and stored, and what conditions it is designed for. Do not assume a system intended for inside use can stay outside, or vice versa. Compare the access needed for each position over a normal week, not just on installation day.
Include seasonal changes and cleaning access in the plan. External screens are more exposed to outdoor debris and weather; internal ones can be harder to reach once benches or vigorous plants fill the greenhouse. Neither position is maintenance-free, and an inaccessible fastening can make regular checks difficult. With a greenhouse with built-in storage, include access to the storage area when planning where the shade gathers or where its controls sit. Check that stored trays and tools will not obstruct those controls during everyday use. Also decide where a removable screen can be kept in the condition specified by its maker, with room to take it down and pack it away.
Before choosing a shade system 5
Compare options under similar conditions
Once you have located the exposed area and checked the permitted mounting position, compare performance in a low-risk, consistent way. Follow the shade product's instructions and change one thing at a time: compare the usual unshaded condition with the approved screen in its intended position, while keeping doors and vents in their usual recorded state. Use similar sunny periods and the same sensor location, then note temperature, humidity and whether direct sun still reaches the plants. A single before-and-after reading is weak evidence if cloud, wind or ventilation changed at the same time.
Judge the practical outcome as well as the reading: is the target bed shaded, does enough light remain for neighbouring plants, can you reach the screen, and do vents move freely? Take matching photos and label the date, time and screen position so later comparisons are useful. Do not test an external option by draping fabric over the greenhouse or fastening it to unapproved parts; a temporary trial still has to follow the maker's instructions. If no permitted option fits, seek an approved alternative rather than treating a short test as proof that a fixing is safe.
Match the shade position to the problem
If recorded temperatures rise with direct sun on the glazing and the aim is to reduce heat entering the greenhouse, external shading is usually the more relevant position to investigate, subject to model-approved fixings and operating conditions. If the main issue is direct sun on particular plants, air readings remain acceptable and interior access is easier, internal shade may address that local need with fewer outdoor access demands. These are starting points, not guarantees: screen coverage, glazing, orientation and ventilation all affect the result. Compare the shade-system instructions with your measurements and greenhouse layout rather than choosing by position alone.
Where high heat and strong direct light affect different areas, shading one exposed section may be more appropriate than darkening every bed, provided ventilation remains clear. If neither system can be fixed as instructed, or your records show little change despite shade, revisit the problem before buying more equipment. The most useful option is the one that blocks the relevant sunlight at the right time, leaves suitable light for the plants, and can be fitted, operated and maintained as the greenhouse and shade-system makers allow.
Frequently asked questions
Is external greenhouse shading always better for controlling heat?
External shading is generally more effective at reducing solar heat gain because it intercepts sunlight before it passes through the glazing. The result still depends on coverage, orientation, glazing and ventilation. It is not a guarantee of a particular indoor temperature, and it must be fixed and operated as the greenhouse and shade-system makers allow.
Can an internal screen stop a greenhouse overheating?
It can reduce direct sun on plants and benches, but sunlight has already crossed the glazing. Some of the energy absorbed by the screen and interior surfaces can remain inside, so an internal screen is usually less effective at limiting heat gain than comparable external shade. Check temperature readings as well as the shaded area.
Should greenhouse shade go on the roof or a side?
There is no universal position. Track which glazing receives direct sun when the problem occurs: low morning or evening sun may reach a different side from midday sun. Shade only the relevant area if the rest of the greenhouse still needs light, and make sure the chosen position is compatible with the model.
Can I attach shade to greenhouse glazing bars?
Do not assume a glazing bar, pane or gutter is an approved fixing point. Check the greenhouse instructions and the shade-system guidance for the exact model and version. If they do not confirm the proposed fixing, ask the manufacturer or a suitably qualified installer rather than drilling, clamping or loading the frame yourself.
What should I record before choosing a shade position?
On bright days, note the time, temperature, humidity, where direct sun falls, and whether doors, vents and fans are operating. Take readings from the same shaded position at crop height, and use matching photos to record the screen position and sun patches. Compare similar conditions rather than relying on one reading.
Treat shade position as part of the greenhouse's measured conditions. External shading addresses solar input before it passes through the glazing and is usually the stronger candidate for limiting heat gain; internal shading can be more practical for targeted plant shade but may not reduce heat build-up as much. Let your records show where and when sunlight causes the problem, then weigh crop light, ventilation, access and model-approved fixings. The better choice is the one that changes the problem you have without getting in the way of growing or working in the greenhouse.
