
Does Extra Greenhouse Width or Length Work Better?
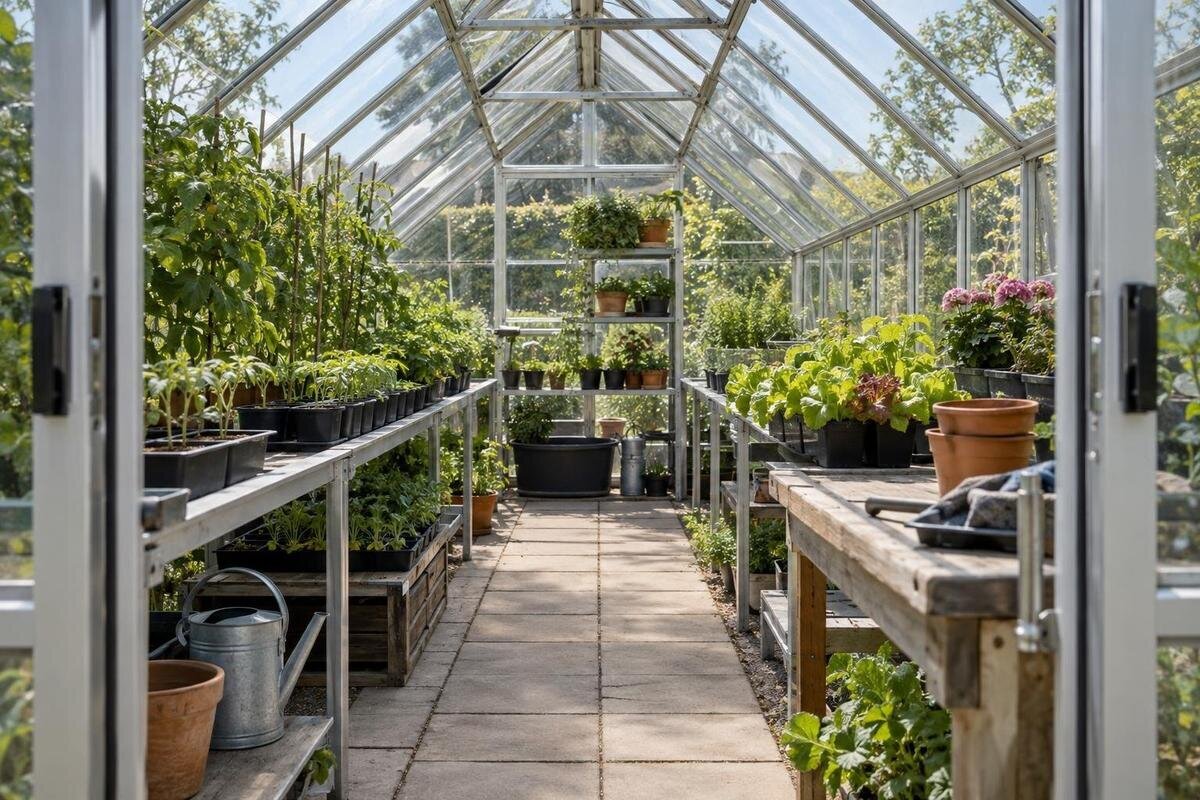
Greenhouse layout guide
Choosing between a wider and a longer greenhouse is not simply a choice between more and less room. When two footprints cover the same area, their proportions still determine whether a central path and parallel beds fit, how long a row can run, and where benches or storage interrupt movement. Compare the layout you can reach and use every day, rather than treating a headline floor-area figure as a complete answer.

Dimensions to verify 1
Equal floor area does not mean equal working space
The floor area of a simple rectangle is its internal width multiplied by its internal length. If one dimension increases while the area stays the same, the other must decrease: a wider footprint is shorter, while a longer footprint is narrower. The total area may be equal even though the clear space across the greenhouse and the length of each bed are not. That is why comparing a wider option with a longer one is different from simply choosing a larger greenhouse. To isolate the effect of shape, compare equal areas; otherwise, a difference in total size obscures what the changed proportions contribute. The formula describes the rectangle, not whether its floor is easy to reach or divide.
An area figure also says little about what is left for planting. A path is useful floor, but not a bed; benches, shelves, a potting station and door clearance claim space too. Before comparing width and length, check whether the quoted dimensions refer to clear space inside the frame, the base or the outside footprint. Use the same measurement basis for every candidate, and account for the route your layout needs. A square foot near a fixed fitting may not be useful for the arrangement you want, even though it belongs in the area total. Otherwise, an apparent shape advantage may come from comparing unlike dimensions or counting floor that cannot take your intended layout.
Extra width changes the layout across the greenhouse
Width changes the choices across the greenhouse. With enough clear width, you may be able to put a bed along each long side and keep a path between them. Depending on bed depth and how you prefer to work, another arrangement might be one bed opposite a workbench, or a central bed with access on both sides. The potential gain is the ability to place growing and working zones beside one another rather than in a single line. Sketch where you would stand and which edges you would reach from the path; beds near both walls are useful only if their edges remain accessible without stepping over crops or relying on access from outside.
That flexibility depends on what remains after the path and fixed fittings are drawn, not on the outside width alone. Spare width might accommodate a bench, give you more room to move or separate pots from the main route; it need not become another bed. A floor-area range, such as the one shown on the Pyramid-type greenhouse page, can help you shortlist sizes, but it does not show how those uses fit alongside one another. Draw the intended beds, bench and clear path across the internal width. Include shelves that project over the aisle and allow for foliage extending beyond the bed edges. If the aisle fits only by making beds too deep to tend, the wider outline has not solved the access problem.
Dimensions to verify 2
Extra length extends rows and routes
Length extends what can run along the building. A longer greenhouse can take a longer bed, a row of pots or a bench, or allow work zones to sit in sequence from the entrance to the far end. This may suit a routine built around tending along one row or keeping potting separate from growing without dividing the width. It can also let you keep a run unbroken instead of splitting it around a crosswise fitting. But extra length makes the journey to the far end longer too; if you visit each part during routine jobs, that distance matters. If the route stops at a bed or bench, the extra run may create a bottleneck rather than a useful zone.
Length is most useful when the width already accommodates the path and bed depth you need. Decide whether the path ends in a usable standing or turning area, or simply stops at the last crop. For a footprint that is not a simple rectangle, area becomes even less revealing: when a listing describes a T-shaped form, as with the T-shaped orangery greenhouse, the product name does not give you the clear width of each part or show how the spaces connect. Use the drawing for the selected configuration to assess each section separately; a total area cannot be treated as one continuous long bed when the footprint branches or narrows at a connection.
Compare equal-area rectangles
Try a like-for-like arithmetic comparison. An illustrative internal rectangle measuring 6 ft by 16 ft and one measuring 8 ft by 12 ft each have an area of 96 sq ft, about 8.9 m². A 4 ft by 24 ft rectangle has the same area. These measurements are examples for comparing proportions only; they are not available product sizes. The six-foot option gives more length than width, the eight-foot option gives more room across, and the four-foot option prioritises length further. The examples assume internal clear measurements, not exterior dimensions. Nothing has been added between them; the same area has simply been reshaped.
Use explicit assumptions to see how the area divides. For illustration only, two beds each 2 ft deep beside a 2 ft central path fill the width of the 6 ft by 16 ft rectangle. Before allowing for entrance or end space, that gives 64 sq ft of beds and 32 sq ft of path. In the 8 ft by 12 ft rectangle, the same bed depths leave a 4 ft central path: 48 sq ft of beds and 48 sq ft of path. Alternatively, two 3 ft-deep beds and a 2 ft path would give 72 sq ft of beds, but the deeper beds would need a reach test. The 4 ft by 24 ft rectangle could take one 2 ft-deep bed beside a 2 ft path, giving 48 sq ft to each. These are arithmetic layouts, not recommended bed or path dimensions. Reserve entrance and end space separately; equal area alone does not determine usable planting space.

Dimensions to verify 3
Set the path width before the bed depth
Draw the main path first, since every bed and fixed fitting has to leave it accessible. For two side beds and a central path, add both intended bed depths and the path width, then compare that total with the clear internal width. For a bed on one side and a bench opposite, count the bed, route and bench in the same way. Use the internal length to position those items and retain any end space needed for entry, turning or standing. Write the sums beside each plan so you can see whether an arrangement gains planting space by narrowing the path. Clear internal measurements should already exclude the frame, but local projections, bench legs and items stored beside the beds can still reduce the route.
Choose bed depth according to how you will reach and tend it. A bed accessible from both sides can be planned differently from one against a wall, where access comes from only one edge. Test the far edge at the intended working height: reaching across a raised bed or staging is different from tending a ground-level bed. Try the tasks you expect to do, rather than checking only whether your fingertips reach the back. The Classic greenhouse range is one catalogue option to compare with this layout. Use your tested bed depths to assess which selected size leaves enough room for the route, rather than increasing bed depth simply to fill a wider footprint.
Plan around the entrance and everyday route
Door position can alter the value of either dimension. With an entrance at a short end, extra length may create a straight route past the beds, but it also means travelling farther to the back. A side entrance may require a break in a bed or bench to connect with the main path. Mark the doorway and its opening clearance before placing the first bed; a container or shelf near the entrance can make a generous interior awkward to enter. Check where you will stand while opening and closing the door, as well as where you will go once inside. The entrance should connect with the working route without requiring you to step over a bed or move equipment.
Think through jobs with something in your hands: carrying a seed tray, moving a pot, watering the far bed or transferring tools between a bench and a growing row. Extra width may make the route less constrained or allow access to more than one side; extra length can give room for tasks to occur in sequence. Neither helps if the path narrows at a doorway, passes through a work area or ends at an obstruction. A lean-to greenhouse range is one format to include in a comparison, but use the exact footprint and access drawing for the selected size. Test the route in the direction you would travel, not just as a line on a plan, and account for pots that will sit alongside it.
Dimensions to verify 4
Include benches and storage in the footprint
A layout also needs room for the things that support growing. A potting bench, staging for trays, shelves and tool storage may be useful, but each can take floor width, shorten a bed or block a route. Decide which fittings are fixed and which can move. A bench along a long wall uses some length but leaves another part of the width open; one across an end shortens possible side-bed runs and may occupy a useful standing or turning area. Add the actual dimensions of these items, including parts that project into the aisle. If a shelf is wall-mounted rather than floor-standing, check whether it still affects the working space below it; do not treat every fitting as an empty label on a sketch.
If storage is part of the plan, count its footprint before assigning the remaining space to crops and paths. The aluminium greenhouse with built-in storage page identifies a storage-inclusive model, but that description alone does not establish how much room a particular configuration leaves for beds or circulation. Check the drawing for the selected size and see how the storage section relates to the growing area. If storage is in a separate compartment, do not count it as clear bed space; if it sits beside your route, include that effect in the layout. This keeps the area comparison honest.
Match the proportions to your growing routine
Match the proportions to the tasks you repeat. If you tend crops in long rows, tie in climbing plants or work along a single bed, a continuous run and access along it may matter more than extra cross-width. If you sow in trays, keep pots on staging or need separate potting and growing zones, extra width can make it easier to place those tasks side by side. These are layout considerations, not promises about harvests or plant capacity: crop spacing, training, containers and equipment still determine how much can be grown in each bed. Consider whether you want to tend one long run at a time or work across several shorter areas.
Seasonal changes can alter which proportion is more useful. Draw one layout for seed trays and young plants, then another for the larger pots or mature crops you expect later. The early-season arrangement may benefit from long staging, while the later one needs more clearance beside foliage and containers. Do not count the same strip of floor as a permanent path and a place to leave trays. When considering the Prestige greenhouse, compare the selected configuration with both plans. Movable staging might let you adapt a shorter, wider space, while a long bed may suit a more permanent arrangement. This makes the comparison about how you will use the space throughout the growing season, rather than how many items fit into an empty outline.

Dimensions to verify 5
Measure the site and check the chosen dimensions
Your garden’s available shape may settle part of the choice. Measure the area you can actually allocate, including the external footprint and any access space that needs to remain around it. If the plot boundary is irregular, measure the narrowest point rather than relying on the widest span alone. A narrow strip may limit width even when it is long enough for an extended layout; a more square space leaves greater choice of proportions. Note where an entrance can work and whether paths, walls, existing beds or other fixed features constrain the approach. The outside footprint and route into it matter as much as the area printed on a product listing.
Then compare the dimensional drawing for the exact size and configuration, not just a catalogue range. Look for clear internal width and length as well as overall dimensions; note whether overall measurements include the frame, base or an attached section, and record the doorway separately. The Limited Edition greenhouse range is a family name, not a measurement for every version; use the drawing for the option you are considering. Keep the same basis for every candidate—internal against internal, external against external—so you do not credit one greenhouse with space that another measurement excludes. If a page shows area but not the dimensions needed to plan beds, request a dimensioned drawing before making the comparison.
Test the exact layout at full size
Before settling on width or length, mark the intended footprint with string or tape, then plot the beds, path, door clearance, bench and storage at full scale. Walk the route and mimic ordinary tasks: reach the far edge of a bed, carry a tray past the work surface and turn at the end. This can reveal a problem hidden by an area total: a bed may fit on paper but leave no useful way to work beside it. Use separate markings for the external footprint and the clear interior, so you test both the fit on the site and the working layout within it. Use the chosen product’s dimensions; the illustrative rectangles above are only a comparison tool.
Choose according to the dimension that limits your layout. If the planned beds and path do not fit across the clear internal width, adding length will not fix that; compare a wider proportion or revise the bed arrangement. If the width works but the bed or work zones are too short, extra length may be more valuable. If both dimensions are adequate but a bench interrupts the route, repositioning the fitting may solve the issue without buying more floor area. The Spacious Greenhouse page lists floor-area options from 506 to 753 sq ft; those figures indicate total size, not the proportions of a selected option. Among equal-area layouts, favour the one that makes your least convenient recurring task easier.
Frequently asked questions
Is a wider greenhouse always more useful?
No. With equal floor area, width comes at the expense of length. More width can let beds and a path sit alongside one another, but the gain disappears if the path is too narrow or the beds are hard to reach. Choose the proportion that supports your working arrangement, rather than treating width as a goal in itself.
Do equal-area greenhouses provide the same amount of planting space?
Not necessarily. Aisles, door clearance, benches and storage can take up different amounts of floor in different layouts. Even if the bed areas are similar, the reach and route may not be. Compare the planned bed and path dimensions, not just the total square footage.
When is extra length more useful?
Extra length can suit a long continuous bed or bench, or allow work areas to sit in sequence. It does not automatically increase plant capacity, which depends on the crops, spacing and bed arrangement. Check that the longer route remains practical and that you can work at the far end.
Are the 6 ft by 16 ft and 8 ft by 12 ft examples real sizes?
No. The 6 ft by 16 ft, 8 ft by 12 ft and 4 ft by 24 ft figures are illustrative equal-area rectangles used to explain the effect of shape. They are not claims about available greenhouse sizes. Use a product’s drawing to compare a specific size and configuration.
Which measurements should I compare on product pages?
For the exact size you are considering, compare clear internal width and length as well as overall dimensions. Check whether the overall measurements include a frame, base or attached section, and note the doorway separately. Keep internal and external measurements distinct. If a page gives only floor area, ask for a dimensioned drawing before planning beds and paths.
Width and length solve different layout problems, even when the total floor area is equal. Favour width when beds, a path and equipment need more room alongside one another; favour length when the width already works and you need longer growing runs or work zones in sequence. The better proportion is the one that removes a practical constraint without creating another. A layout that is easy to reach and move through is more useful than extra planting space you cannot comfortably tend.
