
Planning a Greenhouse Teaching Space for Garden Workshops
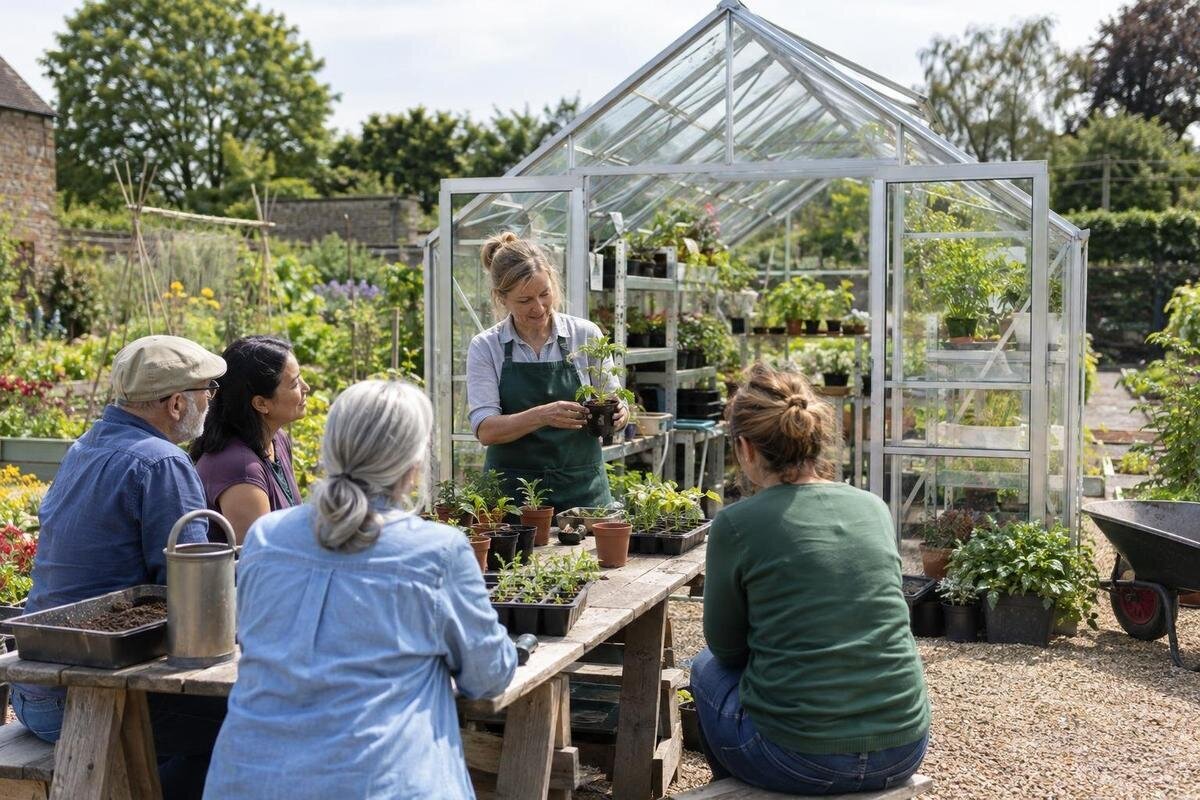
Garden workshops
A greenhouse used for garden workshops is both a growing environment and a teaching space. Participants need to see a technique, reach a bench, move without interrupting one another and find tools or water without crossing the demonstration. A useful layout is therefore built around the lesson and the people taking part, not just the largest available footprint. Map the instructor's position, viewing points, active workstations and supporting facilities, then test the plan against the site, utilities and routine for preparing and resetting the space.

01
Define the teaching format before estimating floor area
Begin with the learning outcomes and the way each session runs. A live demonstration has a different footprint from a class in which every pair pots seedlings, and both differ from a rotation of explanation and practice. Record the usual and largest group size, age range, session length, number of instructors and tasks you expect to teach. List the equipment each task brings out: trays, pots, growing media, plants, hand tools and display materials. Note whether learners observe or work at the same time, and whether the instructor needs a preparation area before participants arrive. These details set the number of active positions and the space required around them.
Estimate usable teaching area rather than treating a quoted floor area as seating capacity. On a sketch, mark the entrance and door swing, fixed features, storage, demonstration table, workstations and routes; the remaining footprint is not automatically usable either. Draw the largest likely session first, including staff, equipment and a place for preparation if that takes place inside. Product ranges can help frame a scale comparison: the Pyramid / Oasis greenhouse is listed from 60 to 203 sq ft, but that figure does not establish a workable participant count. Request the plan for the exact configuration and test it with furniture and people before comparing it with your teaching brief.
Make the demonstration visible from every working position
Make the instructor's hands and the work surface the visual focus. Place the teaching bench so participants can gather where they can see a seed being handled, a graft being made or a plant being pruned without standing in a route. Check sightlines from actual viewing positions, not just from the centre of an empty plan: people at the back, shorter participants and anyone seated may see a different part of the task. Decide whether every learner needs direct visibility or whether a close-up display is necessary, then include that equipment and its position in the drawing. The instructor also needs space to demonstrate without being hemmed in by the group.
Keep plant displays, hanging tools and stored trays out of participants' sightlines, allowing for plants to grow and benches to fill. Consider changing light through the day: reflections on glazing or bright light behind the instructor can make a small task harder to follow even when the layout appears suitable on paper. Stand at each marked position at the time classes will run, or mock up bench heights and viewing angles before ordering. Ask someone else to check what they can see from the furthest positions. The Prestige greenhouse range is listed from 40.6 to 302 sq ft; use the selected configuration's drawing to identify any fixed features that could obstruct the view of the demonstration surface.
02
Separate demonstration, practice and growing areas
Treat teaching, participant practice and growing as related but separate functions. Keep the demonstration area clear enough for the group to gather, place hands-on stations where learners can work without blocking that view, and decide which plants are lesson material rather than general display. If an activity moves from explanation to practice, make the route between those points short and easy to understand. A bench full of display pots or a trolley of compost in the only working aisle can turn a simple exercise into repeated interruptions. Mark each zone on a plan, including the space needed to approach a bench and set down a tray.
Map the order of each common activity: materials arrive, are introduced, used, watered or cleaned, then put away. Keep clean seed packets and labels separate from damp pots, returned tools and loose growing media; containers or defined shelves make the distinction easier to maintain during a busy class. Decide which surfaces stay available and which can be cleared for occasional activities. A movable worktable offers flexibility, but it still needs a parking place that will not narrow a route when it is not in use. If several exercises run at once, give noisy, wet or messy tasks a defined area rather than relying on verbal reminders.
Keep routes clear around people, tools and plants
Draw the route from the garden approach to the entrance, then from the entrance to the demonstration and each work area. Include someone carrying a tray or watering can, a person waiting to join, and a group changing stations; people should not have to pass between the teacher and learners. A loop may make rotation clearer, but it is useful only if the actual doors, benches and room shape allow it. Avoid making circulation depend on moving a display or squeezing past a workstation whenever somebody needs a tool. Show where a late arrival can wait without cutting across the class or blocking an active bench.
Mark door openings, thresholds, passing places and turning space, and check the route to outdoor beds as well as movement inside. Soil, hoses and trays tend to follow the work, so decide where they enter and leave rather than letting the busiest path become a potting area. A T-shaped plan might look promising, but the T-Shaped Orangery Greenhouse name does not tell you where doors or work zones fall; use a current dimensioned plan to test circulation. Walk through the arrangement with the real kit and enough people to represent a typical class. Note where two-way movement creates a bottleneck, then adjust the route or furniture and try again.

03
Size work surfaces for the task and the group
Choose work surfaces from the tasks outward. Seed sowing needs room for trays and labels; potting needs space for a pot, growing media and the plant being handled; pruning may need a clear place for removed growth and tools. Set aside a demonstration surface large enough for the teacher to show each stage without hiding the work behind supplies. For learner stations, decide whether people work singly, in pairs or at shared benches, then mark the approach space as well as the worktop. Consider the ages and working positions of participants: there is no single bench height or arrangement that suits every group.
Count working positions rather than tables. One long bench may look generous but leave a learner facing away from the demonstration, while several smaller stations can make rotation easier but increase movement and storage needs. Draw each activity with containers, labels, hand tools and somewhere for used materials, then check whether someone can reach items without stretching across another person's work. The Classic greenhouse listings cover 40.6 to 302.3 sq ft; use these published area options only as a starting point for comparing plans. Usable bench length and clear floor space depend on the selected configuration, so show the actual equipment and shared materials on the drawing.
Plan water, drainage and electrical needs around lessons
List utilities by teaching task, not by a general wish for everything. Water may be needed for plant care, demonstrations, hand-washing or cleaning equipment; these are different demands and may need different locations. Mark points of use, how containers or tools will be carried, and where wet work and drying can happen. Think about drainage and splashes in relation to growing media, handouts, electrical equipment and walking routes, and include a place to manage damp items. Do not assume that a nearby garden tap or drain can serve the planned use: confirm the site's existing services and any proposed changes with an appropriate professional.
Record electrical needs separately. Perhaps task lighting, a screen, microscope or powered tool is part of the lesson; perhaps it is not. Note where each item will be used, what connections it requires and whether the need is limited to one station or applies throughout the space. Plan connection points around the equipment rather than relying on temporary leads or hoses across routes. When considering the Lean-To Greenhouse, listed from 40 to 154 sq ft, include the adjoining building and its existing services in the site assessment. Proximity to a building does not establish that its services can supply the teaching space. Have electrical capacity and installation requirements assessed by a qualified professional.
04
Build storage and reset routines into the layout
Storage should support the class rather than compete with it for floor space. List what must be close at hand—small tools, labels, pots, trays and handouts—and what can be kept elsewhere, such as bulk growing media or spare equipment. Decide which items need to stay dry, be separated from dirty returns or be securely stored if children may attend. Plan a clear place for used tools and waste after each exercise. Open shelves keep frequently used things visible but can add visual clutter; cupboards conceal supplies but need access space and a consistent reset system. Draw storage units to scale, including clearance for opening doors or drawers and for someone retrieving materials.
Work out who prepares and resets the space, and how much time each changeover needs. Labelled shelves or tubs and a short closing checklist can return activity kits to known places, but allow room to reach and sort them without blocking learners. If built-in storage is part of the comparison, the Limited Edition greenhouse with built-in storage is listed in sizes from 59.4 to 302 sq ft. Check the drawings and storage arrangement against the actual tools and materials; the product name does not show whether a chosen configuration holds a workshop's full kit. Keep clean incoming supplies separate from used items in both the plan and the routine.
Assess comfort and seasonal operation
A greenhouse changes with the weather and time of day, so assess conditions during the hours when classes will run. Sun, glare, cold surfaces, dampness and temperature changes may affect concentration and the handling of plants or materials. Note which areas receive direct sun at different times and whether the instructor will face bright glazing. Set a realistic operating calendar and session length around conditions you can manage; glazing alone does not promise the comfort of an indoor classroom throughout the year. If active heating, cooling or ventilation is needed, include it in the project brief and have the requirements reviewed by a competent specialist.
Plan for seasonal changes in clothing, equipment and lesson choice as well as plant growth. A place to set down coats or bags, and a route to shelter outside, may be more practical than fitting every need around the teaching bench; count adjacent facilities only if they are part of the project. The Classic Accoya / Limited Edition greenhouse is listed in sizes from 40.6 to 302 sq ft, but the area range makes no claim about seasonal comfort. Review the chosen design, intended occupancy and proposed environmental systems together, including how they will be operated and maintained. Make those operating assumptions clear before setting a regular schedule.

05
Check site access and operating responsibilities
Consider access from the whole site, not simply the greenhouse door. Participants may need a suitable route from the entrance, room to pause, an accessible work position and access to hand-washing or toilets elsewhere. Ask who is likely to attend and what support they may need; do not assume everyone can stand for a full session, reach a high shelf or negotiate a narrow path. Test a chair or seated work position in the same plan as standing stations, with space to approach and leave it. Include the site approach and any route to outdoor activities in an access review with an appropriate professional where the intended use calls for one.
If the greenhouse will host organised or public groups, verify the permission, access, fire, insurance and operating requirements for the specific site and use with the relevant local authority or qualified advisers. Requirements depend on the proposal; a product page or floor-area figure cannot establish them. Decide who supervises arrival and departure, manages tools, responds to changing weather and handles an incident, and whether toilets, shelter, first-aid supplies or waiting space are provided elsewhere. These arrangements affect practical group size as much as the workbench. Record responsibilities before committing to a design rather than assuming they will be covered by the building.
Test the plan against drawings and real lessons
Before selecting a model, build a scaled plan with the greenhouse footprint, fixed features, furniture, people, open doors, storage and routes. Test both the largest regular class and a small session; use life-size paper outlines or removable floor tape to check whether learners can see, reach, pass and change stations. If a teaching method depends on close-up viewing or a particular machine, test that exact set-up. The Spacious Greenhouse orangery is listed from 506 to 753 sq ft, which can help frame a scale comparison, but that area is neither an occupancy figure nor proof that the space will function as a classroom.
Use the tested drawing to prepare a project brief: site approach, intended lessons, usual and maximum group sizes, age and access needs, furniture, storage, water, power, seasonal use and the people who will manage the space. Ask for dimensioned plans of the proposed configuration and confirm its exact layout, openings, included features and service interfaces instead of inferring them from a model name or photograph. A greenhouse or orangery specialist can help explore the structure, while a qualified designer or installer should assess site and utility questions within their remit. Keep the plan you tested so supplier discussions address a real teaching routine, not an abstract request for a large greenhouse.
Frequently asked questions
How many people can a greenhouse workshop hold?
There is no dependable headcount based on floor area alone. Work out how many people need to observe and how many can use a work surface at once, then account for fixed features, storage and clear routes. Test the layout with your usual and largest planned groups, and check any site-specific access and operating requirements.
Does the demonstration bench need to be in the centre?
Not necessarily. The instructor needs to be visible from every intended viewing position, but a central bench can obstruct movement or crowd participants. Mark the bench and routes on a plan, then check the view from standing and seated positions. Keep stored plants and equipment out of the view corridor.
Does every participant need an individual work surface?
No. Pairs or rotating stations can suit some activities, provided everyone has room to handle the materials and can see the demonstration before practising. Decide how many people will work at once, where others will wait and how transitions will run. Then check that movement and storage do not take over the work area.
What utilities should I plan for?
List water needs for plant care, demonstrations, hand-washing and cleaning separately, and note any drainage or drying needs. Include lighting, screens or powered tools only if the teaching plan calls for them. Ask qualified professionals to assess service capacity, installation and any site changes.
Can any greenhouse be used for public workshops?
A model name and published area do not establish suitability for organised or public teaching. Check permissions and site-specific requirements for access, fire, insurance and operation with the relevant local authority or qualified advisers. Assess seasonal comfort and any facilities outside the greenhouse before setting a regular programme.
A successful teaching greenhouse is organised around a real sequence of tasks: watching, practising, moving, cleaning and resetting. Keep the plan honest about people, furniture, tools, routes and services, then test it at the busiest intended session. Once the arrangement works on paper and on site, compare greenhouse or orangery configurations using current drawings and confirm the operating requirements. That way, the growing space can support teaching without relying on floor area alone to solve practical needs.
