
Planning a Garden with a Greenhouse and Pergola
Garden planning
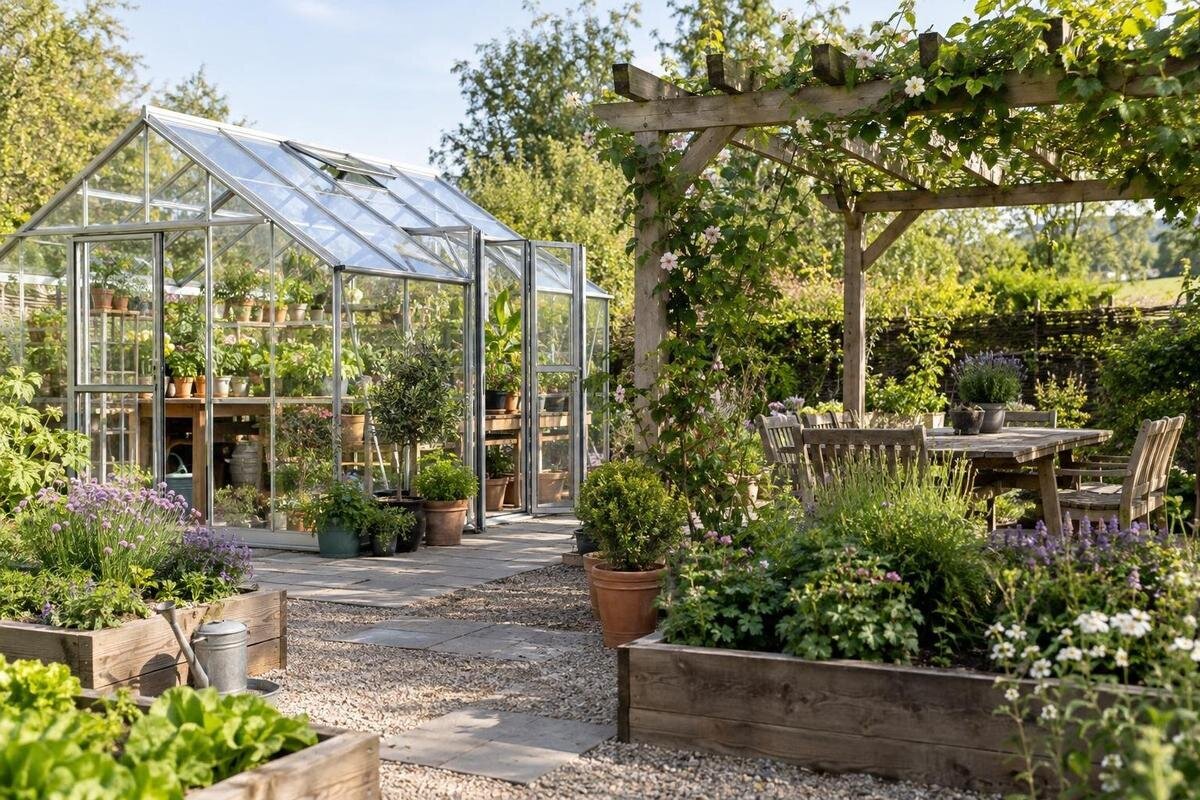
A greenhouse and pergola can share a garden without competing for the same space, but they do different jobs. One supports growing; the other is planned around outdoor use, with shade depending on its design. Their positions affect daylight, privacy, access and any shared services. Set their purposes first, then test a measured layout against changing shade and everyday routes. This makes conflicts visible before you settle on product sizes or groundworks.

Give the greenhouse and pergola different jobs
Give each structure a separate job description before comparing positions. For the greenhouse, note what you plan to grow, when you will use it and how much time you expect to spend watering, potting or tending plants. Include everyday routines such as carrying trays, storing tools and checking plants before work. If your use changes through the year, note that too: sowing, potting and harvesting can mean different journeys around the garden. These needs affect the greenhouse's convenient approach and its relationship to a water point or storage.
For the pergola, define the main use: outdoor meals, sitting or gathering. Record how many people will usually use it and whether sun, shade or a particular view matters most. Then identify activities that should not interfere with one another. Soil, tools and plant trays bring regular movement; an area intended for a meal or quiet sitting may need a less interrupted approach. Keep the structures close enough for convenience only if each remains independently accessible, rather than making the greenhouse a route to the seating area. If equipment needs to stay near the growing space, consider the greenhouse with built-in storage. Check how the storage is accessed and how much growing space remains in the selected version, then decide which items belong there and which need storage elsewhere.
Survey the garden before drawing footprints
Draw the plot at a scale you can measure, and mark fixed features before adding the new structures: house and outbuilding walls, doors, windows, gates, existing paths, boundaries, trees and planted beds. Include objects that use space at particular times, such as bins, washing lines or a compost area, rather than treating them as temporary clutter. Measure gates and side access as well as the intended building area, since the route for delivery or installation may affect which options can be considered. Note changes in level and places where water tends to collect after rain; these may need checking by the person responsible for the groundworks.
Use the manufacturer's drawings for each model under consideration. An advertised floor-area figure is not a substitute for length, width, access or clearance information. The Prestige Greenhouse is listed from 40.6 to 302 sq ft, a range that illustrates why you need to select a specific size before putting its outline on the plan. Add the pergola's post positions and outer roof edge from its own specification, then show paths and the space needed to open doors or move furniture. Keep the selected dimensions with the sketch so later changes do not quietly shrink a route or planting bed.
Map changing sunlight and shade
Sun and shade move, so one midday visit is a weak basis for placing two structures. Observe the proposed area at several times of day and, if possible, on more than one date or in different seasons. Mark which parts receive direct sun and when; record shade from the house, fences, evergreen trees and deciduous canopies separately. Note whether a patch is fully shaded or receives broken light through foliage. A simple sketch on the scaled plan can record the shadow's direction and reach without pretending to predict every cloudy day. If you are planning around crops with particular light needs, compare your observations with reliable growing guidance for those plants.
Add the pergola to this shade map using the design you are considering, not a generic outline. Its posts, roof treatment and any planned overhead planting affect where shade falls, and that pattern changes as the sun moves. Do not assume the shadow stays beneath the pergola: it may reach a greenhouse or growing bed at a time that matters. If considering a larger structure, the Spacious Greenhouse is listed in sizes from 506 to 753 sq ft; plot the particular option against your shade observations before fixing its location. The listed area gives scale context, not a site-specific shadow prediction.
Choose a greenhouse position with its light needs in mind
Use the shade record to compare candidate greenhouse positions against the needs of the plants and the way you will work. Avoid relying on a simple compass-point rule: walls, trees, neighbouring structures and the pergola's own canopy affect conditions on the actual plot. Where light is a priority, check whether a proposed pergola position would shade the greenhouse during the parts of the day you value for growing. Also consider existing shade, rather than attributing every dark patch to the new layout. Keep access to the greenhouse door and any opening panels shown on the selected model clear, so a position that works for light does not make routine use awkward.
Compare exact outlines of both structures on the same plan. The Classic aluminium greenhouse listing covers 40.6 to 302.3 sq ft, but that catalogue area alone cannot show the position of its doors or establish the space it needs around it. Consult the drawing for the specific size, then test the footprint against the shade notes, path and adjacent planting. Repeat the check if you change the pergola roof treatment or plan to add climbing plants, since those choices can alter the pattern overhead. If the preferred site loses important light, keep another candidate position on the plan for comparison.

Keep routes between the two structures clear
Plan routes from the gate and house to the greenhouse, pergola, water point and everyday storage. Someone carrying a tray, hose or watering can should not have to weave through chairs, cross a planted bed or pass through the greenhouse to reach the pergola. Include turns, thresholds, gates and door openings, not just a line between destinations. If a wheelbarrow or bulky bags are part of your gardening routine, trace the whole journey and check that width and turning space remain clear. Where the garden needs to provide an accessible route for particular users, have a suitably qualified access professional confirm appropriate widths, gradients and surfaces for the site.
Give the main path enough definition that visitors can find their way without cutting across growing space, and retain side access for ordinary maintenance. On the plan, show the greenhouse door swing, chairs pulled back from a table and the space needed to carry furniture into the pergola; a door that looks clear when shut may take up part of the route when open. The catalogue includes a T-shaped orangery greenhouse. Use the actual plan for the selected model when tracing a path around it, rather than simplifying its footprint to a rectangle. The aim is to keep each destination reachable without narrowing another.
Coordinate water, drainage and electricity
List water uses separately: hand watering, filling pots, cleaning and any planting or seating needs. Mark the nearest suitable supply and trace the route a hose would take; a tap can be close by yet inconvenient if the hose crosses a table area or main path. If you plan to collect rainwater, include the intended container, access for emptying or maintenance and a considered overflow destination in the discussion. Do not assume either structure includes a particular collection or drainage arrangement. Note where water tends to gather on the site, and ask the installer or an appropriate drainage professional to assess any proposed changes to drainage or runoff.
Power is a separate planning question, not an automatic benefit of putting the structures together. Note whether you intend to use lighting, a pump or other equipment in either space, and which areas need illumination. That information helps a qualified electrician assess suitable provision and routing. Avoid treating a loose extension lead as a permanent plan, or assuming one connection can serve both buildings without checking. Mark any planned route on the drawing before paths and planting are finalised, so later work does not have to cut unexpectedly across the garden. If neither structure needs power, leave it out of the brief rather than adding complexity without a purpose.
Fit the structures around the house, boundaries and planting
Look at the garden from inside the house as well as from the path. Note views you want to keep, windows or doors whose approach should remain clear, and any part of the pergola that would block a useful outlook. If you are considering a greenhouse beside a wall, compare its footprint and access needs with the building, doors and maintenance routes. For a Lean-To Greenhouse, ask the installer to assess the proposed wall and position against the exact model's requirements. Include access to existing gutters, windows and other parts of the house that need maintenance, so the new structure does not make those tasks difficult.
Sketch longer-term planting around both structures. A tree or climber can change the amount of shade as it grows, while evergreen foliage may obscure a view throughout the year; roots and mature spread can also affect where paths and future planting are practical. Avoid squeezing a greenhouse against a border that needs regular attention, and check that the pergola leaves enough room to tend nearby plants without blocking circulation. Consider privacy and the outlook from neighbouring homes, as well as the view from the pergola when seated. Use the plan to identify boundary concerns that may need a separate conversation or local check.
Compare complete footprints, not headline area
Compare the whole footprint, not just the growing or seating area. For the greenhouse, use the selected model's external dimensions and account for door operation and the clearances specified by its supplier. For the pergola, include post positions, outer roof edges and any moving parts where present, then add chairs in their occupied positions. Measure from a real reference point, such as a path edge or wall, so the intended siting can be understood by the installer. A plan is easy to change on paper; on site, posts, ground preparation, structure edges and routes all have to relate to the final specification.
A listed range may include options with very different space requirements. The Limited Edition greenhouse is listed from 40.6 to 302 sq ft, so identify the exact option rather than sizing a path or pergola around the range as a whole. Where space is tight, compare what each size would mean in use: the growing area you would retain, the number of seats under the pergola and the planting space left between them. Keep essential access clear rather than counting it as spare room for a larger structure. If both preferred sizes crowd the garden, decide which activities need the most space and reduce the other footprint accordingly. Compare those alternatives before committing to either purchase.

Confirm site, installation and permission requirements
Before ground preparation, confirm what each selected structure requires at the proposed position. Ground conditions can vary across a garden; note changes in level, soft or wet areas and the proximity of existing services, but leave questions about the base or foundations to the manufacturer and a competent installer. Do not assume the same preparation will suit both structures. A Pyramid-type greenhouse is listed from 60 to 203 sq ft; that area range does not give the exact base dimensions or installation requirements, so use the official drawing for the chosen option. Check service locations before any excavation is considered.
Ask the relevant people about permissions and constraints before ordering or fixing a position. Depending on the property and proposal, questions may involve the local planning authority, landlord, freeholder, management body or another responsible party; requirements cannot be inferred from a generic garden plan. If the project will serve visitors or a community group, identify the actual operating needs and seek advice on applicable access, safety and management requirements rather than assuming a product meets them automatically. Keep the selected drawings and a record of who will resolve outstanding questions about the site, ground preparation and services.
Test the layout with everyday use
Walk through the drawn layout as if it were an ordinary day: carry a watering can from the tap to the greenhouse, take a wheelbarrow along its route, open the doors, pull out chairs and carry food to the pergola. Repeat the exercise for a busier occasion if several people will use the garden, then check how someone can reach the plants while others are seated. If possible, mark proposed edges on the ground with temporary lines or markers placed safely out of the way. View the outline from the house and key paths. This full-scale check often exposes a route or sightline that was easy to miss on paper.
Revise the plan if an outline blocks a door, shades an important growing area, cuts across a regular route or leaves no sensible access for maintenance. The final brief should identify the selected structure options, measured footprints, shade observations, walking routes, water and power decisions, and any site or permission checks still outstanding. Distinguish confirmed dimensions from assumptions, and note who will resolve each open question before installation. That record helps ensure the layout being installed is the one that was actually tested, rather than a later version with smaller clearances or a changed position.
Frequently asked questions
How far apart should a greenhouse and pergola be?
There is no single spacing that suits every garden. Base it on the selected structures' installation clearances, door access, maintenance space, the shade you want and the route between them. Confirm exact clearances from the product drawings and with the relevant installers.
Will a pergola make a greenhouse too shady?
It can cast shade onto a greenhouse, but the effect depends on location, height, roof treatment, planting and season. Map the proposed pergola's shadow at different times, then compare it with the light requirements of the plants you intend to grow.
Which structure should I position first?
Set the purpose of each structure and note fixed site constraints first. Then assess sunlight, shade, routes and services together. Compare actual footprints after those checks; you can move either outline on paper to resolve a conflict before site work begins.
Can both structures use the same water or electricity point?
Possibly, but it depends on intended use, the available supply and the route. Plan water access and any drainage jointly. Ask a qualified electrician to assess the proposed electrical provision rather than assuming a shared connection is suitable.
Can I put a greenhouse next to the house or pergola?
Proximity can be convenient, provided it does not block access or create an unwanted shade problem. For a wall-adjacent model, check the exact manufacturer's instructions and ask the installer to confirm that the proposed building and position are suitable.
A good combined plan lets each structure support a different part of the garden. Site the greenhouse around the plants and growing routines it must serve; give the pergola room for its intended outdoor use. Shade observations, clear routes and coordinated services show where the two can work together without one undermining the other. Their positions may be connected, but their purposes and usable footprints should remain distinct.
