
Making a Greenhouse the Centre of a Kitchen Garden
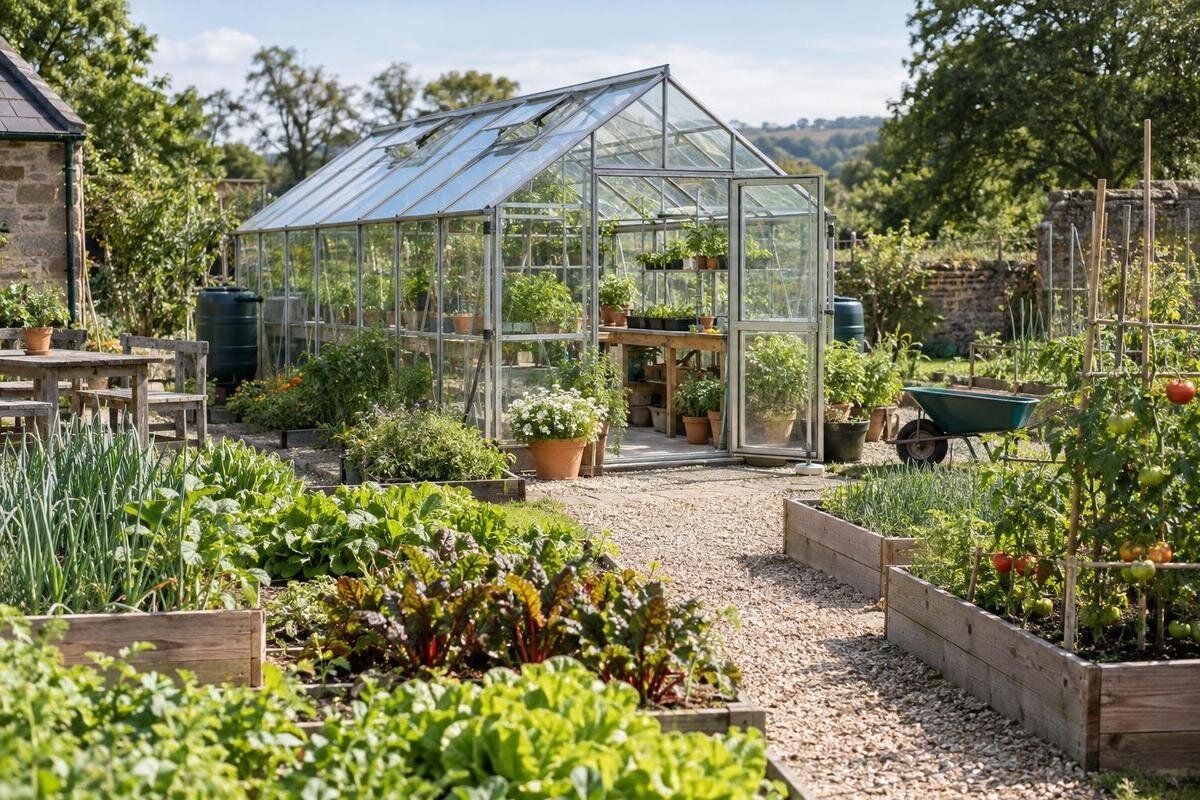
Kitchen garden planning
A kitchen garden works best when its repeated jobs connect: sowing, carrying plants out, watering beds, harvesting and returning suitable plant material to compost. A greenhouse can anchor those movements, but being geometrically central is not the same as being useful. Its value comes from how easily it connects to outdoor beds, a water point and a practical compost route, without awkward detours or crossings. Plan these relationships before settling on the structure. A scaled sketch, tested against the way you actually garden, can show whether the proposed position leaves enough light, working space and access for the rest of the plot.

How the greenhouse links the kitchen garden
Treat the greenhouse as one stop in a working loop, rather than the destination around which every other feature must be squeezed. A growing day may involve collecting tools, sowing or potting under cover, carrying plants to outdoor beds, watering, harvesting and taking suitable plant material to compost. The order changes with the season, but writing down the jobs you repeat shows which connections need to be short. A greenhouse in the geometric centre can still be awkward if its entrance is on the wrong side of the busiest route or if reaching water means crossing the harvest path. Note which trips happen daily and which occur only occasionally; the daily ones deserve the shortest, clearest links.
Trace these movements on the same sketch: a hand carrying seed trays, a basket coming back from beds, and a wheelbarrow carrying soil or garden waste. They need not have separate paved routes, but their meeting points matter. Avoid making the only route to compost pass through the place where clean harvests are sorted, or forcing every trip from a bed past a parked barrow. A shared path can serve several jobs if there is room to pass and turn. If it cannot, moving a bed, tool store or compost bay may solve the problem more simply than relocating the greenhouse. Test the plan for a busy sowing or harvesting day, when hands are occupied and several journeys overlap.
Choose a site that leaves room for beds
Start with a measured outline of the usable garden, including boundaries, the house, fences, gates, sheds, existing beds, mature trees and any fixed water point. Note slopes or areas that hold water, then mark the route from the entrance for people and a wheelbarrow. These features influence where beds and paths can work; they also flag questions to resolve before a structure is ordered. Sketch the outdoor beds, even roughly, before placing the greenhouse, so the largest open patch is not assigned to the building by default. Include room to move around the chosen structure for ordinary access and upkeep, based on its actual plan and your site. Record the space a gate or bin takes when in use, not only when closed.
Compare an exact greenhouse option with the space left for beds and routes, not just with the product family name. The Pyramid-type greenhouse listing gives sizes from 60 to 203 sq ft; that range makes it important to draw the option you would actually choose rather than a generic greenhouse symbol. Add its selected dimensions and intended entrance to the site sketch, then check that useful beds remain broad enough to work and that awkward leftover strips are not doing all the growing. If ground level or drainage is uncertain, note it for a site-specific review instead of assuming a standard base or layout will suit.
Map sunlight and shade across the plot
Check light where outdoor beds could go, not just at the proposed greenhouse site. Note morning, midday and late-afternoon shade from fences, buildings and mature trees; repeat observations at another time of year if possible, because the sun’s path and deciduous canopies change. A single bright visit can give a misleading picture. Mark which bed areas stay open longest, then reserve the brightest spaces for crops that need the most light and use partial shade for crops that tolerate it. Also consider how tall outdoor crops or supports may shade neighbouring beds later in the season.
Include the proposed greenhouse when assessing shade on nearby beds. If you are considering the Prestige greenhouse, use the selected model’s dimensions, including its height, to assess its position in relation to the sun and neighbouring crops. Do not assume that the shadow will stay within the marked footprint or fall in the same place throughout the day. Leave nearby planting flexible until you understand those effects, rather than committing every bed beside the structure to permanent crops. There is no universal compass rule for the whole layout: nearby buildings, boundaries, trees and the crops you intend to grow all affect how useful the available light will be.
Draw paths for everyday garden work
Draw a main path connecting the garden entrance, greenhouse, outdoor beds and compost, then add smaller branches to each bed. A continuous route is easier to use than a chain of narrow gaps between beds. Decide which path must take a wheelbarrow, harvest basket, hose and trays; choose its width by testing those tasks rather than applying one measurement to every garden. Allow room to turn at the ends and pass through gates without scraping crops or blocking an entrance. Include bins or other items that may stand temporarily beside a bed. Less-used paths can be simpler, but every bed should be reachable without walking over planted soil.
Choose path surfaces according to use, drainage and upkeep. Consider whether a loaded barrow will roll easily, whether loose material will spread into beds, and how you will keep the route usable after rain. Where a path meets a greenhouse entrance, avoid leaving an awkward step or a cramped turning point. If the lean-to greenhouse is on your shortlist, examine how its proposed entrance would connect with the route beside the supporting wall. That passage may also need to accommodate existing doors, taps or access for maintenance. Mark the approach on the ground and test it with your usual equipment before fixing path edges; allow for crops spreading beyond their bed boundaries in summer.

Arrange outdoor beds for rotation and harvest
Make outdoor beds the main crop-planning units. Draw them in shapes you can label in a notebook, then record which crop groups occupy each one from year to year if you rotate them. Paths and permanent crops take up space too, so distinguish them from beds that can move through a rotation. Group beds by similar care or harvest frequency when that reduces daily walking, but keep enough separation for access and plant supports. Maximum growing area is not the only aim: a bed you can reach and manage is more useful than a wide block with no practical route through it.
Set bed edges after the greenhouse footprint and main paths are close to settled. When comparing a classic aluminium greenhouse with your outdoor layout, examine the shapes of the remaining beds as well as their combined area. A narrow strip beside the structure may be useful for a small seasonal planting, but should not be counted as equivalent to a bed with easy access along both sides. Keep room at bed ends for carrying trays and working around supports. For successive sowings, reserve a clearly marked section that can be cleared and replanted without disturbing permanent crops. Number the beds on your sketch so that sowing notes, harvest records and future changes refer to the same places.
Place water where it serves the beds
Mark the existing water source and walk from it to the farthest bed, around any proposed greenhouse position. If you water with a hose, unroll the one you use or estimate its working reach and see where it would cross paths; if you carry cans, consider the repeated distance to the most remote crop. A point beside the greenhouse is not automatically the best point for the whole kitchen garden. A position near a path junction may serve several areas, while separate access to a distant bed may prevent daily hauling. Let the bed plan, rather than the building’s centre, determine which journeys need to be short.
Reserve space for the hose reel, watering cans or a tank as part of the outdoor layout, rather than fitting them into whichever gap remains. If you are considering the limited-edition aluminium greenhouse, show the proposed water equipment beside its footprint on your shortlist drawing. This helps you compare the complete working area, including access to a tap or tank outlet, rather than the building alone. Plan where spills or tank overflow will go, and keep hoses clear of gates when stored. For a new permanent supply, tank connection or drainage alteration, ask a qualified professional to assess the proposed arrangement. Position the equipment so that routine filling and tidying do not obstruct a busy path junction.
Make compost handling part of the layout
Choose the compost position by looking at two journeys: garden waste going in, and finished compost or leaf mould going back out. A bin tucked behind the greenhouse may appear out of the way but become difficult to reach with a barrow; one beside a busy path needs enough space for loading without blocking it. Consider where most material comes from, including outdoor beds, lawn mowing or leaf collection, and where finished compost will be used. If bulky material arrives through a garden gate, include that journey too. The most convenient position may be between these sources and destinations rather than at the far boundary, especially when loads are heavy or need several trips.
Allow for the handling space your chosen method needs: opening a lid, moving a container, keeping leaves or finished material temporarily, and getting a fork or barrow alongside. Keep the route back to the beds in view, since moving finished compost can be more awkward than depositing garden waste. If one path has to carry both compost and harvest, make sure each job can be done without blocking access; a short secondary route may help. Check the proposed area against the site’s drainage and ground conditions, and seek advice if you are unsure where runoff will go. Avoid using bed access as a temporary place to park full containers.
Keep tools and storage on the working route
List the items you reach for during ordinary jobs: hand tools, labels, twine, trays, gloves, harvest baskets and the hose. Put frequently used items near the route linking greenhouse and beds, but do not let a cupboard, work surface or bucket narrow that route. Bulky or dirty equipment may belong closer to the garden entrance or compost path than beside seeds and harvested produce. Think about where deliveries of compost or pots will be put down, too; storage is useful only when items can be fetched and returned without carrying them across planted beds. Keep this outdoor working system distinct from anything you plan to store inside the greenhouse.
The greenhouse with built-in storage is an option to compare when deciding where tools and supplies should go. Its title does not establish the storage capacity, internal arrangement or suitability for your particular equipment. List the longest and bulkiest items you want to keep there, then check the product information for usable space and access. Think about retrieving one item without having to remove several others, and whether there is somewhere convenient to put it down. Seasonal trays and pots may occupy space that looks spare in winter but is needed during sowing. A separate outdoor store may still be useful for equipment that does not fit or is mainly used near the compost area.

Match greenhouse scale to the rest of the garden
Set greenhouse size against the total productive space, not only the amount of covered growing you would like. The structure also uses ground that might otherwise hold beds, paths, compost or turning space. The large orangery greenhouse listing gives an area range of 506 to 753 sq ft, an example of why a larger option needs a whole-plot drawing rather than a quick estimate from its name. Compare the chosen dimensions with the remaining outdoor growing area, and keep route width and water access visible on the same plan. Covered growing space does not replace outdoor beds if your aim is a kitchen garden supplied by outdoor crops.
Estimate the routine the combined garden will ask of you: how many beds you can sow, weed, water and harvest, how often compost must be moved, and whether those jobs fit your available time. A greenhouse can support protected growing, but do not assume a larger structure automatically makes the outdoor system more productive. Plan for the busiest part of the growing season, not just a quiet week when the layout is empty. In a household or shared garden, agree who will handle routine watering, harvesting and compost before increasing the scale. If several people use the plot, include their arrival routes and places to put tools or baskets, not just the greenhouse area.
Test the complete plan before fixing positions
Before fixing bed edges or ordering, redraw the plan with the exact greenhouse option, paths, water point, compost area and storage position. Mark the outline on the ground with string or another removable marker and try the route with a barrow, hose and harvest basket. Check the awkward points: turning at a bed end, reaching a gate, taking compost back out and getting from each bed to water. A T-shaped orangery greenhouse has a distinct outline to test against outdoor bed rows; the name alone does not establish the dimensions or entrance position for your chosen option, so use its relevant plan.
Use the trial to decide what can be added in stages and what must be settled first. You might reserve space for future beds or a rainwater store while starting with the paths and outdoor beds you can maintain now. Before committing to a substantial structure, check property-specific and local planning constraints with the relevant authority or a qualified professional; do not assume the same answer applies to every plot. Where ground, drainage or permanent services need work, obtain site-specific advice. Walk the sketch again after making changes, and keep the greenhouse only where it supports the outdoor growing system.
Frequently asked questions
Does the greenhouse need to sit in the physical centre of the garden?
No. It can be off-centre if the position gives workable light and clear routes to beds, water and compost. Think of centre as a functional role: the greenhouse links the main jobs, while paths and outdoor beds determine where it needs to stand.
How wide should the kitchen garden paths be?
There is no single width that suits every plot. Measure the wheelbarrow, baskets and gates you actually use, then allow for turning, passing and plants that overhang paths. Try marking the route on the ground before fixing its edges; a path that works on paper may not work in use.
Where should the compost area go?
Place it where garden waste can be brought in and finished compost moved back to beds without blocking the main route. Include the journey from the farthest bed, access from any delivery gate, and space to handle containers or a barrow. Check that lids or removable panels can be opened and that you can empty the bin without using a planted bed as working space.
Should I plan the greenhouse before the outdoor beds?
Sketch the beds and routes first, then overlay the exact greenhouse plan. This protects room for crops, water access, paths and compost before you commit. Once you know the chosen greenhouse dimensions and entrance position, revise the bed edges to avoid narrow, difficult-to-use strips.
What should I check before adding a water point?
Test the existing source against every bed using the hose or watering cans you will actually use, and mark where hoses cross paths. Consider where spills or tank overflow will drain. For permanent plumbing or drainage work, get advice from a qualified professional familiar with the site.
A kitchen garden feels coherent when each feature supports an actual job: beds use the available light, paths link them to sowing and harvest, water is within practical reach, and compost can travel in both directions. The greenhouse can then act as the hub without taking over the plot. Keep the final choice anchored to a drawn, walkable plan; if the outdoor routes work with the structure in place, the garden is more likely to stay useful as crops and routines change.
