
Greenhouse Drainage: Prevent Puddles After Watering
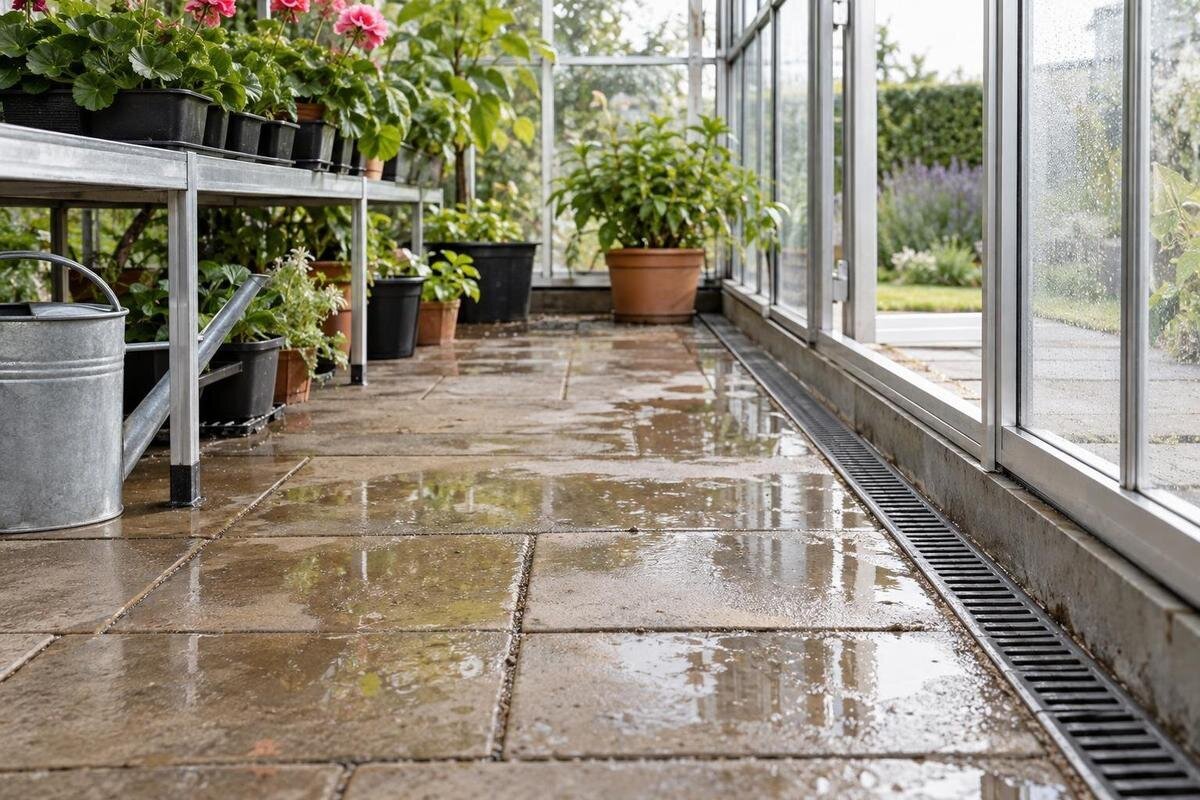
Greenhouse drainage
A puddle after watering is a clue, not a diagnosis. Water may be applied faster than a surface can disperse it, held in a local low spot, blocked from an outlet or entering from outside. The useful question is not only how quickly the water disappears, but where it came from, where it was meant to go and where that route stops. A simple floor plan and a controlled watering test help separate these causes before you alter a path, outlet or greenhouse base.

What the puddle pattern tells you
Start with the shape, position and timing of the puddle. Note whether it forms beside a door, under a bench, along a joint or in one corner, and whether it appears during watering or afterwards. A small wet patch that fades is different evidence from water that spreads across a path or returns to the same spot each time. Mark its outline on your sketch, take a photo from the same angle and note the time. Record whether it reaches a threshold or sits only below a pot. These details give you a point to revisit; they do not, by themselves, prove that the floor is uneven or an outlet has failed.
Look for the source as well as the shape of the pool. Water might arrive from a watering can, a hose connection, a leaking irrigation fitting, drips from above or rain tracking in at the perimeter. If a puddle is present before watering, do not count it as a watering problem. Note whether the floor was already damp and record recent rain and irrigation activity. Roof drips can be condensation or a leak, so observe when and where they form rather than assuming a floor outlet is responsible. A baseline photo taken before watering can make the later comparison clearer. Separating the source from the route prevents another input from distorting your test.
Draw a diagram of the floor and water routes
Draw a rough plan view of the greenhouse; it does not need to be a construction drawing or to scale. Outline the floor and threshold, then mark doors, walls, surface changes, beds or benches, taps, hose runs and any visible channel, drain or outlet. Extend the sketch beyond the frame to include nearby paving, soil, a wall or a rainwater downpipe if any could direct water towards the entrance. Use arrows to show where you water and where you expect water to travel. A simple key—solid arrows for the source and dashed arrows for the suspected route—keeps what you have seen separate from what you are still checking.
Label separate puddles A, B or C and use the same labels in your notes and photographs. Add the direction of each doorway and mark the greenhouse as it sits on site, rather than copying a catalogue image. If the structure is a Lean-To Greenhouse, include any adjoining wall and the exterior strip, if present, as well as the internal edge; this helps show where runoff might cross a threshold. Record the exact model and size from its paperwork, but do not infer a drain or floor fall from the product picture. The sketch needs enough detail to connect an observed puddle with a possible route.
Distinguish watering runoff from rain and leaks
Begin with a baseline when the floor is as dry as practical. Note the weather, whether automatic watering is off and whether any puddle is already present; then watch the area before adding test water. If water appears or grows with watering switched off, investigate another source first, such as rain entering around a threshold, a damp hose joint or drops from above. Check fittings for visible dampness before and after normal use, without dismantling them. Change one input at a time: running several watering zones while it rains makes it difficult to identify which source left the pool.
Keep separate notes for dry-weather watering and wet-weather observations. During rain, record where water first appears inside and photograph the corresponding exterior area when it is safe to do so. This can help an installer distinguish an entrance problem from water arriving elsewhere around the perimeter. If you are considering a limited-edition aluminium greenhouse, ask how roof water and the proposed floor drainage will be handled as separate parts of the installation. Keep the answers with the site sketch. Water collected from the roof should not be confused with water spilled during watering when you compare the results.
Inspect the floor and its edges
Inspect the surface where the water gathers and the transitions around it. Look for a local dip, raised edge, joint that catches debris, broken paving, soft ground or a change from one floor material to another. On a sealed surface, water remains visible at the top; at open joints or soil it may disappear below the surface, so a dry-looking patch does not prove that water has reached a suitable outlet. Compare the same area while dry and after the test. Note whether water travels along an edge, runs back towards a doorway or stops at a raised strip; silt or leaf marks can also show where it has moved.
If the floor plan has branches or returns, inspect each one rather than treating it as a single rectangle. When planning a T-shaped orangery greenhouse, use the matching footprint drawing to label the different areas on your drainage sketch. In an existing greenhouse, check each arm and intersection for a distinct puddle pattern; do not assume that the centre is a low point because of the shape. Pay particular attention where one surface meets another and where benches make the edges difficult to see. Record whether water crosses the junction, gathers beside it or follows it into a neighbouring area.

Trace the route to each outlet
Start at the puddle and follow the route that water should take towards an outlet. Note each transition: a shallow channel, a drain cover, an open joint, a gravel strip, the doorway or the outside ground. Confirm which features are intended to carry water by checking installation information or asking the installer; a gap beside a floor is not automatically a drain. Use your arrows to record whether water can travel from the wet area to the intended destination without meeting a raised edge or being diverted elsewhere. A quick visual check can show where the route stops, but it is not a way to calculate a new fall.
At each accessible outlet, look for visible debris, standing water or signs that flow stops there, and note where the route ends if you can see it. A grate may conceal a separate or blocked route, so do not assume it connects to a particular drain or that water has left the site. Avoid removing heavy covers or probing an unknown pipe; ask a drainage or groundworks professional if the destination is hidden or water backs up. When planning the site for a pyramid-type greenhouse, include the proposed drainage destination on the sketch alongside the footprint, rather than leaving the route beyond the floor unresolved.
Use a controlled watering test
Choose one small zone and start only when it is in a reasonably dry, comparable condition. Use a jug with volume markings to measure the water, then apply it in the same place, at the same rate and in the same way that normally creates the puddle. Use a modest amount that reproduces ordinary watering; do not pour directly into an outlet or flood the floor to test its capacity. Keep other zones and water sources out of the test. If water reaches a doorway or starts spreading towards another structure, stop, record what happened and do not add more.
Record the amount, test area and time at the end of watering, then photograph the floor and trace the puddle edge on your plan. Recheck at consistent intervals—for example, immediately, then after five, fifteen and thirty minutes—and note whether the pool shrinks, shifts or stays in place. Those times are comparison points, not a pass-or-fail drainage standard. Let the area return to its starting condition before testing another zone. For a greenhouse with built-in storage, include the storage area in the observation plan and check which floor edges remain accessible. Mark containers and other obstructions so their positions are consistent between tests.
Read where and when water collects
Look first for repeatability. If a pool forms in the same place after each controlled test, investigate that local floor transition, joint and nearby drainage route; a low spot is possible, but a blockage or water arriving from the edge can create a similar pattern. If the wet area follows a line away from where you watered, follow that line towards its end. Several puddles appearing together may point to a shared route or a wider incoming source. Use the map to check these possibilities one at a time rather than assigning a cause from one photograph.
Timing adds another clue. Water that appears immediately beside a hose or pot may be spill or overspray; water that appears later, or before watering, calls for a check of other inputs and the route from outside. Compare the same location and wait times across tests instead of judging from how long one puddle takes to vanish. For a Prestige greenhouse you are assessing, label photographs by test zone and elapsed time as well as model and size. Distinguish a puddle shrinking at its edges from water moving into an adjacent area: the latter means you need to follow its route further.
Match the remedy to the cause
Make the simplest correction that matches what the test showed, then repeat the same test. If water spills at the watering point, change how it is applied or reduce the amount that reaches the floor. If loose leaves block an accessible grate, clear only the visible debris you can reach safely. Change one thing at a time so the next result remains informative. Do not pour cleaning chemicals into an unidentified outlet, force a rod into a hidden pipe or add a large volume of water to see whether the puddle clears. Those actions can conceal the cause or make the route harder to assess.
Regrading a surface, cutting a channel, adding a drain or altering the greenhouse base is different work. The appropriate route depends on the existing surface, base and destination for the water; a generic fix can move the problem to a threshold or another part of the site. For a proposed Spacious Greenhouse or an existing model, give a suitably qualified groundworks professional the map, photographs, test log and exact base drawing. Ask them to check the site route rather than choosing a fall or outlet from a generic diagram.

Coordinate drainage with the greenhouse base
For a new greenhouse or a floor being relaid, obtain the manufacturer base drawing for the exact model and size before setting out the finished surface. Use it to confirm the outline and interfaces it shows, including the relationship to the threshold and any planned channel or outlet. A base drawing may not specify the full site drainage design, so do not substitute generic foundation dimensions or a similar-looking model. The drawing helps confirm what structure is being installed; a site plan and qualified groundworks review establish how water should travel beyond it.
Agree the route before paving or edging hides it: mark the water entry points, intended path, outlet and where the flow ends. Show where access is needed to inspect or clear drainage features, and ask who will confirm the route on site. If you are considering the aluminium Classic greenhouse, use an installation enquiry to establish which base drawing applies to your selected size and how it relates to the proposed floor. Clarify whether the work includes floor preparation, drainage connections and a final watering check. Record any work that needs a separate contractor so it is not overlooked between groundwork and greenhouse installation.
Record the result and check again
After a change, use the same test area, measured amount, application rate and observation times. Note exactly what changed—such as clearing visible debris or adjusting where water is applied—and avoid combining several changes before retesting. If the first test followed dry weather, record whether a later observation follows rain, since those are different water inputs. A dated log lets you tell whether the correction changed the puddle’s position, duration or spread. It also gives an installer or groundworker clearer evidence than a general description that the greenhouse gets wet.
Keep the diagram, test results, photographs and matching base drawing together, and update the plan if benches, containers or routes change. If water continues to appear despite a clear accessible route, if the outlet is hidden or backing up, or if water seems to pass beneath the base, stop making surface changes and arrange a site-specific assessment. Recurring puddles are easier to resolve when the source, route and destination are visible in the same record, rather than treating each pool as a separate problem.
Frequently asked questions
Why does the same puddle keep coming back?
A repeated location narrows the search to a local floor transition, a joint, a blocked route or a recurring source, but does not prove which one is responsible. Mark the outline, photograph it after a controlled test and trace the route towards the outlet. Check the perimeter too if water appears after rain.
How can I tell watering runoff from rainwater?
Compare a dry, no-watering baseline with the same measured watering test in dry conditions. If water is already present before the test, or appears only after rain, investigate the roof, threshold and outside ground separately. Keep those observations distinct in your notes.
Should a greenhouse floor slope towards a drain?
There is no reliable generic fall or dimension for every floor and base. The intended route depends on the surface, outlet and site design. Check the drawing for the exact greenhouse and ask a suitably qualified groundworks professional to review the site rather than improvising a slope.
Can I clear a blocked outlet myself?
You can remove loose debris from an accessible grate if you can do so safely and without dismantling it. Avoid probing an unknown pipe or lifting a heavy cover. If the outlet remains slow, is hidden or backs up, ask a drainage or groundworks professional to assess the route.
Can I cut a channel or drill holes to remove puddles?
Not before you know how the base and drainage route are built. Altering a floor or base can affect the structure and send water somewhere unintended. Have a qualified professional review the site plan, photographs and matching base drawing before making structural changes.
The most reliable way to prevent recurring puddles is to identify the full route from water source to outlet. A simple diagram, a one-zone test and a clear record can show whether the issue is water application, a surface collection point or an obstructed route. When it involves the base or a concealed outlet, use the matching drawing and a site-specific groundworks review to guide the change.
