
Greenhouses in Frost Pockets: Assessing a Low-Lying Garden
Greenhouse siting
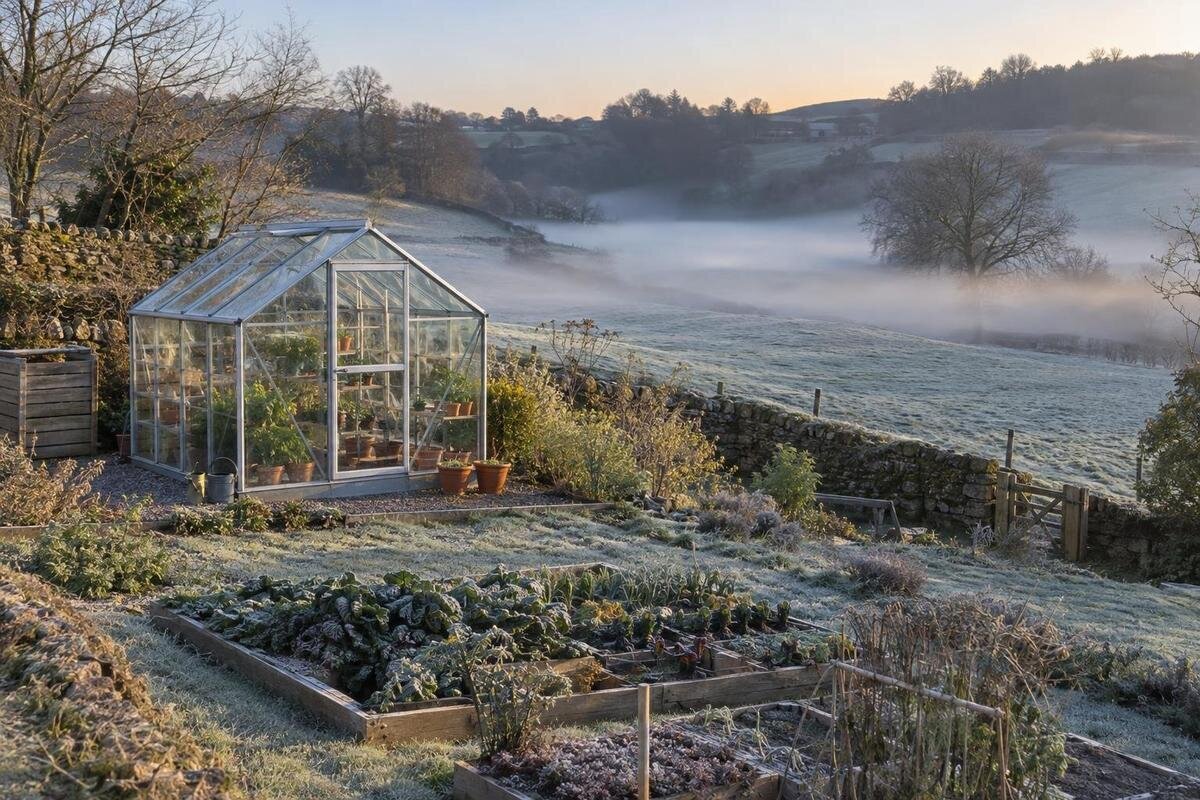
Frost pockets are local cold spots where cool, dense air gathers on low ground, but the lowest corner of a garden is not automatically the worst greenhouse site. The pattern depends on slope, barriers, wind and the conditions on each night, so a glance at the terrain—or a single frosty morning—cannot show what plants will experience. Before choosing a position or planning heat, compare overnight temperatures at the actual candidate footprints and note how the readings relate to the land. A scaled sketch, repeatable minimum-temperature records and observations on cold nights give you a much sounder basis for deciding whether to move the greenhouse, adapt the growing season or consider heating.

How cold air gathers on low ground
During a clear, relatively calm night, the ground loses heat and the air close to it cools. Because colder air is denser, it can drain down a slope and collect in a hollow or behind an obstruction. The pattern is often easiest to notice when the air is still; wind can mix the layers and change it. A dip in the lawn is therefore a clue, not a diagnosis. A small hollow may trap cold, while an open slope may let air continue downhill. Walls, hedges, tree belts and gaps can alter the route, so contours alone cannot prove where the coldest point will be.
An unheated greenhouse should not be treated as a frost-proof shelter. Sunlight may raise its temperature during the day, but temperatures can fall overnight; the result depends on the structure, glazing, openings, draughts, weather and any heat source. Outdoor readings help compare positions, but they do not tell you the exact temperature inside a future greenhouse. Your intended use matters too: extending the growing season is different from protecting tender plants through cold spells. Treat the site assessment as a way to compare risks, not as a promise of a particular indoor minimum.
Map the ground before choosing a position
Draw a simple site plan to scale, or mark measured lengths and relative levels clearly. Include the proposed greenhouse outline, low points, slopes, banks, hollows, retaining walls, fences, hedges, gates, gaps and any obvious route downhill. Add a north arrow and note where cold air might enter or leave; a barrier can matter as much as the lowest contour. The plan need not be a survey, but it should be accurate enough to compare locations and return to the same sensor points. Mark paths and regular access as well, so a thermally favourable patch is not considered separately from everyday use.
If you are considering a wall-mounted position, show the exact wall, roof overhang and proposed lean-to greenhouse footprint. A wall can affect shade, wind and exposure to the night sky, but its presence does not establish that the position will stay warmer. Mark nearby doors, downpipes and slopes that carry rainwater, then compare the wall-side site with a freestanding alternative if both are realistic. Draw seasonal shadows at different times of day, especially for the months when you expect to use the greenhouse. A photograph from a fixed viewpoint can help you check that the diagram matches the garden.
Measure temperature consistently
Use a minimum–maximum thermometer or a temperature logger that records overnight changes. For outdoor air, place the sensor in a ventilated radiation shield suitable for outdoor use, so direct sunlight and exposure to the weather do not distort its readings. Do not let it touch walls, paving or soil, and avoid placing it directly above a surface that is unrepresentative of the proposed growing area. At a wall-side site, record the distance from the wall rather than moving the sensor somewhere that no longer represents the intended footprint. Set each sensor at the same height, near the level of the main crop canopy you expect to manage. If trays or young plants will sit close to the ground, add a lower measurement point rather than assuming one height represents the whole growing space.
Where possible, compare candidate points at the same time with identical instruments instead of moving one thermometer between places on different nights. Label each device and location, write down its height, and keep its position consistent. A T-shaped layout such as the T-shaped orangery greenhouse is a reminder to check the proposed outline rather than relying on one reading at its centre; use the exact plan for the model you are considering to place comparison points. Before logging, place the devices together under the same conditions and allow their readings to stabilise according to the instructions. This is a comparison, not formal calibration. If they disagree, check their stated accuracy and investigate the mismatch before treating small differences between garden positions as meaningful.
Log overnight minima in different weather
One frost or one mild night is not a reliable site test. Log through a period that includes cold, clear, relatively calm nights, because those conditions can make differences between low and higher ground easier to see. Record the date, minimum, location, sensor height and whether the night was clear, cloudy, windy or calm. Note rain, recent ground wetness and unusual changes, such as a temporary obstruction or an open gate. Include contrasting weather conditions too: if a candidate is colder only on still nights, that is useful information, but it should not be mistaken for a constant pattern in every kind of weather.
A data logger can show when the temperature falls and how long it remains low; a max–min instrument gives a simpler overnight low but not the full trace. Set a logger to record often enough to show the overnight fall; intervals of 10–15 minutes are a practical option when available. Avoid comparing records with gaps as if they were complete. Review both the lowest value and the frequency or duration of readings below your plants’ target. The limited-edition aluminium greenhouse range is listed from 40.6 to 302 ft²; whichever footprint you consider, select its exact size before mapping logger coverage. Those area figures are not a measure of thermal performance.

Read frost clues alongside the terrain
Cold air itself is usually not visible, so do not judge its movement from one impression at dawn. On repeated frosty mornings, note which parts of the garden show frost first, where it persists longest and where it clears first. Record these observations on the same plan, with the time and weather, and take photographs from repeatable viewpoints. Frost on grass, a patch of mist or differences in thawing can support a pattern, but each has other causes; none alone proves a cold-air channel. Grass frost is not a measurement of the air around a plant canopy, so use visual clues alongside sensor readings rather than instead of them.
Look for possible routes as well as pools. A gentle slope may carry air towards a lower boundary; a solid fence, hedge or bank might slow that movement, while a gap may let it continue. These are possibilities to investigate, not fixed rules: a screen can also change exposure to wind, and the flow may vary across the garden. Note whether the route is open on more than one side and whether nearby buildings create a sheltered pocket. A ribbon on a short stake records the breeze at that moment, not cold-air drainage on a calm night. Keep those observations separate and do not infer the drainage direction from the prevailing wind alone.
Compare readings across each proposed footprint
Overlay the temperature points and morning observations on the proposed footprint, not just on a general garden map. Compare candidate positions by repeated minimums, how often they cross your crop threshold and how long the cold period lasts. If a low reading sits at one edge, ask whether the whole structure would occupy it or whether a different outline could avoid it. For a pyramid-type greenhouse, use the exact proposed plan rather than assuming that its name tells you where to sample. Readings across the outline can reveal a difference between a comparatively mild centre and a colder edge.
Do not move the greenhouse to a warmer point on the map without checking the rest of the site. Consider whether the entrance and working area are accessible in wet weather, whether carrying water and materials is practical, and whether the position leaves room for maintenance. Compare sunlight in relevant seasons, drainage after rain and the temperature record as separate evidence. The position with the warmest overnight low is not automatically the best if it is persistently wet, deeply shaded when crops need light or difficult to use. Make any trade-off explicit rather than allowing one impressive minimum to settle the choice.
Check drainage and usable space separately
Check what the ground does after rain as well as what it does on a frosty morning. Mark ponding, runoff from roofs or paths, soft areas and places where water crosses the proposed base; repeat the observation after more than one shower if conditions allow. Low ground can combine cold-air collection with drainage concerns, but neither follows automatically from the other. Do not assume that adding soil or changing a bank is a simple fix; where the ground is unstable or water cannot be managed confidently, get suitable site advice before committing. Keep this assessment distinct from temperature logging: a dry site can still be cold, and a cold site can drain adequately.
Draw the full footprint of the version you may buy, including any built-in storage, rather than only the beds or central aisle. A greenhouse with built-in storage may change how much of the available area is devoted to growing, so use the exact model dimensions for the sketch. Consider where the entrance, shelves and working space would sit relative to measured cold spots, and check those details on the product plan rather than assuming the category name provides them. This can reveal whether a colder corner would contain the door, stored equipment or a crop area, and whether the approach is awkward.
Set a crop-specific temperature target
Set the temperature you are trying to protect from the plants and the dates you want to grow them, not from a generic greenhouse rule. Crop tolerance varies by species, growth stage and duration of exposure; use reliable growing guidance for each crop to establish a relevant minimum, and distinguish a brief dip from hours below that point. Seedlings, overwintering plants and summer crops may lead to different plans. Write down which crops need the warmest part of the season, which can tolerate cooler conditions and whether you intend to bring plants indoors during severe weather. That list turns a vague aim such as keeping the greenhouse frost-free into a usable comparison.
Compare your target with outdoor records while remembering that an unheated greenhouse will have its own indoor pattern. Once you have a preferred position, measure inside a completed structure during comparable weather before relying on it to protect frost-sensitive plants. Size should follow the growing plan and the real footprint available, not simply the largest area in a catalogue. The aluminium classic greenhouse range is listed from 40.6 to 302.3 ft², but that range does not indicate which size suits your crops or what temperatures it will maintain. Confirm the dimensions of the exact version and make sure your beds, containers and access fit within it.

Plan heating around measured conditions
Heating decisions are easier when they follow a measured target. If outdoor minima fall below the crop threshold only occasionally, your needs may differ from those of someone seeking a stable temperature for long spells; inside readings, intended dates and crops determine the distinction. The Prestige greenhouse name, like any model label, does not state its heat loss, so do not use a product title or frame category as a substitute for technical details. Ask for relevant specifications for the exact configuration and consider glazing, exposed area, ventilation, draughts and the difference between the outside temperature and your target.
A heater must be assessed for the space and conditions it will serve, not chosen from the garden’s coldest reading alone. Fuel or electricity supply, running cost, control and safe placement all affect whether a proposal is workable. A greenhouse that is more exposed or leaky may need different provision from another structure on the same plot. Ask a suitably qualified heating or electrical professional to assess equipment and installation where relevant; do not improvise wiring or combustion arrangements. Keep clear whether your aim is to prevent a damaging dip, maintain a particular growing temperature or heat the space continuously, since those aims carry different demands.
Build a shortlist from the site evidence
Make the shortlist from the mapped and measured evidence. For each possible position, keep a record of the footprint, nearby barriers, levels, shadow notes, frost photographs, overnight minima, crop target and drainage observations. Compare the number and duration of relevant cold dips rather than choosing by the single lowest number alone. If a large structure is being considered, the spacious greenhouse range is listed from 506 to 753 ft²; check the chosen version against the actual garden plan rather than treating the range as one standard footprint. Use the same method for smaller designs so that unlike options are compared on equal terms.
Your final choice need not be the warmest point at any cost. It should give the intended crops a credible growing window, fit the actual site, avoid unresolved water problems and allow any chosen heat to be planned realistically. If no position meets the crop target without substantial intervention, consider a later start, earlier finish, hardier crops or a different use for the greenhouse rather than assuming heating will erase every site limitation. Keep the sketch and records: they explain why you chose a position and provide a baseline for comparing indoor readings after installation.
Frequently asked questions
Is the lowest point in a garden always the coldest?
No. Cold air can collect in a hollow, but an open slope may drain it away, and wind, walls, hedges and night conditions can change the pattern. Compare minimums at actual candidate positions over several cold nights; ground height alone is not enough.
How many nights should I log?
There is no useful fixed count for every garden. Include several cold, clear, relatively calm nights and some contrasting conditions, then continue if the candidate sites still look similar or records are incomplete. Keep sensor positions and heights consistent so differences are meaningful.
Will an unheated greenhouse stay above the outdoor minimum?
Not reliably enough to assume it will. Daytime solar gain, overnight heat loss, glazing, ventilation and weather all matter. Outdoor readings help compare positions, but measure inside a completed structure in comparable weather before relying on it to protect plants.
Can a wall make a lean-to greenhouse warmer?
A wall may alter shade, wind and exposure to the night sky, but it is not a guaranteed heat source or frost barrier. Check the wall-side footprint in the same way as a freestanding candidate, and note roof overhangs, drainage and local cold-air routes.
Does a frost pocket mean I need a heater?
Not automatically. The answer depends on what you grow, when you grow it and how indoor readings compare with crop-specific minimums. If heat is needed, have the system and supply assessed for the exact greenhouse rather than choosing equipment from the outdoor low alone.
Frost risk is a feature to measure, not a label to apply to the whole garden. Repeated minima, notes on possible cold-air routes and a plan of the exact footprint help identify positions with lower overnight frost risk. They also help you judge whether your intended growing season is realistic, although indoor monitoring is still needed to assess protection for sensitive crops. If temperatures fall below your crop target too often, weigh up a different position, a shorter season or professionally planned heating. That assessment is more useful than choosing by elevation alone.
