
Choosing Greenhouse Shade Netting: Percentage and Position
Greenhouse growing guide
Greenhouse shade netting is easiest to choose when you separate two questions: how much light a crop should receive, and where excess light is reaching it. A label such as 30% shade describes a product rating, not a universal target for every greenhouse. Measure at plant level, compare the result with crop-specific guidance and map the sunlit areas before deciding on a percentage or how much of the roof to cover.

Read the percentage as a material rating
A shade percentage describes the material, not the crop. Depending on the supplier’s wording, it may mean the proportion of a specified light measurement that the net reduces, or the proportion it transmits. If a maker defines a product as 30% shade, that means a 30% reduction in the stated measurement; 70% transmission follows only on the same basis. Check the exact definition before comparing products. The figure is not a recommendation that every greenhouse crop should lose 30% of its light, nor does it say what share of the roof should be covered.
Read the rating alongside any information about the test method and the type of light measured. A shade-reduction figure and a transmission figure run in opposite directions, so do not compare them as if they were the same number. The label also does not describe the combined light reaching leaves after the greenhouse covering, gaps, seams and overlaps are taken into account. On site, readings can vary with sun angle, cloud and position under the roof. Treat the percentage as a comparison point, and ask the supplier to clarify an unclear specification rather than guessing.
Start with the crop’s light requirement
Find the crop’s light requirement before shopping. Different crops and cultivars tolerate different light levels, and the useful range can change between establishment, leafy growth, flowering and fruit production. A high-light fruiting crop and a shade-tolerant leafy crop should not be assumed to need the same treatment; even varieties of one crop may be grown for different purposes. Check guidance for the crop and growing method you actually use, and note whether it gives a range or an optimum. Planting density and the height of the canopy can also affect which leaves receive the most light.
Write down the crop, growth stage, planting location and whether the aim is to maintain growth or protect plants during the brightest period. Prefer crop-specific guidance in units you can compare with your measurements. Some recommendations use a daily light integral (DLI), while a meter reading may be instantaneous; those are not interchangeable. If guidance gives a range, check whether it applies to seedlings, mature plants or a particular growing system. Where several crops share the greenhouse, map each group separately. Leaf markings can prompt a light check, but appearance alone cannot show the daily light total or prove that shade is the right correction.
Measure light at canopy height
Measure the light reaching leaves rather than relying on how bright the greenhouse looks. A PAR meter that reports photosynthetic photon flux density (PPFD) is designed for plant-light measurements; PPFD is an instantaneous rate, commonly expressed in micromoles per square metre per second. Logging readings over time allows daily light integral (DLI), the total in moles per square metre per day, to be calculated. Check that the equipment supports this measurement. A lux meter measures brightness weighted to human vision, so it is not a direct substitute and cannot be converted to PPFD using one universal factor. A phone sensor may help compare brighter and dimmer spots if used consistently, but it is not a crop-target instrument without suitable calibration.
Take readings around canopy height, with the sensor level and not shaded by your body, phone or a greenhouse fitting. Sample the centre of each crop zone, its edges and any visibly brighter patch; record whether direct sun or diffuse light is present. Keep the meter position, date, time, weather and crop stage in a log, then repeat at different times rather than treating one midday value as a day’s exposure. If you are planning a new Bloomcabin Prestige Greenhouse, mark the proposed beds and measuring points on its layout first. Once it is installed, those marked positions provide a consistent basis for assessing shade.
Calculate the reduction you are trying to achieve
Once you have a crop target and a comparable reading, estimate the reduction needed with this calculation: (baseline reading − target reading) ÷ baseline reading × 100. If the unshaded reading is 500 and the desired reading at the same moment is 400, the calculation gives 20%. Those figures illustrate the arithmetic only; they are not a recommended light level for any crop. Use readings in the same units, taken at the same place and under similar conditions. If the guidance states a DLI target, calculate from daily totals rather than substituting a snapshot PPFD value. If the target is a range, calculate against its relevant limits.
Take the baseline inside the greenhouse under its normal covering, either before adding netting or at an equivalent uncovered control point. An outdoor reading cannot stand in for light beneath the greenhouse covering. Repeat the comparison in several crop positions: the calculated reduction may differ at an exposed edge and a shaded bed. Use the result to shortlist a net rating, then verify the reduction after fitting. Keep the light calculation separate from the quantity of material needed. When comparing sizes of the Limited Edition greenhouse with built-in storage, the listed 59.4–302 ft² range helps distinguish options, but you still need roof measurements to work out the net cut size.

Map where direct sun reaches the plants
Map the bright areas before deciding where netting belongs. Direct sunlight moves over the day and changes through the growing season, so a single midday check can miss morning or late-afternoon exposure. Mark the crop rows and greenhouse outline, then record where sun patches fall at several times during bright weather. Repeat under overcast conditions if possible: diffuse light may reach places that are shaded when the sun is direct. Nearby buildings, trees and other obstructions can also change the pattern. Photos from the same viewpoint help show moving shadows, but they do not replace meter readings at plant level.
Use the map to distinguish a local problem from a whole-greenhouse one. A bed in a direct-sun strip may need a different plan from crops that already receive moderate light; shading every roof section to protect that bed can reduce light elsewhere unnecessarily. When considering a Lean-To Greenhouse for a site beside a building, include the building’s shadow and the direction of the proposed glazed surfaces in your exposure notes. Revisit the map once the greenhouse is in use, as readings at crop height will be more useful than the site sketch alone. Update it as the canopy grows, rather than choosing coverage from one photograph of a single sun patch.
Decide between targeted and whole-roof coverage
Choose coverage to match the light map, not a standard percentage of greenhouse area. Local or crop-zone coverage can preserve light for beds that do not need shade, but pay attention to boundaries: as the sun moves, a sharp division can leave one row heavily shaded and the next in full sun. Measure each side of the proposed boundary and include any plant rows outside a formal bed. Keep doors, vents, paths and space needed for watering, training or harvesting in view. If crops or rows may move, leave room to revise the plan instead of assuming today’s planting layout will stay the same.
Covering a larger continuous area may be easier to manage when the same crop occupies it and readings are similar across the space, but it also shades less-exposed corners. For a more complex layout, draw separate coverage sections and match each to a measured crop zone. If you are considering the T-Shaped Orangery Greenhouse, include the different parts of the T-shaped plan in that drawing, rather than treating the footprint as one rectangular growing area. Record transitions between covered and uncovered parts, including rows that cross them. Where sheets must overlap, follow the supplier’s instructions and measure the resulting light reduction; overlapping shade ratings cannot simply be added together.
Allow for seasons and changing crops
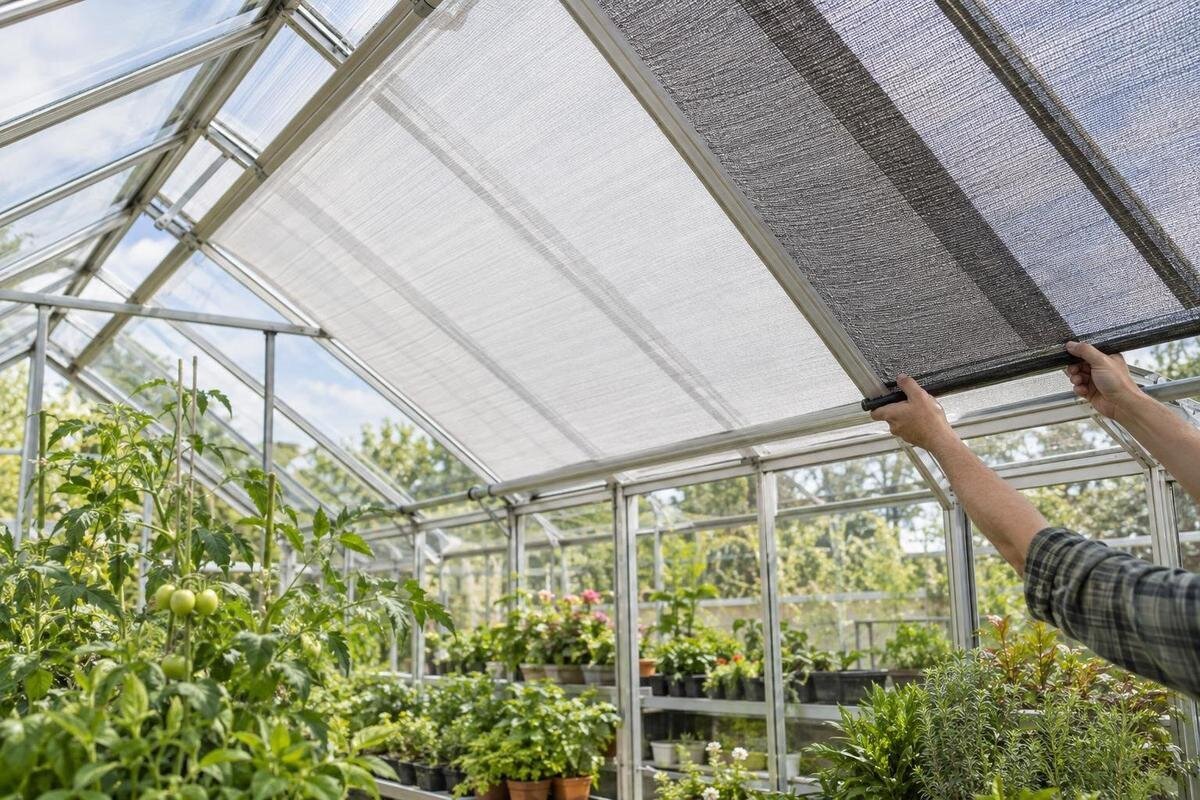
Consider how often the need for shade changes. A fixed net chosen for the brightest part of the season may continue cutting light on cloudy days, in cooler periods or after a crop has been harvested. If the supplier’s system allows it, removable or adjustable coverage can suit a seasonal problem better than permanent full-roof shade. Choose an arrangement you can operate and maintain safely according to its instructions, without obstructing doors or vents. A brief bright spell should not be the sole reason to reduce light across the whole day; compare repeated readings with the crop’s relevant daily target.
Changing plants create a second timing issue. The needs of a seedling, a mature leafy crop and a fruiting crop may differ, so retain a plan for each planting stage if beds are reused. When comparing options in the Spacious Greenhouse range, listed at 506–753 ft², consider how much of your proposed growing area each crop will occupy through the season. Divide a large planting plan into dated zones so you can identify which areas will need shade at the same time. This also helps you assess whether separate removable sections would be practical. Keep a note of when each section is used, rather than leaving all the netting in place simply by habit.
Size netting to the roof and check access
After choosing a zone, measure the surface the net has to span. A greenhouse floor-area figure is not a roof-covering dimension: note the usable width and length of each section, any change of plane, and where the material should stop. Check whether the quoted net size is a single piece, a pack total or a finished size, and whether the supplier specifies an allowance for attachment or overlap. Do not invent that allowance yourself; cutting requirements depend on the system. Compare the shade percentage and dimensions as separate specifications, since the right rating in the wrong size cannot provide the coverage you mapped.
Check access before committing to a position. Netting should not prevent normal use of opening vents, doors or paths, or access for inspecting, cleaning and tending plants. For the aluminium Classic greenhouse, as for any structure under consideration, compare the proposed net layout with the opening positions and their clearance requirements. Confirm the net supplier’s fitting instructions and the greenhouse maker’s guidance for the exact size and version before choosing attachments. If the fixing method or the structure’s ability to take it is uncertain, ask a qualified installer. Avoid improvising attachments that require drilling or place unverified loads on frame components.

Recheck light after the net is in place
Once the net is fitted, test the result instead of relying on its label. Use the same meter, canopy height, marked positions and logging method as before, then compare shaded and unshaded points under similar sky conditions. A cloud passing during one reading can distort a quick comparison, so repeat it and include both bright and more typical days. If the crop target is a DLI, use a logger or a method that gives daily totals; one PPFD reading after fitting shows light only at that moment. Note whether the net was fully deployed and whether any part was folded or overlapped.
Review readings alongside crop stage and growth over time. A darker-looking greenhouse or a lower air temperature does not prove that plants now receive the right light, and one sunlit leaf does not show that the entire roof needs shade. Keep a record before changing coverage, and follow the product instructions when adjusting or removing it. For a greenhouse selected from the aluminium Limited Edition range, record the size and version on the same sheet as the net specification and measuring positions. Add a simple sketch showing covered sections, seams and overlaps. This gives future readings a useful reference when plants, coverage or equipment change.
Compare shade-netting specifications before ordering
Before ordering, compare each supplier’s information against the same questions: does the percentage describe reduction or transmission; what light measurement and test basis does it use; what are the net’s finished dimensions; and how is it meant to be fixed? Check whether it can be removed or adjusted for the season and whether openings and access will remain clear. Keep the crop target and your readings with the comparison. For a Pyramid-type greenhouse, prepare a dimensioned sketch of the roof surfaces you intend to cover and ask the net supplier whether its system accommodates that layout. Resolve missing specifications before ordering; a product photograph cannot establish the necessary measurements or attachment details.
Choose the least restrictive rating that addresses the measured excess and is consistent with crop-specific guidance. If readings vary widely, consider a smaller covered zone or a configurable arrangement instead of increasing shade over the whole greenhouse; if the same excess appears across the crop area, compare broader coverage. Confirm the maker’s definition before treating a listed percentage as your expected result. Then use actual surface dimensions and fitting instructions to order, and repeat measurements once the net is in place. This connects the rating to a specific crop and position rather than treating one figure as a universal solution.
Frequently asked questions
Is a 30% shade net suitable for every greenhouse crop?
No. The percentage describes a netting rating, not a crop’s target. Compare light measured at plant level with guidance for the crop and its current growth stage. The same rating could be useful over one area and too restrictive over another.
Does a 40% shade label mean plants receive exactly 60% of the light?
Only if the supplier defines 40% as a reduction in a specified light measurement, with transmission calculated on the same basis. Even then, the rating applies to the product under its stated test conditions; it does not guarantee a particular daily light total in your greenhouse.
Is one midday light reading enough to choose shade netting?
Usually not. It shows the light level at one place and moment, but misses changes through the day and the difference between direct and diffuse light. Take readings at crop height in representative areas, and use daily totals if the crop guidance gives a DLI target.
Can I use a lux meter to measure light for plants?
A lux meter can help you compare brighter and dimmer areas if you use it consistently, but it measures brightness weighted to human vision. It is not a direct measure of plant-usable light, so do not convert its readings to PPFD using a universal factor.
Should shade netting cover the whole greenhouse roof?
Only if the crop areas have similar light readings and need similar shade. If the problem is confined to one bed or sunlit zone, targeted coverage may preserve more light elsewhere. Map the exposure first, then check that the proposed coverage does not obstruct access or openings.
The right shade netting brings light at crop level into the useful range without unnecessarily reducing it elsewhere. Crop guidance establishes the target, measurements reveal the excess, and the net’s rating helps you shortlist an option. Plan coverage around the actual light map and check the result after fitting. A measured, targeted approach can protect an exposed bed while preserving light in less-exposed areas, with scope to adjust as crops and seasons change.
