
Where Should You Place a Greenhouse Thermostat?
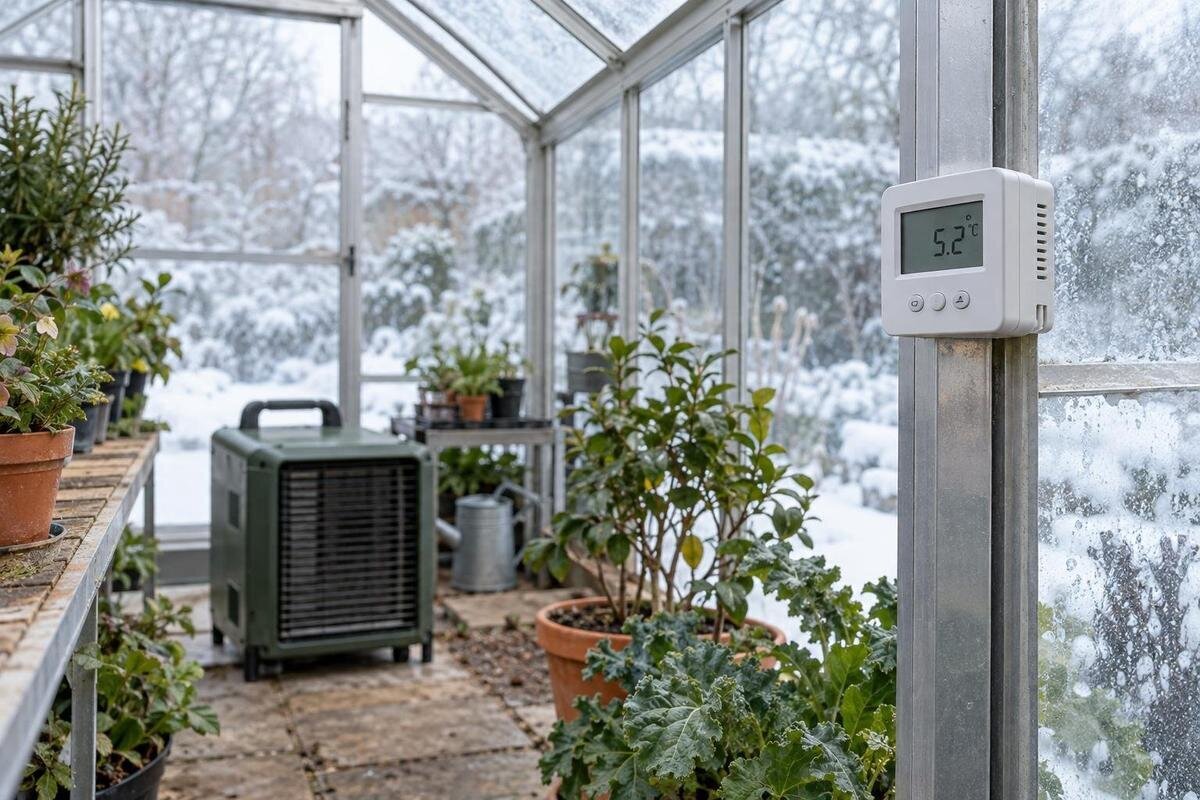
Greenhouse heating
Greenhouse thermostats respond to the air around a sensor, not to an average across every bench, pot and leaf. A probe warmed by sunshine or heater airflow can give a misleading reading, while a single point may miss a cooler planting area elsewhere. The useful position is tied to the plants you intend to protect, the heater and the greenhouse layout. There is no universal mounting height: check the actual plant zone and verify it with an independent thermometer in more than one condition.

What a greenhouse thermostat actually measures
A thermostat does not average conditions across a greenhouse. Its sensor measures the air immediately around it, and the controller responds to that local reading according to its setting. It cannot tell whether leaves at the far end, pots on a lower shelf or plants beside an opening are at the same temperature. Nor does an air sensor directly measure the temperature of compost, a pot or a leaf. Treat the displayed figure as a reading for one small location, not a promise that every plant is experiencing the same conditions. This matters even when the control is working as designed: it may switch the heater on or off correctly at the sensor while another part of the structure is too warm or too cool.
Think about the growing area and circulation before choosing the spot. A product name or floor-area figure alone does not show how plants and equipment will be arranged. The Pyramid-type greenhouse is listed in sizes from 60 to 203 sq ft; for whichever size you consider, sketch the planted area, heater, doors, vents and likely control point. If beds or benches occupy separated ends, one sensor may describe only one of them. A central location can be a useful reference, but it is not automatically right if the plants you need to protect sit elsewhere or the heater warms that spot unusually quickly. The aim is a reading that reflects the crop zone the thermostat is intended to control.
Set the sensor at the height of the plants being heated
Set the sensing element at the height of the plants the thermostat is intended to protect, rather than relying on a fixed rule such as waist height or the centre of the glass. Air near the roof can be warmer than air around a crop; near the floor, a reading may reflect a cooler layer or nearby paving. Put the probe in open air among the relevant plants, without letting it touch leaves, pots, shelves or glazing. If a separate probe is supplied, follow its instructions for orientation and mounting. With an integrated control, do not assume that the sensor can be relocated separately from the heater.
That height can stop being representative as the season progresses. Seed trays on a high bench, low pots and taller crops occupy different zones, while growth or a rearranged shelf shifts the canopy around the probe. If a limited-edition greenhouse with built-in storage is under consideration, its listed sizes run from 59.4 to 302 sq ft; identify the growing area separately from storage before choosing a control point. A convenient spot by an entrance may be easy to reach but poor for measuring the crop. Recheck after changing bench positions or the main crop, rather than assuming last season’s location is still suitable. Where plants at different heights share the space, note which group is being controlled and monitor the others separately.
Direct sunlight can warm the sensor
Direct sun can warm a sensor faster than the surrounding air, so the thermostat may register a comfortable figure and stop heating while shaded plants are still cooler. The effect can come and go as the sun moves, even when the greenhouse air changes little. A probe shaded at midday may receive direct light earlier or later, depending on the greenhouse’s orientation and nearby obstructions. Look at the intended sensor point over a full day and, where possible, in different seasons. A cloudy-day check alone cannot show whether the position will be exposed when the sun is out.
Keep the sensing element out of direct rays and away from glazing, frames or other surfaces warmed by the sun. If the manufacturer supplies or specifies a radiation shield, use it as directed; it should block radiant heat without sealing the sensor away from moving air. A thick cover or closed box can create a different false reading or slow the response. The Bloomcabin Prestige Greenhouse is listed in sizes from 40.6 to 302 sq ft, but its name and area cannot tell you where sunlight will fall at your site. Check the planned sensor position against your own greenhouse and plant layout. If readings change sharply with sunshine, investigate exposure before adjusting the thermostat setting.
Keep the probe clear of heater airflow and draughts
Keep the sensor out of the heater’s discharge and away from direct radiant heat. A probe in a stream of warm air can reach the thermostat’s cut-off point before that warmth has spread to the crop; a nearby hot casing or reflector can affect it too. The heater may then cycle in response to its immediate surroundings rather than the plants. Follow the heater and thermostat manufacturers’ instructions for sensor location and clearances; those instructions take precedence over general advice. If a circulation fan is used, check that it does not direct air from a particularly warm or cold area onto the sensor. The aim is to sample representative air, not to avoid air movement altogether.
Doors, vents and gaps can create local temperature swings, especially when they are opened or exposed to draughts. A sensor beside an opening may trigger the heater whenever outside air reaches it, while one in a warm pocket may miss a cooler planting edge. Neither problem is solved simply by choosing the coldest or warmest corner. With a lean-to greenhouse under consideration, compare the air near its adjoining boundary with the main planting area rather than assuming a wall-side reading represents the whole space. Once the greenhouse is in use, check any known cold spot with a separate thermometer and decide whether it needs its own control zone.

Choose the crop zone the controller needs to represent
Choose the sensor position in relation to the plants the heating is meant to protect. If one crop or bench is the priority, the sensor should measure air at that group, not at a convenient but unrelated place. If you want to control a broad area with several crops, choose a representative part of the occupied growing zone and check cooler edges independently. Do not automatically put the thermostat beside the most vulnerable plant: that could make the heater run for longer and warm other areas more than intended. The right compromise depends on the crop layout, how warmth is distributed and whether separate controls are available.
Make the same distinction when choosing a greenhouse. The Classic aluminium greenhouse is listed in sizes from 40.6 to 302.3 sq ft, but area alone cannot identify a representative sensor position; the intended beds, shelves and plant heights do that. Keep the sensor in open air around the plants, rather than buried in dense foliage, resting on compost or touching the greenhouse frame, where its reading may not reflect the surrounding air temperature. If your planting plan includes crops with clearly different temperature needs, ask whether separate heating zones or controls are appropriate. One thermostat is not a substitute for a system designed to manage distinct zones.
Why one sensor may not suit a large greenhouse
Temperature can vary along the length and width of a greenhouse, as well as between the canopy, floor and roof. Glazing, exterior exposure, doors, vents, partitions and the pattern of heater airflow all influence local readings. The centre can be a sensible reference when planting is fairly continuous, but it may miss an end bay or an area screened by shelving. A larger footprint makes it more important to test more than one location, although size alone does not prove that several heating controls are needed. Map the actual pattern first: layout and measured differences matter more than a general rule about how many sensors a greenhouse should have.
The spacious greenhouse listing covers 506 to 753 sq ft, illustrating why one displayed figure should not be treated as a temperature guarantee for every planting area. Use a separate thermometer or logger to compare the control sensor with the ends, shaded benches and any distinct growing area; check at the relevant plant height. If differences persist, consider whether the main sensor should move or whether the growing areas need independent control, rather than turning up the thermostat to compensate for one cold corner. Heater output and air circulation also affect whether warmth reaches all areas, so check documented equipment specifications instead of assuming placement alone will correct uneven heating.
Check what kind of sensor the thermostat uses
First establish what the thermostat actually controls. Some heaters have a sensor built into the unit, while others use a separate probe; a display thermometer may only record conditions and may not operate the heater at all. A built-in control cannot necessarily be repositioned independently. A remote sensor may have instructions about mounting, exposure to moisture, cable length, wireless range, battery use or operating conditions. Read the heater and controller manuals before placing or buying a probe, and follow their stated limits. Do not cover a sensor or alter a cable or electrical connection to make a particular location work.
Compare the control’s documented capabilities with the greenhouse layout you have chosen. The Limited Edition aluminium greenhouse is listed in sizes from 40.6 to 302 sq ft; for any selected footprint, check whether the separate heater’s probe lead or wireless link can reach the intended plant zone reliably. Confirm that a remote device actually switches the heater, rather than merely showing a reading, and that the control is compatible with the heater. Product photographs or greenhouse dimensions cannot establish those facts. If an integrated sensor cannot represent the crop zone, look for a permitted remote-sensor option or another suitable arrangement rather than trying to modify the unit. Use a qualified professional where fixed electrical work is needed.
Verify plant-zone temperatures independently
After positioning the control sensor, compare it with a separate thermometer or data logger. Put the second instrument at the same height and close enough to sample similar air, without touching glass, metalwork, leaves or pots. Give the devices time to settle in line with their instructions, then record readings rather than relying on a single glance. A maximum–minimum thermometer or logger can reveal how conditions change overnight or when sun reaches the greenhouse. Repeat the check during a colder period and a bright spell if possible: one daytime reading may miss the conditions that matter most to the heater.
Then take the independent thermometer to other plant zones, keeping it at a representative crop height, to see whether differences are local or consistent throughout the space. For a T-shaped orangery greenhouse, include each planting area in the check rather than treating the geometric centre as representative by default. Compare locations under similar conditions: if the weather or heater activity changes while you move the thermometer, return to the control point to check whether the whole greenhouse has warmed or cooled. A difference at one end may indicate a microclimate, not a faulty thermostat. A persistent discrepancy beside the sensor warrants checking both instruments’ stated accuracy and the manufacturer’s guidance on batteries or calibration. Record the time, sunlight, heater activity and measurement position.

Allow for switching behaviour and sensor response time
A thermostat setting is not necessarily a fixed, exact air temperature at every moment. Many controls use a switching differential, delay or other control logic, and a sensor takes time to respond to changing air. The displayed value may therefore rise and fall around the target, especially when a heater warms nearby air before the wider space catches up. Check the manufacturer’s information for accuracy, switching behaviour and any calibration facility. Do not react to every small fluctuation by changing the setting; first look at the independent thermometer and the pattern over time. A persistent mismatch matters more than a brief change during a heating cycle.
If the controller and independent thermometer agree at the control point but other plant zones remain cooler, first distinguish an unrepresentative sensor position from insufficient or uneven heating. Moving the sensor may improve control of the intended crop zone, but it cannot increase the heater’s output or ensure warmth reaches every corner. Compare the heater’s documented output and operating instructions with the structure and its use, and check doors, vents and insulation choices without blocking needed ventilation. For running-cost estimates, use verified power consumption, measured or realistically estimated operating time and your applicable energy tariff. State the assumptions: rated power alone does not show how long a thermostatically controlled heater will run. Neither a thermostat position nor a greenhouse model guarantees a particular temperature or bill.
Recheck the position when the layout changes
Revisit the sensor position whenever the greenhouse changes. Plants grow; benches move; propagation trays appear; a fan, heater or screen may be added; and seasonal sunlight reaches the glazing at a different angle. Each change can alter the air around the probe or the part of the crop it represents. Check the sensor again after rearranging the growing area and during the first cold or sunny conditions of a new season. A simple log of the sensor point, plant height, weather and heater activity helps distinguish a pattern from a one-off reading. If the readings remain representative, there is no need to move the sensor merely because another spot seems more central.
Keep the sensor clean and exposed to air in the way its manufacturer specifies, and inspect it according to the manual. Avoid placing it where watering, condensation drips, stored items or routine work could wet, cover or knock it. Do not improvise a sealed enclosure or modify the thermostat or heater; a shield must not prevent the sensor from detecting the surrounding air. For fixed wiring, heater installation or a control problem beyond ordinary user checks, ask a suitably qualified professional. Accurate placement improves the information available to the controller, but reliable heating still depends on appropriate equipment and the greenhouse’s actual heat loss.
Frequently asked questions
How high should a greenhouse thermostat sensor be?
Place it at the height of the main plants the thermostat is meant to protect, in open air rather than touching leaves, pots or a bench. There is no universal height: reassess it if the crop grows or the planting layout changes.
Should the sensor be in direct sunlight?
No. Direct sun can warm the sensor above the surrounding air and make the heater switch off too soon. Use a position shaded throughout the day, or a radiation shield specified by the manufacturer that still allows air to reach the sensor.
Can I put the thermostat next to the heater?
Avoid placing it in the heater’s warm airflow or direct radiant heat, as the sensor may reach its cut-off point before the warmth reaches the plants. Follow the heater and thermostat instructions for the permitted sensor position.
Where should one sensor go if I grow plants at different heights?
Position it to represent the main group of plants the system is intended to control. Check other heights and areas with a separate thermometer. If different crops need distinct conditions, one control point may not represent them all.
How can I check whether the thermostat is reading accurately?
Place an independent thermometer close to the sensor, at the same height, and compare readings over time. Allow both devices to settle and consider their stated accuracy; a difference does not by itself prove which instrument is wrong. Then check other planting areas during cold and sunny conditions. Follow the manufacturer’s guidance before adjusting or calibrating the thermostat.
A reliable thermostat position is not simply the most central or convenient spot. It is a shaded, unobstructed sample of the air at the height of the plants whose conditions matter, away from the heater and local draughts. Check it beside a second thermometer, then compare other areas and weather conditions. If readings differ, identify the zone before changing the setting: the controller can respond only to its sensor, while uneven warmth may need a different layout or a properly specified heating arrangement. Revisit the measurements when plants, benches or equipment move.
