
Hardening Off Greenhouse Seedlings Before Planting Outside
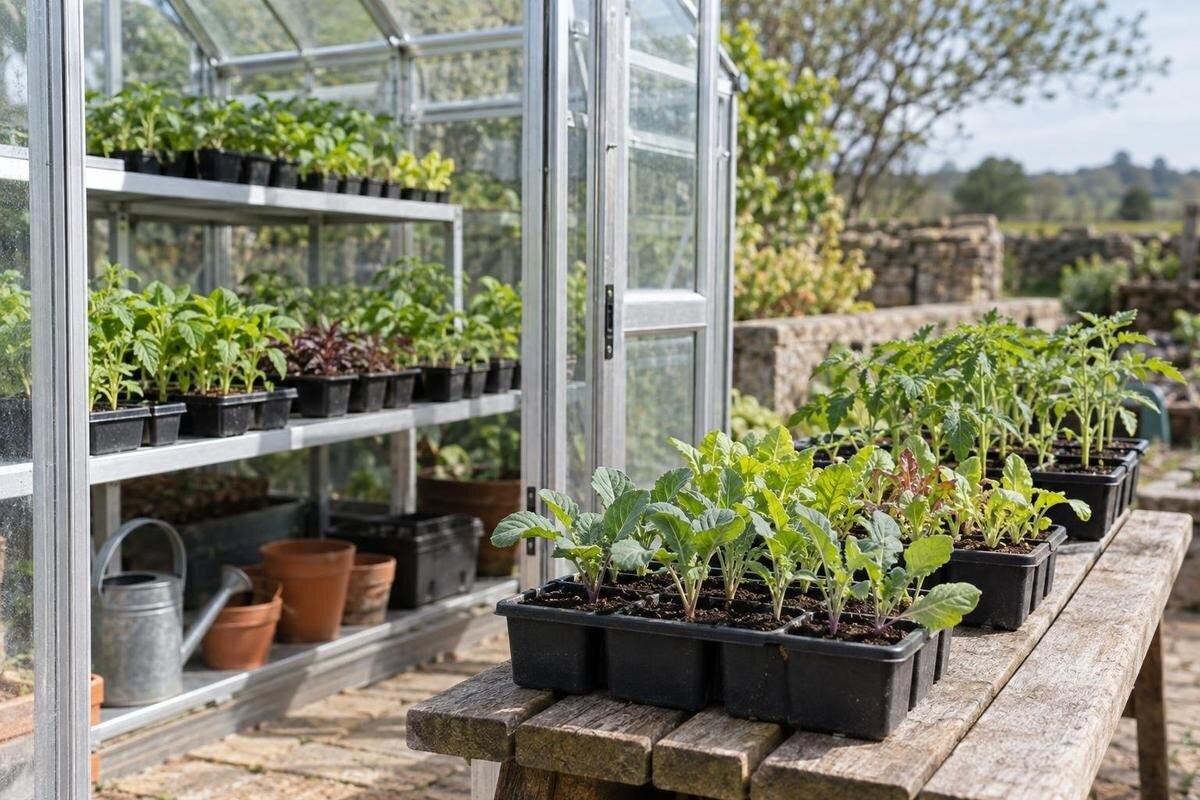
Growing guide
Seedlings raised under glass meet a different combination of light, moving air and temperature outdoors. Moving them straight into a bed can leave tender growth scorched, wind-dried or checked by cold. A flexible hardening-off plan lengthens exposure in manageable stages, pauses when conditions worsen and follows the crop’s needs as well as the forecast.

What hardening off changes
Hardening off is the gradual adjustment of a greenhouse-raised seedling to outdoor conditions. Plants raised under glass are usually sheltered from wind and rain, and experience a different pattern of sunlight, humidity and temperature from an open bed. Even a bright greenhouse does not expose them to the full range of outdoor weather, and a sunny structure can heat rapidly despite being sheltered from wind. Outside, moving air can increase water loss, direct sun may be stronger than the light the leaves have met so far, and nights can be cooler. A sudden move may cause wilting, sun scorch or damaged stems. Staged exposure gives seedlings a chance to cope with these changes before planting. It does not make a frost-tender crop frost-proof or repair weak growth.
Think in stages rather than dates: begin with a protected outdoor period, then lengthen exposure and add more sun and air only while plants remain in good condition. Choose a time when you can check them rather than leaving a new tray unattended for a long stretch. Bring plants back under cover when weather becomes unsuitable; a pause is better than trying to compensate with one long outing. If you are planning propagation space, the Pyramid-type greenhouse listing offers area options from 60 to 203 sq ft. Compare the chosen layout with bench and tray footprints and the practical route to an outdoor holding spot.
Check crop and seedling readiness
Check the crop’s planting guidance before choosing when to start. Seedlings should be established enough to handle normal movement: stems should be firm, leaves healthy and the roots holding compost together when a cell is lifted. A recently pricked-out or potted-on plant may need time to settle before it faces wind and stronger sun. A crowded, root-bound or already stressed seedling is not made robust by leaving it outside. Look for damage, pests and signs of poor watering first. Vigour matters more than height alone. Seedlings bought from a nursery may already have been acclimatised, so find out how they were grown rather than automatically repeating a full transition.
Sort plants by crop and sowing batch instead of treating every tray alike. Hardy brassicas can cope with cooler conditions than tender crops such as tomatoes, courgettes or basil, but tolerance depends on variety and growth stage; use the relevant seed packet or supplier’s directions. Clear labels stop the progress of a hardy batch being mistaken for a tender one. If storage is part of your greenhouse plan, the Limited Edition greenhouse with built-in storage listing names that feature and offers area options from 59.4 to 302 sq ft. Check the selected layout leaves a workable place for seedlings; the listed area does not tell you how much bench space is available.
Weather and the pace of hardening off
Use a local forecast to choose each outdoor period, and check both daytime and overnight conditions. A calm, dry interval is easier for young plants than gusts, driving rain, an abrupt cold snap or unusually strong sun. Frost warnings matter especially for tender crops. Do not use one temperature or calendar date for every species: follow crop-specific guidance and consider whether your garden has sheltered or exposed spots. A forecast describes wider conditions, not necessarily the place beside a wall or hedge where trays will stand, so observe conditions at the staging spot too. A short sheltered outing and a full day in an exposed position are very different tests.
Make a fresh decision each time you take trays out. If conditions turn rough, keep plants under cover, shorten the session or return to the previous level instead of stretching it because a schedule says so. A sunny greenhouse can become much warmer than the outdoor forecast suggests; check plants that remain under glass and ventilate it in line with crop needs. For staggered sowings, the Prestige greenhouse range lists area options from 40.6 to 302 sq ft. Treat that figure as a planning reference, not a seedling count: bench positions and access still matter.
Start in a sheltered, shaded place
Choose bright shade for the first outdoor exposure, not deep darkness. A spot protected from strong wind, with indirect light and easy access back inside, lets leaves experience open air without the full force of midday sun. Set trays on a stable surface where they cannot tip, and keep them away from places where people or pets might knock them. Avoid leaving tender seedlings on a cold or wet surface for long periods. Keep trays within reach rather than at the far end of the garden, where a sudden shower or gust might go unnoticed. The first exposure should be short enough for you to inspect the plants and bring them back before lasting distress develops.
On the first suitable outings, focus on calm air and a modest change in light; do not combine full sun, wind and a long period away from home. If you are raising many trays, plan an outdoor staging spot that does not block the route or leave plants exposed when you cannot check them. The Spacious Greenhouse listing shows options from 506 to 753 sq ft, but a large indoor area does not provide outdoor acclimatisation space. Assess the garden route and sheltered staging position separately from the greenhouse’s listed area.

Increase sunlight gradually
Once plants cope with open air in shade, add direct sunlight in stages. Move them into gentler sun first, then increase the exposure on later suitable outings; avoid an abrupt shift from filtered or shaded conditions to the strongest part of the day. The right pace depends on the crop, season, cloud cover and how sheltered the plant was before. Some seedlings develop pale or papery patches after excessive exposure. If that happens, move them back to bright shade and pause before trying a smaller increase. More water will not undo sun scorch, so reduce the light exposure first. One sunny afternoon is not proof that a seedling can remain in full sun all day.
Look at both new and older leaves after each session, not just at the end of the week. Healthy plants should stay reasonably firm and show no fresh scorch; a change in colour can have other causes, so compare it with the compost’s moisture and the plant’s previous condition. Moving trays in and out is part of the process, so check the planned route before sowing at scale. The Classic greenhouse listing has area options from 40.6 to 302.3 sq ft. Compare the chosen configuration’s dimensions and doorway with your trays, allowing space to carry them comfortably past benches and other plants.
Manage wind, rain and moisture
Wind can make a seedling that looked fine in sunlight suddenly droop: it moves leaves, stresses weak stems and dries small cells quickly. Start in shelter, avoid strong gusts and driving rain, and support leggy plants before they go outside. A light breeze is not the same as an exposed, windy day; let plants encounter airflow in steps. Tall or top-heavy seedlings in pots may be especially vulnerable, so group trays securely while leaving room to inspect them. If rain is heavy, trays can become waterlogged or damaged; use a sheltered position rather than relying on the weather to water them. Temporary cover should not trap excessive heat or leave plants in darkness.
Check compost before, during and after an outing. Small plug cells can dry faster outdoors, particularly when wind and sun coincide, so judge by the growing medium rather than the weather alone. If it is dry, water evenly and let excess drain before moving the tray. Check again after setting it down, as exposed cells at the tray’s edge may dry sooner than those in the middle. Keep watering access in mind when arranging a propagation area. The Lean-to greenhouse listing spans 40 to 154 sq ft; whichever layout you consider, verify that the route between trays, water and outdoor staging works for your site.
Treat cold nights as a separate decision
Daytime progress does not automatically make overnight exposure safe. Tender vegetables and herbs can suffer cold damage even after they have tolerated sun and a breeze; some hardy crops are more tolerant, but their limits remain crop-specific. Keep tender plants in conditions suitable for the crop at night while cold or frost remains a risk. Do not read a mild afternoon as a guarantee about the minimum overnight temperature. An unheated greenhouse can still become cold enough for frost damage, so bringing trays indoors only helps if their overnight location provides the protection they need.
Only consider nights outside when the species guidance, forecast and plants’ response all support it. If there is doubt, bringing trays back under cover is a sensible pause, not a failure to harden them. When growing several crops together, keep labels clear so a cold-sensitive batch is not left out because a hardier one can cope. The Limited Edition aluminium greenhouse listing includes area options from 40.6 to 302 sq ft. Check the selected configuration against the tray sizes you need to bring inside rather than assuming the stated area describes usable bench space.
Choose a suitable planting day
Hardening off is only one part of choosing a planting day. The outdoor bed or container must also be ready for the crop: soil should be in suitable condition, the site prepared and the forecast appropriate for the plant after it is moved. A well-acclimatised seedling can still struggle if planted into cold, saturated ground or left without water in a dry spell. If soil is sticky and waterlogged, delay rather than compressing the transition to fit a convenient date. Use the crop’s planting directions for spacing, depth and timing, and do not let a free weekend overrule unsuitable conditions.
Before lifting a tray, water if the compost is dry and let excess drain. Ease each root ball out of its cell or pot rather than pulling on the stem. Support the root ball as you move it to the planting hole, disturbing the roots as little as possible unless the crop’s guidance says otherwise. Keep batches labelled and have the bed and watering equipment ready so seedlings are not left waiting in the open. If you are planning greenhouse space for separate sowings, the T-shaped orangery greenhouse is one model to compare. Check its dimensions against your proposed bench arrangement rather than judging growing space from the name alone.

Support seedlings after planting
After planting, gently firm soil or compost around the roots and water according to the crop’s needs. Good contact between the root ball and surrounding growing medium helps establishment; avoid leaving gaps around the roots, but do not compact wet ground. On a bright, dry or breezy day, temporary shade or a suitable horticultural cover can reduce the immediate strain. Allow room for the plants beneath it and secure it so it cannot flap against tender leaves. Check beneath the cover for overheating and inspect the plants for slug or snail damage. Follow crop-specific advice for planting depth and support rather than applying one method to every seedling.
Inspect transplants as they establish. A brief midday droop can have several causes, but persistent wilting, drying compost, scorched edges or stems leaning in the wind call for a check of moisture and protection. Water the root zone when needed, and remove or ventilate covers when conditions become warm. Do not leave fleece or cloches in place without checking their effect. New growth is a more useful sign of establishment than expecting damaged leaves to regain their original appearance. If a plant continues to decline despite reasonable care, look for other problems rather than attributing every symptom to hardening off.
Keep records for each seedling batch
A brief record helps you judge progress when several batches are at different stages. Note the crop and variety, sowing date, tray or pot size, outdoor position and approximate time spent outside. Add whether the outing was shaded or sunny, calm or breezy, and how the plants looked afterwards. Record any watering too: a tray that stayed firm after watering has not necessarily responded in the same way as one whose compost remained moist throughout. A few words or a photograph are enough. The purpose is to remember what each batch actually experienced, particularly when weather interrupts the sequence or another person takes over its care.
Use those observations to choose the next exposure rather than counting completed days. A tray that has coped with a long spell in bright shade has not yet demonstrated tolerance of strong direct sun. Likewise, calm conditions tell you little about its response to an exposed planting site. Note these gaps before increasing exposure. If only some plants in a batch struggle, inspect their root balls and position in the tray rather than assuming every seedling needs the same adjustment. Keep the records for later sowings, but compare conditions before reusing the plan: changing sunlight, wind and plant size can make the same outdoor position a different test.
Frequently asked questions
How long does hardening off take?
There is no dependable fixed number of days. The pace depends on the crop, how sheltered the seedlings have been and how many suitable spells of weather you get. Extend exposure when plants cope; pause or step back if conditions turn cold, windy or unusually bright. Follow crop-specific advice rather than trying to finish by a particular date.
Can I leave greenhouse seedlings outside overnight?
Only when the crop’s tolerance and the actual night conditions make it appropriate. Tender plants such as tomatoes, courgettes and basil need protection while cold or frost remains a risk. A long day outdoors does not make a frost-sensitive seedling safe on a cold night. Move it somewhere suitably protected if the forecast is unsuitable; an unheated greenhouse is not guaranteed to remain frost-free.
Should the first outing be in full sun?
No. Begin in a sheltered place with bright shade, then introduce direct sun in stages on suitable days. A sudden change from filtered or shaded conditions to strong sunshine can scorch leaves. If you see fresh pale or papery patches, move the tray back to bright shade and wait before increasing exposure again.
Why are my seedlings wilting after being moved outside?
Wind, direct sun and faster drying of the compost can all cause wilting. Check the growing medium before watering, since waterlogged roots can also leave a plant limp. Move the tray to shelter, reduce exposure and let it recover before trying again. If symptoms continue under suitable conditions, consider causes other than hardening off.
Do seedlings need hardening off if the greenhouse doors have been open?
Opening doors may increase airflow, but it does not necessarily expose plants to outdoor sun, wind, rain or night temperatures for long periods. Continue the transition gradually unless the supplier confirms that the seedlings are already acclimatised. Adjust the plan to the conditions they have experienced and the crop’s own guidance.
A successful transition is measured by seedlings that cope with longer outdoor exposure, not by a box ticked on a particular date. Keep crop tolerance and local weather at the centre of the plan: offer shelter when conditions worsen, increase light and airflow only as plants adjust, and plant out when both the seedlings and the site are ready. That flexible approach protects the progress made in the greenhouse without forcing a vulnerable tray through unsuitable conditions.
