
Mulching Greenhouse Beds: Materials, Moisture and Slug Risks
GREENHOUSE GROWING
Mulch can reduce water loss from a greenhouse bed, but a roof changes the balance. Rain cannot replenish the soil, irrigation is under your control, and sunny beds can dry differently from shaded corners. At the same time, damp material can provide shelter for slugs and hide the true moisture level beneath it. The right choice is not simply the mulch that holds most water: match the material to the crop, check beneath the cover and keep every bed easy to inspect.

Before choosing a mulch 1
Why greenhouse mulch needs a different watering routine
In an open bed, rainfall can top up soil moisture; in a greenhouse it normally cannot reach the growing area. Roof runoff goes elsewhere, so irrigation is the routine source of water. Humid air and condensation on the glazing do not show that roots have enough. Sunshine, ventilation, crop canopy, soil texture and drainage create different drying rates, even within one house. Mulch reduces evaporation from the covered surface, but it does not supply water or correct poor drainage or uneven wetting. Its effect is conservation, not automatic moisture control. A sunny bed may dry faster than a sheltered one, so assess each area rather than using one schedule.
A pale, dry-looking top is not reliable evidence that roots need water; damp mulch may sit over dry soil if irrigation misses the root zone. Pull the layer aside at several points and feel the soil at the depth occupied by active roots; a small trowel helps in a deep bed. Check the centre as well as the edges, and compare places with different exposure or watering. Newly sown seed is an exception: its surface needs attention, so leave the row open until seedlings are established. Checking before you cover the bed gives you a useful baseline. If it is already persistently wet, investigate the cause rather than hiding it beneath mulch. Repeat checks after a sunny spell or a change in ventilation.
Decide which beds should be mulched
Mulch is most useful where a crop is established and exposed soil would otherwise lose water or grow weeds. It is less useful over a direct-sown row that needs a clear, fine surface for emergence. Keep seed lines and tiny seedlings visible, and leave the immediate collar around stems clear so damp material does not sit against tender growth. Crops differ in the moisture, warmth and drainage their roots need; a deep, water-holding layer is not a universal fit. Use crop-specific growing advice, and remember that one bed can contain covered and uncovered strips. A newly transplanted crop may also need time to settle before you bring mulch close.
Think of each planting strip as its own management zone. A crop that benefits from steadier moisture may suit a loose cover, while a sowing row or a plant sensitive to prolonged dampness can remain open. If you are still choosing a structure, compare the intended bed and path areas with the actual dimensions of a lean-to greenhouse variant before estimating material. The greenhouse footprint is not the soil area you will mulch; the plan must also leave room to water, weed and inspect each strip. Where sowing and established crops share a bed, decide on the mulch boundary before planting so you do not disturb new roots later.
Before choosing a mulch 2
Keep paths and working access clear
A bed mulch and a path surface do different jobs. Keep loose material inside the bed edge so it does not migrate under pots or into the working aisle. A path cover may be useful, but it is another potential hiding place for slugs and should be easy to lift, sweep or inspect. Water on a path will not substitute for watering plant roots. Treat paths and beds as separate zones when comparing dampness: the surface beside a bed can feel dry while the crop’s root zone remains moist. Keep the boundary visible enough to stop cover spilling into access space.
Leave a clear route to every bed edge and enough room to turn mulch back when checking soil or removing weeds. Avoid routine foot traffic on growing soil, which can compact it and make watering less even. When planning a Limited Edition aluminium greenhouse, use the drawing for the exact size under consideration to place beds and aisles; a headline area alone does not tell you how much space remains for reaching, watering and maintenance. Map containers and tools too, rather than letting them block the inspection route. Decide where a lifted cover can rest without landing on plants or obstructing the aisle.
What compost and leaf mould do in a covered bed
Well-finished compost can serve as a top dressing that is easy to rake away or mix into the surface later. Unlike an inert sheet, it contributes organic matter and nutrients, so treat it as an amendment as well as a cover and fit it to the crop’s feeding plan. Use a known, suitable source; unfinished or contaminated material is a poor choice around growing plants. Do not cover seeds that need an open surface, or use compost to mask a bed that is already too wet. Check the bag’s intended use rather than assuming all compost products are interchangeable.
Leaf mould is moisture-retentive but usually contributes little nutrition; it is a cover, not a complete growing medium. Under cover, its underside may stay damp after the top seems dry, particularly where air movement is limited. Try it on a small area before covering every bed, noting whether it remains loose enough to lift or forms a matted layer. Where you use compost and leaf mould in separate crop zones, label them so that later feeding and top-dressing do not become guesswork. If comparing a T-shaped orangery greenhouse, map these zones on the chosen version’s plan, including where you will stand to rake material aside without disturbing neighbouring plants. Keep a record of what you applied and when.

Before choosing a mulch 3
Compare straw, grass clippings and woody materials
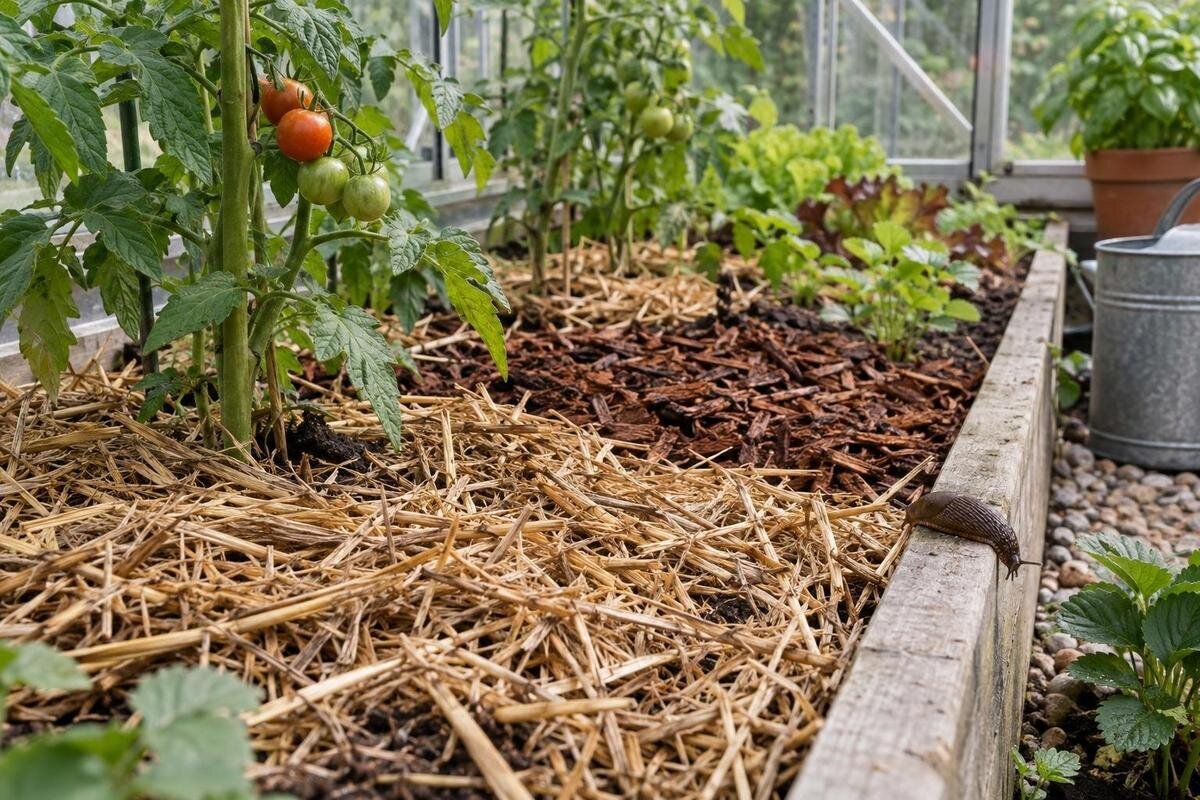
Straw is loose and straightforward to lift, which makes soil checks easier, but it can flatten and stay damp, leaving shelter underneath. Choose clean, identifiable straw intended for garden use, and keep it clear of stems and sowing rows. Hay is not an exact substitute; it may contain seed heads that introduce unwanted plants. Dry leaves can clump as they break down. If a leaf layer mats, blocks water or is hard to lift, thin or remove it instead of adding a fresh layer on top. A material that stays open is easier to manage than one that forms a compact blanket.
Grass clippings break down quickly, and a thick, fresh layer can mat into wet patches. If using clippings, let them wilt and spread only a thin layer that does not seal the soil; avoid them if you do not know the lawn’s treatment history. Bark and wood chips last longer and are coarse, so they can be awkward over seed rows or annual beds that need frequent replanting. They may be simpler on a path, but keep them separate from soil you regularly cultivate. When considering a pyramid-type greenhouse, check whether the proposed bed edges will contain loose path material. Allow for sweeping it back after watering or moving equipment, rather than letting chips accumulate among seedlings.
When a sheet or fabric is a better fit
Plastic film and weed-control fabric can reduce direct evaporation and suppress weeds, but their behaviour depends on whether water passes through. Check the manufacturer’s description before laying a cover: an impermeable sheet can divert water, while fabrics vary by product. Plan how water will reach the soil at planting openings or underneath, and test the wetting pattern rather than assuming a hose or irrigation line will penetrate. A sheet also changes how easily you can see the soil. It suits beds where you can manage openings and remove or lift it, not every crop, sowing method or rotation. Check that the product is intended for the use you have in mind.
Because a sheet hides the bed, arrange it so you can lift an edge or open a section to check moisture, weeds and slug activity. Folded edges and planting holes deserve attention, particularly where water collects around stems. A removable strip also lets you expose a sowing area without uncovering the whole bed. Decide where removed covers will be cleaned, dried and stored between crops. If a greenhouse with built-in storage is on your shortlist, verify the storage arrangement and dimensions before assuming a folded sheet or rolled fabric will fit. Keep used covers separate from clean seed trays and other propagation equipment, and collect torn fragments rather than leaving them in the soil.
Before choosing a mulch 4
Apply mulch without covering plants
Before applying a loose mulch, remove weeds and water the bed if the root zone is dry; a cover should conserve moisture already present, not hide dry soil. Wait until the bed is warm enough for the crop, particularly for heat-loving plants in spring, because a layer can slow surface warming. Spread material evenly, but keep it clear of stems, crowns and emerging leaves. Leave sowing lines open so seeds meet the prepared soil and seedlings are not obstructed. Follow crop and material guidance on layer depth: too little may leave bare patches, while too much can obstruct emergence or remain wet. Keep bed edges accessible for inspection.
Calculate quantities from the bed, not the greenhouse footprint. Multiply bed length by width to get the area, then multiply by the intended layer depth, using the same units. For example, a 1.2 m by 3 m bed covered to an illustrative depth of 5 cm (0.05 m) needs 0.18 m³, or 180 litres, before allowing for settling; that depth illustrates the calculation, not a universal recommendation. If only part of the bed is covered, measure that section. For an irregular bed, divide the covered area into simple shapes and add them together. For a Prestige greenhouse with metallic base, use the selected model’s actual plan to distinguish soil beds from paths and other floor area before calculating.
Water carefully after covering the bed
The first watering after mulching is a useful test of how the cover affects water delivery. Organic covers usually allow water through, but a compacted layer or very dry material can slow or redirect it. Watch for water running towards the bed edge instead of soaking in. With film or fabric, follow the maker’s guidance on permeability and direct water to soil through the intended openings or beneath the cover. Once water has had time to soak in, lift a small patch at several points to check the wetted depth. If only the mulch is wet, or the soil is wet around one opening but dry elsewhere, adjust delivery before relying on the arrangement for the whole crop.
Do not reduce watering by a fixed percentage after mulching. For the first few watering cycles, note the date, the amount applied where you can measure it, and how the root-zone soil feels before the next watering. This helps distinguish a bed that dries more slowly from one that receives water unevenly. A persistently saturated patch needs investigation of drainage and delivery; a dry patch may need water directed to it rather than a larger dose across the whole bed. When planning beds within a Spacious Greenhouse, identify which zones can be watered separately. Grouping crops with similar watering needs can make management simpler, but the actual planting and irrigation layout must determine those groups.

Before choosing a mulch 5
Slug hiding places beneath mulch
Mulch does not create slugs, and a greenhouse roof does not guarantee a dry bed. Slugs can arrive on plants or pots, or enter through gaps, and favour cool, damp hiding places. A loose layer gives them cover when the soil beneath stays moist, particularly where it touches stems, bed edges, plant labels, pot bases or debris. Different materials offer different refuges, but none should be treated as slug-proof. Risk depends on moisture and hiding places as well as the mulch itself, so inspect vulnerable seedlings rather than removing every cover automatically.
Lift small areas regularly, including the bed edge and underside of any sheet, board or pot left on the soil. Check at dusk or early morning, when slugs are often active, and remove any you find. Inspect suspected egg clusters carefully rather than assuming every pale cluster belongs to a slug. Remove decaying leaves and spillages, and give newly planted seedlings particular attention. If damage continues, compare affected plants with nearby uncovered ones and check other refuges before blaming the mulch alone. For a Classic aluminium greenhouse, consider the inspection route when arranging beds: vulnerable plants should be reachable without stepping into the soil or moving heavy containers each time. Reducing inaccessible hiding places makes these checks more practical.
Know when to lift or refresh the mulch
Mulch is not necessarily permanent. Lift or thin it when it mats, stops water passing, hides too much of the soil or prevents a direct-sown crop from emerging. If a bed needs to warm for a particular crop, expose some soil and judge conditions against crop guidance rather than a calendar date. Replace only what has decomposed or become difficult to manage, not automatically at the start of a new season. Laying fresh material over an old, compacted layer can deepen the problem and make moisture checks harder.
At changeover, rake loose material aside, inspect the surface and remove crop residues that are unsuitable for reuse. Reuse clean, healthy plant matter only in a composting system suited to it; if a crop has disease problems, follow plant-health guidance rather than carrying suspect residue into the next bed. Where you used different materials, note which stayed moist, which dried too quickly and whether slugs sheltered beneath them. Record the crop and watering conditions as well as the material, so the comparison is useful next time. Leaving an uncovered strip or trialling a small area first makes it easier to see whether mulch actually helps in your greenhouse.
Frequently asked questions
Does every greenhouse bed need mulch?
No. Leave beds or strips bare where you are sowing directly, want the surface to warm or need to inspect moisture easily. Mulch is useful only when its effects suit the crop and the bed. An uncovered strip can also help you compare how the soil behaves.
Can I use straw on greenhouse beds?
Yes, if it is clean and stays loose enough to lift. Keep it away from stems and sowing rows, and check beneath it for dampness and slugs. If it mats or remains wet, thin or remove it rather than adding another layer. There is no single depth that suits every crop.
Will I need to water less often after mulching?
Mulch may slow evaporation, but rain still cannot reach a covered bed. Check the soil beneath the layer near the roots and at several points before changing your routine. Adjust watering in response to those checks and the crop’s needs, not by a fixed percentage.
Does mulch attract slugs?
Mulch does not create slugs, but damp material can give them shelter. They can also hide around pots, debris and bed edges. Lift parts of the cover regularly, inspect vulnerable plants and keep the layer clear of stems so that damp hiding places are easier to spot.
How do I calculate how much mulch to buy?
Measure the part of the bed you intend to cover, multiply its length by its width, then multiply the area by the intended layer depth. Use consistent units and follow crop- and material-specific guidance for depth. Do not use the whole greenhouse floor area, which includes paths and other uncovered space.
Greenhouse mulch is a layer to manage, not a set-and-forget fix. Start with a clean, suitable material on a crop-compatible part of the bed, while keeping the soil easy to reach. Check moisture at root level after watering, lift the cover to inspect for slugs and note where the surface dries or stays wet. If the bed remains damp, is hard to water or attracts persistent pests, thin or change the cover; an open strip can provide a useful comparison. The best choice is the one that supports the crop without making watering and inspection harder.
