
How to Set Up No-Dig Beds in a Greenhouse
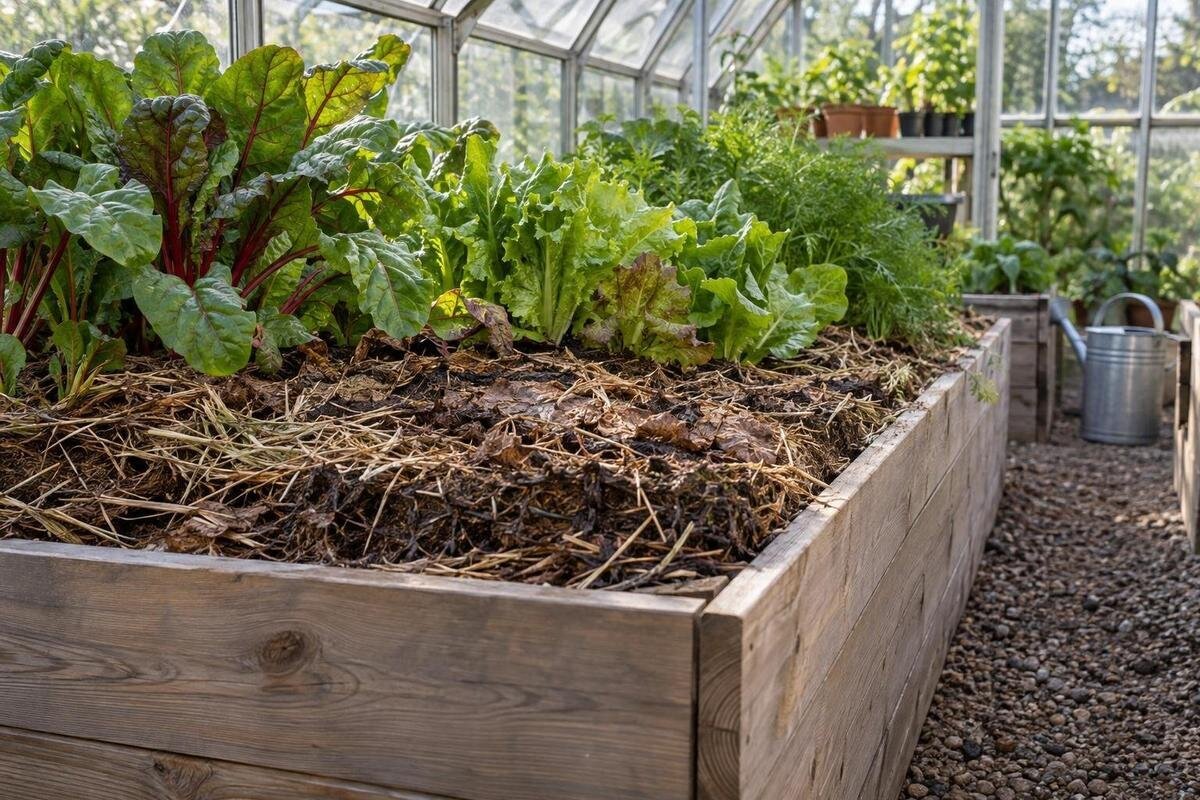
Greenhouse growing
Setting up a no-dig bed in a greenhouse is not simply a matter of covering soil with compost. The bed needs to suit the ground already there, leave workable paths and receive surface additions appropriate to the crop. Because a permanent roof keeps rain off the soil, moisture management also needs attention. Start by checking the base and fixing bed and path positions, then choose materials whose source and suitability are known.

01
What no-dig means in a greenhouse
No-dig describes how you manage a bed: you avoid routine turning, digging or mechanical cultivation and place suitable organic matter on the surface. That limits repeated disturbance to soil aggregates, roots and the spaces through which air and water move. After harvesting a healthy crop, you can cut away its top growth and leave fine roots to break down in place, provided they do not obstruct the next planting. Remove diseased material and deal with persistent weeds separately. A planting hole, a small repair or careful removal of a problem root does not defeat the method. The aim is to make disturbance deliberate and as local as practical.
Inside a greenhouse, the method needs an adjustment for the roof, not a different definition. Rain is excluded, so the surface layer and the soil beneath it depend on your watering. A dry surface can conceal moist soil lower down, while a damp surface does not rule out poor drainage. Beds are also likely to stay in the same positions, making access, crop history and watering reach worth planning from the outset. No-dig is not a cure for compaction, unsuitable soil or disease. It gives you a consistent way to manage the surface while you assess those issues on their own merits.
Check the existing ground before choosing a bed type
Before fixing a layout, establish what lies beneath it. If the greenhouse stands on garden soil, inspect a small representative area without turning the whole bed. Note the soil texture, rubble, roots and how water behaves after ordinary watering. A quick hand inspection cannot rule out contaminants. If the site’s previous use or any imported fill is uncertain, arrange testing that addresses the specific concern before growing edible crops. If water remains on the surface or the soil is very hard, do not assume that adding compost will resolve the cause. Where the floor is paved, or the soil is unsuitable, an in-ground bed is not an option as planned; a raised bed needs an appropriate root-zone medium.
Compare the bed plan with the exact greenhouse layout, rather than relying on a headline area figure. The Limited Edition greenhouse with built-in storage has listed area options from 59.4 to 302 sq ft; those figures do not show how much clear floor space a selected configuration leaves. Mark any storage shown on its plan, along with doors and access routes, before deciding where in-ground beds can go. If you plan to use raised beds instead, check the root depth needed for your intended crops and the suitability of the fill. A raised structure does not make an unsuitable base suitable for in-ground growing.
02
Lay out permanent beds and paths
Mark proposed beds and paths on the floor with string or tape before committing to them. Choose a bed width that lets you reach the centre from a path without stepping on the soil; there is no single width that suits every gardener or layout. Test the reach from your normal working position, and leave enough clear space to carry a watering can, harvest container or other equipment. Consider how tall crops and their supports will affect access as they grow. A bare bed may look easy to reach, but foliage can narrow a path later in the season.
When considering the T-Shaped Orangery Greenhouse, use the selected plan, not the model name, to place beds and paths. Draw a continuous route to the ends of each bed and to the doors, then check access to any fitted ventilation controls. Include the mature spread of planned crops and space to work around their supports, not just the width of an empty bed. If you are unsure whether a route will feel workable, mark it out and walk through with the containers or tools you expect to use. Adjust the bed positions before planting, while they are still easy to change.
Clear weeds without turning the whole bed
Remove old crop debris and identify weeds before covering the soil. Cut annual weeds and surface growth close to ground level; deal separately with persistent weeds that spread from roots or underground stems. A thin cover is not a reliable way to eliminate every perennial weed, so remove or control those plants rather than hoping they will disappear beneath compost. Lift roots only where needed instead of cultivating the whole bed. If the ground is already reasonably clean, there is no need to lay a weed barrier as a standard first step: preserving the existing soil is more consistent with a low-disturbance approach.
Where turf or annual weeds need suppressing, plain, uncoated cardboard can be used as a temporary layer. Remove tape and plastic labels, overlap the edges to block light and wet the sheets thoroughly before adding the surface material. Because the greenhouse roof excludes rain, the cardboard will not soften through rainfall; check that it does not remain dry. Do not use it as a permanent liner under an in-ground bed. When planning beds in the Spacious Greenhouse, allow access to their edges as well as their centres. Weeds can emerge through gaps beside edging or around supports, so leave those points accessible for inspection and removal rather than enclosing them behind fixed equipment.

03
Choose a suitable surface material and measure it
Choose a finished, stable compost with a known source and a description that suits the intended growing use. Check the supplier’s information rather than treating all organic materials as interchangeable. Unlabelled waste, partly rotted material and fresh manure are not automatically suitable substitutes for mature compost. A surface addition can contribute organic matter, but it is not a universal remedy for every soil or crop need. Keep a note of the material and date of application; that record can help you interpret a later soil test or crop response. If a test or crop-specific guidance calls for a different input, follow that advice instead of assuming compost will provide it.
Measure the actual bed length and width, then multiply the bed area by the layer depth you have chosen in metres to estimate cubic metres. Multiply by 1,000 to convert that volume to litres. For example, a 1.2 m by 3 m bed with an illustrative 3 cm layer would need 108 litres; this demonstrates the calculation, not a recommended depth. The Classic Greenhouse has listed area options from 40.6 to 302.3 sq ft, but the selected floor area is not the amount of bed surface to cover. Exclude paths and measure each growing area before estimating the material.
Plant without turning the bed
For direct sowing, use the sowing depth and spacing advised for the crop, and make sure the surface is fine and level enough for small seeds. If the compost layer is coarse, create a narrow sowing strip using finer material suitable for seed sowing rather than mixing the whole bed. For transplants, make a hole large enough for the root ball and set the plant at the depth appropriate to that crop. There is no need to force every root ball down into the original soil: its position depends on planting depth and the suitability of the surface layer. Water around the roots and remove emerging weeds while they are small.
Check the planned layout against mature crop size as well as planting-day spacing. The Bloomcabin Prestige Greenhouse has listed area options from 40.6 to 302 sq ft; use the plan for the selected option to see whether you can reach each plant to prune, support and harvest it without leaning across or standing on a bed. Leave room for crop supports where they are needed, and think about how they will be installed and removed with minimal soil disturbance. If space permits, rotate crop families between beds over time. In a small greenhouse rotation may be limited, so keep notes on where crops grew and any recurring problems.
04
Water by root-zone conditions, not the calendar
A greenhouse roof keeps rain off the beds, so you control the water the soil receives. Do not judge the whole bed from the surface alone: check a little below it in several places, especially near the roots of established crops. A dry compost layer may sit above soil that is still moist, and surface dampness may not tell you whether water has reached the full root zone. Water the bed rather than the path, applying it evenly and giving it time to soak in. Adjust according to the crop, its stage of growth and the conditions inside the greenhouse, rather than following a fixed calendar.
Plan how you will carry water before plants and supports make the paths harder to use. The Lean-To Greenhouse has listed area options from 40 to 154 sq ft; for the selected layout, check whether you can reach the beds with your chosen watering method without crossing the growing soil. If you use a hose or an irrigation system, check that water is reaching the whole bed rather than assuming delivery is even. If an area stays saturated, investigate drainage or how the water is being applied before adding more. Watering more often is not a substitute for finding the cause of persistently wet soil.
Top up according to crop and bed condition
Between crops, remove spent top growth and weeds, then assess the surface before adding anything. Consider the crop you intend to grow, previous applications and any relevant test results. Check whether the surface remains suitable for planting or has become uneven, with coarse remnants or exposed roots. Poor growth alone does not prove that more compost is needed; first consider whether the crop had adequate light, water and suitable temperatures. A no-dig system uses surface additions, but their amount and timing should reflect the bed and material rather than an automatic thick annual layer. Where a test identifies a particular nutrient need, follow crop-relevant guidance instead of assuming compost supplies the right balance.
When assessing the Limited Edition greenhouse, include access for bringing in compost and spreading it across each planned bed. Check the selected layout rather than assuming that a listed floor area guarantees convenient working space. Record additions by bed, including the material, approximate amount and date, so you can distinguish a newly established bed from one that has received several applications. Watch the surface level beside edging, paths and the greenhouse base: repeated additions should not spill into access routes or cover parts of the structure that need to remain clear. Spread the material evenly within the bed and keep it clear of existing plant stems. Leave it at the surface rather than digging it through the soil.

05
Keep beds clean and paths workable
Low disturbance does not mean leaving unhealthy crop material in place. Remove diseased plants and suspect debris rather than spreading them across the bed, and do not assume that ordinary composting will make every disease problem safe to reuse. Clear healthy crop residues according to your usual garden hygiene practice, and keep tools and containers from carrying soil or plant debris between affected areas. Keep path material and stored equipment out of the growing beds. These habits preserve access and help you notice changes in the soil or plants, rather than burying a problem beneath a new surface layer.
For the Pyramid-type greenhouse, check the selected plan for a place to set down a harvest container and collect crop debris without walking on the soil. Keep containers used for suspect plants separate from those holding compost or clean planting materials until they have been cleaned appropriately. Remove loose leaves from path edges, where they can hide weeds and make access less tidy. Store hand tools where they are easy to retrieve without reaching across growing plants. At crop clearance, remove redundant ties and supports as well as top growth; leaving them scattered around the bed makes later sowing, surface additions and weed checks more awkward.
Review the bed after each crop cycle
Use the end of a crop cycle to review how the bed worked, rather than to reset it automatically. Sketch where each crop grew and note its planting and clearance dates. Record uneven growth, recurring weeds and any areas where watering was difficult, alongside the material added to that bed. Include practical observations: could you reach the back row, harvest without brushing through neighbouring plants and remove supports without stepping on the soil? Comparing these notes with the original layout helps distinguish a soil concern from an access or spacing problem. It also gives the next planting plan a clearer basis than memory alone.
Choose a specific adjustment for the next crop and record what you expect it to improve. For example, fewer plants may leave a crowded row easier to tend, while moving a watering line may improve coverage in a dry corner. Make changes within the permanent bed layout where possible, rather than shifting bed boundaries each season. If a problem needs diagnosis, keep that investigation separate from routine maintenance so you do not lose track of what changed. Over time, these records help you retain arrangements that work and revise those that do not. The value of permanent beds lies partly in this continuity, as well as in avoiding unnecessary cultivation.
Frequently asked questions
Can I use no-dig methods with existing greenhouse soil?
Yes, if the soil is suitable for the crops and roots can grow into it. Check its history and drainage before adding a surface layer. No-dig will not correct contaminated, waterlogged or impenetrable ground; if suitability is uncertain, arrange appropriate testing or advice, or consider a separate raised-bed system.
Do I need to put cardboard under a no-dig bed?
No. Plain cardboard is an optional, temporary way to suppress annual weeds or turf when establishing a bed. Remove tape and plastic labels, overlap the sheets and wet them thoroughly: under a greenhouse roof, rain will not soften them. Persistent perennial weeds need separate attention.
How much compost should I add?
There is no single amount that suits every bed. Consider whether you are establishing or maintaining it, the condition of the soil, the crop and the material’s instructions. Estimate volume from the bed’s area and chosen layer depth; do not base the order on the greenhouse’s full floor area.
How often should I water a no-dig greenhouse bed?
There is no fixed schedule. A greenhouse roof keeps out rainfall, but water needs still vary with the crop, soil, weather and plant stage. Check below the surface near the root zone, water so it reaches the roots, then check again. Soil that stays saturated may have a drainage or delivery problem.
Can I walk on a no-dig bed?
Avoid routine foot traffic: it can compact the soil and undermines the purpose of permanent beds. Plan paths so you can reach the plants from either side, and make beds narrow enough to work without stepping into them.
Once the ground is suitable, the sequence is straightforward: mark permanent beds and paths, deal with problem weeds, add an appropriate surface layer and plant with minimal disturbance. In a greenhouse, the ongoing work is less about repeated digging than observation. Check moisture below the surface, add material in response to the bed and crop, and keep notes on crop position and performance. If drainage, the soil surface or plant growth changes, investigate the cause before changing the whole bed.
