
Why Are Plants Scorching on One Side of the Greenhouse?
Greenhouse troubleshooting
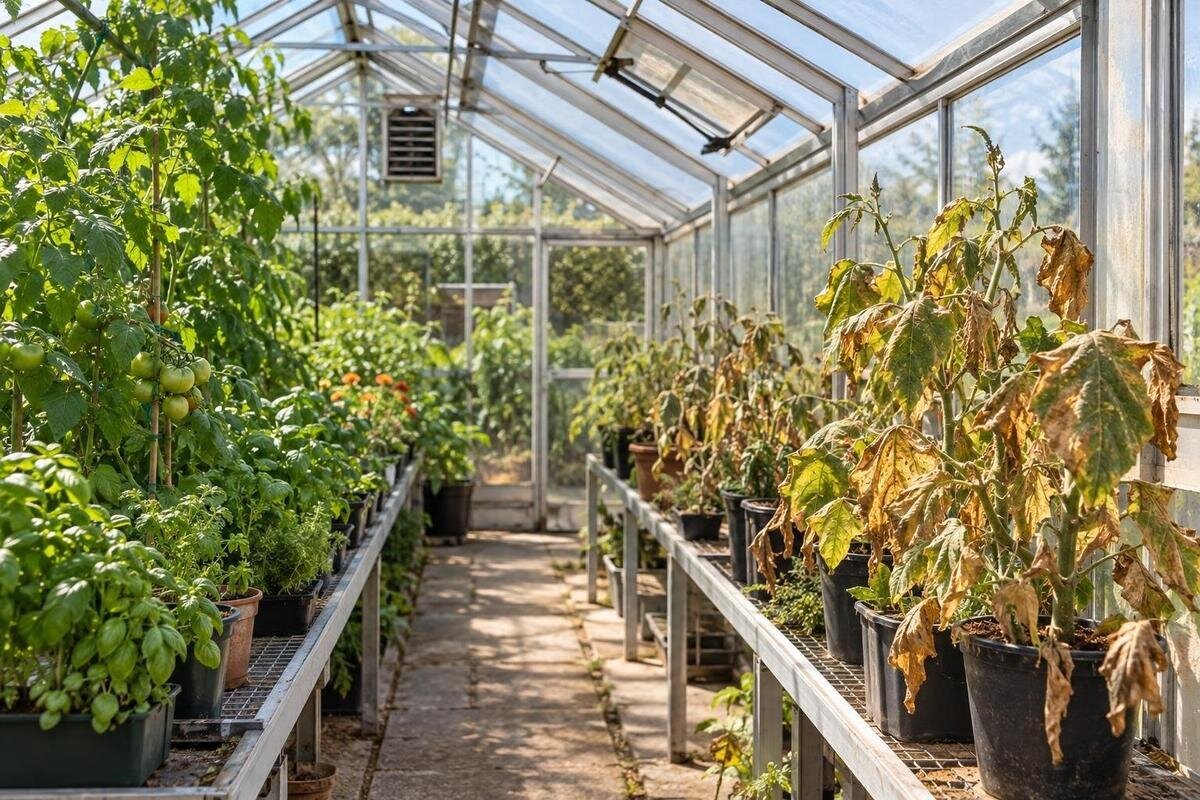
Damage concentrated on one side of a greenhouse tells you where to investigate, but not necessarily what caused it. The affected strip may receive a short spell of direct sun, reflected light from a nearby surface, stagnant warm air or a local plant stress. Start by pinning down which leaves and positions are affected, then compare exposure and conditions with healthier plants before changing ventilation or adding shade. A simple map and a few matched observations can help distinguish a local hotspot from a problem with one plant.

Pin down the pattern of damage
Make a rough floor plan and mark every affected plant, rather than labelling an entire side as scorched. Note which leaves are marked, whether the damage faces the glazing or an aisle, wall or neighbouring structure, and whether nearby plants show the same pattern. Photograph each example from a fixed position and date it; old damage may have formed under different conditions. Mark the precise part of the leaf too. Scorch on the sun-facing surfaces of several plants suggests a different exposure pattern from damage confined to one plant or one row. Record plant height and whether it was recently moved, so later observations have a location and history.
Treat scorch as a description of damage, not a confirmed cause. Intense light or heat can leave exposed tissue pale, bleached or tan, then dry and papery, but water stress, root problems, feed or salt build-up, spray residue, pests and disease can also damage leaves. Compare new marks with older ones and note whether injury follows the side exposed to light. A similar pattern across several plants is useful evidence, but does not prove that sunlight is responsible. The map is there to guide what you check next, not to settle the diagnosis before you have compared conditions.
How direct sunlight changes through the day
On a clear spell, check the greenhouse at several times rather than relying on one midday visit. Record where direct beams fall, when they reach the affected plants and when they move away. A sketch or dated photograph is more useful than a general note such as one side gets hot: a beam may cross a bench, reach a particular layer of leaves or be interrupted by a tree, fence, roofline or neighbouring building. Note the weather and whether doors and vents are open, since those conditions affect comparisons. Look at the plants themselves as well as the floor; their height and position can make the pattern quite different.
Repeat the observations on another day if possible. Sun angle and day length change through the year, and a pattern noticed now may not persist in another season. Do not assume a compass direction alone predicts damage: orientation, glazing, nearby obstructions and plant placement all matter. When considering a pyramid-type greenhouse, mark the proposed benches and mature crop heights on the site plan, then check their exposure at the times when damage currently occurs. Include hanging plants as well as beds and pots. A narrow, brief patch of strong light may be more relevant than the general brightness of the whole structure.
Reflected light and nearby heat sources
Look beyond the greenhouse walls for surfaces that may affect the damaged zone. Glazing, pale paving, bright metal or a light-coloured wall can reflect sunlight onto leaves. A sun-warmed wall or paved area may also affect conditions nearby, even if there is no obvious bright reflection. Check the outside at the height of the affected plants and compare what you see with the timing in your sun observations. Do not assume a window acts like a lens or that any nearby surface is the cause; look for a patch of light or warmth that coincides with the location and time of the damage.
Watch the suspected area from a normal viewing position as the sun moves, without looking directly towards glare. Note whether the bright patch shifts in step with the sun and whether its path reaches the affected leaves. If a lean-to is being considered or is already part of the site, include the host wall in that light map. When assessing a lean-to greenhouse for a particular position, record which sections of wall are sunlit during the problem period and where adjacent windows face. Distinguish an observed reflection from warmth near a surface: the two may need different adjustments, even when they affect the same planting area.
Local temperature readings at plant height
A single thermometer can miss a small warm zone. Compare the damaged side with an unaffected area using two similar sensors placed at the same height as the crop, out of direct sunlight and away from the glazing. Read them at the same time and note the sun, vent and door positions. If only one sensor is available, move it between locations on comparable days; a quick sequence during changing sunshine is not a fair comparison. Where possible, swap two sensors between the locations afterwards. If the readings follow the position rather than the instrument, that makes a local difference more plausible.
Log relative humidity alongside temperature, but interpret the figures together: relative humidity changes with air temperature and is not, by itself, proof of poor airflow. Look for a pattern across several comparable observations instead of reacting to one reading or a universal threshold. Also remember that a sunlit leaf can be warmer than the surrounding air; similar air readings do not rule out unequal light exposure. If planning a layout for the aluminium Classic Greenhouse, listed in sizes from 40.6 to 302.3 sq ft, mark paired measuring positions beside the intended crops. Keep those locations consistent so that later readings can be compared meaningfully.

Air movement around the affected plants
A greenhouse can have uneven air movement even when it feels comfortable near the door. Dense foliage, shelving, stacked pots or a narrow gap between plants and a wall may leave one area less exposed to moving air. Note which vents or doors are open and whether their route through the greenhouse is obstructed. A reading taken beside an opening may not describe a sheltered corner at crop level. Compare the affected zone with a healthier one at the same time, and avoid treating a warm reading as proof that ventilation is the only issue: direct and reflected light can produce a similar local pattern.
Check the equipment instructions before changing the operation of an existing vent or opener. Observe whether each opening serving the affected area actually opens during the problem period, rather than assuming that an automatic mechanism has responded. If comparing a replacement greenhouse, request the opening layout and operating guidance for the chosen Bloomcabin Prestige Greenhouse configuration. Compare the proposed openings with the bench positions and any tall crops between them. Follow the manufacturer’s guidance for powered equipment or mechanisms requiring adjustment, using a suitably qualified professional where needed. For your diagnostic test, change one opening at a time and record its position alongside the crop-level readings.
Shadows cast by greenhouse contents
Inspect the inside of the greenhouse for objects that cast a moving or uneven shadow. A shelf, hanging pot, tall plant, tool rack or stored item can shade one group of leaves in the morning and leave it exposed later. The edge of that shadow may also mean neighbouring leaves receive quite different amounts of direct light. Compare the location of these objects with your time-stamped photographs, and note whether they or the plants have recently been moved. A shadow is not automatically harmful; the useful question is whether the changing pattern matches the location and timing of new damage.
Storage can affect how you arrange planting space, so include it on the same drawing as your benches and crops. When considering a limited-edition greenhouse with built-in storage, examine the drawing for the selected version to establish the relationship between storage and growing areas. Mark where tall items would stand and whether retrieving them would require moving pots into stronger light. In an existing greenhouse, compare photographs taken before and after any recent rearrangement. Temporarily relocating one movable item can help test its influence on the shadow pattern. Keep the plants in their original positions during that test so that moving them does not introduce another variable.
When leaf damage may not be sun scorch
Consider whether the affected plant has a history that differs from its neighbours. A plant moved from a sheltered spot into stronger light, or one whose previously shaded leaves have become exposed after pruning or training, may react differently from established plants nearby. Differences in species, age, pot size or growth stage can also complicate comparisons. If only one plant is affected while surrounding plants receive the same light and airflow, investigate its recent changes and root conditions before altering the whole greenhouse. If several plants are affected in the same place, the local environment becomes more relevant, though it still needs checking.
Look over both sides of the leaves and the growing tips, and check the root-zone moisture rather than judging only by the surface of the compost or soil. Note recent feeding, spraying, repotting and any signs of pests or disease. A pattern that continues during dull weather, appears on protected leaves or does not follow the exposure map may justify looking beyond heat and sunlight. Avoid removing lots of foliage or applying a treatment before you have identified a likely cause; doing so can erase useful clues or create a second change that makes the result harder to interpret.
Testing a targeted adjustment
Once the evidence points to a likely cause, make one small, reversible change. For example, move one affected pot a short distance from the suspected hotspot, or clear a temporary obstruction to an existing airflow route. Keep a comparable plant or area unchanged if practical, then observe both through similar bright spells. Record what you altered, when you did it and whether fresh damage appears. Existing scorched tissue will not return to its former condition, so judge the test by new growth and whether new marks develop, not by whether old marks disappear. Avoid making several adjustments at once; otherwise you will not know which one mattered.
If testing shade, use an option intended for greenhouse use and follow its instructions for the particular structure. Before selecting one for a limited-edition aluminium greenhouse, establish how it would be supported and whether it can be moved clear of openings and mechanisms. Record the area covered and the hours during which the affected leaves are shaded. Compare fresh damage with the unchanged area through similar weather, rather than attributing an improvement during a cloudy spell to the shade. If the test helps, retain only the coverage needed for that exposure period; the result does not necessarily justify shading the rest of the greenhouse.

Choosing shade for the affected area
If the observations point to excessive direct or reflected light in a defined zone, targeted shade may be more appropriate than reducing light throughout the greenhouse. Match its position to the time and direction of the exposure: a fixed screen on one side may not intercept a beam that reaches the crop from above or at another angle. Consider the light needs of the plants in both the affected and unaffected areas. A shade that helps one group can leave another with less light than it needs, so check the result on the plants rather than judging only by how dark the space looks.
For a permanent shade, check the maker’s instructions for compatibility, fixing positions and clearance around moving parts. Consider whether it can be drawn back when the troublesome beam has passed, and whether you can reach it without disturbing plants. If comparing layouts for a T-shaped orangery greenhouse, mark the shade’s proposed coverage on the drawing for the selected version, including beds or benches beyond the affected zone. Ask for clarification wherever the drawing leaves its coverage uncertain. Plan access for adjustment and cleaning too: a shade that is difficult to reach may remain in place long after the brief exposure it was intended to address.
When the site or layout needs reconsidering
After mapping the pattern and testing a small change, ask whether the cause follows a fixed part of the site or something inside the greenhouse. Fresh damage that repeatedly coincides with the same reflected beam points towards the surroundings; a temperature difference that changes when a vent is operated may involve air movement. If a moved plant develops new injury despite leaving the suspected exposure zone, investigate plant-specific causes. Old marks remaining after a move tell you nothing about the new position. Keep these observations together and seek experienced horticultural advice if damage continues without a clear explanation. Persistent problems with a mechanism or ventilation setup may also need assessment by the relevant equipment professional.
If you are planning to relocate or replace the greenhouse, use the light map to compare the site and the exact growing layout before choosing a size. The Spacious Greenhouse is listed in sizes from 506 to 753 sq ft, but a larger footprint alone does not remove a local exposure difference. Mark the sun path, nearby reflective surfaces, likely planting areas and access routes on the plan for the version you are considering. A sound diagnosis should inform that decision; changing the structure before identifying the cause can reproduce the same hotspot in a new layout.
Frequently asked questions
How can I tell direct sunlight from reflected light?
Record when and where the bright patch appears, then look for nearby reflective surfaces such as glazing, pale paving or metal. A reflection may move across the greenhouse as the sun moves. Compare its position with the damaged leaves; a compass direction alone will not identify the source.
Why are leaves scorching if the thermometer shows an ordinary temperature?
A thermometer measures the air around it, whereas a leaf in direct sunlight can be warmer than that air. The instrument may also miss a brief hot spell or sit in a cooler part of the greenhouse. Compare shaded sensor readings at crop height on both sides, alongside observations of the light reaching the leaves.
Should I shade the whole greenhouse?
Not without evidence that the whole growing area needs less light. Broad shading can reduce light on unaffected plants, while a narrow hot spot may need only a local change. Identify when and where the exposure occurs, then test an option intended for greenhouse use without obstructing vents or moving parts.
Could watering problems look like sun scorch?
Yes. Stress from roots that are too dry or too wet can damage leaves and may be mistaken for scorch. Check moisture in the root zone and compare affected plants with healthy ones. Also note recent feeding, spraying, repotting or changes in position; the appearance of a leaf is not a diagnosis on its own.
Will opening a vent stop the damage?
It may help if warm, still air is part of the problem, but it will not remove direct or reflected sunlight. Note whether the damaged area changes when an existing vent is operated as its manual describes. If the pattern remains, investigate the light path and plant-specific causes too.
One-sided scorch is a clue about where light, heat or air movement differs, or where damage follows an individual plant. A dated map, observations of the moving sun, matched readings at crop height and a one-change-at-a-time test help separate these possibilities. If the cause is local, a limited adjustment is more informative than shading everything. If the pattern persists, revisit the site and plant history before deciding whether the layout, equipment or growing conditions need further attention.
