
Planning Greenhouse Bench Space for Spring Seed Trays
Greenhouse planning
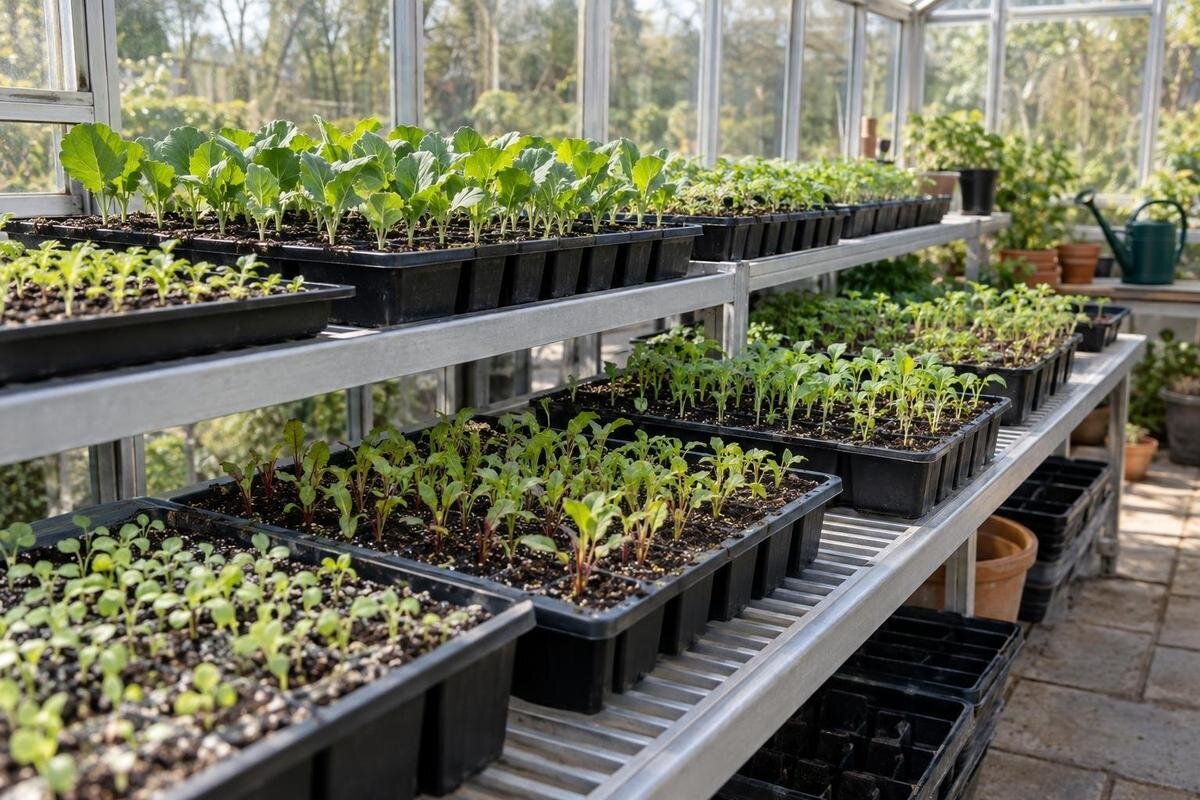
Spring sowing can make a greenhouse bench look spacious one week and crowded the next: a new batch arrives while earlier seedlings still occupy trays. The useful figure is not how many trays you use across the whole season, but the maximum number and arrangement that must fit at once. A short occupancy calendar, accurate tray footprints and measurements of bench tops you can actually use turn that peak into a practical layout. This guide shows how to calculate it before buying benches or fixing your sowing sequence.

Calculate peak tray demand
Greenhouse bench demand rises when sowings overlap, so count the trays that occupy the space at the same time rather than adding every tray used across your spring programme. For each batch, mark when it arrives on the bench and when it leaves for potting on, planting out, another growing area or disposal. A batch still sitting in its original cells counts even if no more work is planned on it. Conversely, trays held elsewhere before transfer do not occupy this bench yet. Include every tray in a sowing group, not just the first one you put down; split a batch if part of it moves earlier. This distinction prevents a seasonal total from being mistaken for peak capacity.
Use a week-by-week example to check the arithmetic. Suppose Batch A uses three trays from weeks 1–4, Batch B uses four from weeks 3–5, and Batch C uses two from weeks 5–6. The total over the season is nine, but the peak is seven in weeks 3–4; in week 5, B and C overlap to make six. The dates and quantities are illustrative, not crop timings. If trays differ in size, keep the same overlap calculation but test the physical footprints as well. This gives you a demand figure to compare with measured benches, rather than an impression based on how full they look on one particular day.
Build an occupancy calendar for each batch
Make one row for each sowing group, which may be more useful than a row for every packet. Record the crop or batch name, planned sowing window, number and type of trays, expected date they reach the bench, and the event that frees the space. An event such as potting on or moving to another growing area is clearer than an unexamined end date. Let species-specific growing guidance and your own previous seasons inform the timing; different plants cannot be assigned one reliable bench-stay duration. If a group is split between formats or transferred in stages, record those parts separately so the schedule reflects what will actually happen.
Turn the rows into a calendar using weeks, or shorter intervals if handovers happen mid-week. At each point, add the batches whose bench-occupancy periods include it and mark the largest overlap. Where dates are uncertain, show a likely and a later clearance date or write a separate busy-case estimate; do not assume every tray leaves precisely on schedule. If a tray begins in a propagator or on a different surface, count it from the moment it reaches this bench. If potting on changes the footprint, record the new format and occupancy as another stage. The calendar then reveals whether the pinch point is initial sowing, later growth or a handover between groups. Update it when your intended sowing dates change.
Measure the bench surfaces you can actually use
Measure the flat top of every bench rather than estimating from greenhouse floor area. Note its clear length and usable depth in centimetres, and identify parts occupied by permanent equipment, an inaccessible edge, a sink or another fixed task. Do not count an aisle, door opening or gap between benches as tray-supporting surface. If a bench narrows, is interrupted or is split into separate runs, record those sections separately instead of averaging them into one tidy rectangle. If there is more than one level, list each surface separately: a narrow shelf and a wide lower bench may not take the same formats or offer the same access. The aim is a record of surfaces that can genuinely take a tray.
Keep greenhouse area and bench capacity as separate figures when comparing buildings. The Classic aluminium greenhouse is listed in options from 40.6 to 302.3 ft²; that range is not a guaranteed amount of bench top. For the particular size under consideration, check the internal layout and where a bench can stand. On your sketch, give each proposed bench an identifying letter and record its clear length and depth beside it. This lets you assign batches to specific surfaces rather than treating all available space as interchangeable. If a dimension is missing from the product information, obtain it before committing to a bench size; do not scale it from a photograph.
Record the full footprint of every tray
Measure each tray from its outside edge, including a projecting rim or base, rather than using the cell block’s internal dimensions. Record length × width and whether the tray can be turned through 90 degrees on the bench. If a drip tray, mat, cover or other item always stays beneath or around it, use the footprint of the whole working unit: that is the area the bench cannot be given to a neighbour. Label formats consistently, such as small, medium and large or a code, instead of writing only the number of cells. Cell count tells you something about the growing insert, not how much bench surface the format occupies. Measure the equipment as you use it, not while it is stacked for storage.
Use one measuring convention for every batch: centimetres, with length and width written in the same order. A tape measure or squared paper is enough to build the inventory; do not round dimensions down to make a layout appear to fit. When considering the Lean-To Greenhouse, keep your tray inventory alongside the proposed bench measurements so you can compare individual formats with each run. Its listed options cover 40–154 ft². For equipment you already own, label one representative tray of each format with its measured dimensions. For trays you intend to buy, obtain the external dimensions first. Recheck unusual or tapered items individually rather than assigning them the average size of a familiar tray.

Calculate how many trays fit on a bench
For identical rectangular trays on a clear rectangular bench, estimate a first-pass capacity as floor(usable bench length ÷ tray length) × floor(usable bench depth ÷ tray width). Use the same units throughout and round down each division: a partial tray does not fit. Repeat the calculation with the tray rotated, but count the result only if it leaves the working clearance you have allowed. For example, on a hypothetical 180 × 60 cm bench, 40 × 30 cm trays fit four along the length and two across the depth in that orientation, giving eight before extra clearance. Rotated, they fit six along and one across, giving six. These made-up dimensions show the arithmetic; they are not standard bench or tray sizes.
Treat the formula as a grid check, not a promise: it assumes straight sides, a uniform footprint and no interruptions. A gap, inset or unusable end changes the count, while separate benches may have different lengths or depths. When considering the T-shaped orangery greenhouse, use the plan for the exact option and calculate each proposed bench run separately. Do not combine their lengths before dividing by tray length: two short runs may hold fewer trays than one uninterrupted run of the same total length. Add the resulting counts only after checking each run. A mixed-orientation arrangement may improve on either uniform grid, but it needs a drawing to show that every tray fits without overlapping another.
Allow for access and everyday handling
The mathematical maximum is not always a workable daily layout. Trays need to be put down, lifted, checked and watered without knocking neighbouring seedlings or blocking access to another part of the bench. Place an actual tray on the surface and test the route your hands and watering equipment take; decide what clearance your own tasks require instead of adopting an arbitrary universal gap. Mark that working space on the plan and remove it from the tray area. Keep walking routes and door access separate from bench capacity, and retain any surface needed for routine jobs that would otherwise be pushed aside during a peak week. If a bench is approached from only one side, test the layout from that side rather than assuming the far edge is equally convenient.
Give storage and growing separate lines on the sketch. If you are considering the Limited Edition greenhouse with built-in storage, establish the storage section’s dimensions and access separately from the space intended for benches. Its listed options range from 59.4 to 302 ft². List the items you expect to keep nearby, such as empty pots, compost and labels, and decide where they will go while the benches are full. Also consider where you will put a tray temporarily when working on another batch. A surface used for that purpose cannot simultaneously be filled to its maximum tray count. Making these allocations explicit prevents routine work from spilling into the space reserved for seedlings.
Draw a layout for mixed tray sizes
Mixed formats need a drawn layout because total tray area is only a rough lower bound on the bench surface required. Add length × width for each unit in the peak batch to compare broad demand, then fit the actual rectangles on the measured bench drawing. Small gaps can leave enough area on paper but no space for a wide tray; rotating one format may use a narrow remainder. Use graph paper at a simple scale or cut paper rectangles, label each by batch, and try more than one arrangement. Do not count an overlap or overhang across an edge as usable support. Keep odd-sized pots and flats in the drawing as their own formats rather than hiding them in an average.
Keep the plan legible by assigning each rectangle a batch name and a release week. Test the busiest combination first, then see how the layout changes as earlier trays leave. For a shortlisted Limited Edition aluminium greenhouse, listed in options from 40.6 to 302 ft², retain the drawing for the particular size you are considering rather than reusing it for the whole range. Mark tray orientation and bench identity so the arrangement can be reproduced. Where a batch is divided between benches, record both locations on the calendar. Compare workable layouts by the number of trays that must be moved during a handover, as well as by their total capacity; a tightly packed arrangement can involve unnecessary reshuffling.
Compare the bench plan with the greenhouse layout
Once peak occupancy is known, translate it into bench runs, not a greenhouse area target alone. Add the surfaces required by the tested layout, then include the space needed for access and any other uses that will remain in place. A paper plan of the proposed interior can show whether a bench run fits without obstructing a route or another task. Compare the exact options you might buy; different outlines and internal arrangements can use the same stated area differently. If a product drawing does not answer a dimension you need, treat it as unconfirmed rather than estimating from a photograph. Keep other intended uses, such as a work surface or space for existing plants, in the plan too.
The Pyramid greenhouse has listed area options from 60 to 203 sq ft. After identifying an option to investigate, put the proposed benches onto its dimensioned interior plan. Check both the bench footprints on the floor and the tray layouts on their tops: these are different measurements serving different purposes. Include any existing plants or work surfaces that will remain during spring propagation. If the intended bench has more than one level, confirm the available space at each level rather than assuming the floor outline describes it. Keep unanswered dimensions on a short list for the supplier. This gives you a concrete basis for comparing options without treating the stated area as a tray-capacity figure.

Allow for delayed batch clearance
Build uncertainty into the forecast instead of hiding it in a single optimistic date. Some batches may remain on the bench longer than planned; sowing may move, seedlings may be potted on in stages, or a new batch may begin before the bench is clear. Use your own records and species-specific guidance to create an expected schedule and a second version with plausible delays. Change the clearance dates of the affected batches, then recalculate the overlap. Do not simply add an arbitrary number of spare trays or assume every possible delay happens at once. Write down which batch creates the maximum and how long that peak lasts. If experience is limited, mark the uncertain dates and revisit them after the first sowing cycle.
If the delayed-clearance version exceeds the benches, identify the size and duration of the shortage before choosing a remedy. Where crop guidance allows, shift a sowing window, arrange a suitable next location for a batch, add usable benching or reduce the number of trays running concurrently. Recalculate after each change: moving a batch by a week can create a different peak rather than remove it. If comparing size options for the Bloomcabin Prestige Greenhouse, which are listed from 40.6 to 302 ft², use both schedules in the comparison. A brief clash involving one tray calls for a different planning response from a shortage that persists through several successive batches.
Rehearse the layout and record what happens
Before the season, put the test layout on the real benches using empty trays or full-size paper outlines. Confirm that the widest tray fits, that the orientation in your drawing is possible, and that labels, watering and lifting can be handled without relocating another batch. Rehearse a handover as well as a full bench: remove the outlines of a departing batch and place those of the incoming group in their assigned positions. Check whether a tray can be lifted out independently or whether neighbouring trays must move first. Update measurements if the actual bench differs from the drawing. These checks reveal practical problems that a capacity calculation alone will not show, while sowing dates and bench arrangements are still easier to adjust.
After each busy spell, note which batches actually overlapped, when each left the bench and where the arrangement became awkward. Record the footprint after potting on as well as the original tray count, so an apparent release of space is not mistaken for a reduction in overall demand. If you are assessing the Spacious Greenhouse, listed in area options from 506 to 753 ft², these observations provide a useful brief for the bench layout you would need. Keep the record simple: predicted and actual clearance dates, tray numbers and formats, and any space temporarily occupied by other work. Next spring, use the differences between forecast and reality to revise the occupancy periods, rather than repeating the same timetable unchanged.
Frequently asked questions
How do I calculate the peak number of seed trays?
List when each batch occupies the bench, then add the tray counts for every period when batches overlap. The highest total is the peak if their footprints are similar. With different tray sizes, keep the timing calculation but also check that the trays physically fit together on the measured benches.
Should I use greenhouse area as bench capacity?
No. The stated area is not all usable bench top: some space may be needed for access, storage or other work, and benches may be divided into separate runs. Measure the surfaces you plan to use and compare their dimensions with your actual trays.
How much space should I leave around each tray?
There is no single clearance that suits every bench and handling method. Test how you lift and water your trays, keep routes clear, and mark the working space you need before calculating capacity.
Can I estimate capacity by adding tray areas?
Adding tray areas is useful for an initial comparison, but it does not prove that the rectangles will fit. Different shapes, leftover strips and edge clearance can reduce the usable count. Check a scale drawing or arrange empty trays on the bench.
What if seedlings stay on the bench longer than planned?
Update their clearance dates using your observations, recalculate the overlap and test a later-clearance version. If it will not fit, change the schedule only where crop guidance allows or arrange suitable additional space before sowing.
Planning bench space is mainly a timing and measurement task: record when each batch occupies the bench, identify the peak overlap, and test real tray footprints on the usable surfaces. A layout that includes access, storage and other routine work is more reliable than one based on greenhouse area or a seasonal tray total. Keep the schedule and measurements together, then update them after spring’s first crowded spell; next year’s plan can use what actually happened rather than assumptions.
