
Moving a Greenhouse to a New Position in the Garden
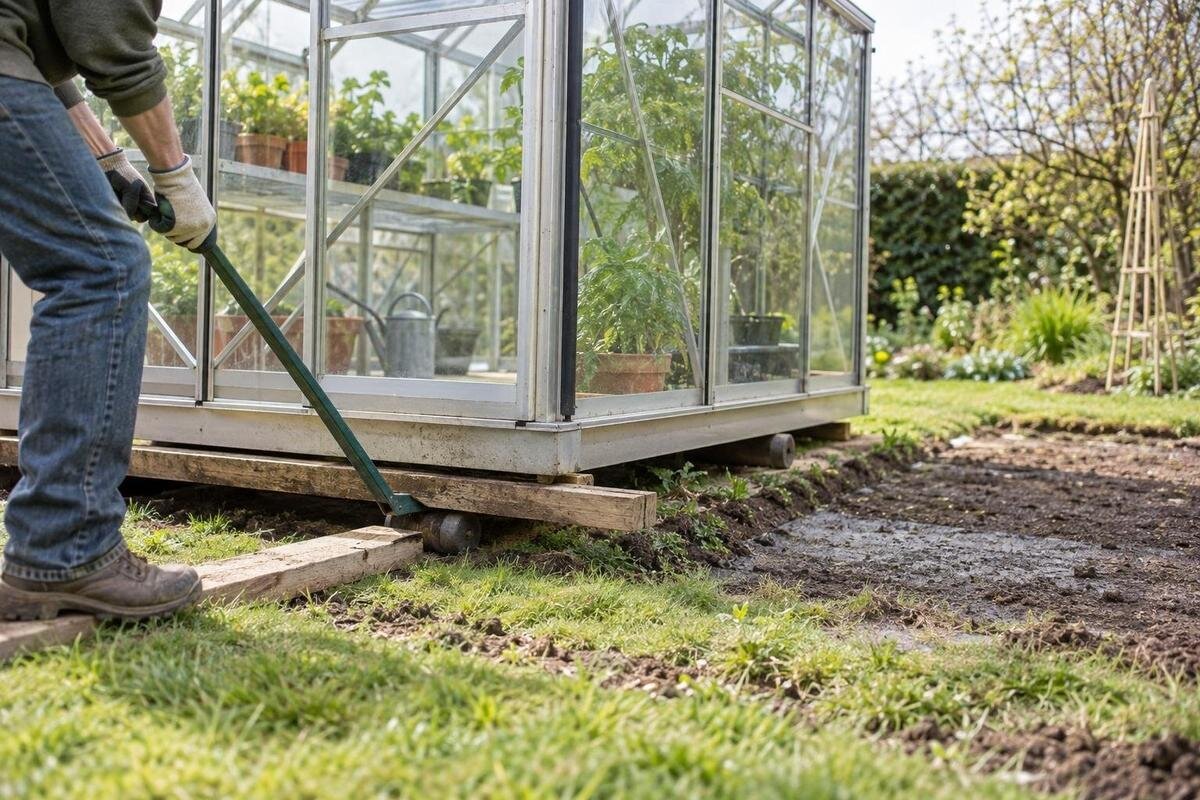
Greenhouse relocation guide
Moving an established greenhouse to a new part of the garden involves the structure, its glazing and the ground beneath it. A workable plan begins before anything is loosened: identify the exact model, find its instructions, assess its condition and check whether the new site and base can accommodate it. A qualified greenhouse installer should review the dismantling and reassembly method, especially where glass, altered parts or an uncertain frame are involved. This guide covers the information to gather, site preparation and the practical points to settle before deciding whether relocation is preferable to repair or replacement.

Decide whether relocation is worthwhile
Begin with the reason for moving: perhaps a path or growing bed needs to change, or the greenhouse would work better elsewhere. Decide whether your aim is to keep this particular structure or simply to retain a growing space in the garden. Note visible damage, repeated leaks, stiff doors or vents, cracked or missing glazing and any previous repairs, but do not take anything apart to investigate. Those observations are a starting point for a professional assessment, not proof that the frame is safe to reuse. Its age alone does not settle the question: the exact model, current condition, repair history and availability of compatible parts all affect whether to move, repair in place or replace it.
Compare the full relocation cost with the alternatives. An estimate should distinguish inspection, dismantling, packing, transport, base preparation, reassembly, replacement parts and disposal; it should also say who is responsible for each item. Ask whether it assumes existing glazing and fixings can be reused, and how extra parts will be priced. If replacement is on the table, the Classic aluminium greenhouse is one catalogue model to compare, not a like-for-like specification for your existing structure. Check its current drawings and requirements separately. Price the same scope for each option, including work at the destination, so an attractive transport figure does not obscure the cost of making the greenhouse usable again.
Record the greenhouse model and gather its documents
Look for the original invoice, order confirmation, warranty paperwork, assembly manual and technical drawing. Record the manufacturer, model name or number, serial or product code and approximate purchase date, if available. Keep the exact version in mind: a manual for a similar-looking greenhouse may show a different frame, glazing arrangement or connection detail. If no label remains, gather photographs of the whole structure and ask the manufacturer or supplier to help identify it before ordering parts. Note previous alterations, repairs and substitutions, with dates if known. Do not rely on a retailer’s current catalogue name as proof that an older model uses the same components. Photograph or scan the documents before work begins, so the model information does not become separated from the greenhouse.
Make a simple inventory of what belongs to the greenhouse and what is loose: doors, vents, shelving, staging, gutters, irrigation and any attached storage or work area. Photograph each side, corners, roof, openings and visible fittings from safe, ground-level positions, then label the images so an installer can tell which view is which. Keep manuals and part references together with that record. If a replacement has to preserve a storage function, the greenhouse with built-in storage is a catalogue listing to compare; check its current drawings and specification rather than assuming its arrangement matches yours. Include accessories you intend to retain, listed separately from structural parts. Good records make later questions about missing items and replacement parts more precise.
Assess the new position before booking work
Assess the proposed position at different times of day and, if practical, in more than one season. Note direct sun and shade, including shadows from buildings and trees, and consider how nearby growth may change. A tree that is bare in winter can cast shade once in leaf, so judge the garden for the period when you expect to use the greenhouse. Check what lies above and around the footprint, such as overhanging branches, fences and routes used to reach the site. Note where water collects after rain. Avoid choosing solely by compass direction: the light and access in this particular garden matter more than a universal orientation rule.
Ground and services matter too. Ask the installer what the existing surface, slope, drainage and soil conditions mean for the proposed base; do not assume an old slab or a level-looking patch is suitable. Leave room for doors and for people to work around the structure, and identify a safe place where dismantled components can be set down. If the only plausible position is beside a building, compare the actual plan for that option; a lean-to greenhouse listing is a different model category, not evidence that your existing structure can be converted or that a particular wall is suitable. Have any water or electrical connections reviewed by the appropriate qualified tradesperson. Tell the base contractor about known drains or services before ground work starts.
Inspect condition and parts availability
Ask a qualified greenhouse installer to inspect the existing structure before the move is booked. The review should cover the frame, joints and fixings, the way it is attached to its base, glazing and the condition of doors, vents and other moving parts. Mention any section that has been repaired, altered or replaced. A greenhouse can appear sound from outside while a connection or component needs attention, so an owner’s quick visual check cannot confirm that dismantling and reassembly are feasible. The assessment should establish whether the maker’s method allows this model to be taken apart and rebuilt. Do not remove panels or force a stuck fitting to expose a problem; record it and let the person assessing the job decide how to examine it safely.
Confirm that the maker’s instructions identify the relevant parts and that exact replacements can still be sourced where needed. When asking, give the model and version, any part number in the manual and clear photos; describe the component’s location rather than calling it simply a clip or bracket. Ask the supplier to distinguish confirmed replacements from items that still need identification, so the installer can judge whether the move can proceed. If unavailable components make relocation impractical, include the Limited Edition aluminium greenhouse in a replacement comparison. Obtain its current specification and an installation estimate rather than treating the purchase price alone as the alternative cost. Keep compatibility replies and any outstanding enquiries with your relocation record.

Check the footprint against everyday use
The new position can be physically possible yet awkward for everyday growing. Use the manufacturer’s plan to mark the existing footprint, door and fixed features, then sketch paths, beds and the places you need to reach from the greenhouse. Consider whether you can bring in compost, water plants and move pots without blocking a regular route. Allow for the access needed to maintain the outside as well as the footprint itself; fitting within a boundary line does not guarantee practical access. If the garden arrangement changes what you plan to grow, list the working space and storage you need before paying to transfer the old layout. This is a question of practical fit, separate from whether the frame can be moved safely.
If the current shape is the reason for seeking a different position, compare plans for other formats before treating relocation as the only answer. Include the T-shaped orangery greenhouse only if you want to investigate a different layout, and obtain its verified dimensions and door positions before drawing it into your garden plan. Compare the space left around each option, not just the area enclosed by the greenhouse. A larger or differently shaped footprint may affect an adjoining bed, a path junction or the route from a shed. Where a move would leave poor access or sacrifice the beds and paths you need, ask for relocation and replacement to be priced separately. Use the same garden measurements for both.
Plan dismantling and glazing with the installer
Before work starts, agree who will dismantle the greenhouse and how its components will be identified and protected. The method should follow the instructions for the exact model and account for its present condition; there is no safe universal sequence for every frame. Ask the installer to explain whether the structure must be dismantled fully and which parts, if any, may be reused. Do not assume it can be lifted as one unit, and do not attempt to move the frame or loosen connections yourself. If a manual is unavailable or contradicts what is on site, pause for manufacturer or installer advice rather than improvising. Agree who will contact the manufacturer if the parts or instructions do not match what is found.
Glass and other glazing can be hazardous to handle, and a pane may be difficult to assess while fitted. Leave removal, packing and refitting to a suitably experienced installer, using the method and protection appropriate to the product. Ask how panes and their original positions will be identified, how broken or missing glazing will be dealt with, and where components will be stored during groundwork. As the owner, useful preparation is usually clearing plants, pots, loose shelves and personal belongings from the work area. Keep children and pets away while work is under way; do not lift, carry or stack panes yourself. Agree in advance what happens if damage is uncovered.
Prepare a base for the exact greenhouse
The base at the new position must be planned for the exact greenhouse, not copied by eye from the old one. Use the manufacturer’s applicable drawing or instructions to confirm the required footprint and fixing arrangement, and ask the installer to check dimensions and alignment. A surface that looks level may still be unsuitable, while the base type depends on the structure, the maker’s requirements and site conditions. Distinguish a detachable base frame from the foundation beneath it: the installer may be able to assess the former for reuse, but that does not establish that the ground or foundation at the destination is suitable. Record which elements the quotation includes and which require separate groundwork.
Arrange the groundwork before dismantling is booked, and agree who will prepare and approve it. Confirm that the base is complete and ready for the greenhouse installer, including any required level, squareness, drainage and fixing details stated by the manufacturer. If replacement is being considered, ask what is included with the Prestige greenhouse with metallic base and what foundation work its documentation requires. The base supplied with a greenhouse and the preparation needed beneath it are separate questions when comparing quotations. If ground conditions or a slope raise concerns, have a suitable building or structural professional advise on the design. Put the agreed dimensions and responsibilities in writing so the base contractor and installer work to the same information.
Plan the route, transport and schedule
Plan the route and sequence as carefully as the new position. Check gates, narrow turns, steps, soft ground, low branches, fences and nearby buildings from the point where components will be removed to the point where they will be installed. Agree where a vehicle can stop, where parts can be kept temporarily and whether access must remain clear for other garden work. Tell the installer about anything that could limit carrying or equipment access; do not discover a blocked route on moving day. If the greenhouse is near services, establish who is responsible for making the work area safe before dismantling. Confirm who will protect the parts while they are being transported or stored.
Choose dates only after the installer and whoever prepares the base agree on the sequence. The quote should state how transport, temporary storage, replacement glazing or fixings, waste and extra work are handled, and how unforeseen damage will be reported before additional work is undertaken. If access or transport costs make relocation unattractive, compare the cost of installing a replacement at the proposed site. The Pyramid greenhouse offers another model to investigate if you are open to changing the greenhouse’s form; obtain its plans before assessing whether it meets your requirements. Keep plants and materials out of the work zone and arrange a separate temporary place for them. Ask what conditions could alter the schedule rather than assuming a generic timeframe.

Reassembly and the installer handover
Reassembly should be carried out by a qualified installer using the instructions for the exact model and the parts identified before dismantling. Agree that the component inventory will be checked before assembly starts, with missing or damaged items recorded against the photographs and part references. Ask how the installer will confirm that the prepared base matches the required footprint and fixing arrangement before fitting the frame. Do not authorise improvised drilling, cutting, joining or substitutions just to complete the job; get manufacturer guidance when the stated method cannot be followed. Set out who can approve additional parts or work, and require any resulting change to the price or completion date to be explained before proceeding.
Before the installer leaves, go through the agreed handover with them. Ask them to confirm what was reused, what was replaced, whether any outstanding work remains and that doors, vents and other moving parts operate as intended under the manufacturer’s instructions. Record new part identifiers, keep the final photos and note any follow-up they recommend. Do not put plants, shelves or other contents back until the installer says the structure is ready and any specified checks are complete. If something does not match the manual or the agreed scope, raise it before treating the relocation as finished. Keep any care instructions with the model record and ask whom to contact if an issue appears later.
Plan space for plants and equipment
Make a separate plan for plants, tools and supplies during the gap between dismantling and handover. Choose a temporary location where you can still reach plants for watering, and keep pots and bags of compost out of the transport route. Decide which loose items you can move yourself and which need specialist disconnection; for any fitted electrical or water service, use the appropriate qualified trade rather than trying to detach it as part of the greenhouse move. After handover, return contents without blocking access paths, doors or vents. Restore only the fittings and accessories that the installer has confirmed are compatible and ready to use, and wait until packaging and offcuts have been removed.
Before committing to relocation, check whether the existing greenhouse still has room for the plants and equipment you intend to keep. If your growing space needs have increased, include the Spacious Greenhouse range in a replacement enquiry and request the dimensions and layout of the particular option under consideration. Compare usable growing and storage space as well as the room needed around the structure. If you proceed with the move, use your planned layout when returning contents, then observe whether watering, potting and access work as expected. Keep final model details, installer notes and replacement-part numbers with the original manual. A successful relocation preserves a useful growing space, rather than simply putting the structure back up.
Frequently asked questions
Can the greenhouse be moved without dismantling it?
Do not assume that it can. Whether an intact move is possible depends on the exact design, condition, base connection and access. Ask a qualified installer to assess it against the manufacturer’s instructions; do not try to lift the structure or test its joints yourself. The installer can explain whether dismantling and reassembly are required.
Can I reuse the old base?
First distinguish a detachable base frame from the foundation beneath it. An installer should assess whether the base frame is suitable for reuse and confirm the foundation requirements at the new position. Moving the same greenhouse does not make an existing slab or other surface at the destination suitable. Have any concerns about ground conditions reviewed by an appropriate professional before groundwork begins.
Should I remove the glass before the move?
Leave glazing removal, packing and refitting to a suitably experienced installer who can follow the instructions for the exact model and identify the panes. Do not remove or transport panes yourself. Agree in advance how the installer will deal with any cracked, missing or damaged glazing.
How long will greenhouse relocation take?
There is no reliable one-size timetable. The model, condition, access, readiness of the new base and availability of replacement parts can all affect the programme. Ask the installer to set out the sequence and explain what could change the dates. Plan to return plants only after reassembly and handover are complete.
What details should I provide when asking for spare parts?
Provide the manufacturer, exact model and version, any serial or product code, and the part number from the manual if available. Add a clear photo and describe where the component sits. Ask the supplier to confirm compatibility before ordering; visual resemblance alone is not enough to identify a suitable replacement.
Relocation is easier to plan when the greenhouse is identified, its condition and parts are documented, and the destination is prepared before dismantling begins. Have a qualified installer confirm the method from the exact manufacturer’s instructions, coordinate the new base and take responsibility for glazing and reassembly. If that assessment reveals unavailable parts, a structure that cannot be reused or a site that does not meet its requirements, compare repair or replacement before committing to the move. A considered decision protects the greenhouse and the garden plan that prompted the change.
