
Separate Watering Zones for Pots and Greenhouse Beds
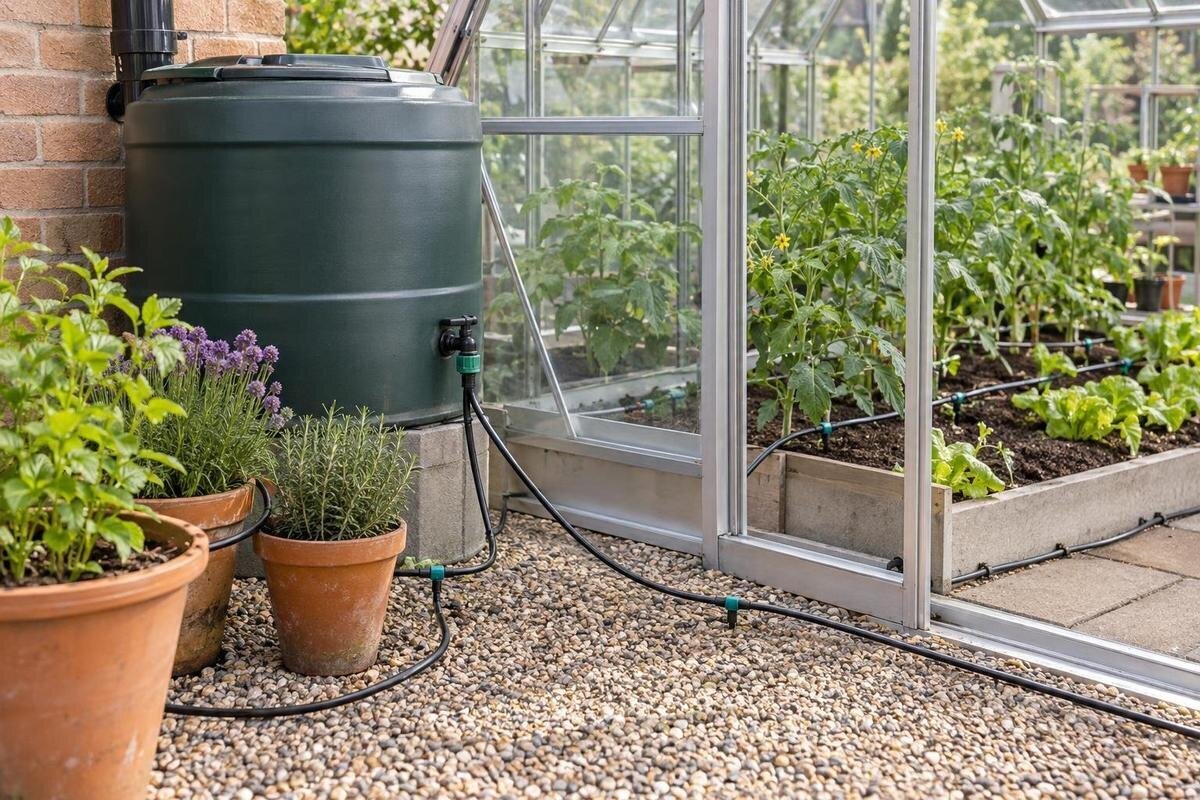
Greenhouse watering
Plants in the same greenhouse can have very different watering needs. Pots contain a limited volume of growing medium and have exposed sides, while beds usually offer a broader, deeper root zone; plant size, growing medium and local conditions can change the comparison. Two independently controlled watering zones let container plants and bed-grown crops follow different schedules, reducing the risk of watering one group unnecessarily while another dries out. The useful design work is to group plants by their actual drying rates, route each branch clearly and check that water reaches the roots evenly.

Why pots and beds may need different watering schedules
A pot holds a finite volume of growing medium, and its sides are exposed to greenhouse air. A small container can therefore lose usable moisture sooner than a deep bed, but pots drying faster is a tendency, not a rule. Container size and material, compost, plant size, crop stage and local exposure all affect dry-down. A shallow bed or freely draining soil may dry quickly, while a large pot with a small plant can stay moist for longer. Temperature, ventilation and position matter too, even under one roof. Base the schedule on conditions around the roots, not on whether a plant is in a pot or bed.
Think of a watering zone as a group of plants served by a control that can be timed independently. The aim is not to give every pot its own timer; it is to avoid forcing dissimilar root volumes onto one frequency. A bed and a pot cluster may share a schedule if their needs and delivery can be managed together. If one group repeatedly needs a different frequency, keeping both on the same outlet can leave one too wet while the other dries. Consider the amount delivered as well as timing: an equal run time does not guarantee that each root zone receives the same amount.
Map crops by root volume and water demand
Before dividing the pipework, list the main crops and their growing conditions. Note container sizes, approximate bed depth, crop stage and which plants sit in more exposed or better-ventilated parts of the greenhouse. Pots that are close in size and contain similar plants may form a useful group; a row of small containers may behave differently from a few large tubs. In beds, newly planted crops and established plants may not have the same root volume or watering needs. This inventory helps you identify where a shared schedule is practical and where it would require a compromise.
Mark the water source, paths, bed edges, benches and moveable pot groups on a floor plan. The Pyramid-type greenhouse options are listed in variants from 60 to 203 sq ft, so plan around the footprint you are actually considering rather than the model-family name. Overall floor area is not the same as planted area: count the bed runs and pots that will receive water. Leave room to reach valves and inspect line ends, and allow for containers that may move. A clear sketch helps you estimate routes without mistaking the greenhouse’s total area for the amount of ground that needs irrigation.
Plan branches for genuinely independent control
A common layout takes water from one source to a main line, then divides it into separate branches for the bed and container zones. Each branch needs a control that lets its schedule be changed without changing the other’s. A splitter with two tubes is not enough if both outlets open and close together. Check the timer instructions for independent channels, outlet numbers and whether zones operate one at a time or simultaneously. The controller and the valves, filters and emitters also need to be compatible with one another and with the water source; a set of spare outlets does not, by itself, confirm that.
Draw pipe routes around the way you use the greenhouse, keeping routine access to plants and equipment in mind. If the greenhouse design includes storage, check where it sits on the plan before fixing a route; the greenhouse with built-in storage listing covers variants from 59.4 to 302 sq ft, so the selected version matters. Keep controls accessible for adjustment and inspection, and avoid placing lines where normal movement will crush or dislodge them. The product category identifies the greenhouse type, not a suitable irrigation route, so use the layout for your chosen model when planning.
Water delivery to individual pots
Plan the container branch around where water must reach, not just where a supply tube can be laid. Count the pots in their intended positions and decide how each will receive water. A line running beside a row does not ensure that every pot is served; check the fittings and emitter arrangement specified for the equipment you choose. Aim for delivery into the growing medium around the root zone, and make each outlet easy to inspect. When the pots are on benches, allow for normal movement and access so that the line does not become difficult to check after planting.
Group pots only when their plants and volumes can share a workable schedule. A small pot and a large tub might dry at different rates even if they stand side by side. Different emitter outputs may help accommodate different amounts of water, provided the equipment is compatible, but they cannot give plants different watering frequencies on a single timed branch. When comparing the Prestige greenhouse options, sketch the container arrangement you intend to use and count its outlets. Leave enough slack, as specified by the equipment supplier, to reposition pots without pulling fittings loose. Keep a note of each pot’s zone so that moving a container does not inadvertently change its watering schedule.

Lay out watering for greenhouse beds
In a bed, plan the delivery route around the planted rows and the depth at which the crops are rooting. Follow the chosen equipment’s instructions for line placement and spacing, then check that water reaches the intended part of the bed along its length. A bed is not necessarily one uniform zone: crops with different planting dates, root depths or moisture needs may be better served separately. Check several places rather than judging the whole bed from its surface or from the point nearest the supply. If one end repeatedly dries sooner, investigate delivery there before extending the entire bed’s schedule.
Use the actual planted area, rather than total greenhouse floor area, when planning branches. When considering the Bloomcabin orangery, mark beds, paths and pot areas separately on the layout for your chosen version. Give each proposed bed branch a clear start and end, and note which planted rows it will serve. This makes it easier to distinguish a crop-grouping decision from a pipe-routing decision: two adjacent beds need not share a schedule, while similar crops in separate beds may be able to do so. Keep empty or temporarily unplanted areas identifiable, so you can isolate them where the equipment allows rather than watering bare ground throughout the season.
Choose a timer that can keep schedules separate
A timer only creates separate schedules if its outlets or connected valves can be controlled independently. Check the instructions before buying: some devices provide multiple connections without providing separate timing, while others require valves or other components to control branches. Confirm how the timer operates its outlets and whether your intended pattern runs one zone at a time or several together. If you plan to use a manual valve instead, it can separate branches for watering, but someone must operate it; it will not provide automatic schedules on its own.
Keep frequency and run time distinct. One zone might need watering more often, while another might need a different duration because its emitters or layout deliver water at a different rate. For a planned Classic greenhouse layout, write down the controls your crop groups require before choosing a timer. Check whether each outlet can have its own watering days, start times and duration, rather than assuming that ‘multiple programmes’ means independent outlets. Also check how manual watering affects the stored programme and what happens after a battery change or power interruption. These operating details matter when you want to adjust the pots without accidentally altering the bed schedule.
Set timings by checking moisture at root depth
Use moisture around the roots, rather than the appearance of the surface, to judge whether a schedule is working. In a few representative pots, check the growing medium below the surface and within the depth used by the roots. In beds, inspect more than one position, including places farther along the delivery line. Make checks at similar points in the watering cycle so that you can compare like with like. A dry surface does not necessarily mean the whole root zone is dry, and a damp patch near an emitter does not show that the rest of the bed has received enough water.
Adjust one zone at a time and record what changed, including plant growth and conditions in the greenhouse. If one pot or one end of a bed differs from the rest, check its outlet and position before changing the schedule for every plant. When planning a lean-to greenhouse, mark a few representative checking points across the actual growing area rather than assuming that conditions are uniform. Include different pot sizes and both ends of a bed where relevant. A moisture meter, if used, should be suitable for the growing medium and used consistently; compare its readings with direct checks rather than treating a single reading as a watering instruction.
Test delivery before relying on the schedules
When the lines and controls are in place, test each branch in the way it will normally operate. Watch the outlets nearest to and farthest from the supply, and check for leaks, loose fittings or emitters that appear blocked. You can collect water from comparable outlets for the same test period to see whether delivery is consistent where it should be. Do this for the container line and bed line separately, then test the planned timer sequence. The aim is to confirm what reaches the growing areas in your own setup, not to assume that a setting on the timer proves even delivery.
Ask the irrigation supplier for the required pressure, flow and compatible components; do not infer those details from the greenhouse product page. The Limited Edition aluminium greenhouse range identifies greenhouse options, not an irrigation specification. Check the equipment requirements against measurements from your actual supply under the intended operating conditions. If you cannot obtain reliable measurements or need advice on connecting to the supply, use a qualified irrigation installer. Where zones run simultaneously, the supply must meet their combined requirements; testing one branch alone will not establish that. Resolve an unsuitable supply or uneven branch delivery before using a longer timer setting to compensate.

Review schedules as plants and conditions change
A schedule that works for small plants in one part of the year may need revisiting as crops grow and the greenhouse conditions change. Warmer, brighter periods can increase water loss, while cooler or duller spells may reduce it; treat these as reasons to check, not as automatic instructions to alter every timer. Plant size, rooting and crop stage also change over time. Recheck moisture in both zones after a significant change in conditions, and adjust only the schedule for the group whose root zone has changed. This preserves useful differences between the container and bed programmes.
Update the plan if you move pots, change a bed or add a new crop group. For a T-shaped orangery greenhouse, use the selected model’s drawing to mark growing areas and branch routes through the different parts of the layout. Label each branch at its control and match that label to the timer channel. Before moving a crop onto another branch, compare the destination schedule with its current one; physical proximity does not establish similar watering needs. If a branch is extended, count the added outlets and repeat the delivery test. Extra emitters can change the demands on the supply even when the timer settings remain unchanged.
Record and troubleshoot each watering zone
Keep a simple record for each zone alongside the layout drawing. Include its label, the plants it serves, emitter arrangement, watering frequency, run time and date of the last adjustment. Record the results of delivery tests separately from moisture observations: one tells you what the equipment supplies, while the other helps show whether that supply suits the plants. Note the conditions when checking, such as a bright spell or recent crop replacement, so later observations have context. This record need not be elaborate, but it should make clear which setting changed and why, especially if more than one person looks after the greenhouse.
When something looks wrong, investigate the affected branch rather than lengthening every programme. If pots are wilting while a bed remains moist, check root-zone moisture in those pots, the outlet and the emitter before changing the bed schedule. If the start of a bed is wet but its far end is dry, inspect delivery along the line and the conditions at that end. If both groups are dry, check the shared supply and controller as well as the individual branches. Follow equipment instructions when inspecting or cleaning components, and record any adjustment so you can tell whether it helped.
Frequently asked questions
Do pots always need watering more often than greenhouse beds?
No. Small pots and actively growing plants often dry sooner, but container size, growing medium, plant type, bed depth and local conditions all make a difference. Check moisture around the roots in representative pots and bed areas, then set schedules from what you observe rather than from the container label.
How many watering zones does a mixed greenhouse need?
There is no fixed number. A pot group and a bed are useful starting zones if they have different watering needs. Divide either group further when different crops, container sizes or bed conditions cannot share a workable frequency and delivery. Keep plants together only when the same schedule suits them.
Can one timer water both zones?
Yes, if it can control the outlets or valves independently and is suitable for the water source and equipment. Two hose connections that open and close together do not provide separate schedules. Check the timer instructions and test the system in the way you intend to run it.
How should I set the run time for each zone?
Do not copy the same number of minutes from one branch to another. Check the delivery from the installed emitters, run an initial programme and inspect moisture at root depth. Adjust one zone at a time and reassess. Run time only makes sense alongside emitter output and the plants’ needs.
Do pots and beds need separate water supplies?
Not necessarily. One source can feed independent branches, provided it and the selected components can supply the system as intended. The important distinction is separate control, not separate water storage. Check component requirements, especially if more than one zone may run at once.
Separate watering zones are useful when they let you change one group’s schedule without overwatering or neglecting another. Pots and beds can share a water source while receiving different frequencies and amounts. Keep the arrangement as simple as the crops allow, but do not combine groups merely because they stand close together. A labelled layout, reliable delivery and regular checks around the roots will help you retain that independence as plants grow and the greenhouse planting changes.
