
Does Your Greenhouse Soil Need Replacing?
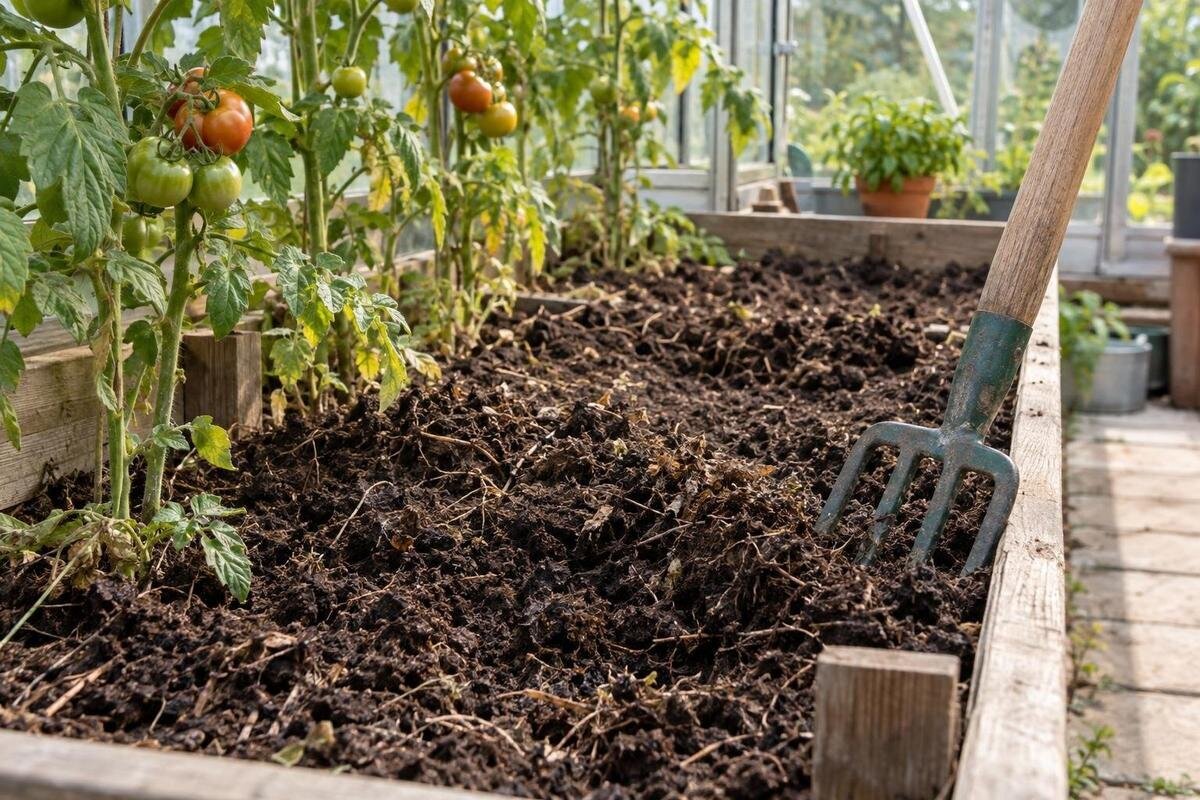
Greenhouse soil care
Seeing a poor crop in the greenhouse can make the soil seem like the obvious culprit, but replacing a whole bed is often the most disruptive response. Soil may have lost nutrients, become compacted or be affected by a persistent pest or disease; those problems call for different investigations. The useful question is not simply whether the soil looks tired, but what has changed, where the trouble occurs and whether a test or informed diagnosis points to removal.

Before removing soil 1
Greenhouse soil does not need replacing every year
Greenhouse soil has no universal service life. A bed can support healthy crops for years when its structure, moisture and fertility are managed; a roof overhead does not automatically exhaust it. A covered bed also receives less direct rain than an open plot, so repeated watering and amendments can affect it differently over time. That is a reason to monitor the soil, not to replace it on a fixed annual schedule. Removing a functioning bed can disturb its established structure, cost time and money, and leave the original cause of poor growth untouched. Treat visible decline as a reason to investigate, not proof that the whole bed is finished.
Start with the growing system as well as the soil: a permanent ground bed, a raised bed filled with soil, a container and a growbag hold different media and are managed differently. A failed pot does not show that the greenhouse bed needs renewal, and replacing one bed does not set a timetable for the others. If a new structure is part of the plan, compare the Pyramid-type greenhouse with a sketch of the intended beds, containers and paths. Use the layout for the particular option you are considering, rather than the model name, to judge what fits. Keeping the structure decision separate from the soil diagnosis helps prevent unnecessary removal.
Plant symptoms are clues, not a soil diagnosis
One poor harvest can result from watering, light, temperature, pests, pollination or crop care as well as soil. Yellow leaves, slow growth, wilting and poor fruit set are clues, but several unrelated causes can produce similar signs. Look for a pattern: are plants affected throughout the greenhouse, in one bed, at one end, or only within one crop? Do plants in containers show the same problem? Note when symptoms began and whether new or older growth is affected. These observations help narrow the investigation without prematurely deciding that soil must be removed.
Sketch the growing area and mark each bed, container group, crop, planting date and affected plants. Add notes on compost, fertiliser, manure, irrigation and any soil moved between beds. A problem confined to one strip may be linked to a local wet patch, a previous crop or handling; a wider decline calls for a broader review. Include places where tools and materials are kept, since moving soil through those areas can spread it beyond the affected bed. If considering the aluminium greenhouse with built-in storage, check how the storage section connects with the growing area and where used equipment could be kept separately. A dated map makes those connections easier to trace.
Before removing soil 2
When the issue is nutrient supply
Crops draw nutrients from a bed as they grow, and harvested produce carries some away. If the same crops return to the same ground and little suitable material has been added, a shortage is plausible. Weak growth alone does not prove depletion, though. Soil pH can affect how available some nutrients are, while repeated feeding or amendment can leave levels high or unbalanced. Watering can also influence what remains in the root zone. Pale leaves or a poor crop are not, by themselves, a reason to add general fertiliser, lime or compost; first establish what the crop and soil actually need.
Read test results alongside the bed’s history: which crops grew there, what was harvested, and what amendments have already been used? Test separate beds if their histories differ, then consider the results for the crops you plan to grow. A single sample from a mixed greenhouse can hide a low or high patch. These differences also matter when planning a larger growing area. The Bloomcabin Prestige Greenhouse is listed in sizes from 40.6 to 302 sq ft, but a larger footprint need not mean managing all the soil as one bed. Divide the planting plan into clearly identified areas so that sampling, feeding and any future replacement can be targeted rather than applied indiscriminately.
When soil structure has deteriorated
Soil structure describes how particles and organic matter form aggregates and the spaces that let roots grow, air move and water drain. Compacted soil may feel hard when moist, form a crust or stay wet in one area; very dry, cloddy soil can make watering uneven. These signs need context. Some soils are naturally dense, and a dry surface does not prove that the whole root zone is compacted. Check conditions in more than one part of the bed and below the surface, rather than judging by appearance alone. A structural problem can be local, so it does not automatically call for replacing every bed.
Consider what happens around the growing area: repeated foot traffic, working soil when it is wet, or water collecting in one place can worsen a local problem. Mark paths clearly and avoid using beds as walkways; replacing soil and then repeating the same traffic pattern is unlikely to help. When comparing the Spacious Greenhouse, check the chosen layout against your planned bed and path arrangement. The product name does not show whether you can reach each bed without stepping on it. If water remains in one area, find out whether the cause is the bed, its boundary or the wider site before changing the soil.

Before removing soil 3
When pests or disease may be involved
Some pests and diseases can persist in growing areas and affect later crops, but plant symptoms rarely identify the cause by themselves. Repeated trouble in the same crop or patch raises a question; it does not confirm an infection. Wilting, root decline and poor growth can also follow waterlogging, drought, root damage or other pests. Record the crop and timing, and note whether the same problem has appeared in that bed before. If symptoms are severe or keep returning, seek a diagnosis from a qualified horticultural adviser or diagnostic service before removing soil. A test for fertility alone may not answer a question about disease.
While the cause is uncertain, avoid carrying suspect soil, roots or dirty tools from an affected area into clean beds. Keep zones separate and take care not to mix them during routine work. Do not add symptomatic material to your own composting process unless suitable horticultural advice says that is appropriate. Replacing soil can be part of a control plan after diagnosis, but it is not a universal cure: the problem may remain in adjoining ground, debris, containers or equipment. Ask what needs to be removed, what can be retained and how to reduce the chance of reintroduction before undertaking a full reset.
Test the bed before choosing a remedy
Testing is most useful when the sample represents a defined bed and the result could change your decision. Follow the test provider’s collection instructions rather than combining soil from the whole greenhouse by default. Keep beds with different crops, amendment histories or symptoms separate, and do not blend an affected patch into a healthy sample. Give the laboratory the crop history and the question you want answered. A general soil test may assess pH and selected nutrients; a suspected pest or disease usually needs a specific diagnostic route, not just a routine fertility result.
Where possible, test before adding compost, lime or fertiliser. If something has been applied recently, tell the provider and follow its advice on timing. Use clean sampling tools, and ask whether the test covers the particular issue you are investigating, such as nutrient levels or soluble salts. Home kits can give an indication but may not assess every relevant factor, so interpret them within their stated limits. Keep a dated copy of the results with your bed notes. Later results are most useful when the same areas and comparable testing methods are used, rather than treated as an automatic instruction to replace soil.
Before removing soil 4
How to restore soil that is still worth keeping
If results point to a nutrient shortfall and the physical condition is sound, targeted feeding or a suitable soil-improving amendment may be enough. Choose material appropriate to the crops and apply it according to test advice or product guidance; adding more is not necessarily better. Compost can contribute organic matter and nutrients, but its composition varies. Repeated additions without considering existing nutrient levels may create a new imbalance. Record the material, amount, application date and area treated. Assess subsequent growth rather than expecting damaged leaves to recover immediately, and avoid making several unrelated changes at once: otherwise, it becomes difficult to tell which action helped.
For soil that is difficult to work, address the cause before adding material. Avoid working saturated soil, keep traffic on defined paths, and check that any amendment is appropriate to the existing nutrient levels and drainage. A local compacted patch may need a different response from the rest of the bed; mixing it throughout sound soil only makes the work larger. Access matters when carrying out these repairs. If considering the Classic aluminium greenhouse, check the selected option’s doorway and internal arrangement against the tools and containers you expect to use. Plan somewhere off the beds to put buckets and amendments during work, rather than repairing the soil while continuing to stand on it.
When partial or complete replacement makes sense
Partial replacement may make sense when a problem is confined to a defined area, its cause is understood and that portion cannot be restored safely or reliably. It could mean replacing the medium in one container, a section of a bed or a diagnosed affected zone, rather than stripping every bed. The boundary matters: roots may extend beyond visible symptoms, and a pest or pathogen may persist below or beside the material removed. Follow expert advice where disease is suspected. For nutrient or structure problems, check whether a targeted amendment could work before assuming that removal is necessary.
Full replacement is a major decision for a persistent, confirmed problem across the growing root zone, or soil that cannot reasonably be brought back into suitable condition. Check that the replacement material is appropriate for the intended crops and growing system. Estimate the quantity from the measured bed area and the depth you intend to fill, allowing for the shape of the beds rather than using the greenhouse footprint. If a new layout is also being considered, the Lean-To Greenhouse is one catalogue option to assess; calculate soil only for the measured growing beds in the chosen configuration. Ask how to handle removed material before work begins.

Before removing soil 5
Prevent the same problem from returning
Keep a record of what grew in each bed, what was added and what happened. Where space allows, rotate crop families so the same susceptible crops are not repeatedly planted in the same soil. Rotation may be limited in a small greenhouse, so moving containers or using a separate growing medium can offer more flexibility. Remove diseased crop residues promptly and clean tools between affected and healthy areas. If a crop-specific problem has been confirmed, ask whether rotation is appropriate to its management; it is not a substitute for diagnosis. Notes on both healthy and poor growth can reveal gradual changes before they become harder to interpret.
Watering and access also affect whether soil stays workable. Avoid repeated trampling and adjust watering to the crop and changing conditions rather than relying on an unchanging routine. Leave room to move containers and remove crop residues without dragging them across other beds. If planning a new growing area, use the limited-edition aluminium greenhouse as one option when drawing up separate crop zones and a clear handling route. Check the chosen size and layout before committing to that arrangement. For an existing greenhouse, a modest change such as keeping one area for movable pots may make crop changes easier without discarding the permanent beds. Retain the records for each zone even when its crop changes.
Match the soil plan to the greenhouse layout
Before setting up a bed again, decide whether crops will grow directly in the ground, in raised beds, in pots or in growbags. These systems use different growing volumes and need different watering and feeding approaches, so do not treat their media as one shared batch. Test and amend a bed that is staying in place on its own; fresh potting compost is not a substitute for diagnosing garden soil. If you mix beds and containers, label each area and keep a separate record. That makes future problems easier to trace and helps avoid replacing unaffected soil.
If replacement is justified, plan the handling as carefully as the planting. Measure the beds rather than ordering material for the whole greenhouse footprint, and identify where incoming material can wait without being mixed with removed soil. Check the route through the doorway and around existing plants before deciding whether to use bags, buckets or another suitable method. When assessing the T-shaped orangery greenhouse, use the exact option’s dimensions to check these routes as well as the planting space. Arrange any necessary plant moves before work begins. A manageable renewal plan should leave you with accessible beds and clearly separated growing areas, not simply a greenhouse full of fresh soil.
Frequently asked questions
How often should greenhouse soil be replaced?
There is no universal replacement interval. Assess the bed’s growing history, structure, crop performance and test results instead. Soil that remains workable and can be managed for the crops you grow does not need to be removed simply because it has been used for another season.
How can I distinguish low fertility from a disease problem?
Plant symptoms alone rarely settle the question. Note which crops and areas are affected, then use a soil test to assess fertility and seek a specific diagnosis if a pest or disease is suspected. Similar symptoms can have different causes, so avoid treating or removing a whole bed on appearance alone.
Is adding compost enough to restore soil?
Not necessarily. Compost can add organic matter and nutrients, but its composition varies and it will not correct every drainage, compaction or disease problem. Check the bed’s condition and nutrient results first, then choose an amendment and amount suited to the soil and intended crops.
Can I reuse soil after a diseased crop?
That depends on what caused the problem. Some pests and diseases can persist in soil or plant debris, while other crop failures have non-infectious causes. Keep suspect material separate and seek a diagnosis before reusing it, composting affected debris or spreading soil to another bed.
Should I replace only the top layer?
There is no reliable depth that suits every problem. A surface layer may not contain affected roots or a soil-borne pest, while replacing it unnecessarily can waste sound soil. Establish the cause and its extent first, then decide with appropriate advice whether a local or deeper removal is needed.
Let the evidence set the scale of the response. If the soil is workable and testing points to an adjustment, keep it and correct the identified issue. If the problem is local, deal with that area rather than removing sound soil elsewhere. Where a pest or disease is suspected, get the cause and extent assessed before choosing a replacement plan. Greenhouse beds do not have an annual expiry date: their condition, crop history and intended use are what matter.
