
Do Soil-Moisture Sensors Improve Greenhouse Watering?
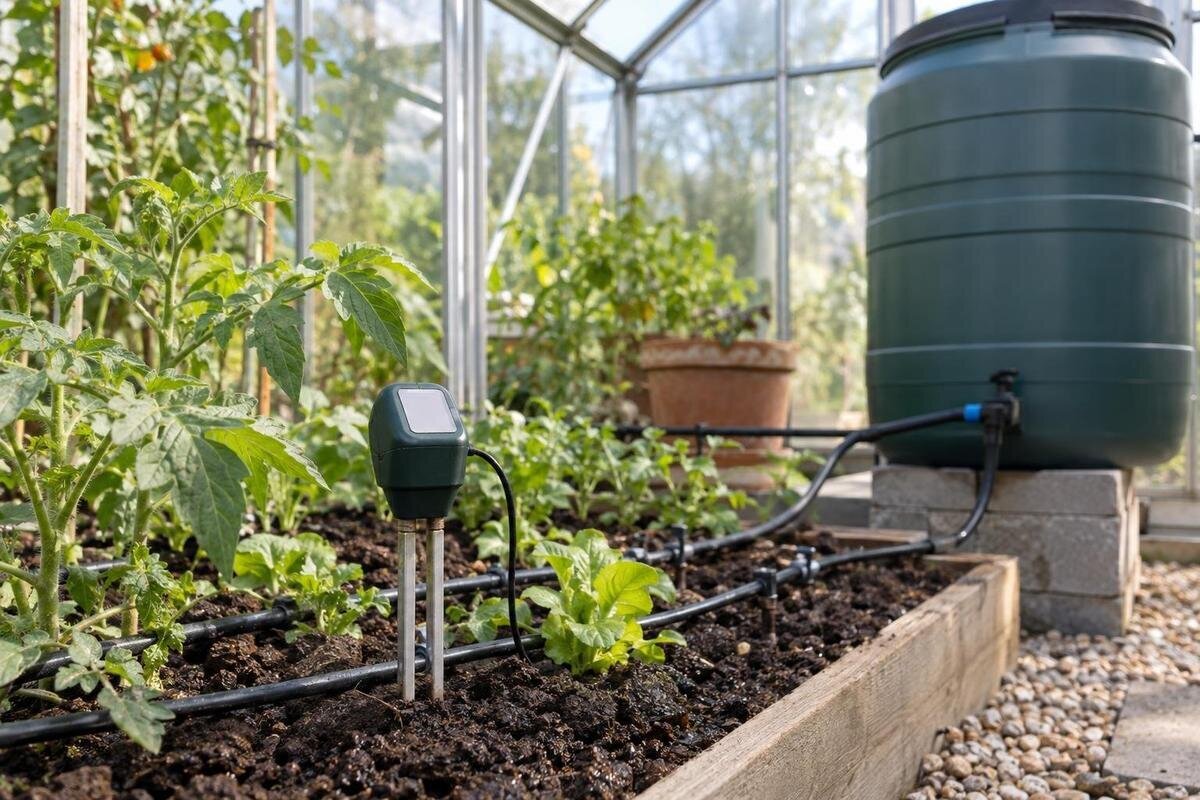
Greenhouse watering
Soil-moisture sensors can make greenhouse watering more consistent, especially when you cannot check every bed or container at the same time each day. They do not measure the whole greenhouse or tell you automatically how much water every plant needs. Each reading reflects a small area around the probe, and its meaning depends on the sensor, growing medium and position. Before using a reading to trigger irrigation, compare it with the medium by hand, learn how the reading changes as that same area dries, and confirm that water reaches the monitored roots.

01
What a soil-moisture sensor actually measures
A probe reports conditions in the material touching its sensing element, not an average for the bed, pot or greenhouse. Some devices give an estimated water-content percentage, others a relative scale, a tension value or a raw number. Figures from two models are not directly comparable, and a number such as 40 has no universal meaning without knowing the method and medium. Even within one bed, moisture at the surface, around roots and near the bottom may differ. Treat the display as local evidence from one spot, not an instruction that every plant needs water. It cannot tell you how much to apply or whether every part of a zone has been wetted.
The measuring method affects how to interpret a reading. The product instructions should explain what the device detects, which growing media it supports, how it should be inserted and whether its value is calibrated or simply comparative. A loose air gap, compacted material, dissolved salts or temperature may affect some technologies differently; exact sensitivities depend on the design. A sensor does not tell you whether water is flowing to other plants, whether an emitter is blocked or what nutrient level a medium contains. Those are separate checks, so a steady display is not proof that the complete watering system is working as intended.
When sensors improve watering consistency
The clearest gain is consistency. A sensor can show whether root-zone material is still damp or drying between manual inspections, while a record of readings makes the effect of watering easier to see. Remote checks are possible only if the chosen system supports them. Monitoring can help when routines vary, more than one person waters, or pots and beds dry at different rates. It may also reveal that a calendar-based routine does not match conditions in the medium. Treat that as a prompt to check, not automatic proof that watering should begin: one point may not represent the driest or wettest part of the crop area. If a reading would not change a decision, the display may simply add another number to check.
Sensors are most useful where a stable probe position represents a defined growing area. Before buying, sketch the planted footprint and mark the media, crops and watering outlets. The Classic greenhouse range is listed from 40.6 ft² to 302.3 ft²; that area provides context, but cannot tell you how many watering zones exist or where roots sit. A small greenhouse may contain unlike pots and beds, while a larger one may have a single consistent area. Let the growing layout, rather than floor area alone, guide monitoring.
02
Match the sensor to the growing medium
Start with the material the probe will monitor. In-ground soil, a raised bed filled with a mix and potting compost do not store or redistribute water in the same way. Particle size, compaction, depth and container shape can all change what a local reading means. Choose a sensor whose instructions cover the medium and installation depth you intend to use. If you grow in several media, do not copy one trigger value from a bed into pots merely because the displays use the same units. The sensor cannot make those growing environments equivalent, and it does not replace judgement about the plants being grown.
Check the output and control method before buying. A display-only probe may be a useful prompt but cannot necessarily communicate with an irrigation timer; controllers may require a particular signal, interface or matched sensor. Confirm compatibility in both manuals. If you are also considering a lean-to greenhouse, plan the beds and containers before choosing the monitoring equipment: the growing medium and watering arrangement determine what the sensor must measure. The supplied greenhouse listing does not establish that sensors, controllers or compatible watering accessories are included. For the monitoring equipment itself, check the instructions for placement, cleaning, replacement and stated operating limits.
Plan monitoring around watering zones
A watering zone is an area managed together because its crop, medium and water delivery are sufficiently alike. A bed of established plants and a line of small pots may share a timer yet dry at different rates. Conversely, two beds may be monitored together if one sensor position genuinely represents both. Think about the controller's reach and the crop's needs separately: one valve or schedule does not guarantee one moisture pattern. A probe helps only if its reading is relevant to the area that receives water when the controller acts. Where separate areas are not controlled separately, a reading may expose a mismatch rather than solve it.
Map beds, pots, outlets and irrigation lines, and mark where the growing medium or crop changes. When comparing a Limited Edition greenhouse with your intended layout, distinguish the overall footprint from the areas that will actually be planted. Paths and working space do not need moisture monitoring, while groups of pots may need checks separate from an adjacent bed. One probe may suit a uniform growing area; consider separate monitoring where another zone could dry or wet differently. Confirm water delivery independently before choosing the number of probes. More sensors can reveal uneven watering, but cannot correct it.

03
Place the probe in the active root zone
Place the sensing element within the active root zone of the crop it represents, following the insertion-depth guidance for that sensor. A shallow reading can follow surface drying rather than moisture where roots are taking up water; a much deeper reading may represent a different layer. Root depth varies by crop, stage, container and medium, so one universal depth is not reliable. If nearby crops root differently, choose a representative group or monitor them as separate areas. Keep the probe at a consistent depth for comparisons, and take care not to damage roots when inserting or moving it. Avoid placing it at the bottom of a pot unless that is the layer you mean to monitor.
Horizontal position matters too. Put the sensing element in the part of the root area actually wetted by irrigation, but not so close to an emitter that one narrow wet patch appears satisfactory while nearby roots remain dry. Equally, a point outside the wetted area can stay dry after watering. Check how water spreads after a normal cycle and choose a typical planted position, not a path or bed edge. With a T-shaped orangery greenhouse, a floor-plan sketch helps prevent one central point being assumed to represent all planted areas, especially where media or watering lines differ.
Calibrate before setting a watering trigger
Calibration has two practical parts. First, follow the manufacturer's procedure to calibrate or configure the instrument, if its instructions require it. Second, learn what the resulting reading means in the medium and position you will monitor. Do not treat a generic threshold or a percentage on a screen as a universal point at which to water: the sensing method, substrate and crop all matter. Keep settings at the instructed values unless the manual explains how to adjust them, and record the units and any changes. If the display uses a relative scale, compare readings only under consistent conditions.
To establish a useful reference, install the sensor correctly in its intended zone, water as you normally would, and allow moisture to distribute before noting the display and checking nearby material by hand. Continue checking as that same area dries; note the readings alongside what you observe, rather than choosing a trigger number in advance. Repeat the comparison on several occasions so one unusual watering does not set the threshold. If you are planning beds or containers for a Pyramid-type greenhouse, establish this reference in the final growing arrangement, rather than a temporary pot used to test the equipment. Record the probe position as well as the reading, so later comparisons refer to the same depth and location. Repeat the process if you move the probe or change the growing medium.
04
Cross-check readings by hand
Manual checks anchor an electronic reading in the growing material. At the same time as looking at the display, inspect a small sample close to the probe and at the same depth, without tugging the probe or repeatedly disturbing roots. Notice whether the material crumbles, holds together or feels wet in a way that makes sense for that mix. These observations are not universal measurements, but they can flag an unexpected reading. A dry-looking surface alone is poor evidence about deeper roots. In a pot, lifting it can give a rough sense of change once you know how that particular container feels at different moisture levels.
Cross-check more than one representative position if the zone varies. If the display says wet but the nearby sample is dry, check that the sensing element is properly inserted, at the intended depth and in contact with the medium. If the sample is wet but the display stays dry, review the sensor, settings and instructions. Make readings easy to identify: label each monitored bed or container and use the same label in your log. When planning a greenhouse with built-in storage, distinguish growing areas from storage and working space on that record, especially if pots are moved during routine tasks. Record what you found and make one change at a time, so you can tell whether the correction helped.
Test automatic watering before relying on it
Only automate after readings and hands-on checks agree repeatedly. Set the controller's trigger using its supported inputs and the reference you have developed, then supervise the first cycles. Check that water reaches the monitored root zone, that the reading changes in a plausible direction after watering and that another part of the zone is not being missed. Judge the system by water delivery as well as the screen: a wet reading next to one outlet cannot confirm that every line is flowing. Follow the manufacturers' instructions for connections, settings and any operating limits; do not assume that a probe and timer will work together.
Keep a way to observe and intervene while building confidence. If the controller offers a manual pause, maximum run limit or alert, understand and test those features as described in its instructions; do not assume they are available. Check what happens if the sensor is disconnected, out of range or gives an implausible value, using the manufacturer's test procedure. Avoid leaving untested automation to run unattended. When planning the growing layout for a Prestige greenhouse, allow access to the monitored beds and watering outlets so you can inspect a supervised cycle without moving containers or disturbing the probe. For any mains-powered connection or uncertain installation, ask a qualified professional rather than improvising.

05
Keep the sensor representative as conditions change
Keep a simple log of the date, zone, medium, reading, manual observation and watering action. Comparing similar situations is more useful than collecting unexplained numbers. A sudden change after moving the sensor, repotting, replacing substrate or altering an outlet may reflect a change in conditions, not a new watering requirement. Check contact, position and settings before changing the controller's trigger. Do not chase every short fluctuation; a repeated pattern backed by a manual check is more informative than one isolated value.
Review the probe position as plants grow and greenhouse use changes. New roots may make the old measuring point less representative, and moved containers or altered watering lines can change what the reading describes. In a larger space, review whether different planted areas need separate checks: the Spacious Greenhouse range is listed from 506 ft² to 753 ft², but footprint alone still does not set sensor count. A map of planted beds, growing media and watering circuits is more useful. After moving a probe, establish a fresh reference before relying on automation again.
When a sensor may add little
A sensor may offer limited value for one small, stable bed if you are usually present and already make reliable manual checks. It may also be a poor fit if containers and media change often, the probe cannot be placed in representative material, or the device's instructions do not cover your growing medium. Before buying, consider whether you will check the display and act on what it tells you. A sensor that produces data but does not change a decision or improve your routine adds another task without making watering more reliable.
When a reading and the plants' apparent needs disagree, separate a measurement problem from a delivery problem. A reading that changes unexpectedly without watering calls for a check of probe contact, position and settings. A reading that responds to watering while neighbouring material remains dry points towards an unrepresentative measuring point or uneven distribution. Changing the trigger alone could make the monitored spot wetter without helping the missed area. If you cannot establish a dependable relationship between readings and conditions in the root zone, keep control manual while investigating. The useful outcome is a more reliable watering decision, not automation for its own sake.
Frequently asked questions
Can one sensor serve several greenhouse beds?
Only if its position gives a useful reading for all the areas it represents. Beds with different crops, growing media or watering patterns may dry differently, even if they share a timer. Map the zones first and check more than one representative spot by hand before treating one reading as a guide for all of them.
Does a reading such as 40% mean the compost is 40% wet?
Not necessarily. Displays and measuring methods vary, and a percentage may be an estimate rather than a direct, comparable measure of water content. Check the sensor instructions for the units and supported media. Even then, interpret the value for the particular growing medium and probe position.
How should I calibrate a soil-moisture sensor?
Follow the manufacturer's calibration instructions, if the device requires a setup procedure. Then compare readings in the medium and position you will monitor: note the value after your normal watering routine, and check again as the material dries. Use manual observations to interpret the readings; do not rely on a universal threshold.
Should the probe go directly beside a dripper?
It should sit within the wetted root area, but a point directly under an outlet may become wet before the rest of the area. Check how water spreads after a normal cycle, then choose a representative position at the sensor's recommended depth. If the zone varies, check other positions as well.
Can any soil-moisture sensor control an irrigation timer?
No. A display-only sensor may not communicate with a timer, and controllers can require a particular signal or interface. Check both products' instructions for compatibility and their response to a missing or implausible reading. Ask a qualified professional about any mains-powered control connection.
A soil-moisture sensor improves watering when it gives a repeatable reading from the right part of a defined growing area. Its value comes from suitable placement, a baseline for the actual medium and regular manual cross-checks. Keep automatic control secondary until readings and water delivery agree over repeated checks. Where beds, containers or irrigation zones differ, assess them separately; where a simple manual routine already works, a sensor may add little.
