
Using a Greenhouse to Start Plants for Outdoor Raised Beds
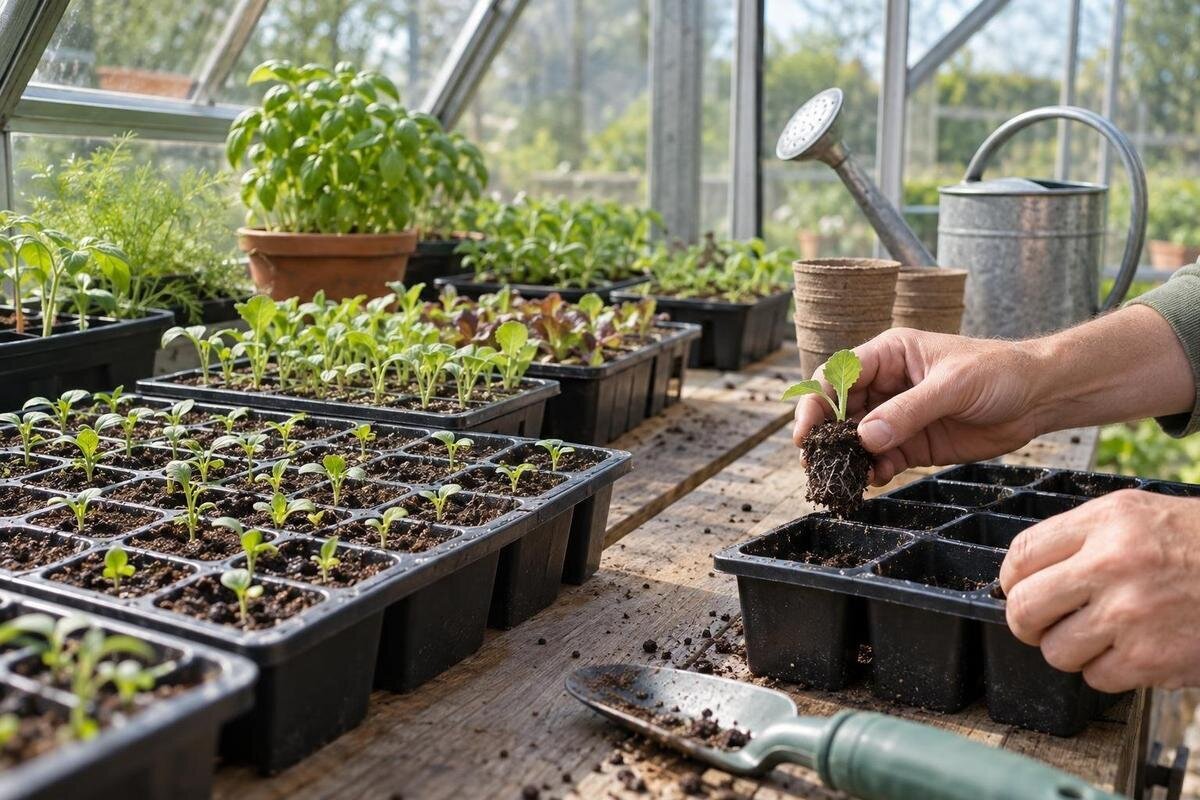
Greenhouse growing guide
A greenhouse can give seedlings a protected place to establish, but healthy growth under cover is only part of preparing them for outdoor planting. For crops destined for outdoor raised beds, success depends on aligning sowing dates, nursery space, acclimatisation and a bed that is ready to receive them. Treat the greenhouse as temporary growing-on space: plan every batch towards a specific planting place, then move it outdoors gradually when both the crop and conditions are suitable.

01
The greenhouse's role in an outdoor-bed growing plan
In this system, seedlings spend only part of their growing life in the greenhouse: they are sown and raised there, then acclimatised and planted into an outdoor raised bed. The bed, rather than the greenhouse, is where the crop is intended to mature. That changes how you allocate space. A crop kept under glass through flowering and harvest can occupy a growing area for months; nursery plants should move on at the right stage, freeing bench space for another sowing. The greenhouse is therefore one stage in the plan, not a second destination for the same crop. A plant's size under cover alone says little about how it will cope with outdoor light, wind and temperature.
Give each batch a destination before it enters the greenhouse: name the bed, its intended planting space and the likely planting period. That link helps prevent two common mismatches: seedlings are ready while the bed is still being prepared, or a prepared bed waits for plants that were sown too late. Keep the order visible on labels or a simple schedule. Where a bed contains crops with different planting windows, give them separate slots even if you sowed them at the same time. Greenhouse protection can help young plants establish, but it does not make outdoor soil, weather or crop requirements irrelevant.
Plan backwards from the planting window
Begin with the outdoor layout. Mark the usable surface of each raised bed, note the access gaps you need and assign positions to the intended crops. Use the crop's recommended spacing rather than treating the whole bed as one undivided area: a row of larger plants and a dense block of small plants need different numbers of starts. Allow for each crop's mature size, rather than planting close together just to fill bare soil. Also decide whether you want one planting or several smaller successions. These choices set the number of seedlings and the dates when you will need them, so make them before ordering seed or filling every tray.
Work back from a locally suitable planting window using the seed packet or a reliable crop-specific guide for indoor sowing and growing-on time. Do not apply one calendar date to every crop: sensitivity to cold, development rate and current conditions differ. If greenhouse capacity is part of the plan, the Pyramid greenhouse is listed in sizes from 60 to 203 sq ft. Treat the listed area as an overall size figure, then check the selected layout for bench space, access and a place to stage plants before converting it into a tray count. Leave a little flexibility for unsettled weather or a bed that takes longer to prepare.
02
Match sowing batches to bed capacity
Calculate the planting count from the number of bed positions you intend to fill and the spacing in the crop guidance. Add a modest reserve if you expect germination failures or losses, but set a ceiling so the spare plants do not become another crowded batch demanding care. Check the sowing instructions for whether seeds should go singly or in groups, and how many plants you are likely to use from each module; follow crop-specific instructions where they differ. Consider how many trays you can label, water and inspect at once. The aim is enough healthy choices for the bed, not the maximum number of seedlings the greenhouse can hold.
Where a crop will be planted over several weeks, sow separate, labelled batches rather than producing every plant at once. This spreads the work of watering, potting and planting, and reduces the time early seedlings must wait for a later bed slot. A Classic greenhouse listing covers sizes from 40.6 to 302.3 sq ft, but listed area cannot tell you how many trays fit. Account for bench depth, walking space and containers as plants grow. Review the selected configuration against your actual batch plan, not just the largest number in the range; a good sowing schedule also allows room to care for each batch properly.
Organise the nursery around the handover
Arrange the greenhouse so that the batch nearest to planting is easy to identify and reach. Keep crops for different beds or dates in separate groups, and put a durable label in every tray; include the crop or variety, sowing date and destination bed. A note on a simple plan can help if trays need to be moved. Place young plants where you can inspect and water them without reaching over other pots. Put the trays that are nearly ready where they can be taken out without shifting newly sown ones, and leave the routes you need for carrying trays clear instead of using every surface as permanent storage.
Keep seed packets, labels, dibbers and small tools in a consistent place, and separate clean supplies from compost or used trays. This reduces time spent handling seedlings and helps avoid mixing batches when several crops are at different stages. If built-in storage is important when comparing structures, the aluminium greenhouse with built-in storage is a configuration to inspect. Check its exact layout to see how storage and growing areas relate before planning benches around it; the product name alone does not tell you the usable dimensions of either area.

03
Allow space for more than germination
Bench capacity has to cover more than newly sown modules. Leave room for germinating trays, plants that need a larger container, labelled batches waiting for a bed and a place where plants can be set aside for hardening. These uses overlap: a second sowing may begin while the first is still growing on. Sketch the stages in sequence, including the space you need to stand and work, then check whether the layout still makes sense when several batches are present. Estimate capacity at the busiest point in the schedule, rather than from the greenhouse's average day or an empty bench.
Compare a greenhouse's dimensions and internal layout with that sketch instead of assuming all its area is available for plants. The Prestige greenhouse with metallic base is one listed model to include in a comparison; use its selected product details to check space for benches and circulation. Show permanent greenhouse crops, potting work and stored equipment on the plan if they will share the structure. Otherwise, a layout that fits only at sowing can become blocked just when trays need more room or the first batch is ready to leave.
Manage light, warmth and watering under glass
Protected does not mean that conditions stay even. Sunshine can raise the temperature inside quickly, while nights and cold spells can still affect young plants. Give seedlings the light recommended for their crop, and avoid crowding trays so that neighbouring plants shade one another. Check for shading from shelving or stored equipment as well as from other plants. During bright weather, ventilation and suitable shading can help manage conditions, but follow the structure and crop guidance rather than leaving every tray shaded throughout the season. Check temperatures near the plants and recheck after adjustments: a closed greenhouse can warm up even when the air outside feels cool. Use each crop's needs rather than setting one target temperature for every tray.
Water according to the moisture in each tray, not a fixed timetable: small modules can dry faster than a raised bed, while persistently wet compost can cause problems. Check the compost and tray, water evenly when needed, and allow excess to drain. The Lean-To Greenhouse is listed in sizes from 40 to 154 sq ft, but square footage alone says nothing about conditions at bench height. Review the selected specification and ventilation arrangements against the crops you plan to raise. A thermometer placed near the plants can help you notice differences between a sunny afternoon and a cool morning.
04
Check seedlings and beds at the same time
Check plants against the stage recommended for their crop. Ready transplants are generally healthy, well rooted enough to transfer and growing steadily, rather than stretched, damaged or wilting. Avoid using height alone as a test: seedlings raised in dim conditions may be tall but weak, while compact plants may be ready at a different size. Look for the crop's expected leaf development and inspect for pests or disease before moving a whole tray. If the guidance says a crop dislikes disturbance or needs a different planting method, follow that advice instead of applying a single transplant rule.
At the same time, check the bed. Its layout should be marked, the surface ready to plant and the moisture suitable for working; a bed that is waterlogged, very dry or not prepared can delay the move. Raised beds can dry more quickly than surrounding ground, so check their soil rather than assuming that a clear, elevated bed is ready. Check the forecast again as planting approaches, not just when you first sow. For overlapping batches, the limited-edition aluminium greenhouse range is listed from 40.6 to 302 sq ft; if comparing it for holding plants through a delay, use the chosen plan to check bench space, not just the stated area.
Harden off seedlings gradually
Hardening off is the gradual change from sheltered greenhouse conditions to outdoor exposure. Start with a sheltered, shaded position for a short period, then increase the time outside and the amount of sun and breeze over successive days. Many seedlings need roughly a week to ten days for this transition, but crop, starting conditions and weather affect the pace. Follow crop-specific advice, and do not begin with a full day in strong sun or wind. If the weather turns harsh, shorten the exposure or pause rather than treating a fixed schedule as more important than the plants.
Keep trays watered during the process, since a small volume of compost can dry quickly outdoors, and check them after each move. Bring plants back under cover when conditions are unsuitable for that crop, especially if a cold night or severe weather is forecast. A greenhouse door left open is not automatically the same as outdoor acclimatisation: sheltered air and exposure can still differ. Use a protected outdoor spot as the first stage, then increase exposure gradually while watching for wilting, leaf scorch or wind damage. Do not deliberately let seedlings wilt as a way of toughening them.

05
Plant out with the bed and weather in mind
Choose a mild, calm time to plant out where possible, and have the bed and labels ready before carrying trays outside. Water seedlings before handling if their compost is dry, lift them carefully by the root ball or leaves rather than pulling at a fragile stem, and plant at the depth and spacing recommended for that crop. Firm the soil gently around each plant and water it in, then keep an eye on moisture while it settles. Arrange the planting order in advance, and keep trays not yet planted in a sheltered place rather than leaving them in sun or wind while you finish marking the bed.
Plan the physical route from greenhouse to bed as part of the layout: clear the path, make sure trays can be carried without catching on stored items, and group plants in the order you will use them. The T-shaped Orangery Greenhouse is one named layout to assess if shape matters to your site, but rely on the product plan and dimensions to check entrances, working space and the route out; the model name alone cannot establish that fit. After planting, follow crop guidance on any temporary protection or care needed outdoors.
Allow for delays and clear space for the next batch
Weather and bed preparation can shift a planting window, so leave a realistic buffer rather than scheduling every batch to move on the same day. If a delay develops, check plants more often for watering, space and signs that their current container is no longer suitable; pot on only where the crop and stage call for it. Do not compensate by sowing a large reserve without a place for it. If a bed is not ready, prepare it as soon as practical and keep young plants in conditions they can tolerate while you adjust later sowing dates to avoid a growing backlog.
When a batch has gone outdoors, clear its bench area, remove spent compost and clean used trays before reusing them. Check labels or the plan against what was actually planted, including any positions left empty. Those gaps may need replacements from your reserve rather than another full sowing. Start the next batch only if there is a real bed position and enough time for it to reach the right stage. The spacious orangery greenhouse is listed from 506 to 753 sq ft; that larger area is a comparison point for extensive growing plans, not a requirement for raising plants for a few outdoor beds.
Frequently asked questions
When should I sow seeds for raised-bed planting?
Choose the crop's recommended outdoor planting window first, then work backwards using the seed packet or a crop-specific guide for indoor sowing and growing-on time. Adjust for local conditions and the forecast as the date approaches; a general calendar date cannot account for every crop, bed and season.
How long does hardening off take?
Allow roughly a week to ten days where conditions permit, but treat that as a guide rather than a fixed deadline. Start with short periods in a sheltered spot, then increase exposure gradually. Slow down or pause if the weather turns harsh or the seedlings show signs of stress.
Do greenhouse-raised seedlings still need hardening off?
Usually, yes. A greenhouse changes how much sun, wind and temperature variation plants experience, so seedlings raised under cover may not be ready for outdoor conditions straight away. Move them outside gradually, following crop-specific advice and taking account of the weather.
Can I leave seedlings in the greenhouse if a bed is not ready?
A short delay may be manageable if the plants still have suitable light, watering and space, but a greenhouse is not an indefinite holding area. Prepare the bed as soon as practical, check whether the seedlings need a larger container, and adjust later sowings if the delay affects the schedule.
How many extra seedlings should I raise?
Allow a modest reserve for uneven germination or losses, based on the crop and the number of planting positions you have. Avoid sowing far more than the bed can take: surplus plants still need space, watering and attention while they wait for a destination.
A productive greenhouse-to-raised-bed routine depends on timing each stage to the space available outdoors. Give every batch a destination, allow room for growing on and hardening off, and check both the plants and the bed before moving them. Once a batch is planted, clearing the nursery area promptly keeps the greenhouse ready for the next sowing without turning it into a permanent holding space.
