
Tracing Condensation Drips onto Greenhouse Plants
Greenhouse troubleshooting
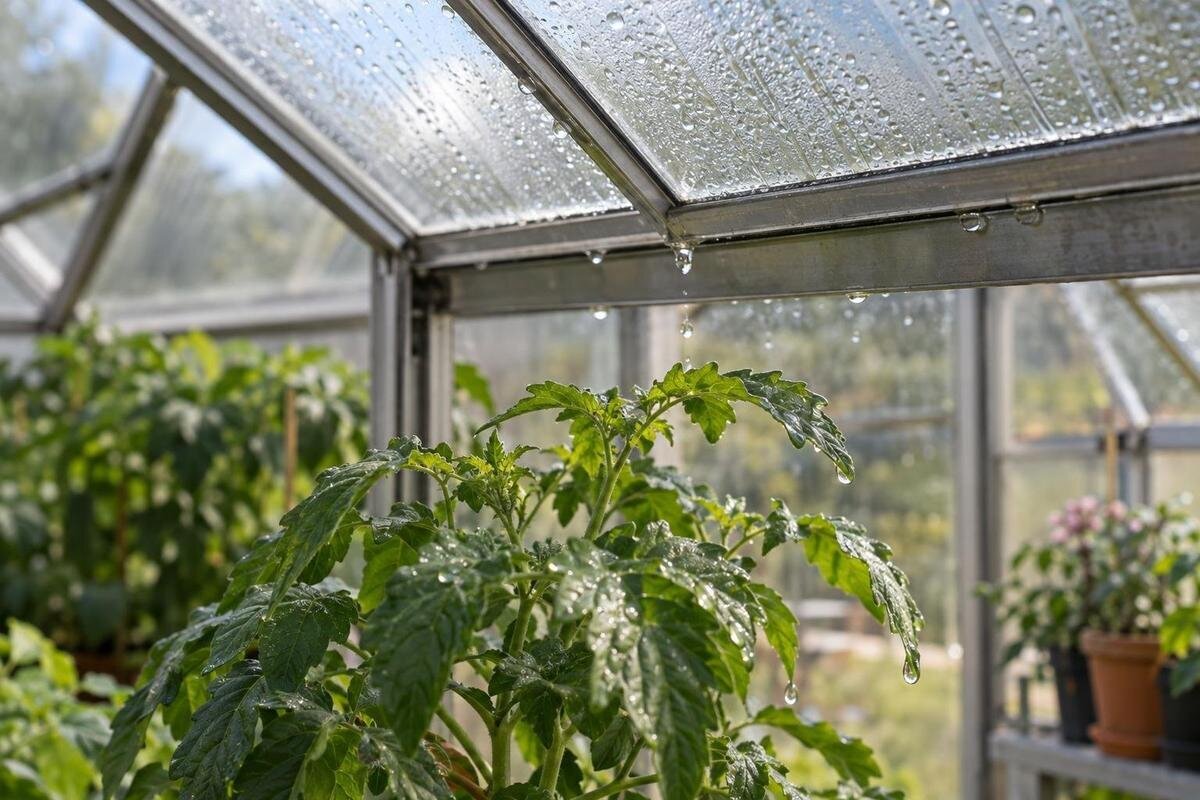
Condensation drips are easiest to trace before you change ventilation, move every pot or wipe the roof. A wet leaf shows where water landed, not necessarily where it formed: moisture can bead on a cold pane or frame, travel along a glazing bar, then fall some distance away. Record the first wet spots, the overnight timing and nearby surfaces, and compare photographs with temperature and humidity readings. This helps separate a likely condensation pattern from rainwater or irrigation and shows what needs checking next.

How condensation reaches greenhouse plants
Condensation forms when water vapour in greenhouse air meets a surface cool enough for the vapour to become liquid. That surface might be the underside of a roof pane, a glazing bar, a frame corner or the edge of a vent. The air temperature measured at plant height is not the temperature of the glazing, so a single room reading cannot identify the coldest point. Fine beads can merge into larger drops; gravity then carries water down glass or along a frame until it releases. The change from a sheen to a falling drop can look sudden even when the surface has been damp for a while.
A wet leaf is the endpoint, not proof of the source. A drop can fall close to where it formed, but a film may travel along a member first; one larger drop can wet a single pot while nearby plants stay dry. Condensation may be present before droplets gather enough to fall, or its original track may have dried by the time you open the door. Check the pane and frame above and slightly upslope from the plant, and record whether they look beaded, streaked or dry. If the surface has warmed or dried before you inspect it, note that gap: its condition at that moment does not show what happened earlier.
Map where the water lands
Use a simple plan instead of relying on memory. Mark the door, benches or beds, roof panels and main frames with short labels such as A1 and A2. On the same plan, use separate marks for wet foliage, visible droplets overhead and dry comparison areas. Include where the plants were, not just the pots that caught water, since leaf wetness can spread or be mistaken for a direct drip. A rough sketch is sufficient if its orientation stays fixed; note which end you faced so ‘left side’ means the same place on each visit. A compass direction can help if you record it consistently, but it is not essential.
Record when you first notice each patch and whether you saw water fall or only found wet leaves later. Photograph the map or write a short caption before moving pots or wiping surfaces. For a lean-to layout, mark the adjoining wall and the outer edge separately, so observations remain easy to locate when discussing a product such as the Lean-To Greenhouse. Draw the actual roof bays and openings rather than copying a catalogue image. Mark each observation rather than colouring a whole side wet, so small differences are visible. Repeat the map on several occasions before treating one isolated spot as a persistent pattern.
Inspect panes, frames and joints safely
Start at the wet leaf, look directly above it, then follow visible tracks towards their highest point. From a safe position inside, record whether the first visible moisture is separate beads on the underside, a sheen across a pane, a wet line along a glazing bar, or water beside a frame or opening. These are observations, not diagnoses. If the starting point is hidden, label it unknown and photograph the nearest visible trace. Never climb onto greenhouse glazing or lean against a pane; if the area cannot be seen safely from the ground, ask a suitable professional to inspect it.
Check pane edges, frame corners, joints and the perimeter of any vent. Note the highest visible wet point as well as where the drip falls; a continuous run mark can give a better lead than the final drop location, because water may have travelled before release. Compare the pane and supporting frame separately, since a wet patch can cross from one surface to another. When assessing the limited-edition aluminium greenhouse, request drawings for the selected configuration to locate pane divisions and openings. These can help you describe a suspected drip route precisely and ask which joints or drainage details need inspection.
Distinguish condensation from rain or watering
Timing helps distinguish likely condensation from a leak, although neither timing nor appearance proves the cause. Drips that recur after a cool night, with beads visible on interior roof surfaces and no recent rain, support condensation as a possibility. Water that appears during or soon after rain and repeatedly follows one edge or joint deserves a leak check. Rainwater can travel along a frame, while condensation can also gather at a seam, so record the weather, first-observed time and precise starting point. A mark left from the previous day may outlast its cause; note whether it is fresh or a dried trace. Clear water is not a reliable way to tell the two sources apart.
Include overhead watering, misting, cleaning and splashes from pots or trays in the same timeline. Wet foliage that appears soon after watering, especially where a spray or splash can reach it, may have a different source from water beading above. Do not withhold watering a crop needs simply to test the theory; note the usual routine and inspect before and after it. For a layout such as the T-Shaped Orangery Greenhouse, give each part of the plan a separate label so observations from different roof areas are not mixed together. Record floor or bench wetness separately from drops on leaves, and note whether it appeared before or after the overhead surface became wet.

Record the overnight sequence
Build an overnight timeline, not a single midday snapshot. Note air temperature and relative humidity in late afternoon, later in the evening, at the first drip if you happen to see it, and before opening the greenhouse in the morning. Use repeatable times; exact intervals matter less than consistency. Beside each reading, record rain, watering, vent and door positions, any shade in use, and whether heating or other equipment was running. If nobody witnessed the first drop, write ‘first noticed at’ rather than treating that time as when condensation began. If you take an outdoor reading too, identify its sensor and position separately.
Keep the meter in a representative crop area and use the same location for comparisons, away from direct sun, a heater, water spray and contact with glazing. If you take a second reading nearer the roof, label it separately: it measures air there, not the surface temperature of the pane. Follow the meter’s instructions and note its units, such as °C and relative humidity. Readings from different sensors or positions may not match exactly, so look for trends in your own log rather than treating one value as proof. When considering the Pyramid-type greenhouse, ask where sensors could be positioned and accessed in the chosen layout, without obstructing openings or routine plant care.
Photograph the route from roof to plant
Photographs work best as a sequence. Take a wide view from the same safe place to show the greenhouse area, then a closer image of the wet foliage and the pane or frame that could be above it. Where possible, include a fixed reference such as a bench end or labelled roof bay. Photograph before wiping beads away or shifting plants, and repeat at the same point in the morning on later days. Keep the camera position and framing similar; a cropped close-up alone can hide which roof section it belongs to. A separate detail of the suspected starting point can show whether the water is on glass, a bar or a joint.
Give each image a caption with the date, time, weather, map label and whether rain, watering or a vent change occurred; phone timestamps do not capture those conditions. Keep an unedited original, then add arrows or circles to a copy to show a suspected path from pane to plant. When sending photographs to a supplier, include the exact model, selected size and any order reference. For a product such as the aluminium greenhouse with built-in storage, identify which area each photograph shows so the supplier can match it to the correct drawing. Do not climb or put a phone against fragile glazing to get a closer shot.
Interpret repeated patterns with care
Look for repetition across more than one morning. Beads across several interior roof areas followed by drops in several places are consistent with widespread condensation; a narrow wet line running from a bar or frame suggests a route worth inspecting. A single drip beneath one point may still be condensation, rainwater or water travelling from higher up. The pattern narrows where to look but does not identify the source on its own. Keep separate notes for roof wetness, frame wetness and damp leaves, and record whether you saw one drip or several rather than estimating the source from the size of a wet mark.
Compare nights with and without rain, and note whether the same spot is wet before or after watering, shade changes or vent operation. If the roof is dry when you arrive but leaves are wet, record how long after sunrise or opening you checked: surfaces may have changed before inspection. If the drip point shifts, look upward and along the frame rather than assuming the plant beneath it caused the change. Write ‘not observed’ if you did not check a particular area; that is different from confirming it was dry. A repeated, well-labelled pattern is more useful than naming the problem from one photograph.
Use ventilation and shading records as clues
Ventilation belongs in the record because opening positions and timing can change the air conditions, but a control setting is not proof that a vent actually moved. Note whether each opening was shut, partly open or open when inspected; if an automatic opener is fitted, record its visible position as well as any controller setting. Check the relevant equipment instructions if its operation is unclear. Do not force a mechanism or assume that leaving a vent open overnight is suitable for every crop or weather condition. Change only a setting you can operate according to its instructions, then compare the resulting log with the previous pattern.
Record any shade screen or curtain, including when it was drawn and which roof areas it covered. Shading changes the light reaching plants and can alter the conditions you are observing; it does not, by itself, establish why water is falling. If considering the Bloomcabin Prestige Greenhouse, ask for the ventilation options and any shading accessories documented for the selected configuration. Confirm how a compatible screen is supported, whether it affects access to openings and what its instructions say about use. Compare those details with the locations in your drip map before deciding whether an accessory addresses the conditions you recorded.

Protect foliage while testing one change
While investigating, reduce direct wetting without hiding the evidence. If practical, move a pot out of the drip line temporarily or place a clean catch tray beneath the suspected point so water cannot splash onto leaves. Keep the tray clear of walkways and empty it rather than leaving standing water. Avoid wrapping foliage or covering the roof in a way that traps moisture or blocks needed light and airflow. Mark any temporary move on the map; otherwise a drier plant may make it look as if the source has disappeared when only its position has changed.
Test one change at a time and write down exactly what changed: a vent setting, the timing of normal watering, or the position of a shade screen, for example. Keep crop care requirements intact, follow equipment instructions and compare photographs and readings under reasonably similar weather. If considering the Spacious Greenhouse as a replacement, use your existing drip map to identify questions about the proposed planting layout, access to vents and safe inspection of roof surfaces. More space alone is not evidence that condensation will stop. Avoid changing several controls together, or you will not know which adjustment affected the pattern.
When to seek an inspection or compare another greenhouse
If the evidence points to water entering at a pane or joint during rain, or you find a damaged component, keep the dated photos and ask the greenhouse supplier or a suitable repair professional what inspection is appropriate. Give them the model identity, the location on your map, the weather and when water appeared. Do not remove glazing, dismantle a vent or apply sealant based on a guess; materials and repair methods need to suit the particular structure. Keep images in chronological order so the first wet point can be compared with later traces. If no leak clue appears but the same overnight drip repeats, share the log and ask about the exact vent operation and glazing arrangement.
When comparing another greenhouse or an accessory, look for the exact selected configuration and documented vent positions, glazing, joint details and any compatible shading options. Ask which parts of a listing are standard and which vary by model. For the classic aluminium greenhouse range, request those details for the size and options you intend to order, rather than relying on a photograph of another configuration. Ask whether the design includes a method of managing condensate, where the water is intended to go and how that system is maintained. Judge a possible replacement against the conditions you actually logged rather than assuming a new structure will eliminate condensation.
Frequently asked questions
How can I tell condensation from a roof leak?
One morning may not be enough to tell. Condensation is more likely when beads form on the inside of the glazing after a cool night; a leak is more likely when water follows the same joint during or after rain. Photograph the route and compare several occasions, as either source can track along a frame.
How many nights should I record?
There is no fixed number. Repeat the map and timeline until you can compare more than one occasion, ideally including different weather or rain conditions. If water is damaging plants or a component appears damaged, seek an inspection rather than waiting for a long series of observations.
Should I leave a greenhouse vent open overnight?
Not automatically. The appropriate setting depends on the greenhouse, its equipment instructions, outside conditions and the plants inside. Record the vent’s actual position and your readings, then test only an adjustment that is suitable for the equipment and crop. An open vent is not, by itself, a diagnosis.
Can a fan stop condensation drips?
Air movement may redistribute air, but a fan does not show where water is forming and cannot be assumed to remove moisture from the greenhouse. Trace the wet surface and record the ventilation first. Assess any fan according to its own instructions and the layout of your greenhouse.
Where should I put a temperature and humidity meter?
Put it in a representative crop area, away from direct sun, heaters, water spray and contact with the glazing. Keep it in the same place for comparisons. A second sensor nearer the roof can be useful if labelled separately, but it measures the air there, not the pane temperature.
Once you have repeated evidence, the diagnosis can become specific: a particular glazing area, joint, vent setting or unrelated watering event. Keep the map, photographs and overnight log together, and judge any change by whether the same pattern returns under comparable conditions. The useful result is a clear account of where water formed, how it travelled and what component or operating detail still needs checking—not a guess based on the wettest leaf.
