
Pricking Out Seedlings: When to Move Them into Larger Pots
Seedling propagation
Pricking out is the point at which crowded seedlings leave a shared tray for individual cells or small pots. The calendar is a poor guide on its own: true leaves, root growth and the amount of crowding together give a better indication. Move too early and a seedling may be awkward to handle; wait until roots are tightly tangled and separation becomes harder. This guide explains how to judge the stage, lift seedlings gently and settle them into fresh compost, while distinguishing pricking out from potting on.
01
Pricking out and potting on are different jobs
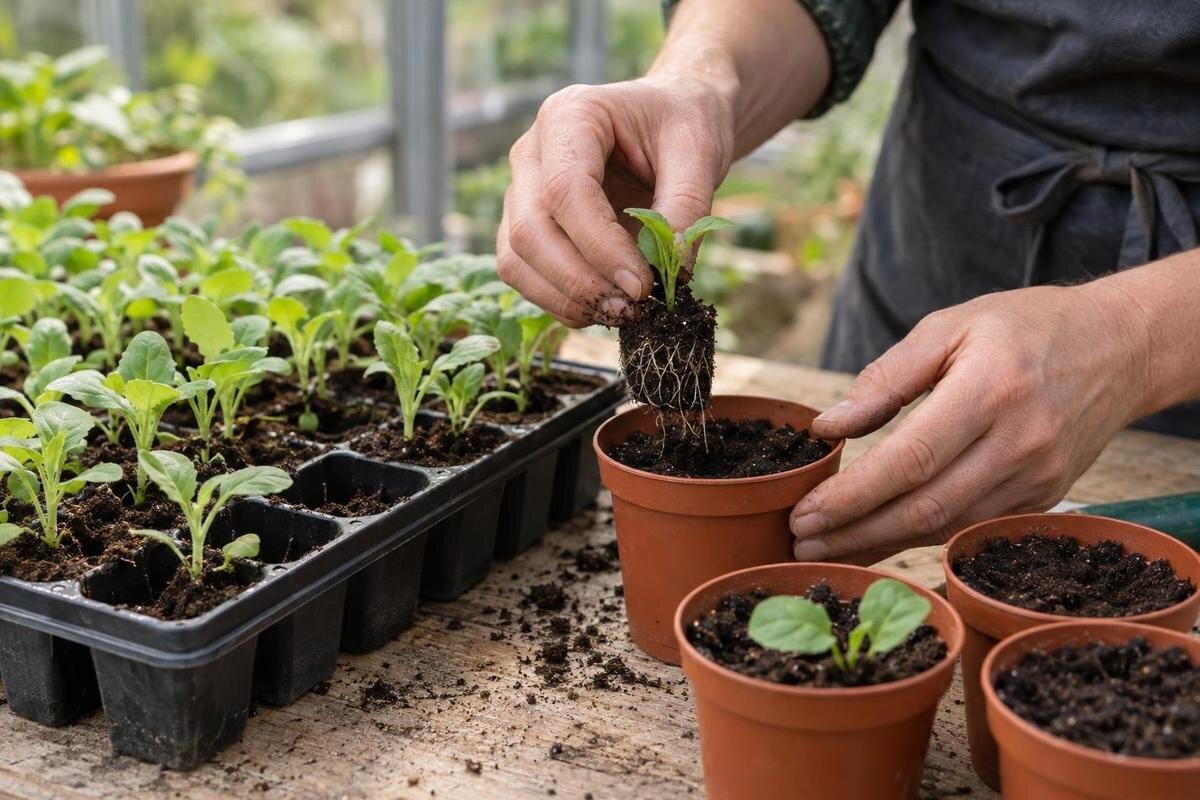
Pricking out means lifting individual seedlings from a shared seed tray or other communal sowing container and planting them separately in cells or small pots. It usually follows germination when several seedlings are growing close together and each is large enough to handle. The aim is to give each plant its own root space before neighbouring seedlings become difficult to separate. It is not a stage that every seed-grown plant has to pass through: whether seedlings are sharing compost is a better guide than the number of days since they appeared.
Potting on is a later move for a plant already growing in its own pot or cell. You transfer it to a larger container when its roots need more room; you are not separating it from its neighbours. The terms are sometimes used loosely, but the distinction helps you choose the right action. A crowded row may need pricking out, while a single seedling in a module may need nothing yet. If it is growing well and its roots have not filled the available space, moving it simply because other seedlings are being moved can cause unnecessary disturbance.
Recognising the first true leaves
Seed leaves, or cotyledons, usually appear before the true leaves. Depending on the plant, you may see one or two; they often look simpler or rounder than the leaves that follow. True leaves begin to show the characteristic shape of the plant. When judging readiness, look for true leaves that have unfolded enough to identify, rather than counting every green tip as a developed leaf. This gives you a visible sign of development, while the seedling’s size and sturdiness tell you whether it can be handled safely. Compare plants within the same crop or variety: a naturally small seedling need not reach the size of a different crop before it is ready to move.
A calendar date or a fixed number of days after germination is less dependable. Species, growing conditions and how closely the seeds were sown all affect the pace of development. For many readily transplanted crops, the first true leaves are a useful point to assess the seedlings; some are easier to move a little earlier or later. Do not wait for a large, mature-looking plant if neighbours are already competing for space. Where a crop has particular requirements, use its growing guidance alongside the leaves and roots you can see.
02
Root development and overcrowding
Roots help show whether a seedling is established enough to move. Tips visible at the base of a cell or drainage hole indicate root growth, but they are easier to observe in modules than in a shared tray. For seedlings in communal compost, loosen one at the edge when the leaves suggest it is ready, supporting the roots from below. Some compost may fall away; a seedling does not need a dense, pot-shaped rootball before pricking out. What matters is lifting the root system without tearing it or letting it dry out. Do not repeatedly uproot seedlings to check their progress. If the first plant is too delicate to lift successfully and the others still have room, leave the batch to develop further.
Crowding is a separate clue. Leaves that overlap, seedlings shaded by their neighbours and roots beginning to intermingle all suggest that waiting may make separation harder. Assess whether the seedlings are developed enough to move, rather than treating every overlap as an immediate reason to transplant. Prepare somewhere for the separated plants before starting: a tray of individual pots will usually occupy more room than the original sowing tray. If you are comparing larger growing spaces, the Spacious Greenhouse range is listed from 506 ft² to 753 ft². Choose a footprint against your expected growing-on needs, rather than the compact tray arrangement at germination.
Choose between pricking out, thinning and waiting
If several seedlings have emerged in one patch and you want to keep more than one, separate those that can be lifted without tearing their roots. If only one plant is needed, thinning is often simpler: remove the extras so they do not compete with the seedling you are keeping. Snipping unwanted seedlings at compost level avoids tugging on the roots of the one left in place. For seedlings already growing separately in modules, neither action may be needed yet; wait until there are signs that an individual plant is ready for potting on.
Some crops are commonly sown individually because disturbing young roots can set them back. Many beans and cucurbits, for example, are often started in separate pots; check the guidance for the particular crop rather than forcing apart a crowded plug. Where several seedlings can be separated, allow for the extra room their individual pots will occupy. The Classic aluminium greenhouse range is listed from 40.6 ft² to 302.3 ft²; compare the selected layout with the trays and pots you actually use, and leave enough access to reach them.
03
Prepare pots and a workable potting area
Have the receiving pots or cells, a suitable potting compost, a dibber or similar narrow tool, and labels ready before lifting anything. Use clean containers with drainage holes and a fine-textured compost intended for seedlings or young plants; check its stated uses rather than assuming every multipurpose mix handles equally well in small cells. Break up lumps and moisten the compost before filling the containers, so you are not trying to wet dry pockets around newly planted roots. Fill evenly without compressing it hard, leaving space below the rim for watering. Prepare a few spare containers so an extra seedling does not interrupt the job. Label batches before the plants are separated; small seedlings can be hard to identify once several varieties are on the same bench.
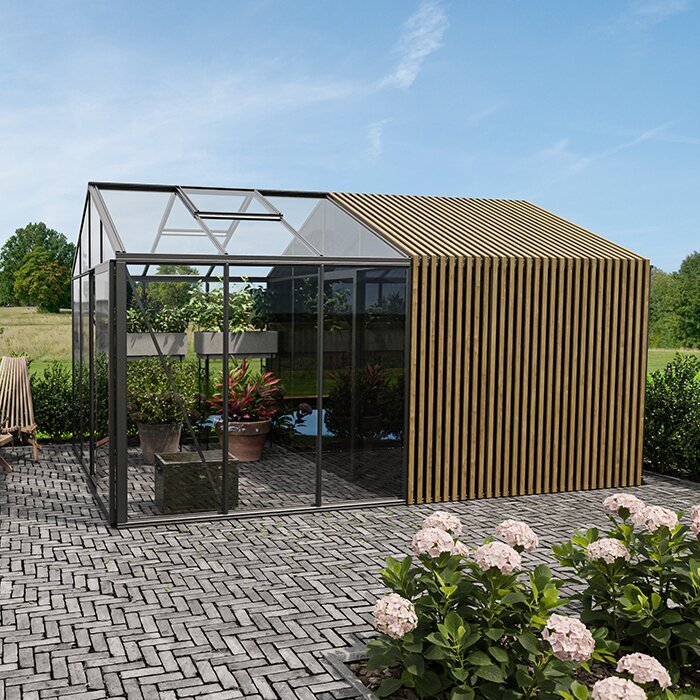
Choose a container that accommodates the roots and the next stage of growth without surrounding a very small root system with an unnecessarily large volume of compost. Keep unused compost, clean pots and labels separate from the area where you are lifting seedlings, so you can work without knocking plants over. If you are considering the limited-edition greenhouse with built-in storage, check the storage dimensions and arrangement in the product details. Consider which supplies you need close to hand and which can be stored elsewhere. The listing identifies built-in storage, but does not establish that a potting bench, shelving or any particular storage fittings are included.
Handle seedlings by a leaf, not the stem
If the tray is dry, water it ahead of time and allow excess moisture to drain before you begin. Compost should hold together without being sodden. Starting at the edge of a row or group, slide a dibber, plant label or similar tool beneath the roots and gently lift the surrounding compost. Hold the seedling lightly by a leaf, usually a seed leaf if it is large enough to grasp, rather than pinching the stem. A damaged leaf is generally less serious than a crushed stem, but the leaf should guide the plant, not take the force of pulling it out. Use the tool to support the roots as you lift. Work with one seedling at a time so the others remain protected in the tray and the lifted plant can be replanted promptly.
Where roots are lightly intertwined, loosen the compost between them with the tool and ease them apart without tugging the stems. If they resist, do not force separation: check whether the crop is suitable for growing as a deliberately sown clump, or keep one seedling and thin the others. Arrange the original tray, receiving pots and completed plants within easy reach, with a clear place to set down the tool. When comparing the Lean-To Greenhouse range, listed from 40 ft² to 154 ft², check whether your proposed working surface leaves enough access to carry out this handling comfortably.
04
Planting depth and root position
Make a hole large enough for the roots to sit naturally, without being folded back on themselves or forced upwards. Lower the seedling by its leaf and guide the roots into the hole with the dibber. For many plants, replanting at about the level they were growing is a sound guide: cover the roots while keeping the growing point clear. Some crops tolerate or benefit from deeper planting, so follow crop-specific advice rather than applying one depth to every seedling.
Bring compost gently around the roots and firm it just enough to support the plant. Pressing hard can compact the compost and make it harder to keep evenly moist. Check that the seedling is upright and that no roots are exposed; water gently afterwards to settle the compost around them. If watering reveals a hollow beside the stem, add a little compost without burying the growing point. Set finished pots on a stable surface where drainage water can escape, rather than collecting around their bases. When considering the limited-edition aluminium greenhouse, check what benching is supplied or available separately and whether your proposed arrangement allows you to water pots without soaking stored supplies.
Give newly moved seedlings steady conditions
After replanting, keep seedlings in a bright, sheltered position and avoid an abrupt change to harsh direct sun, strong draughts or conditions that dry the pots quickly. Plan this position before starting, particularly if the original tray has been standing somewhere more protected. Temporary light shade during strong sunshine may help reduce wilting, but prolonged deep shade is not a substitute for suitable growing conditions. As the seedlings recover, return them gradually to the light appropriate for their crop. A greenhouse can change quickly, so pay attention to conditions at pot level. Keep leaves clear of hot glazing and check that any shading does not obstruct access to the plants.
Water gently when the compost needs it, and let excess drain away. Check below the surface as well as looking at its colour: a dry-looking top does not always mean the whole pot is dry. Lifting a pot can help you learn the difference between freshly watered and drying compost. A brief pause in growth or slight droop may follow handling; watch for recovery and fresh growth rather than responding automatically with more water or feed. Follow the compost’s feeding guidance instead of assuming newly moved seedlings need an immediate boost. If comparing the Prestige Greenhouse, look at the selected model’s ventilation details and how accessible the controls would be from your proposed growing-on area. The listing alone does not establish the conditions your seedlings will experience.
05
Signs that seedlings need potting on
After pricking out, let roots establish in the new container before deciding on another move. Root tips at drainage holes, a rootball that holds together when the pot is removed, and roots beginning to occupy the compost can all suggest that the plant is using its available space. Look at these signs alongside growth above the compost. A single root at a drainage hole does not necessarily mean a plant is root-bound, and slow growth alone does not prove that a larger pot is needed.
When roots are approaching the limits of the container, choose the next suitable pot size rather than skipping several sizes at once. Prepare a layer of compost in the new pot, then support the plant and ease off its existing container without pulling the stem. Place the rootball centrally and check its height before filling around it: for many crops, the compost surface should remain at its previous level, with watering space below the rim. Keep the rootball intact unless crop-specific guidance calls for different treatment. Water to settle the fresh compost, then reassess moisture as the roots grow into it. If considering the Pyramid-type greenhouse, listed from 60 sq ft to 203 sq ft, use the selected model’s internal dimensions to check that larger pots will remain accessible on your chosen bench.
Keep batches labelled as they grow
Label each group with its crop or variety when you prick it out, and keep labels with the pots if they are moved to another bench. A simple note of the date and the seedlings’ stage can also help you compare batches later. Use those records as a guide to how quickly your own plants develop, not as a deadline to repeat regardless of conditions. Differences in crop, sowing density and growing environment can change when seedlings are ready, even when they were started at the same time.
Keep the same batch label with plants through each move, and note how many you retain after pricking out. This makes it easier to distinguish losses during handling from seedlings you deliberately discarded. If pots are split between trays, duplicate the label rather than relying on their position to identify them. Group plants with similar care needs where practical, while leaving enough room to lift trays without brushing leaves. If greenhouse shape affects this arrangement, the T-Shaped Orangery Greenhouse is one layout to compare. Check the selected model’s dimensions, door position and routes between your proposed benches; the name of a shape does not establish how conveniently you can move labelled batches through it.
Frequently asked questions
How many true leaves should a seedling have before pricking out?
There is no fixed number for every crop. Many seedlings are ready when their first true leaves are unfolded and the plant is sturdy enough to lift, before neighbouring roots become tangled. Check crop-specific advice if a plant is unusually sensitive to root disturbance.
Can I prick out seedlings before their true leaves appear?
They are usually easier to handle once true leaves have started to develop. Cotyledons alone may leave a seedling too small to lift safely, although crop-specific guidance may call for an earlier move. If seedlings are already crowded, avoid pulling them apart by their stems.
Should I move a small seedling straight into a large pot?
Usually, a pot suited to the size of the root system and the plant’s next stage is easier to manage. A much larger volume of compost can stay wet around a small rootball for longer. Potting on can be done later as the roots fill their current space.
Should I water seedlings before or after pricking them out?
The compost should be slightly moist before lifting, rather than dry or saturated. After replanting, water gently to settle compost around the roots, then let excess drain. Keep checking the pots afterwards instead of watering to a fixed timetable.
Is it normal for seedlings to droop after pricking out?
A short pause or slight droop can follow root disturbance. Check that the compost is moist, the roots are covered and the seedlings are out of harsh sun or drying draughts. Persistent collapse is not something to treat by adding water automatically; assess the compost and growing conditions.
Pricking out is a window rather than a single date: the seedling needs enough leaf and root growth to handle, but it is easier to separate before neighbours are firmly tangled. Match the method to the way the crop was sown, keep the roots intact where possible and give each plant a pot suited to its next stage. After the move, steady light, shelter and sensible watering help you judge whether it is settling in. The useful measure is not how quickly you can pot every seedling, but whether each transfer gives the plant room without adding avoidable root disturbance.
