
Why Is My Greenhouse Hotter Than the Outdoor Forecast?
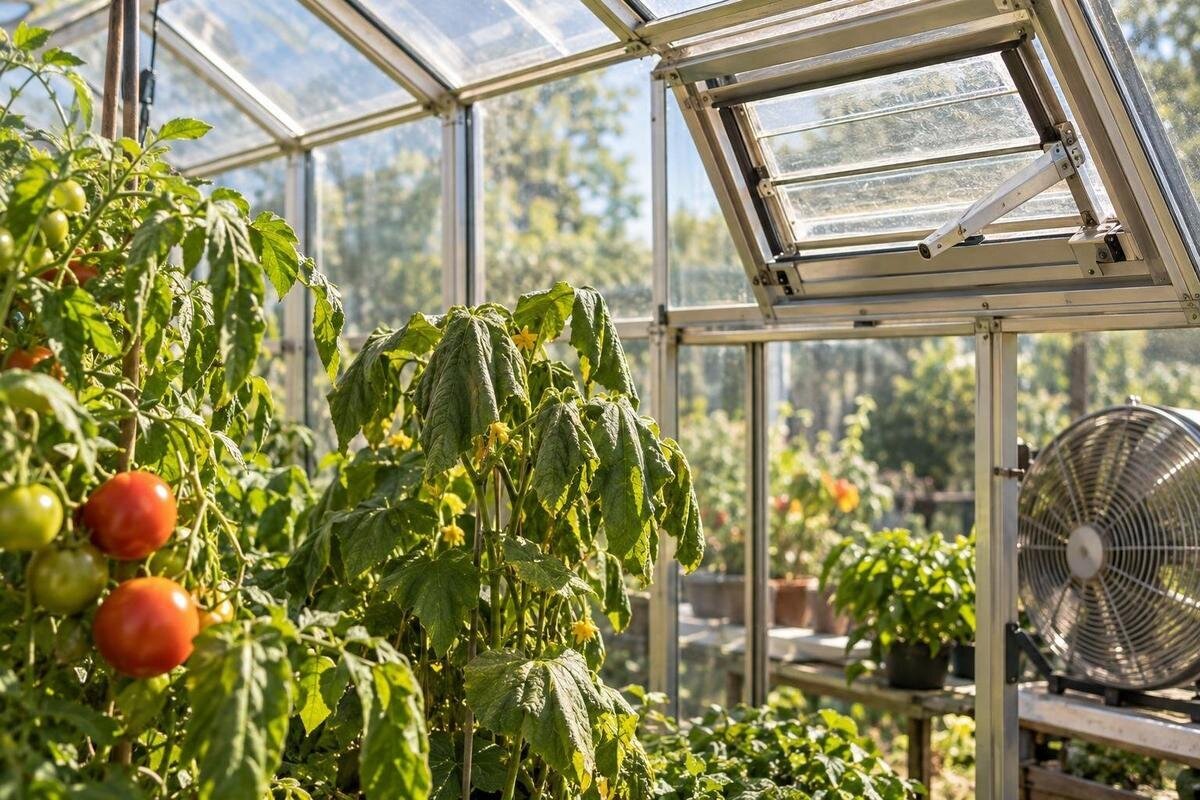
Greenhouse climate troubleshooting
A greenhouse reading above the outdoor forecast is not automatically a faulty thermometer or a problem with the forecast. The two readings describe different settings: outdoor air over a local area and air inside a sunlit enclosure. The useful diagnosis is to separate a real temperature rise from a sensor warmed by direct rays, then check whether the pattern follows sunlight, local shelter or limited air movement. A consistent temperature-and-humidity log, combined with a physical check of openings, can show which cause to investigate without treating one peak as a verdict.

Why the greenhouse reading can exceed the forecast
An outdoor forecast and a greenhouse thermometer describe different conditions. The forecast concerns outdoor air for a location and time; it does not predict the temperature beneath glazing or of a surface in direct sun. Sunlight entering the greenhouse warms soil, pots, benches and other objects. Those surfaces transfer heat to nearby air, and the indoor temperature rises if heat builds faster than the structure exchanges air with outside. This can be conspicuous during a bright spell even when the outdoor air feels cool. The forecast figure is not a ceiling for the temperature of an enclosed space, nor is it intended to describe the greenhouse interior.
There are two questions to separate: is the greenhouse air genuinely warmer, and does the sensor represent that air? A sensor in direct rays can absorb energy and read above the air around it. A correctly shaded sensor may still record a genuine rise caused by sunlight, local shelter or limited air movement. Forecasts are area-based estimates, while one garden has its own cloud cover, wind and nearby surfaces. Even an outdoor observation may be taken in a different setting from your greenhouse. Do not respond to one number by changing the structure or buying a fan; verify the measurement first, then use timing and conditions to identify the cause.
Check the thermometer's position and readings
Place a diagnostic thermometer where the plants experience the air, usually near crop-canopy height, rather than on the roof, glazing, frame, bench or soil. It should be shaded from direct sun but exposed to moving air; follow the instrument or radiation-shield instructions. Keep it away from a sunlit wall, water container, heater, open door or vent jet, since each can create an unrepresentative pocket. It should not touch a leaf or sit where foliage encloses it. If there are distinct bays or growing levels, one sensor may not describe all of them. Record its exact position and height so repeat readings can be compared fairly. If it is also a control sensor, do not move it unless its manual permits it; use a separate logger for diagnosis.
Check the basics before interpreting the display: confirm the units, replace a weak battery if indicated, and check the clock, recording interval and manual for stated accuracy and humidity-sensor limitations. To test for instrument bias, place a second thermometer beside the first in the same shaded, ventilated spot and let both settle as their manuals advise. Then swap their positions. If the high reading follows one device, suspect an instrument offset; if it stays with the original place, investigate that microclimate. Side-by-side checks can reveal a discrepancy, although two inexpensive instruments are not automatically a calibrated reference. Keep their clocks aligned if you plan to compare logged readings later.
Keep a temperature and humidity log
Record a run of days rather than relying on the hottest instant. Include a bright period and, if possible, a cloudy or changeable day so the greenhouse can be compared under different conditions. Start before the main warming period and continue through the afternoon and evening; this shows when the rise begins and whether the air cools after sunlight fades. A data logger at a steady interval—perhaps every 15 to 30 minutes—can capture short peaks. With a manual thermometer, use consistent times and avoid moving it between readings. Keep the same indoor sensor in the same position for the main series, and note the date and time of each entry.
For each entry, record indoor temperature and relative humidity, outdoor temperature from a separate shaded sensor if available, and the matching forecast for the same place and time. Add brief notes on sun or cloud, wind, door and vent positions, shade, watering and any change in plant density. A simple plan helps when comparing more than one zone. Write down the greenhouse's exact model and configuration too. If you are considering a pyramid-type greenhouse, ask for a drawing showing the openings, then use it to plan monitoring positions around your proposed growing layout. For an existing structure, mark the openings you actually use on your plan so their positions can be matched to the log.
Compare the forecast with local outdoor conditions
Compare like with like. A forecast for the nearest town, or its midday value, may not match the exact location and time shown by an indoor logger. Save the hourly forecast from the source you normally consult alongside a thermometer in a shaded, well-ventilated outdoor place. Keep that sensor away from the greenhouse wall, warm paving, direct sun, air leaving the greenhouse and rain. It need not duplicate an official weather-station exposure to be useful, but it must be consistently placed and protected from direct heating. Label the three figures separately: forecast, local outdoor measurement and greenhouse measurement. Avoid comparing a forecast daily maximum with an indoor reading taken at a different time.
Look at the difference at matching times, not just the daily maximum. A bright gap in cloud can produce a rapid indoor rise while a forecast value changes little; a sheltered garden can also experience less wind than the forecast area. Note whether the indoor and outdoor thermometers track one another during overcast periods. When planning a replacement such as a classic aluminium greenhouse, retain this outdoor record as a guide to the conditions at the proposed site. Record orientation, nearby shelter and where openings could face. These observations give you useful questions to raise when comparing ventilation configurations, rather than assuming that a new structure will match the forecast.

What temperature and humidity patterns reveal
Patterns are more informative than a single maximum. If one reading climbs sharply when sunlight falls directly on its sensor while a second shaded thermometer stays lower, repeat the side-by-side test and check the placement. If both shaded indoor instruments rise together as the greenhouse receives sun, the air is genuinely warming. A delay between the sun appearing and the highest air temperature can occur as soil, pots and the structure absorb and later release heat. When the reading stays high after the sun moves, check whether air exchange, cloud, wind and stored warmth could explain the lag before deciding that the sensor is defective. Note whether the same pattern appears on another comparable day.
Compare different points if the interior has separate arms, bays or a long growing area; a central reading can hide a warm end or a cooler shaded zone. When considering a T-shaped orangery greenhouse, use the proposed growing layout to identify which areas you would monitor separately, rather than relying on a single central sensor. Relative humidity is worth logging, but interpret it alongside temperature. The percentage can fall as air warms even without water being removed, while transpiration, damp surfaces and watering can change moisture in the air. A temperature rise paired with a lower relative-humidity figure does not by itself prove that the growing area has dried out.
How walls, paving and planting affect greenhouse conditions
Your plot can differ from the weather station because sun, wind and surrounding surfaces vary over short distances. A fence, hedge or building may reduce wind; nearby paving or a sunlit wall can warm, while reflective surfaces may send additional sunlight towards the greenhouse. Trees cast moving shade, so note when a patch of direct sun reaches the roof or side rather than making a one-time note that the site is shaded. These factors affect heat gain or the air reaching openings, but no single orientation or surface has the same effect in every garden. Use observations from your own log instead of relying on a universal rule.
Draw a simple plan with the greenhouse, walls, doors, vents, trees and hard surfaces, then mark the sunlit and shaded periods you observe. Compare them with the temperature record and note wind direction or still conditions if you can do so consistently. For a lean-to greenhouse, include the adjoining wall and nearby openings or reflective surfaces in that sketch. Observe when the wall receives sun and whether the area beside it warms differently from the rest of the growing space. This is useful when the hottest zone lies beside a wall or readings stay high on calm days: it helps distinguish a local effect from a ventilation problem affecting the whole greenhouse.
Inspect the full ventilation route
Inspect the full air route, not just whether a window looks open. Effective ventilation depends on air being able to enter and leave; the route may involve more than one opening, depending on the design. Foliage, shelves, stored items, closed doors or screens can interrupt it. Check that each intended opening can move through its normal range and that the surrounding area is clear, following the manufacturer's instructions. Do not force a stiff or damaged mechanism. Warm air tends to rise, so high and lower openings can work together, but wind and opening positions affect what happens in practice. An open roof vent is not proof that fresh air reaches every growing area.
If an automatic opener or controller is involved, note the temperature at its own sensor, when it starts to open, how far it opens and whether the opening then moves freely. Do not assume a logger elsewhere is the trigger sensor or that its display represents the controller's reading. Use the manual for operating information, and leave electrical or structural changes to a qualified person. When comparing a Prestige greenhouse with your current setup, ask which openings and opener options apply to the version you are considering. Match those details to your growing layout and access needs. Photographs taken from the same position can help document an opening that operates inconsistently.
Test airflow without changing several things at once
Observe movement at both sides of the air route. A very light strip of tissue held near an opening can show whether air is moving in or out at that moment; repeat at plant level to see whether air reaches the crop rather than passing directly between nearby openings. Keep the tissue clear of moving parts and do not use flames or smoke. This is a qualitative check, not a measurement of air-exchange rate, and a calm day can behave differently from a breezy one. Record the conditions and opening positions, then repeat the same observation on another day before concluding that ventilation is effective or inadequate.
To see whether ventilation contributes to a hot peak, compare periods when the intended openings operate normally, keeping sensor position and logging interval unchanged. Do not deliberately shut vents or leave plants exposed to harmful conditions just to run a test; use normal, safe operation and stop if plants are at risk. Avoid changing shade, door position and watering at the same time, since you will not know which change mattered. If you are considering a Limited Edition greenhouse with built-in storage, mark the items you expect to store on the proposed plan. Check their position against openings, operating mechanisms and access routes so that everyday storage does not interfere with ventilation.

When shading may help
Consider shade only after the record shows a genuine temperature rise associated with strong sunlight and your ventilation checks show that intended openings are working. Shade can reduce solar gain, but it also reduces light available to crops; a general percentage is not a substitute for crop needs and measured conditions. Shade will not correct a thermometer heated by direct rays, a blocked vent or a faulty opener. Make one change at a time, monitor the same positions and note the effect across comparable weather. If the rise is limited to one sunny side or time of day, that pattern can help you decide whether temporary or targeted shade is worth investigating.
Before buying or fitting shade, verify that it suits the exact greenhouse configuration and that its fixing method will not obstruct vents or damage the structure. For a limited-edition aluminium greenhouse, ask which shading options and attachment methods are supported for the version you are considering; the supplied product information does not establish these details. Check how the shade would move or be removed, and whether you could still reach vent handles and opening mechanisms. If a fixing or modification is unclear, ask the supplier or an appropriately qualified installer. Record the area shaded and the times it is in use so you can relate any temperature change to the intervention.
Choose a response that matches the cause
Use the evidence to choose the smallest relevant response. If the excess follows one sunlit sensor, correct its position or replace it only after checking the manual and comparing another instrument. If several shaded sensors record a real rise and openings are obstructed, restore their intended operation safely and repeat the log. If openings work but peak temperatures still follow strong sun, assess shade and the greenhouse's local exposure. If readings stay high in dull weather or vary sharply by device, revisit placement, battery, time settings and instrument accuracy before making structural changes. Keep a brief before-and-after record and change one factor at a time, unless immediate crop protection takes priority.
If the log points to insufficient ventilation capacity rather than a fault, review the configuration with the manufacturer or a qualified greenhouse professional. For a larger structure such as the Spacious Greenhouse, listed from 506 to 753 sq ft, floor area is only part of that discussion. Ask for the opening locations, operating arrangements and compatible equipment for the size you are considering, then compare them with the areas where you expect to grow. Bring your site sketch, temperature log and photographs of the existing openings if you have them. Evidence showing when heat builds and where it is strongest provides a more useful basis for advice than a forecast-versus-thermometer comparison alone.
Frequently asked questions
Should my greenhouse match the outdoor forecast?
No. A forecast describes outdoor conditions for a location and time, not the air beneath greenhouse glazing. Sunshine can warm surfaces inside faster than heat escapes, while your garden may also differ from the forecast area in wind, cloud and shelter. Compare the forecast with a shaded local outdoor reading as well as the greenhouse reading.
Can direct sunlight make a greenhouse thermometer read too high?
Yes. Direct rays can warm the sensor itself, so it may show a higher temperature than the surrounding air. Place a diagnostic thermometer in a shaded, ventilated position and compare it beside another instrument. If the high reading follows one device when you swap their positions, investigate the instrument rather than the location.
Where should I put a greenhouse thermometer?
For a representative air reading, place a diagnostic thermometer near the height of the crop canopy, shaded from direct sun and exposed to moving air. Keep it away from glazing, frames, walls, soil, heaters, doors and direct vent flow. If the greenhouse has separate growing areas, compare more than one position.
Why does the humidity reading fall as the greenhouse warms?
Relative humidity depends on both moisture in the air and temperature. As air warms, the relative-humidity percentage can fall even if no water has been removed. Log temperature and humidity together, and do not treat a lower percentage on its own as proof that the greenhouse or growing area has dried out.
What if the greenhouse stays hot when the vents are open?
Check that the intended openings can move freely and are not obstructed, then consider whether air reaches the growing area rather than passing straight between nearby openings. Confirm that an automatic opener is responding as its manual describes. If several shaded sensors still record high temperatures, review the log and seek advice on the exact ventilation configuration.
The forecast is an outdoor reference, not an indoor reading. A correctly placed sensor, a like-for-like outdoor comparison and a record of sunlight and vent positions help show whether the heat is real and where it builds. Address the cause the evidence points to: correct a measurement problem, restore intended ventilation or investigate shade when strong sun is driving the rise. That distinction gives you a useful baseline for managing the conditions in your own greenhouse.
