
Including a Greenhouse in a New-Build Landscaping Project
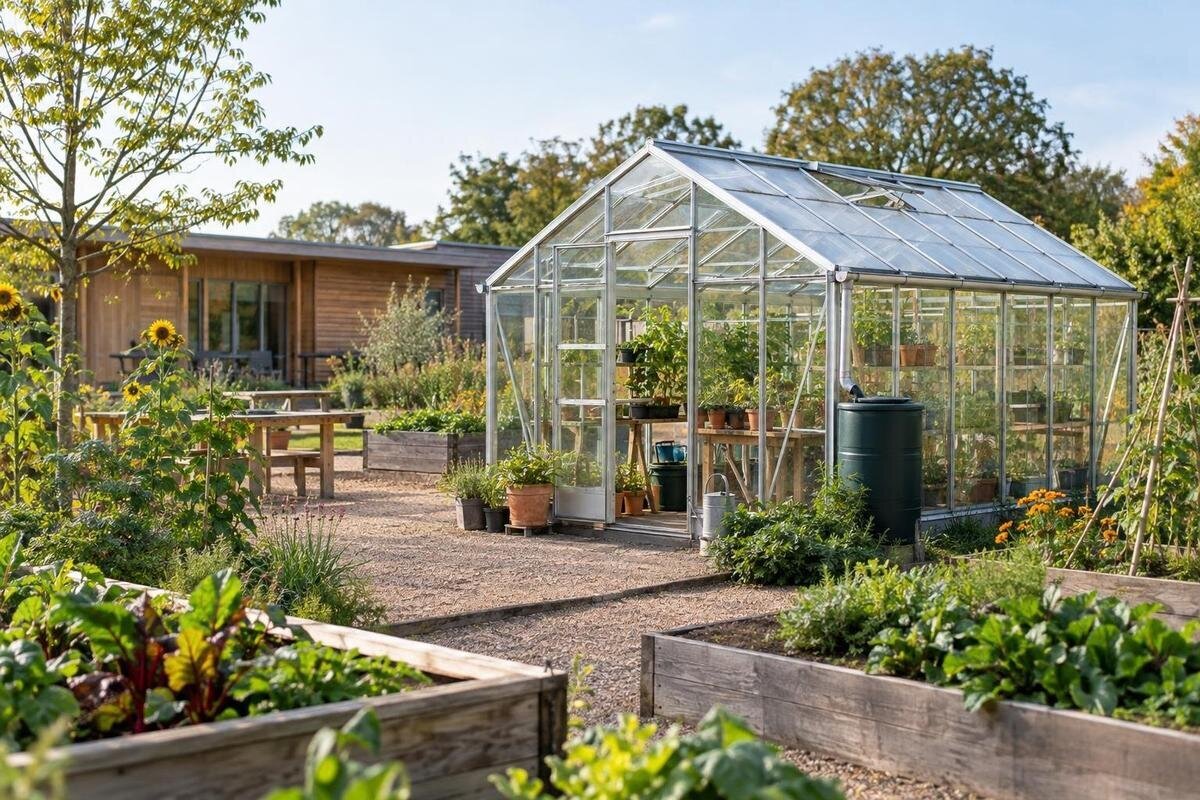
New-build garden planning
On a new-build, a greenhouse can be left until the garden looks nearly complete. By then, finished levels, paving, planting and buried services may already have been agreed, so moving the structure can mean reopening work or compromising the layout. Bringing it into the landscape plan early lets the house builder, groundworker, landscaper, greenhouse installer and service trades coordinate around one set of drawings. This guide focuses on those hand-offs, from choosing the position to recording what is covered before the garden is signed off.

Include the greenhouse in the first landscape brief
Treat the greenhouse as a fixed part of the landscape brief, not a decorative choice to be made after the patio is drawn. Record what it must support—routine growing, potting and storage, or a more social garden room—because this affects the space needed around it, the services worth considering and how people reach it. Note which requirements are essential now and which are only possible future additions. Assign one decision-maker to approve changes; otherwise the house, garden and greenhouse teams can each work from different assumptions. Include the greenhouse on the project programme, with a decision date before paving or planting orders are released. Separate the greenhouse purchase from the associated site works in the budget. Base preparation, spoil removal, paths and service connections may fall under different quotations. Comparing their scope early helps reveal omitted work and overlapping allowances, rather than leaving the homeowner to resolve gaps once contractors are on site.
On the master landscape plan, mark an indicative footprint, door position and the clear space needed for access and maintenance. Show boundaries, house openings, trees, sheds and paths on the same drawing. A catalogue area is not enough to set out a rectangle: obtain a plan for the exact option. For example, the Classic aluminium greenhouse is listed in sizes from 40.6 to 302.3 ft². Use that range to shortlist a scale, then use the selected model’s drawing—not its headline area—to reserve the site. Label the outline provisional until the supplier confirms the dimensions.
Choose a position that works in the finished garden
Visit the plot with the landscape designer while it is accessible and compare the proposed position with the finished garden, rather than judging it from a bare construction plan. Note when nearby buildings, fences or existing trees cast shade, what can be seen from house windows, and whether the greenhouse would interrupt a route or a desired view. Conditions change as planting grows, so record established trees and the intended size of new planting instead of assuming today’s open plot will remain open. Put observations on the plan so any later move is visible to all trades.
Consider how the installer will approach the location and how the doors and glazing will remain reachable. If a lean-to form is on the shortlist, request the selected Lean-To Greenhouse drawing and the supplier’s requirements for the wall interface, clearances and assembly before fixing paths or borders. The product name identifies a type, not the exact dimensions or fit against your particular house. Have the relevant designer or installer confirm the arrangement rather than treating a convenient wall as suitable. Resolve this before the façade or garden edge becomes difficult to alter.
Coordinate ground levels and surface water
Ask the landscape designer and groundworks contractor to show the greenhouse base, adjacent path and garden surfaces on one finished-level drawing. Make clear which levels are provisional and which will be set against a reliable reference on site; an early plot sketch should not become the installer’s setting-out instruction. If the garden slopes, the response may involve a different layout or a professionally designed level transition. There is no single foundation arrangement that suits every site, so leave structural decisions to the people responsible for the ground and the selected greenhouse. Confirm who checks the levels before base work begins. Ask the builder what is known about the ground beneath the proposed position, including any previous excavation, backfilling or buried construction material. Pass available records to the person specifying the support. Where information is incomplete, agree whether a site inspection or further investigation is needed before the contractor finalises the price and construction method.
Coordinate surface water at the same time. Identify the new home’s drainage routes, inspection covers and any planned rainwater collection, and mark their relationship to the base, paths and planting beds. Decide where water from the greenhouse roof is meant to go, and have the project designer confirm that route is compatible with the site’s drainage design. Do not assume a level pad deals with runoff, or that a soakaway can be placed anywhere. Keeping access to inspection points clear also prevents a later path or bed from obstructing maintenance. Check these details before excavation or hard landscaping.
Confirm the base requirements for the selected model
Ask for the installation instructions and base details for the exact greenhouse configuration before anyone prices or builds a support. Confirm the required outline, level tolerances, fixing method, whether a supplied base is part of that particular option, and which contractor provides the support beneath it. These are product- and site-specific questions, not details to guess from a photograph or general catalogue page. If ground conditions or a proposed raised level are uncertain, obtain advice from a suitably qualified professional before the landscaper commits to a construction detail. Put any agreed departures from the instructions in writing.
A product label should not be mistaken for a complete foundation specification. The Bloomcabin Prestige greenhouse with a metallic base is identified with that component in its product name, but the name alone does not establish what prepared support, anchoring or drainage the site needs. Ask the supplier and installer to confirm those requirements together, including where the entrance sits relative to finished paving and who checks the completed base before assembly. Agree a hold point so paving or planting does not hide the base before the responsible contractor has checked it.

Plan water and electrical routes before paving
List services by purpose before routes are buried: perhaps a water point for hand-watering, or an electrical supply for lighting or equipment. Separate items wanted for the first season from ideas that are only being considered, and identify the intended source, endpoint and access needed to operate or maintain each service. Put the routes on the coordinated site drawing and compare them with foundations, drains, trees and paving. A note saying ‘services to greenhouse’ is too vague for another trade to install without assumptions. Record who makes each connection and who checks the work. For water, think through the everyday task as well as the buried route: where will a watering can be filled, where will a hose be stored, and would it trail across the main path? Tell the plumbing contractor how the point will be used and ask about maintenance and arrangements when it is not in use.
Ask the relevant qualified trades to specify and install plumbing or electrical work; the garden contractor should not have to guess capacity or connection details. Keep controls, isolation points and inspection access reachable, and ensure service access does not conflict with the greenhouse’s doors or working area. If storage is part of the brief, the aluminium greenhouse with built-in storage is listed in sizes from 59.4 to 302 ft². Confirm the exact option and its layout drawing, then reserve usable circulation as well as the stated area; a figure in square feet does not show where equipment or service points can go.
Keep delivery and installation access open
Plan installation access while the builder still controls site routes. The path from the delivery or unloading point to the greenhouse can be narrower or more awkward than the final garden plan suggests, particularly after fences, retaining features or a side gate are installed. Measure the actual route, including turns and overhead restrictions, and ask the supplier or installer what access is needed for the selected model and how its components will be moved. Do not infer that vehicle access, a particular lifting method or a clear assembly area will be available. Assign someone to protect the route from later work. Include a contingency if the house or garden programme changes: establish who must be notified, whether the delivery can be rescheduled, and what happens if the base is not ready. Any temporary storage arrangement should be agreed with the supplier, including protection and handling requirements, rather than assuming materials can be left outdoors until installation.
Agree the installation date with the builder and landscaper, and decide where materials may be unloaded or temporarily stored without blocking trades or damaging finished surfaces. Establish whether installation should happen before final paths, fencing, turf or planting; the sequence depends on actual access and the installation plan. The Bloomcabin Orangery is listed as a spacious greenhouse in sizes from 506 to 753 ft², but area does not describe package length, unloading needs or the route through a plot. Request those details for the chosen model rather than making assumptions from its title. Put the delivery window and responsibility for site access in the programme.
Give each contractor a defined responsibility
Name one project lead to coordinate the greenhouse, even if several firms perform the work. The builder, groundworker, landscaper, greenhouse installer and plumbing or electrical trades should each know the limits of their responsibility: who provides the drawing, sets out the position, prepares the base, installs services, protects open routes, checks interfaces and accepts each completed task. A brief written responsibility list is more reliable than expecting one contractor to assume another has included an item. Give each decision a due date before the relevant work is covered.
Keep one current site plan and a simple change record. It should identify the exact model and size, drawing revision, base arrangement, service endpoints, finished levels and access route; mark superseded details clearly. The Limited Edition aluminium greenhouse listing spans 40.6 to 302 ft², so the product-family name alone cannot tell a contractor which option to set out. If the model or position changes, send the revision to every affected trade and reassess the base, drainage, access and service routes before work continues. Agree who circulates revisions and records approval.
Check project approvals and site constraints
Before ordering or starting permanent work, check the approved project drawings and any conditions or site guidance that apply to the plot. Do not assume that the fact the house is a new build answers the question for a later greenhouse; its position, size and intended use may matter. Ask the project’s planning adviser, developer or relevant local planning authority to clarify what is covered, and keep the response with the project record. Resolve uncertainty before a base, boundary treatment or service route makes the chosen position costly to change.
Review the plot plan for drains, service corridors, access points and any areas that must remain available for inspection or maintenance. A greenhouse should not obstruct a route or cover that a contractor needs to reach; ask the project lead to confirm unknowns rather than moving it informally. Shape also affects how the footprint meets boundaries and paths. If considering a T-shaped orangery greenhouse, obtain its exact plan and place that outline on the site drawing; the model name describes a form, not the dimensions or clearances for your plot. Check any revised outline against the same project requirements.

Set out paths and planting around the greenhouse
Plan the approach and planting at the same time as the greenhouse outline. Draw the exact door opening and the path connection from the house, not simply a line ending at the structure. Retain the working space needed to open the chosen doors, carry trays or tools, and reach surfaces that will need routine cleaning or repair. Then account for the mature spread of shrubs or climbers and leave inspection covers and service points visible. Planting that looks generous on the first-day plan can narrow a route as it grows, so use the planting plan’s intended mature sizes.
Consider how different outlines affect the junction between path, beds and boundary before choosing a model. For the Pyramid-type greenhouse, for example, the listing gives a range from 60 to 203 ft²; that area does not show the precise sides, entrance position or clearance needed for a particular size. Ask for the chosen configuration’s drawing, trace its perimeter and door position at scale, then test the intended routes and planting edges. This keeps the garden usable without treating a catalogue image as a measured site plan. Leave any maintenance space clear of planting.
Checks and records before garden handover
Build inspection points into the landscape programme. Before base work starts, confirm the set-out against the latest greenhouse drawing; before service routes are covered, have the responsible trades check their work and record where those routes run. Before final paving or planting, review the entrance, surrounding levels, drainage access and intended delivery and maintenance routes together. The person coordinating the work should record any outstanding item and who must resolve it. A verbal assurance that something looks fine is not a substitute for the appropriate trade’s check.
At handover, collect the final layout and updated service information from the contractors, along with the greenhouse instructions supplied for the selected model. Confirm who is responsible for outstanding landscaping, whom to contact if the installer finds a mismatch, and how access to drainage and service controls will be maintained. If a route or level changed on site, update the record before the team disperses. Keep it with the wider new-build handover papers so the greenhouse, base, services and finished surfaces can be traced to the same plan. Ask for photographs of concealed work, labelled with their location and date, to accompany the drawings; photographs alone may not establish a route accurately. Include the contractors’ contact details and any relevant inspection or test records they provide. Walk through the finished garden with the project lead and record unfinished items separately from work that has been accepted.
Frequently asked questions
When should a greenhouse be included in a new-build landscaping plan?
Include it before groundworks and the landscape layout are fixed, while the position, levels, drainage and service routes can still be coordinated. The exact outline and installation requirements should be on the project drawings before a base, paving or planting makes changes disruptive.
Should the greenhouse base be built before the model is chosen?
It is better to confirm the model and its installation requirements first. Ask for the drawing and base details for the exact option, then have the responsible contractor agree the support, levels and fixing arrangements. A general catalogue image or area figure is not a foundation specification.
Is it worth routing water or electricity to the greenhouse in advance?
That depends on what you intend to use and maintain there. Decide which services are needed now and whether future provision is worth planning before paths are laid. Ask the relevant qualified trades to specify the route and connections; a spare route alone does not guarantee that a future supply will be suitable.
Who should coordinate the greenhouse installation?
Name one project lead to manage information and changes, then set out each contractor’s responsibility in writing. The groundworker, landscaper, installer and service trades should know who provides the drawings, prepares the base, installs services and checks each interface before it is covered.
Does approval for a new-build home automatically cover a greenhouse?
Do not assume that it does. Check the approved project drawings and any conditions or site guidance, then ask the project adviser or relevant local planning authority about the proposed size, position and use. Resolve questions before ordering or starting permanent work.
A greenhouse is easier to integrate when its position, support and connections are resolved before the garden is finished. Choose the location and model while the ground is accessible, coordinate levels and services, and give one named lead responsibility for communicating changes. With the concealed work checked and recorded, paths and planting can be completed around the greenhouse without losing the access needed for installation, everyday use and maintenance.
