
Greenhouse Leaks: Is Water Coming from Above or Below?
Greenhouse repair
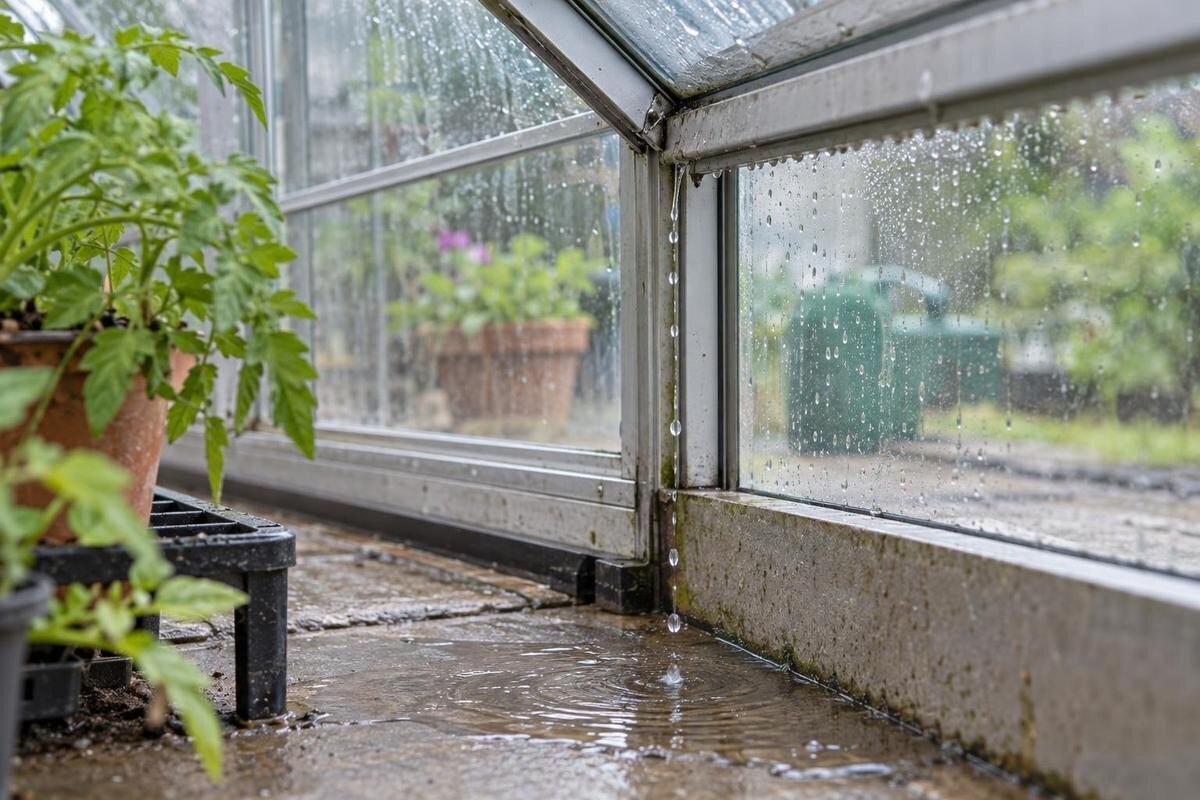
A puddle inside a greenhouse does not automatically mean rain has come through the roof. Water may run in at the base, or form as condensation on cool glazing and drip later. The useful clues are the sequence: when the first moisture appeared, where it began, and what the weather and watering were doing at the time. This guide follows those clues in a low-risk order, before you buy a part, apply a sealant or ask whether the structure needs repair.

Before you inspect 1
A wet greenhouse floor can have three different sources
Water inside a greenhouse can have three sources, and a puddle alone cannot distinguish them. Rain may pass through a roof panel, glazing joint, vent, door edge or junction with a neighbouring structure, then travel along a frame before dripping. Water at ground level may instead cross the perimeter or appear through soil after rain, irrigation or a local drainage problem. Condensation is different: water vapour in the air condenses on a cooler inside surface and can run down or fall as drops. More than one source can be active at once, so do not assume every wet patch shares one cause.
Look for the first damp point, not just the lowest puddle. Take a wide photograph, then a close-up showing the mark in relation to a roof line, corner, door, vent or base. Note whether the floor is wet across a broad area or only along one edge, and whether pots or tools have already been moved. Wiping away moisture can remove useful clues, so record it first. If water has reached electrical equipment, keep clear and arrange a qualified assessment rather than handling it while wet. Otherwise, keep the investigation observational until the pattern becomes clearer.
Use rainfall timing to narrow down the source
Start a simple log before changing watering or ventilation habits. Record when the first drop appeared, when rain began and ended, how heavy it seemed, and whether wind was driving rain against a particular side. Add irrigation, hose use, open vents or doors, and the first time you noticed condensation. Note a dry period too, distinguishing fresh moisture from a puddle left by earlier rain. Water can remain on the floor after the roof has dried, so persistence alone does not identify its source. A phone note is enough; weather records can support what you observed but cannot identify the exact entry point by themselves.
Keep the structure's identity in the same record, using paperwork or a label rather than guessing from its appearance. If your documents name a Pyramid / Oasis greenhouse, copy that wording exactly in a parts or replacement enquiry. Add the installation date if known and note whether the problem is new, has occurred since installation or began after maintenance. Those details help separate a longstanding water route from a recent change. Keep any previous repair dates alongside the weather log so the person reviewing it can see the sequence.
Before you inspect 2
Trace a roof leak from the first wet mark
On a dry, safe visit, look from inside at the ridge, roof-panel edges, glazing bars, corners, vent frames and points where sections meet. Follow any stain or track upwards; the highest fresh mark is usually more useful than the place where water finally drips. A clear trail may show that water has run along a bar or surface before falling, so do not assume the drip point is the leak. Use a torch from the floor if the roof is difficult to see. Do not lean on glazing or climb onto the frame to get closer.
Repeat the observation during natural rainfall, remaining inside or at ground level. A track that starts at a roof joint as rain reaches it is stronger evidence of roof entry than a damp patch noticed much later. Do not pry at retaining strips, lift panels or press a pane to check for movement; that risks damage and is unsafe with glass. If your records identify a Classic greenhouse, include the exact name and any version information when asking about a roof component. Describe the affected roof slope and its position relative to the door, then mark the trail on a photograph. This is clearer than reporting only a leak on the left or right.
Inspect glazing and openings without dismantling them
From a safe position, look at visible joins around doors, vents, the ridge and panel edges. Note any clear gap, visibly shifted seal or dirt line that might show the path of water. Do not pull a seal out or try to reseat glazing. A panel can look sound from inside while water is entering somewhere else and travelling along the frame, so take close-up photographs from both sides where you can do so from the ground. Never work at height, handle loose glass or lift a pane as a diagnostic test. If anything looks cracked or unstable, stop inspecting that area and ask an installer to assess it.
Check roof openings in the position they were in when the water appeared. An open vent, door or window can change the route rain takes, but a drip nearby does not prove that the opening is the entry point. Record whether it was open, shut or moved between checks; use normal controls only and do not force stiff parts. If your documents identify a Prestige greenhouse, include that wording and the opening's location in an enquiry. Explain whether the wet mark begins above, beside or below the opening and whether it appears with the opening closed. Ask for guidance on the relevant assembly rather than assuming its seal needs replacing.

Before you inspect 3
Check how rainwater moves around the greenhouse
Water coming from outside at ground level can be mistaken for a roof leak. Rain shed from a roof may collect beside the greenhouse, splash onto a lower panel or base, or flow across paving towards a threshold. During rainfall, observe from safe ground where water runs and whether any fitted gutter or downpipe appears to overflow or discharge nearby. Do not climb to reach high gutters. If the greenhouse is close to a building, note whether water from that building's roof reaches the same area; a wet patch beside the greenhouse does not, by itself, reveal how water entered.
Look again after the rain, noting where puddles remain and which inside edge is wet. A damp threshold may point towards runoff, but it does not prove whether water crossed the base, entered at a low panel or came from another source. If your paperwork names the greenhouse with built-in storage, label photographs to distinguish the growing area, storage area and their junction. Record which area becomes wet first rather than treating the whole floor as one patch. Include an exterior view showing nearby paving and any visible discharge point. This gives an installer useful context for assessing whether outside water and the inside damp mark follow the same route.
Look for water entering at ground level
A ground-level source becomes more plausible when moisture first appears at the base or through the growing surface, especially if no rain is falling overhead. Check whether it begins at one boundary, around a threshold, under benches or across the soil. Note whether water seems to flow in from outside, collect in one area or spread broadly. Do not call it groundwater solely because it appears below: runoff, irrigation, a leaking supply or damp growing medium can look similar. The aim is to locate and time the moisture, not to infer the ground conditions or alter the base.
Repeat the observation during a dry interval and note outdoor watering, irrigation, nearby taps or drains, and any adjacent roof discharge. Avoid digging under the base or changing supports to investigate. If a water supply may be leaking, have a qualified plumber assess it; for repeated water entering under a perimeter or signs that the base has moved, seek an installer or suitable drainage professional. If yours is a Lean-To Greenhouse, record which side meets the building. Photograph whether the first fresh moisture is on the wall, at the wall-to-base junction or along the outer perimeter. These are separate observations that can help an installer decide which area needs closer examination.
Before you inspect 4
Recognise condensation by its pattern and timing
Condensation often appears as a film or many small droplets on inside glazing, then runs down or drips later. It may be most noticeable after a cool night or when conditions change, while roof entry often has a clearer relationship to rainfall and a more localised track. These are clues, not absolute tests: condensation can collect in one area, and rain can enter before travelling across a surface. Check whether several panes, the roof or the walls show similar beads, or whether a single joint has a fresh trail that can be followed from above.
On days without rain, note ventilation, watering, wet compost, standing water and whether doors or vents were open. Use the greenhouse's intended ventilation controls in the normal way; do not block vents or add sealant to stop droplets. Widespread beads forming during a rain-free period support condensation as a possible source, especially if you see them forming on previously dry glazing. If moisture instead appears at one marked joint after rain, continue tracing that route. Compare both patterns over several visits, since condensation and rain entry can occur together. Replacing a roof seal will not remove condensation if that is the only source.
Confirm the source without creating a new leak
Use the least disruptive check first: observe during natural rain and compare photographs taken before and after it. A dry tray placed safely on the floor beneath a drip can show when and where drops land, but it cannot reveal their entry point. Keep trays away from electrical equipment and walking routes, and do not place them on high shelves. Photograph the same location in dry weather as well as after rain. Change only one normal condition at a time, such as noting whether a vent was open, rather than cleaning a seal, moving soil and changing watering together. Multiple changes make comparisons less useful.
An improvised hose test can push water into gaps that ordinary rainfall does not reach, leaving an ambiguous result. Avoid pressure washing, spraying roof joints from a ladder or pouring water into an opening. If a controlled test is needed, ask the manufacturer or installer for an appropriate staged method, particularly where glass, height or hidden joints are involved. If your service file names a Bloomcabin Orangery, include that identity with a marked overview of the affected area. Ask what the proposed test would establish and which observation would support each suspected route. Keep the test record separate from natural-rain observations so that its results are not confused with normal weather behaviour.

Before you inspect 5
Prepare a parts or installer enquiry
A concise record can help someone assess the problem without guessing. Include the greenhouse model and version if known, any label or order information, a short timeline, the weather, and whether irrigation or ventilation changed. Send a wide photograph that locates the damp area and close-ups of the first mark, any visible trail and the corresponding outside ground. Describe comparisons rather than claiming to have ruled a cause out: for example, whether beads appeared across several panes during dry weather, or only one joint became wet during rain. Distinguish what you saw from what you suspect. Do not remove glazing or dismantle a joint just to photograph a hidden fitting.
Ask for the exact spare-part identifier and the manufacturer documentation relevant to your model before ordering or fitting a component. For an existing Classic Accoya / Limited Edition model, use the full name from your records rather than relying on appearance; a catalogue identity is not evidence that parts are interchangeable. Identify the location and function of the suspected component, and ask the supplier to confirm the matching part in writing. If it cannot be identified from your records and photographs, ask whether an installer should review the area. Also clarify whether the proposed work addresses the observed entry route or whether further diagnosis is needed before a part is ordered.
Choose repair or replacement after the source is clear
A straightforward, visible source does not automatically mean that a repair is appropriate to do yourself. Ask for professional help if a leak is above reach, glazing looks cracked or loose, the frame appears to have moved, water keeps returning or the source remains unclear. Do not modify the structure, remove glass or apply an unapproved sealant as a trial. If the evidence points to a plumbing supply, use a qualified plumber; if water is repeatedly entering at the perimeter, an installer or suitable drainage professional can assess the situation without you disturbing the base.
Once the source is understood, compare a manufacturer-approved component repair with a wider repair or replacement enquiry. A confirmed roof entry may call for assessment of a specific component; condensation or water entering from the ground will not necessarily be solved by a new roof part or a new greenhouse. If full replacement is being considered for other reasons, the T-Shaped Orangery Greenhouse is a named catalogue option to include in an enquiry. Explain the existing water problem alongside your space and access requirements. Ask how the site conditions would be addressed independently of the new structure, then check current product documentation for the proposed model. A replacement comparison should account for the diagnosed cause, not just the appearance of a different greenhouse.
Frequently asked questions
How can I tell a roof leak from condensation?
Note when the water first appears and where. A drip that begins during rain and follows a localised track from a roof joint points towards water entry. Beads across several inside surfaces, especially without rain, are more consistent with condensation. Neither pattern is conclusive on its own, so compare observations over more than one occasion.
Why is the drip not directly below the leak?
Water can run along a glazing bar, frame or other surface before it falls. The puddle marks where it landed, not necessarily where it entered. Follow any visible trail upwards and photograph the highest fresh mark; do not dismantle a joint to trace it.
Should I seal a gap as soon as I find it?
It is better to confirm the source first. A visible gap may not be where water enters, and an unapproved sealant or repair could obscure the route or complicate a later assessment. Check the manufacturer's guidance and ask an installer if the joint, glazing or frame needs attention.
Can I use a hose to find the entry point?
An improvised hose test can push water into places ordinary rain does not reach, leaving an unclear result. Begin with observations during natural rainfall. If a controlled test is needed, ask the manufacturer or an installer for a suitable staged method, particularly if glass or an inaccessible roof is involved.
When should I contact an installer?
Seek an assessment if water is entering through a hard-to-reach roof area, a pane looks cracked or loose, the frame appears to have moved, or repeated observations do not reveal a clear source. Use an appropriately qualified professional if a water supply or electrical equipment may be involved.
Treat the puddle as the end of a route, not proof of where water entered. Timing, the first damp mark, the weather and conditions inside the greenhouse help separate roof entry from water at ground level and condensation. Keep photographs and notes, avoid dismantling glazing or making trial repairs, and use the evidence to ask for the right part or professional assessment. That makes it easier to choose a remedy that addresses the cause, rather than just the visible puddle.
