



SUPPORT
How to request spare parts, replacement glass and components
A technical guide to clearly identifying, requesting, receiving and fitting replacement glass, hardware, seals and other components.
A successful spare-parts request starts with clear identification of the structure, model and component—not a rough description. On aluminium greenhouses and pergolas, similar-looking profiles, panes, seals or fittings can serve different purposes. Dimensions alone are therefore often insufficient. This guide explains which details are needed, how to measure replacement glass safely, and how to avoid unnecessary follow-up questions.
First, establish why the component is needed
The reason for replacement provides important technical clues. A pane damaged in transit is handled differently from a window that becomes difficult to move after several years. Start by describing the event or change that led to your request.
- Transit damage: Document the packaging, label, damaged area and affected position.
- Assembly damage: state at which assembly stage the damage occurred and whether adjacent components are affected.
- Wear: include the structure’s age, maintenance to date and observed change in function.
- Severe weather or external impact: inspect not only the visibly damaged part, but also frames, fixings and connection areas.
- Missing part: explain which construction stage or package the part is likely to have come from.
- Planned alteration: make clear that you are planning a change rather than restoring the original condition.
For a functional issue, also explain whether it is constant, temperature-dependent, or only occurs in wind or under load. A sticking door leaf may result from dirt, changed alignment, loose connections or an unsuitable adjustment. Replacing one part will not necessarily remove the underlying cause.
Details needed to identify a spare part
The more complete the initial information, the lower the risk of selecting a part that looks similar but is technically unsuitable. Where possible, use documents from the original order and the assembly manual for the model. Guidance on the usual ordering process is available under How to order.
Structure and order details
- order number, invoice number or another available order reference
- full name of the person or business that placed the order
- original delivery address and approximate order period
- product name, model family and version
- colour or surface finish of the aluminium structure
- construction type, such as freestanding, lean-to or a special footprint
- accessories ordered at the same time or later modifications
Older photographs of the fully assembled structure can also help with identification. The greenhouse reviews also show different installation situations, illustrating why an overall view and close-up together are more informative than an isolated component photo.
Component details
Describe the position from one clearly defined viewing direction. Terms such as “left” or “back” are ambiguous without a reference point. Better: “Standing outside in front of the door, the second roof panel on the right.” Also include:
- number of parts required
- function of the component
- visible marking, number or stamp
- overall dimensions and relevant hole spacing
- cross-section for profiles or seals
- type and location of damage
- photos with a scale and overview images of the installation position
For fixings, length and diameter are not the only important details. Head geometry, thread, material, mating part and fitting orientation can also matter. Do not remove a fixing that is still load-bearing just to take a photograph if this could make the structure unstable.
Identify the correct product family
Bloomcabin offers various construction types and product groups. Start by establishing whether the component belongs to a greenhouse, conservatory, pergola or another product. An overview is available in Greenhouses and conservatories. Wall connections and roof geometries on lean-to structures may differ from freestanding models; further background is available in the article on the aluminium lean-to greenhouse.
Do not assume a component fits simply because it has the same colour or a similar production year. Even within one model family, position, opening direction and structural function can matter. Product names are not transferable between categories either. An Elma S outdoor sauna belongs to an entirely different technical product family from an aluminium greenhouse. Precise identification prevents requests from being based on the wrong structure.
Typical spare-component categories
| Category | Examples | Key identification features |
|---|---|---|
| Glazing | roof, side, door or gable panes | model, position, shape, edges, holes, nominal dimensions |
| Aluminium profiles | posts, rails, rafters, cover and connection profiles | profile cross-section, length, finish, connection points |
| Seals | glass, door, window and connection seals | cross-section, fitting direction, groove, material condition |
| Hardware | hinges, rollers, handles, brackets and connectors | hole pattern, side, movement direction, mating part |
| Fixings | screws, nuts, channel nuts and clamps | thread, dimensions, head, material, installation point |
| Opening elements | roof-window, door or ventilation components | model, opening type, lift direction, fixing points |
| Drainage | gutter, outlet and end components | profile shape, outlet side, connection and fall |
Do not describe several damaged small items generically as an “assembly kit”. List each part separately or mark it in a photograph. This makes it possible to check whether a complete kit or only a particular subgroup is actually required.
Replacement glass for the greenhouse
A greenhouse pane is a structural component. Alongside width and height, glass type, thickness, shape, edge finishing, holes, cut-outs and installation position may be relevant. Roof panels can differ from similarly sized side panels. Replacement glass should therefore preferably be identified by product model, pane position and original documents.
Do not confuse glass with multiwall sheets or other glazing materials. Information on the structure and selection of plastic sheets is available in Polycarbonate for greenhouses. Changing material is not an ordinary spare-parts order but a technical alteration whose effects on fixing, sealing and load transfer must be assessed.
When a pane is cracked or broken
First, keep people away from the area. Wear suitable personal protective equipment and avoid working in wind. A damaged pane must not be subjected to further load. Temporary protection must prevent fragments or loose covers from falling or being caught by the wind.
- Photograph the entire structure, then the affected panel.
- Document the crack pattern, edges, fixings and neighbouring profiles.
- Record the exact position using a clear viewing direction.
- Without adding load, check whether profiles, seals or brackets are also damaged.
- Keep any labels and safe, identifiable components.
- Remove hazardous shards safely and properly; safety takes priority over preserving evidence.
Do not fit a new pane until the cause of unusual stress has been clarified. A distorted frame, uneven foundation, wrongly seated seals or uneven clamping can lead to further damage.
Measure glass as supporting evidence
Measurements are valuable checks, but do not always replace model identification. Measure the pane itself where possible, rather than only the visible opening. For broken glass, an identical position, original documents or retained edge pieces may help. Do not estimate missing corners without clearly marking them as estimates.
- measure width and height in several places
- state dimensions in millimetres
- prepare a dimensioned sketch for non-rectangular panes
- record diagonals where the shape is uncertain
- measure holes from clear reference edges
- determine glass thickness only using a suitable method
- clearly match every measurement to a photograph or sketch
Some safety glass cannot be cut or drilled after manufacture like ordinary raw glass. Shape and processing must therefore be clear before production. Do not order apparently suitable local glass based only on the clear frame opening.
Prepare a clear spare-parts request
Put all information into one message. Several unlabelled messages containing individual photographs increase the chance of confusion. Use a numbered list if different parts are required.
- Provide order and contact details.
- State the product model and version.
- Briefly describe the reason for the request.
- Number every part and state the quantity.
- Name photos using the same numbering.
- Add measurements and positions.
- state whether the structure can currently be used safely.
To submit your request, use Bloomcabin contact options. Instead of writing only “door seal”, write, for example: “Position 3: lower seal on the moving door leaf, viewed from outside; overall view and cross-section in photos 3a to 3c.”
Delivery issues and receiving replacement items
If a missing or damaged part is identified on first delivery, document the consignment before unnecessarily changing the packaging or goods. Photograph the outer packaging, shipping label, damaged area, inner packaging and component relationship. Further process guidance is available under Purchasing and delivery.
For cross-border orders, the delivery route and identification may require additional details. If the original delivery was to New Zealand, including all its islands and territories, see the information on buying a greenhouse for delivery to New Zealand.
Receiving checklist
- Check shipment and recipient details.
- Photograph the packaging from every side before opening.
- Document visible damage.
- Match parts to the accompanying documents.
- Check glass and long profiles for visible damage.
- Do not discard small parts with packaging.
- Store components dry, protected and clearly labelled.
Do not test-fit a clearly incorrect or damaged component. Doing so can damage further parts and make later assessment more difficult.
Plan the replacement-part installation
Before installation, establish whether the structure must be unloaded, supported or partly dismantled. Keep the appropriate assembly manual available and label removed components. Work on glass, roof areas and load-bearing connections requires suitable tools, safe access and enough people.
Check in advance:
- Is the spare part clearly assigned to its position?
- Are seals, connectors and fixings complete?
- Is the frame square and free from distortion?
- Can the old part be removed safely?
- Do adjacent components need supporting?
- Are local requirements or professional qualifications relevant?
Changes to the foundation, site or construction type may require a fresh check of local requirements. General guidance is available in the article on whether a greenhouse or pergola needs consent. In New Zealand, check building-consent requirements, district-plan controls and the proposed use with your council. For a pergola substructure, the pergola foundation guide is also helpful.
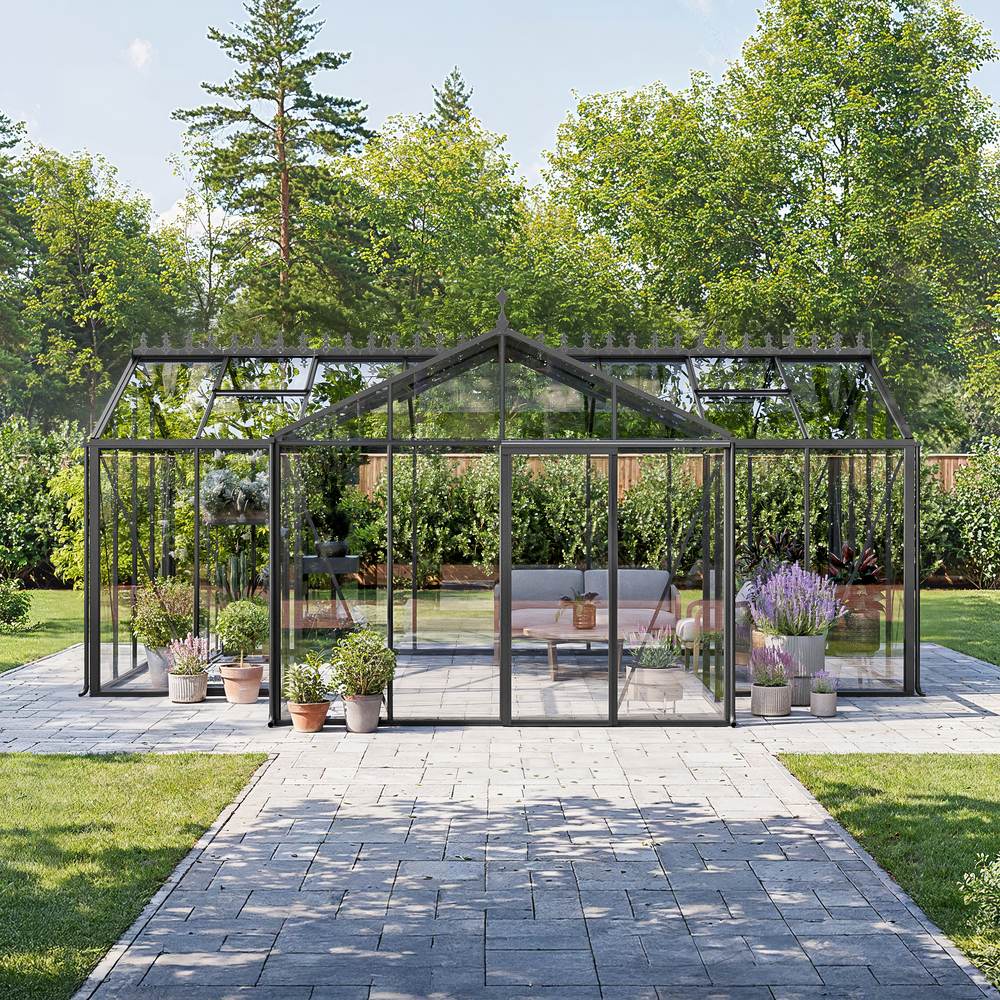
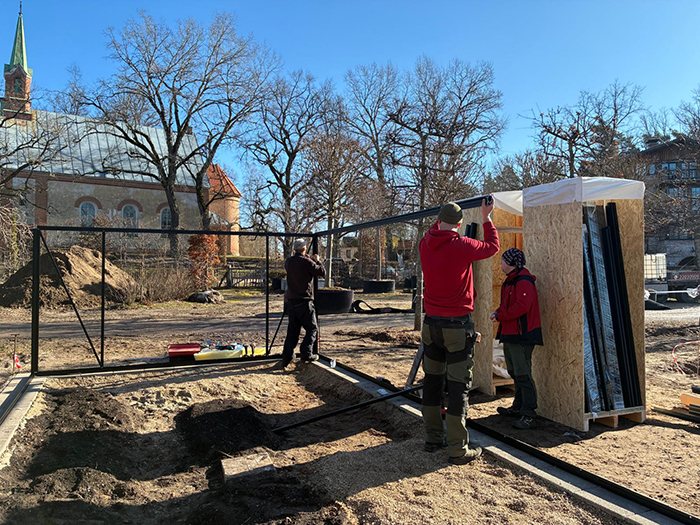
Anna Koku Skola: a real installation sequence
The Anna Koku Skola image sequence documents one continuous installation and must not be interpreted as a collection of different projects. For spare-parts requests, this kind of ongoing record is particularly valuable: early images often show components and connections before they are concealed, while later images show their final position in the completed structure.
A continuous sequence suggests three useful documentation stages: first the delivered condition of parts, then intermediate assembly stages, and finally the completed, aligned structure. If photographs are stored chronologically and named by construction stage, a profile, connector or glass panel needed later can be located much more reliably. Photograph concealed connections before covers or glazing are installed.
Maintenance and sensible spare-part storage
Regular inspections reduce consequential damage. Guidance is available under Caring for your aluminium greenhouse. Check moving elements, seals, drainage and visible connections without tightening fixings indiscriminately. Components tightened too far can be as problematic as loose ones.
Temperature and humidity affect condensation, dirt build-up and the loading of ventilation elements. Further advice is available in the guide to greenhouse temperature and humidity. Well-organised watering can also stop water from standing in unsuitable places; see the guide to water-efficient gardening.
Keeping a small reserve of commonly used, clearly identified wear or assembly components can be sensible. Do not stock unknown universal parts just in case. Store seals without tension, small parts dry, and glass securely against tipping, impact and edge loading. Each package should show the model, position, part number and storage date.

Pergola glass walls and operating components
The same identification principles apply to pergolas, but construction type and operation are even more important. First establish whether it is a bioclimatic or classic pergola and whether the structure is wall-mounted or freestanding . Dimensions and panel layout can be considered using the pergola size guide .
For glass walls, panel position, opening direction, running or guide system, and connections to the floor and roof are critical. For powered operating components, also record the drive type, wiring or mechanical coupling and describe the fault precisely. Ask a licensed electrical professional to assess the installation, protection, equipment suitability and certification.
A roof or glass-wall alteration is not automatically compatible with an existing pergola. The article Bioclimatic pergolas, roofs and glass explains the different functional relationships. Do not force stuck louvres, sliding elements or drives.
Frequently asked questions
Can I order replacement glass using only width and height?
As a rule, width and height should only be used as check measurements. Where possible, also provide the model, installation position, glass type, thickness, shape, edges and any holes. A photograph of the complete panel and a dimensioned sketch reduce the risk of incorrect identification.
Are glass panes interchangeable between Bloomcabin models?
Do not assume this without checking. Similar external dimensions do not automatically mean identical edge finishing, fixing or structural function. Roof, side and door panes on the same structure can also differ.
Which photographs should I send?
Send an overall view, an image of the structure side, a picture of the exact installation position and several close-ups. Add photographs with a tape measure or scale, markings and mating parts. For movement issues, a short image sequence at different positions can help.
Should I dispose of damaged parts after photographing them?
Keep safe parts, labels and identifiable fragments until the request has been documented sufficiently. Hazardous glass shards must, however, be removed safely and disposed of properly. Safety comes first; good photographs can capture the necessary identifying features.
Can I install replacement glass myself?
That depends on pane size, position, access, construction and your own expertise. Roof glazing and heavy or large panes involve significant risks. If unsure, appoint a suitable professional. Follow the assembly manual and use safe working practices.
What if I do not know the component name?
Use a position description and numbered photographs. Explain what the part does, what it is attached to, and which element it moves or holds. A sketch with an arrow is often more useful than a guessed technical term.
Can a seal, screw or bracket be replaced locally?
Only where technical suitability and compatibility have been clearly verified. Geometry, material, corrosion behaviour, strength and interaction with aluminium or glass can all matter. A similar-looking part is not automatically a suitable replacement.
What should I do if a door or roof vent becomes difficult to move?
Do not force the element. Check for dirt, visible distortion, loose connections, guides and alignment. Record when the issue occurs. Before replacing parts, rule out the foundation or frame as the cause.
Is a spare-parts request automatically covered by the guarantee?
No. Whether a service is covered by the commercial guarantee depends on the product, cause, documents and applicable terms. A technical request is initially an assessment, not a promise. Any statutory consumer rights that apply are separate. See details in the Guarantee section.
Can I request parts to modify my greenhouse?
A request is possible, but the availability of an individual component does not automatically make an alteration technically permissible. Changes can affect structural performance, glazing, drainage, ventilation and connections. Describe the intended original and final condition completely.
How should replacement components be stored?
Keep them dry, protected and clearly labelled. Support long profiles against bending. Glass must stand securely and be protected from edge impacts. Seals should not be kinked, heavily stretched, or exposed continuously to high heat and direct sunlight.
Where can I find guidance on purchasing and personal data?
Check the Bloomcabin terms and privacy information displayed when purchasing and making an enquiry. Send only the personal data needed for identification. The Useful information section provides general entry points for service and ordering information.
Final spare-parts checklist
- reason for request clearly described
- order reference and product model provided
- installation position described from a clear viewing direction
- every part numbered and listed with quantity
- overall, position and detail photographs attached
- measurements in millimetres entered as supporting evidence
- glass shape, holes and edges documented
- adjacent components checked for damage
- installation and safety conditions considered
- delivery address and contact details checked
Careful documentation saves time and prevents incorrect orders. What matters is not the largest possible number of photographs, but a traceable connection between the product, position, component, measurement and observed issue.
