



Useful information · PREPARATION
What Photos, Measurements and Drawings Should You Send for a Quote?
A complete site package helps Bloomcabin understand your proposed greenhouse or pergola location. Use this practical checklist to organize photos, measurements, drawings, access information and project preferences before requesting a quote.
A useful quote request does more than identify the greenhouse or pergola you like. It explains the proposed location, available space, nearby structures, access conditions and the choices that matter to your project. Clear information helps our team understand your request and identify questions that should be resolved before ordering.
You do not need professional architectural drawings simply to begin a conversation. A labeled hand sketch, a practical set of measurements and well-organized photographs can provide an effective starting point. Projects involving an existing wall, unusual site geometry, significant grading, restricted access or local approval requirements may need additional information later.
This guide explains what to send, how to photograph the site, which measurements are useful and how to create a simple drawing. It applies to freestanding greenhouses, wall-mounted greenhouses, orangeries and pergolas. It is a preparation guide, not a substitute for project-specific engineering, site verification or local approval.
Quick quote-request checklist
Before sending your inquiry, check whether your package includes the following:
- Your name, project address and reliable contact information.
- The product type or Bloomcabin model you are considering.
- A brief explanation of how you intend to use the structure.
- Wide photographs showing the complete proposed location.
- Photographs from several directions, not only from the most attractive viewpoint.
- Close photographs of relevant walls, paving, slopes, drains, steps or obstacles.
- Overall available length and width.
- Relevant height measurements for wall-mounted projects.
- Distances to buildings, fences, property boundaries and permanent obstacles.
- A simple plan-view sketch with dimensions and photo positions.
- Notes about delivery and installation access.
- Known local, zoning, permit or homeowners association considerations.
- Your preferred layout, finish or optional features, if already known.
- A clear distinction between confirmed facts and approximate measurements.
If some information is unavailable, do not guess. Mark it as unknown or approximate and explain how the measurement was taken. An honest preliminary measurement is more useful than an exact-looking number that has not been verified.
1. Identify the product and intended use
Begin by telling us which general structure you are considering. You may be comparing a classic aluminum greenhouse, the Classic Plus 385, a larger Bloomcabin Orangerie or a Bloomcabin Prestige greenhouse. For more unusual layouts, identify whether you are interested in a Garden View T greenhouse.
For an attached project, specify whether you are considering an aluminum lean-to greenhouse, a compact mini wall greenhouse or a wall-mounted T-model orangery. Outdoor living projects should identify the preferred pergola category, such as the Bloomcabin pergola. If you are uncertain about pergola types, review bioclimatic versus standard pergolas.
Explain the intended use in one or two sentences. Examples include seasonal plant growing, year-round gardening, seedlings, entertaining, relaxation or a combination of plants and seating. If storage is important, mention the tools, pots or garden materials that need a place; the guide to greenhouses with built-in storage can help you consider the layout.
Your intended use affects the questions our team may ask about doors, circulation, ventilation, benches and interior organization. For broader selection guidance, read the ultimate guide to buying a greenhouse and our information about greenhouse design choices.
2. Take a complete set of site photographs
Photographs should establish context before showing details. Stand far enough away to include the proposed footprint and its surroundings. A close-up of grass or paving alone does not reveal how the location relates to a house, fence, trees, pathways or changes in ground level.
Recommended photo sequence
- Approach view: Photograph the route from the street, driveway or property entrance toward the proposed location.
- Full-site view: Show the entire area where the structure may stand, with extra space visible around it.
- Opposite view: Turn around and photograph back toward the first camera position.
- Side views: Photograph the site from the left and right.
- Corner views: Add diagonal views when the site is enclosed or irregular.
- Ground view: Show the existing lawn, soil, paving, deck or foundation area.
- Obstacle views: Photograph steps, retaining walls, drains, utility equipment, branches, overhangs, gates and narrow passages that could be relevant.
- Wall views: For attached structures, photograph the entire wall and then its important details.
Take photographs in useful daylight when possible. Avoid digital filters, extreme wide-angle distortion and screenshots of low-resolution images. Keep the original files available. If you annotate copies, retain an unmarked version as well.
Place an easily recognized temporary marker at each approximate corner of the proposed footprint. Cones, stakes or other visible removable markers can make the intended location easier to understand. Do not represent these markers as surveyed boundaries or final foundation points.
What not to rely on
- One photograph taken from only one direction.
- Images that crop out the roofline, ground or neighboring features.
- Close-ups without a wider image showing where the detail is located.
- Old photographs that no longer represent the site.
- Satellite images as the only evidence of current conditions.
- Photographs with measurements added but no explanation of how they were obtained.
3. Measure the available area
Measure the usable area rather than only the size you hope to purchase. Our team needs to understand the space around the proposed structure, not just its nominal footprint. Record measurements consistently in feet and inches or in one metric unit, and state which system you used.
| Measurement | What to record | Why it is useful |
|---|---|---|
| Available length | The clear distance along the proposed long side | Helps establish the practical project area |
| Available width | The clear distance across the proposed site | Shows lateral space and circulation constraints |
| Corner diagonals | Diagonal distances across a marked rectangle | Helps reveal whether a preliminary layout is square |
| Nearby clearances | Distances to walls, fences, paths and fixed objects | Provides context for access and placement |
| Level changes | Locations and approximate amount of visible rise or fall | Flags an area that may require further assessment |
| Overhead space | Relevant eaves, branches, wires or projections | Identifies possible overhead conflicts |
| Opening space | Available area near the anticipated entrance | Helps discuss practical access and circulation |
Measure more than once, especially if the ground is uneven or the site is not rectangular. Where two readings differ, record both and check the endpoints. Do not measure across soft curves or obstacles without explaining the route followed by the tape or measuring device.
A quote-stage measurement does not automatically establish construction dimensions, legal boundaries or foundation positions. Final placement and base preparation should be verified for the selected product and site. If growing plans are influencing your preferred size, the month-by-month greenhouse growing guide can help you think about usable interior space.
4. Add measurements for wall-mounted projects
A wall-mounted greenhouse or pergola requires more information because the proposed structure must be considered in relation to an existing building. Photograph and draw the full wall rather than showing only an apparently empty section.
Record the total usable wall length, the height to the eaves or other relevant projections, and the positions of doors, windows, vents, exterior lights, faucets, outlets, downspouts, trim and utility equipment. Measure each relevant feature from a consistent reference corner. Also record the width and height of openings and the distance from the ground to their lower and upper edges.
Photograph the wall straight on and from both ends. Include the roof edge, wall base and surrounding ground. Add close-ups of changes in wall plane, decorative bands, siding transitions or visible deterioration. Photos can document visible conditions, but they cannot confirm hidden construction, structural capacity, concealed utilities or waterproofing details.
Do not assume that an open-looking wall area is suitable for attachment. The wall, foundation interface, drainage and attachment conditions may need project-specific review.
5. Document slopes, drainage and the proposed base area
A photograph rarely shows grade accurately. If the site appears to slope, note the direction of fall on your sketch and provide several ground-level views. Record approximate changes only if you can measure them reliably. Otherwise, state that the site is visibly uneven and needs evaluation.
Show existing paving joints, cracks, drains, channels, downspout outlets, retaining walls and areas where water collects. Do not cover or temporarily disguise the ground before taking photographs. Our team needs to understand the current visible condition.
Your request should identify whether the proposed location is currently grass, soil, gravel, concrete, pavers, decking or another surface. This description does not confirm that the surface is a suitable foundation. Base and anchoring decisions depend on the selected structure, site conditions and applicable requirements.
6. Provide a simple site drawing
A hand drawing is acceptable if it is legible, dimensioned and photographed or scanned clearly. Start with a plan view, as though you were looking straight down on the property. Draw the proposed structure as a rectangle or appropriate basic shape and show its relationship to the house, fences, paths and other permanent features.
Include these items on the plan view
- A north arrow if you know the direction.
- The proposed structure and approximate entrance position.
- Overall available length and width.
- Distances from the proposed footprint to nearby structures and boundaries.
- Doors, gates, paths and access routes.
- Trees, retaining walls, drains and fixed equipment.
- The direction of visible slope or water movement.
- Numbered camera positions with arrows showing viewing direction.
- A note identifying approximate versus verified measurements.
For a wall-mounted project, add a simple elevation drawing looking directly at the wall. Show the wall width and height, roof edge, windows, doors, downspouts and other relevant features. Connect every height measurement to a clear reference point, such as the existing finished ground level.
Do not scale a drawing by eye and label it “to scale.” If the sketch is not produced to a consistent scale, write “not to scale” and include dimensions beside the relevant lines. Dimensions are more reliable than visual proportions in a rough drawing.
7. Explain delivery and installation access
The proposed footprint is only one part of site planning. Describe how components could move from the delivery point to the installation area. Photograph the driveway or curb area, gates, pathways, corners, steps and overhead restrictions along the route.
Provide clear opening widths for relevant gates and narrow passages. Note stairs, steep grades, soft ground, tight turns and restrictions affecting vehicle access or temporary material handling. If access crosses property you do not control, identify that fact rather than assuming it will be available.
Keep site-access information separate from assumptions about delivery service. Current order and delivery provisions are available in the terms of purchase and delivery. The ordering sequence is explained in how to order. Discuss unresolved access questions before placing an order.
8. Check local project considerations early
Tell us about any known permit, zoning, setback, easement, historic-district or homeowners association consideration. Requirements can vary by location and project, so do not rely on a neighbor’s experience or assume that a small structure is automatically exempt. Our USA greenhouse and pergola permit guide provides a practical list of questions to investigate.
If a local authority or association has supplied written conditions, include a readable copy. Mark which requirements are confirmed and which remain under review. A sales quote should not be treated as approval from an authority, association, utility provider or property owner.
9. Add preferences without turning them into measurements
List preferred colors, doors, internal zoning, decorative elements or other choices separately from site facts. This prevents a desired feature from being mistaken for an existing condition. If you are still comparing materials and general benefits, review the guide to aluminum glass greenhouses.
Pergola customers should explain expected seasonal use and whether the area is exposed to leaves, snow, wind or freezing conditions. The winter pergola guide outlines useful care and planning topics. This information supports the discussion but does not replace location-specific assessment.
10. Organize files so they are easy to review
Use descriptive filenames such as “01-site-from-driveway,” “02-site-facing-house” and “03-east-wall.” Name drawings by view, such as “site-plan” and “house-wall-elevation.” If possible, send one current package rather than several messages containing unlabeled revisions.
Include a short index listing each attachment. When replacing a drawing, add a revision date and clearly identify the newer file. Do not overwrite an important measurement without noting what changed and why.
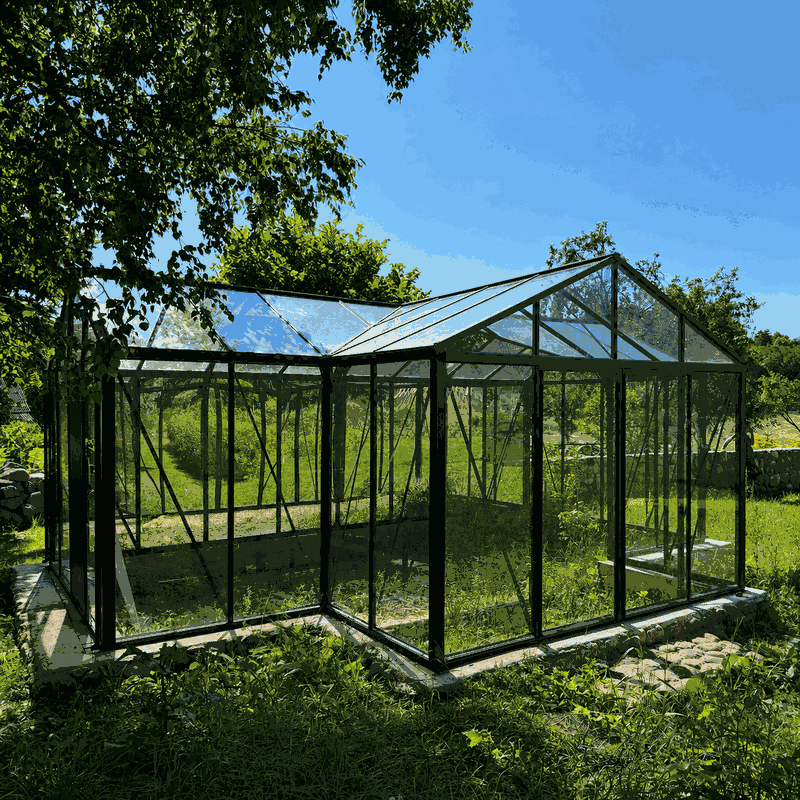
Anna Koku Skola should be treated as one real greenhouse installation sequence, not as several unrelated projects. Its documentation should remain in chronological order: initial site context, preparation, installation progress and completed structure. This kind of sequence helps preserve the relationship between stages without claiming that photographs reveal concealed technical details.
11. Use product manuals at the correct stage
Manuals can help you understand the general assembly sequence, component organization and preparation topics associated with a selected product. Review the manual that corresponds to the actual model and version being considered. Do not substitute a manual for another product merely because the structures look similar.
A manual does not replace accurate site information, final order documents or local requirements. Quote photographs and sketches should describe the real property; they should not be redrawn to imitate a manual illustration. Before installation, confirm that the applicable manual and current project documents are available to the people responsible for preparation and assembly.
12. Review the package before submitting it
- Confirm that the product or product category is identified.
- Check that every photograph is current, upright and clearly labeled.
- Verify that wide views and close details are both included.
- Use the same measurement units throughout.
- Mark approximate values clearly.
- Check that the sketch matches the photographs.
- Include access-route information.
- List unresolved permits, approvals and site questions.
- Separate required features from optional preferences.
- Keep a complete copy of everything submitted.
Do not send sensitive information that is unnecessary for the inquiry. Bloomcabin’s Data Privacy Policy explains relevant data practices. Before purchasing, review the applicable warranty information and Return and Cancellation Policy. For assistance organizing your request, contact our customer service team.
Frequently asked questions
Do I need professional drawings to request a quote?
Not necessarily. A clear hand sketch with labeled dimensions can be enough to begin a preliminary discussion. Professional drawings or additional technical documentation may be needed later depending on the structure, property and applicable requirements.
Can I send only the dimensions of the greenhouse I want?
No. Also send the dimensions of the available site and distances to surrounding features. This allows the desired structure to be considered within its actual context rather than as an isolated footprint.
How many site photos should I send?
There is no universal number. Send enough images to show the complete site from multiple directions, the approach route and every relevant detail. A smaller set of organized, informative photographs is better than many duplicates, but one or two views are rarely sufficient.
Can photographs replace measurements?
No. Photographs provide visual context but can distort distance and perspective. Measurements provide scale. Use both, and label the points between which each important dimension was taken.
Should I include satellite images?
You may include one as additional context if it is current and useful, but it should not replace ground-level photographs, direct measurements or a site sketch. Aerial imagery may not show recent work, elevation changes or restricted access.
What if the site is not level?
Photograph the slope from several directions, mark the direction of fall on the plan and provide reliable measurements if available. Do not guess at the amount of level difference. State that further site evaluation is required.
What should I send for a lean-to or wall greenhouse?
Send full-wall and angled photographs, overall wall dimensions, relevant heights and the exact locations of doors, windows, roof projections, downspouts, utilities and other visible features. Include a wall elevation sketch in addition to the site plan.
Should utilities be shown?
Show visible utility equipment, outlets, pipes, drains and overhead lines that may affect the project. Do not attempt to locate concealed services yourself. If utilities are proposed for the structure, state that separately so the appropriate questions can be identified.
Can Bloomcabin confirm my property line from photographs?
No. Fences, landscaping and paving edges should not automatically be treated as legal property boundaries. Use verified information when placement depends on boundaries, easements or setbacks.
Does a quote confirm that my site is ready for installation?
No. A quote addresses the identified product and stated project information. Site readiness, final dimensions, foundation conditions, access and applicable approvals must be confirmed through the appropriate project process.
Should I send maintenance questions with the quote request?
Yes, especially when local exposure or intended use creates a specific concern. For general preparation, read the aluminum greenhouse maintenance and cleaning guide. Maintenance expectations should be considered before placement because access around the structure may matter later.
What happens if my measurements change?
Send a revised drawing with the change date, identify every affected dimension and explain why it changed. Do not assume that an earlier quote or layout remains applicable after site conditions, dimensions or product preferences change.
